Do you want to scan your USB, computer drives or a folder using Windows Defender antivirus? You’re in the right place.
In this tutorial, I will guide you step-by-step on how to scan USB device, Windows drives, or any other folder on Windows 10 using the Windows Defender antivirus.
Windows 10 has its own builtin antivirus software called Windows Defender. When it is up-to date it protects your Windows from all sort of viruses. There are 3 different ways you can scan your computer with Windows Defender i.e. Quick Scan, Full Scan, & Custom Scan.
Quick Scan takes few minutes to scan all drives of your computer and Full Scan takes lot of time to full scan all drives of your computer. But what if you want to scan a specific folder, specific Windows drive, or an external drive like portable hard disk, passport drive, or USB drive? The solution is, Custom Scan.
Custom Scan allows you to scan any selected folder, Windows drive, or external hard drive/USB drive. It saves lot of your time by scanning only chosen folder or drive. The other two scan options scan all your hard drives.
There are 2 methods to Custom Scan your computer using Windows Defender:
- Custom Scan from Security Dashboard
- Custom Scan Directly
Method 1: Custom Scan from Security Dashboard
Follow the steps to custom scan from Security Dashboard.
- At bottom-right corner of your Windows taskbar, right click on the Windows Defender icon.
- Click on the View security dashboard. You can also open Windows Defender from Windows 10 Search Bar by typing Windows Security.
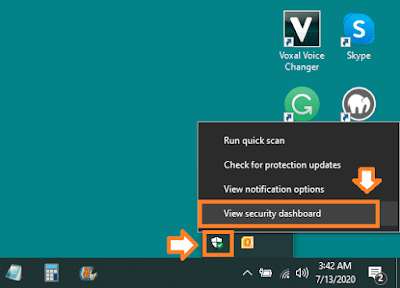
- Click on the Virus & threat protection.
- Click on the Scan options.
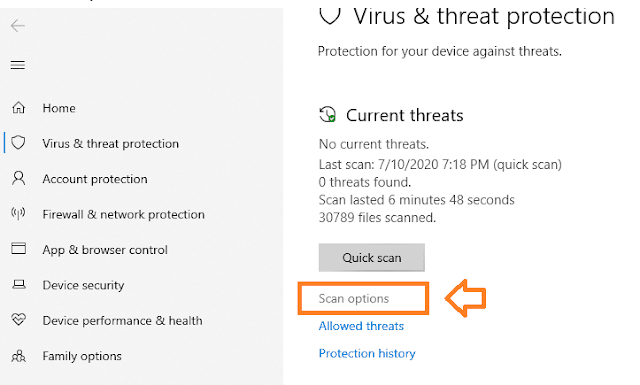
- Select the Custom scan option.
- Click on the Scan now button.
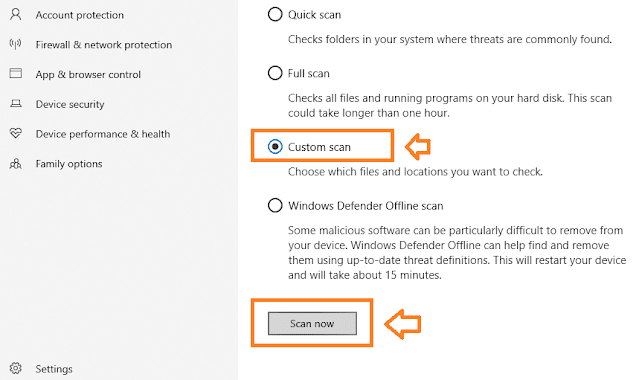
- Select the Drive, USB drive, Folder, or Folder within drive that you want to scan.
- Here you can see that I have chosen the USB drive. If you want to scan complete drive don’t select any folder, just click on the Select Folder.
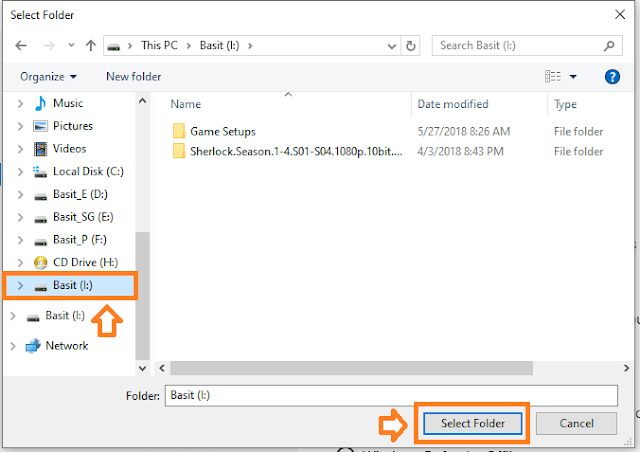
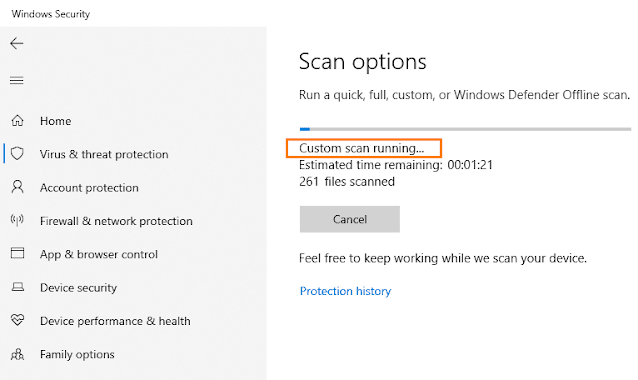
- The scan will start. You can see that the “Custom scan running…”. You can also Cancel the Custom scan any time.
Method 2: Custom Scan Directly
Follow the steps to Custom Scan Directly using Windows Defender.
- Right-click on any folder, Windows drive, sub-folder, or USB drive.
- Click on the Scan with Windows Defender….
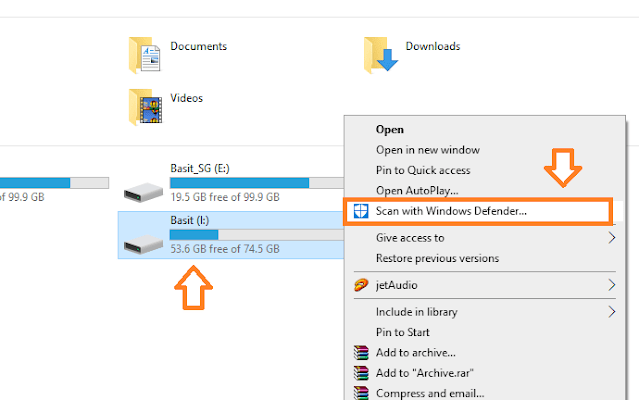
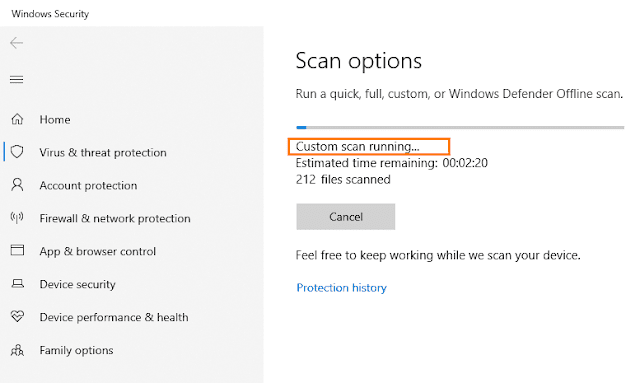
- It will start custom scanning your selected drive, USB drive or folder. You can Cancel the Custom Scan anytime.
If you like this post then don’t forget to share with other people. Share your feedback in the comments section below.

Also Read



Leave a Reply