Do you want to take the take the backup of your emails on MS Outlook in a PST file? You’re in the right place.
The PST file is an Outlook Data file that stores your email messages and other Outlook items like Calendar Events, Contact, etc, is saved on your computer.
There are various scenarios in which you can restore the emails on MS Outlook from the backup file:
- Your Outlook gets corrupt
- Your Windows gets corrupt or computer hardware fails to work
- You uninstall Outlook
- You delete old emails to make your Outlook load quickly and perform well. When hundreds of thousands of emails load on Outlook, they not only slow down and hang your outlook, but also affects the performance of browsers and computer. You might face “Outlook is not responding” issue.
ALSO READ
- How to Start a Professional Blog and Make Passive Income Online
- Solved: Your E-mail Server Rejected Your Login – Outlook Error
- How to Import Emails on MS Outlook From a PST File
How to Take Backup of Emails on MS Outlook in PST File
Follow the steps to take the backup of your emails on MS Outlook in a PST file.
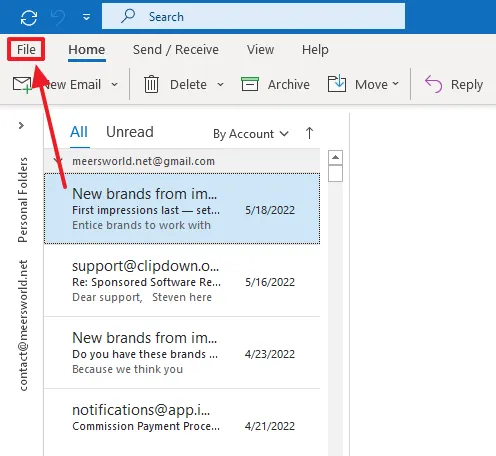
- Open your MS Outlook.
- Click the File tab from the menu located at top-left corner.
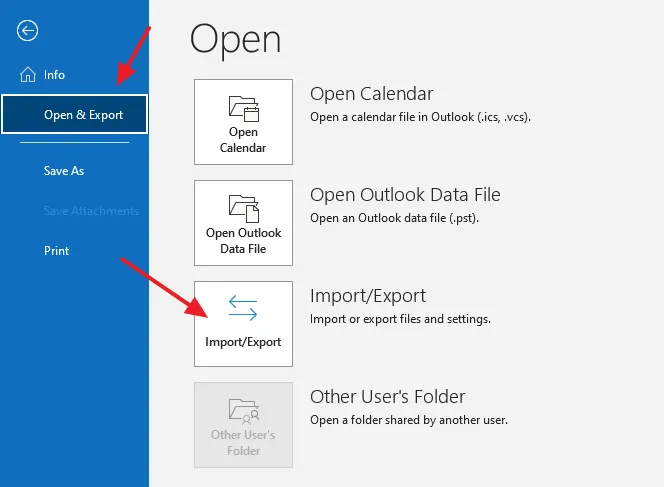
- Go to Open & Export section from the sidebar.
- Click the Import/Export.
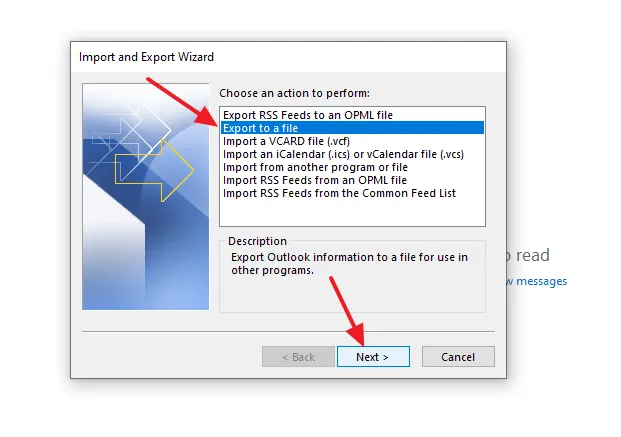
- On Choose an action to perform, select the Export to a file.
- Click the Next button.
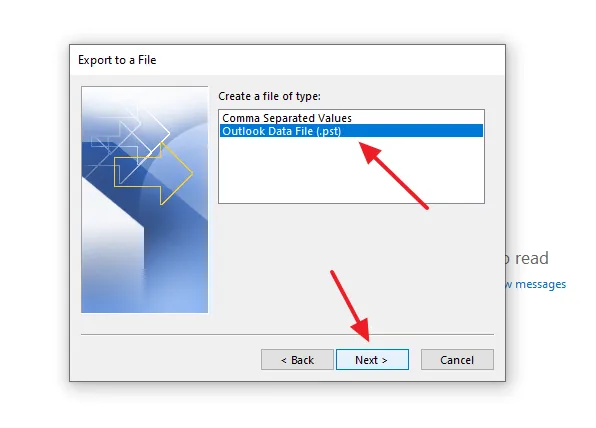
- On Create a file of type, select the Outlook Data File (.pst).
- Click the Next button.
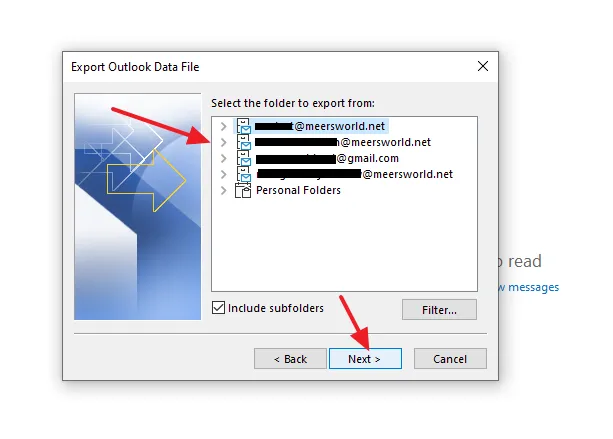
- On Select the folder to export from, select the email account of which you want to take the backup. On Outlook, you can take the backup of emails of one email account at a time.
- Tick the Include subfolders option.
- Click the Next button.
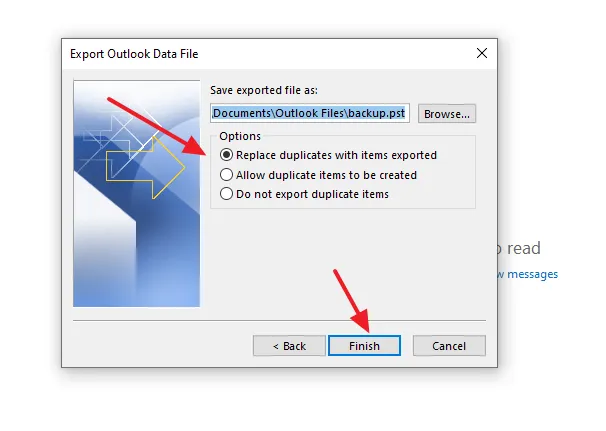
- On Save exported file as, click the Browse button to name your backup file and select a location for it on your computer, where it will be saved
- Click the Finish button.
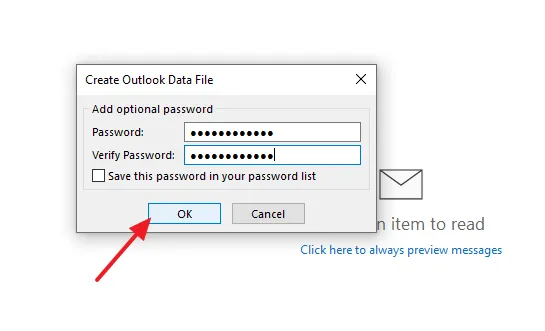
- On the Add optional password enter a password for your backup file. It will protect your backup file from unauthorized access. Whenever you will import this .PST backup file on Outlook, Outlook will prompt for this password. Don’t forget to save this password in a safe place.
- Click the OK button.
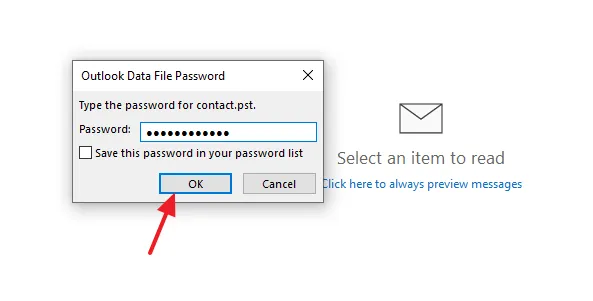
- On the Type the password for backup_file_name.pst, enter the same password again that you have created in the above step.
- Click the OK button.
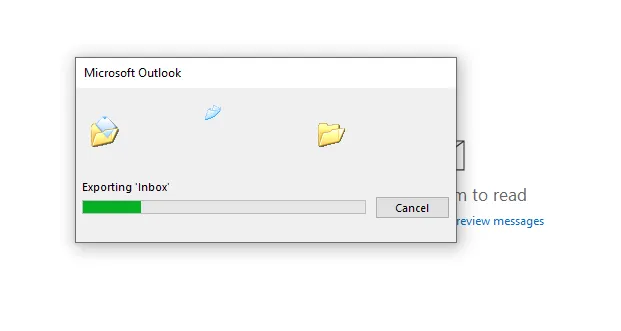
- The export process will begin. It will take some time depending on the size of your emails. Once it is completed your backup will be saved on your computer with a “.PST” extension, like “meersworld.pst”.
If you want to take the backup of other email accounts, repeat the same process for them.
If you like this post then don’t forget to share with other people. Share your feedback in the comments section below.
Also Read



Leave a Reply