Do you want to install Drupal on XAMPP localhost in Windows? You’re in the right place.
In this tutorial, I will guide you step-by-step on How to download and extract Drupal to XAMPP htdocs, create a database for Drupal on phpMyAdmin, configure php.ini and my.ini files for Drupal on XAMPP, and How to install Drupal on XAMPP in Windows.
Drupal is an open source powerful CMS (Content Management System) written in PHP programming language. It is used to create websites and complex web applications. Drupal provides reliable performance, incredible security, customization features, flexibility, and modularity.
RELATED TUTORIALS
Following topics will be covered in this post:
- How to Download & Extract Drupal to XAMPP
- How to Create a Database for Drupal on phpMyAdmin
- How to Configure php.ini and my.ini Files for Drupal on XAMPP
- How to Install Drupal on XAMPP in Windows
01. How to Download & Extract Drupal to XAMPP
In this section, first I will guide you on how to download Drupal to your computer and then how to extract and copy it to XAMPP htdocs directory.
- Open the Drupal Download Page.
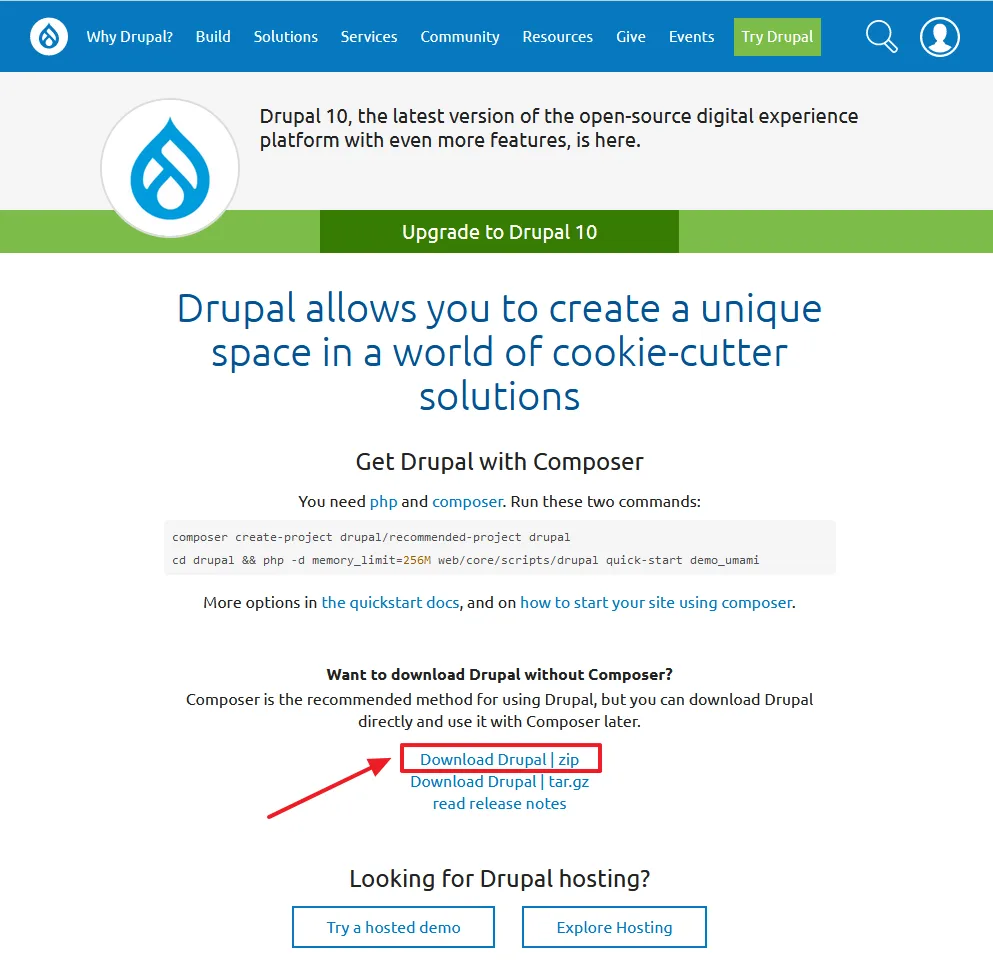
- Scroll-down to the section that says, “Want to download Drupal without Composer?” and click on the Download Drupal | zip link to download the latest version of Drupal to your computer.
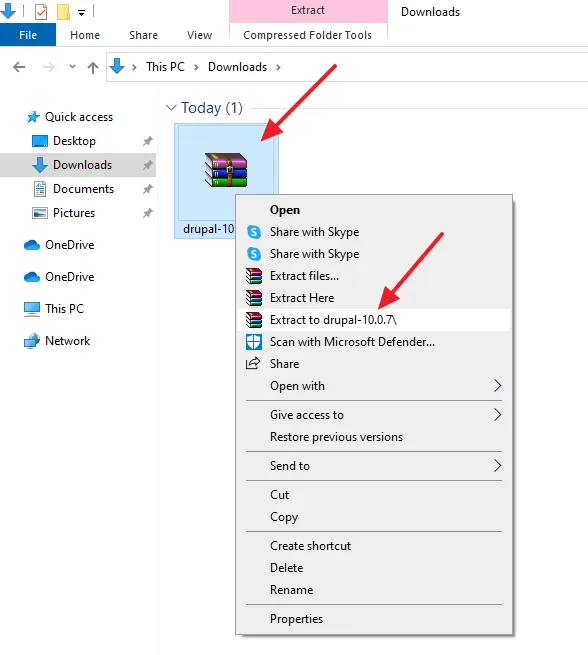
- Right-click on the Drupal Zip File and click on the Extract to drupal. Here the current version of Drupal is 10.0.7.
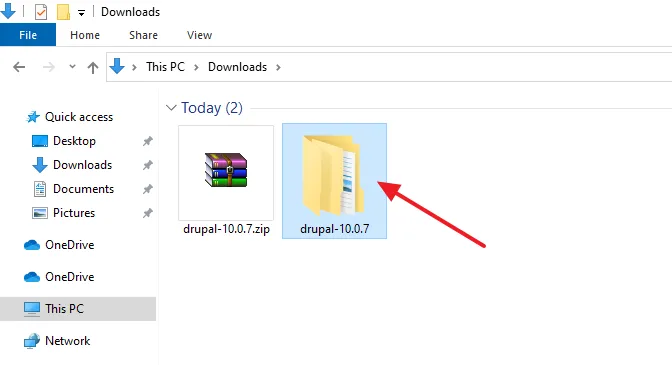
- Click on the Drupal Extracted folder to open the sub-folder.
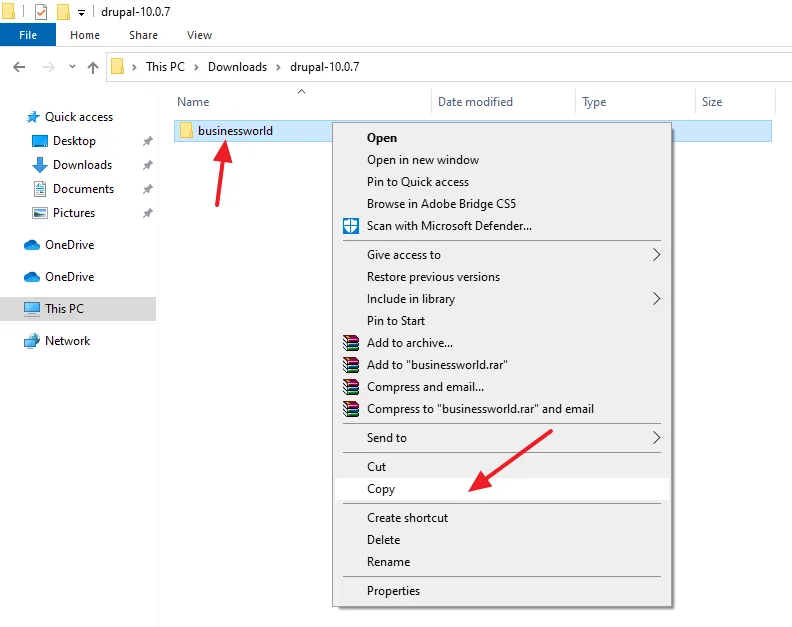
- Rename the Drupal sub-folder with your site or project name. Here I have renamed drupal-10.0.7 to businessworld.
- Right-click on the folder and click on the Copy.
- Now go ahead and open the XAMPP folder.
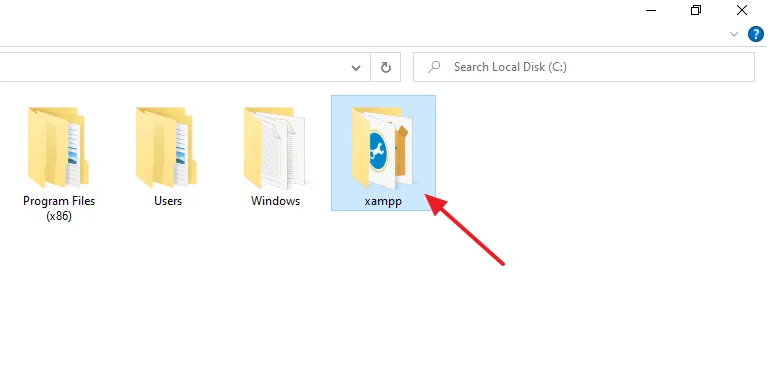
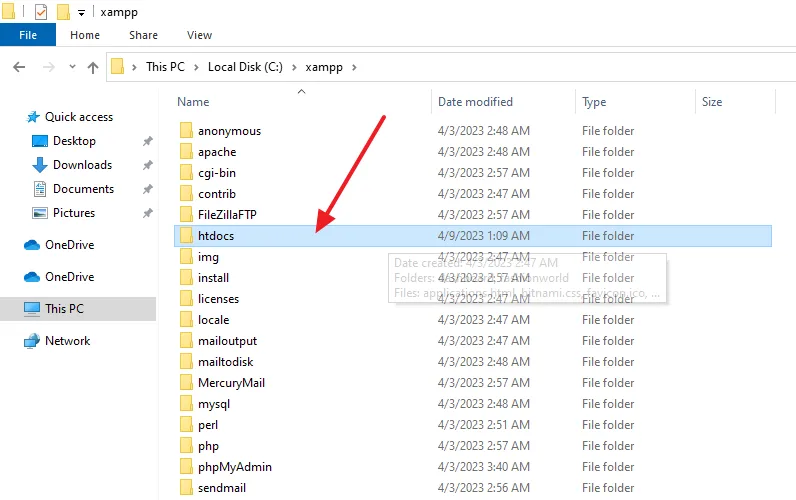
- Open the htdocs directory. The htdocs is the root directory of XAMPP where you place and create sites and applications.
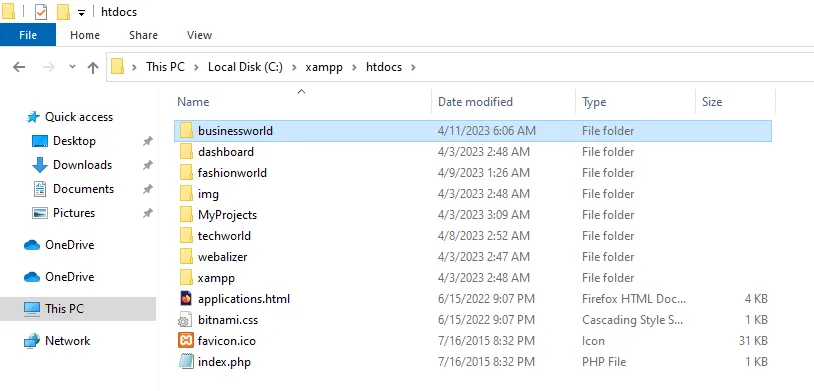
- In the htdocs directory right-click on the white space and click on the Paste to copy Drupal here. You can see here that the Drupal folder businessworld is copied in the htdocs directory.
02. How to Create a Database for Drupal on phpMyAdmin
In this section, I will guide you on how to create a database for Drupal on phpMyAdmin where the data will be stored in the tables. The tables in the database will be created automatically during the Drupal installation.
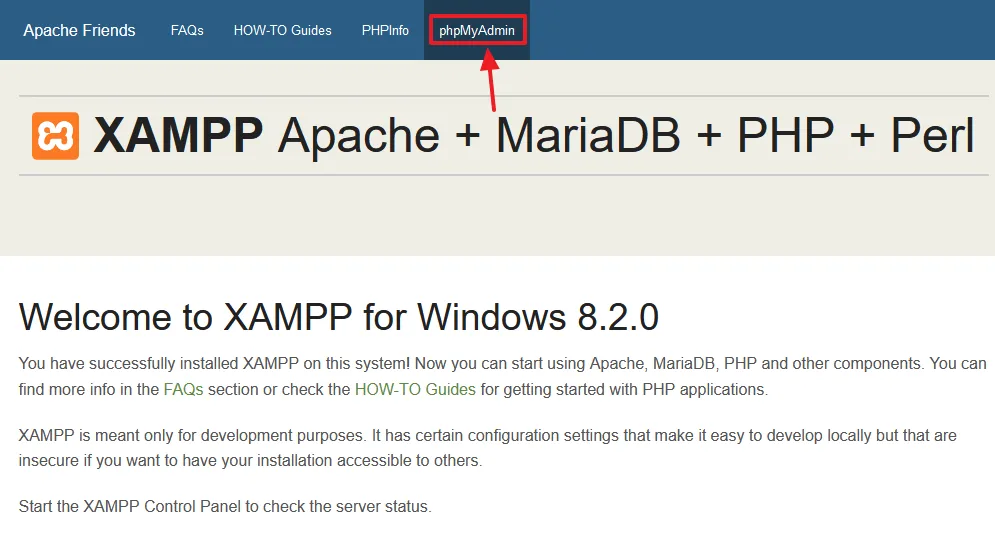
- Open XAMPP localhost on your browser.
- Click on the phpMyAdmin tab to open the phpMyAdmin. You can directly open phpMyAdmin using this URL: http://localhost/phpmyadmin/.
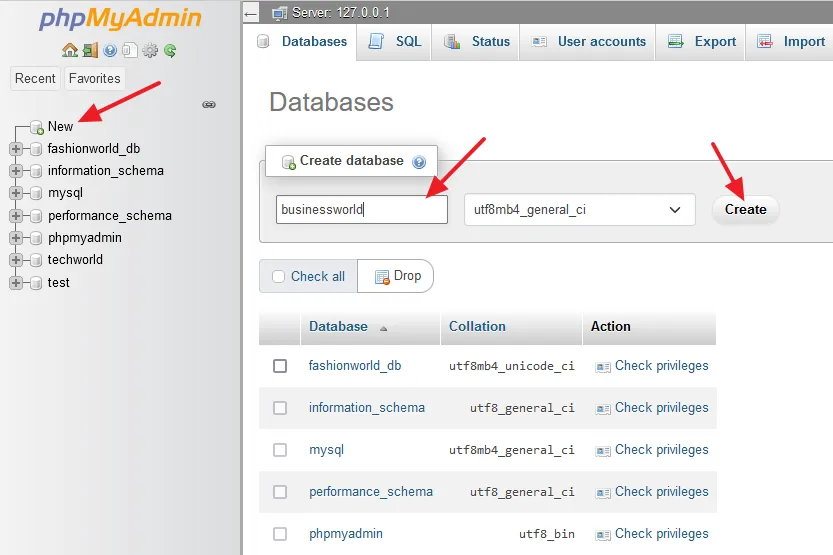
- Click on the New to create a new database on phpMyAdmin.
- On the Create database section enter your database name.
- Click on the Create button.
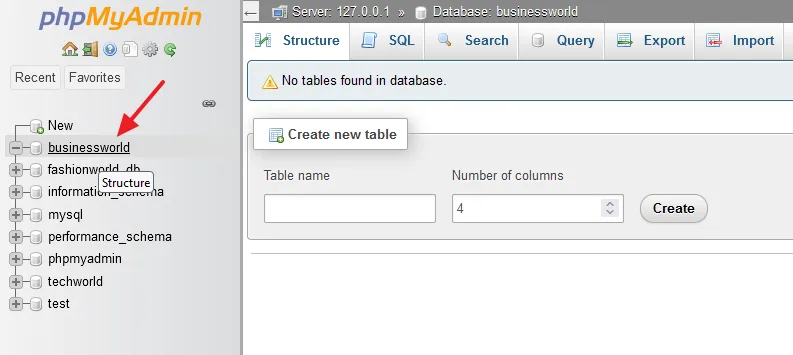
- You can see at the left side that a new database businessworld for Drupal site is successfully created. The tables in the database will be created automatically during the Drupal installation.
03. Configure php.ini and my.ini Files for Drupal on XAMPP
In this section, I will guide you on how to configure php.ini and my.ini for Drupal on XAMPP so that you won’t get warnings and errors during the Drupal Installation on XAMPP.
- Open the XAMPP Control Panel.
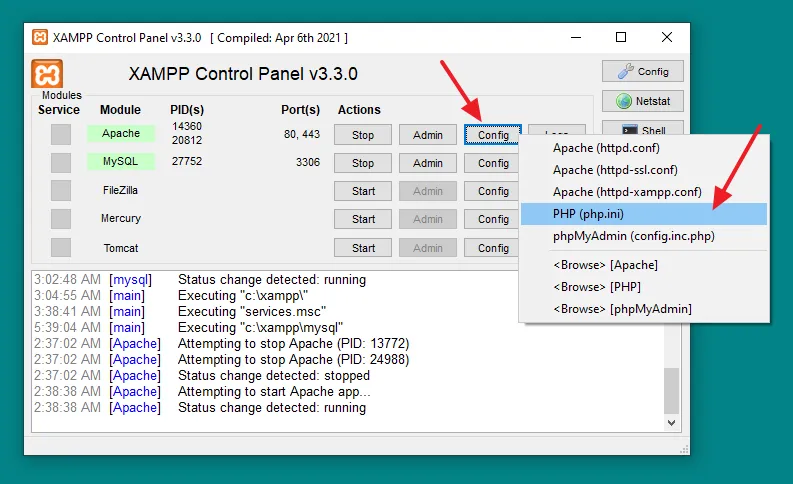
- Click on the Config button of Apache module.
- Click on the PHP (php.ini). It will open the php.ini file on Notepad.
- Press Ctrl + F to open the Notepad Search.
Find the below directives in the php.ini file and update their values with the values that are assigned below. For example, the default value of the directive max_execution_time in php.ini file is 120, update 120 with 600.
max_execution_time = 600
max_input_time = 600
memory_limit = 512M
post_max_size = 64M
upload_max_filesize = 64M
mysql.connect_timeout = 600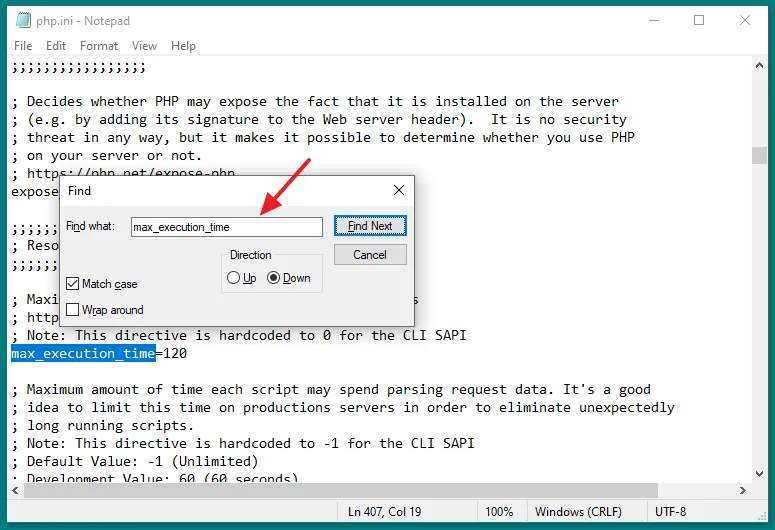
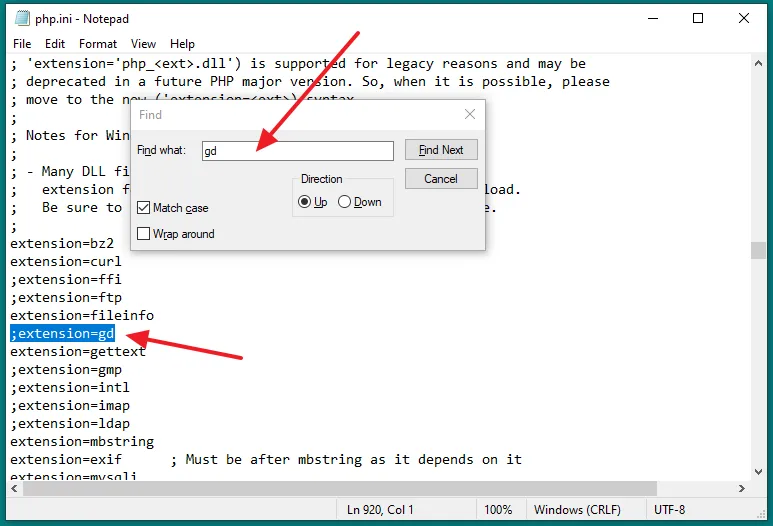
- In the php.ini file, find gd extension and remove the semicolon (;) from its beginning to enable it like this: ;extension=gd to extension=gd. A semicolon (;) at the beginning of a line makes it a comment, means the line is ignored.
If you don’t enable gd extension, you may get this error, during the Drupal Installation.
Disabled
Drupal requires you to enable the PHP extensions in the following list (see the system requirements page for more information):gd
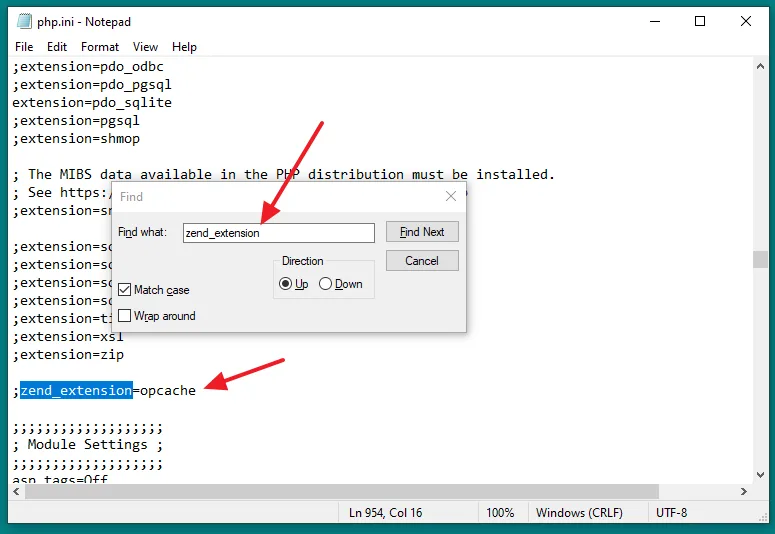
- In the php.ini file, find zend_extension=opcache and remove the semicolon from its beginning to enable it like this: ;zend_extension=opcache to zend_extension=opcache.
- Save the php.ini file.
If you don’t enable zend_extension=opcache you may get this warning during the Drupal Installation on XAMPP.
PHP OPcode caching
Not enabled
PHP OPcode caching can improve your site’s performance considerably. It is highly recommended to have OPcache installed on your server.
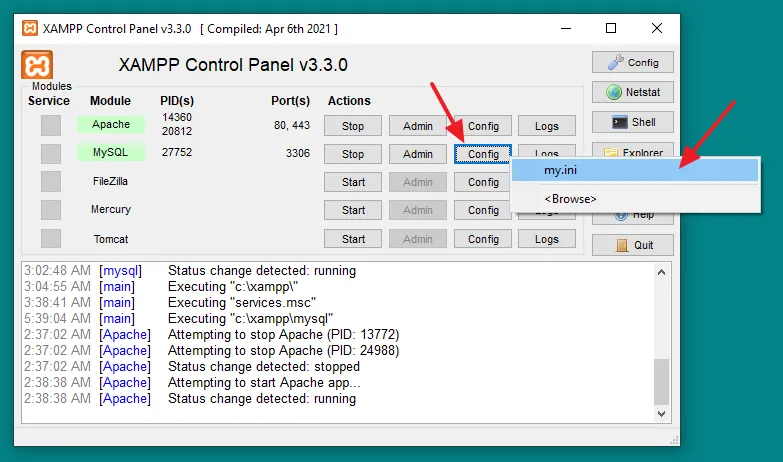
- On XAMPP Control Panel click on the Config button of MySQL module.
- Click on the my.ini. It will open my.ini file on the Notepad.
- On my.ini file find the 2 directives (1) max_allowed_packet (2) innodb_flush_log_at_trx_commit. Update their values with the values that are assigned below. For example, the default value of the directive max_allowed_packet in my.ini file is 1M, replace the 1M with 64M.
- Save the my.ini file.
max_allowed_packet = 64M
innodb_flush_log_at_trx_commit = 2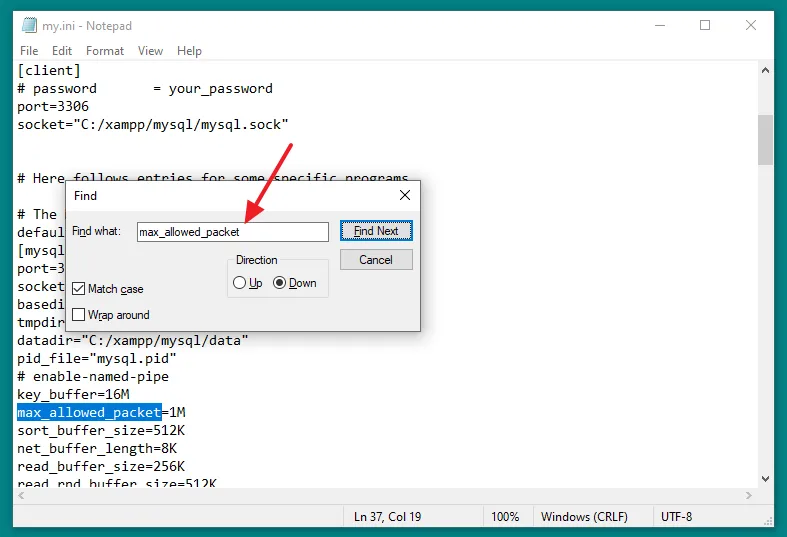
After configuring the php.ini and my.ini files, go to XAMPP Control Panel to restart the Apache and MySQL. The changes you made to these two configuration files will be applied after you restart Apache and MySQL modules.
- First stop the Apache and MySQL modules.
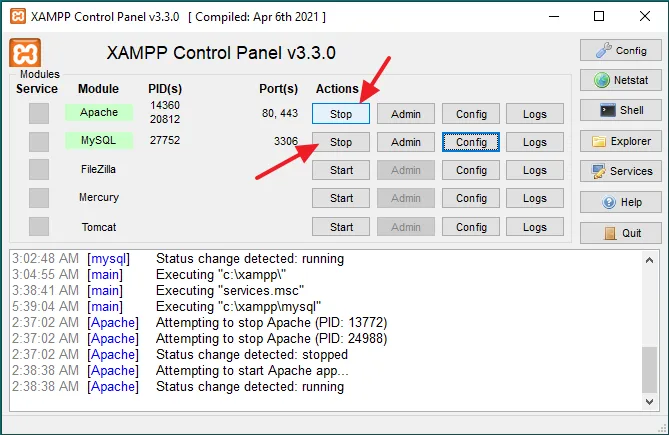
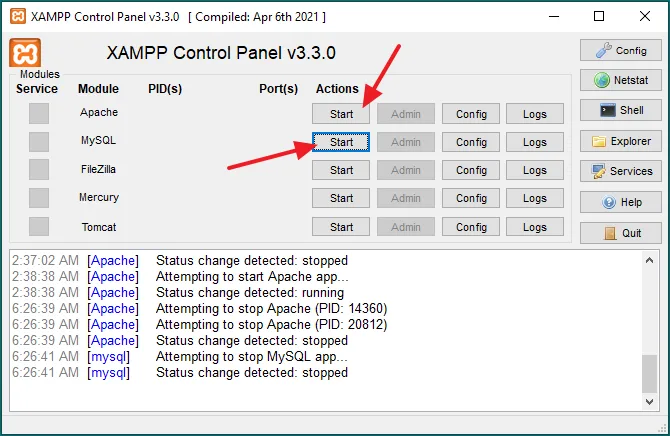
- Now Restart both Apache and MySQL modules on XAMPP Control Panel.
- To restart a module, click on its Start button.
04. How to Install Drupal on XAMPP in Windows
Everything is ready for the installation of Drupal on XAMPP in Windows. Follow the steps below to begin the installation of Drupal on XAMPP server.
To begin the installation of Drupal on XAMPP, browse your Drupal Site that you had copied to XAMPP htdocs like this: http://localhost/Your_Site, for example, http://localhost/businessworld.
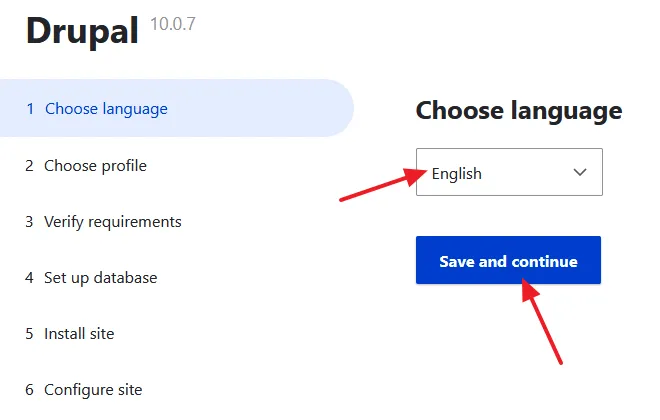
01. Choose Language
- Choose Language.
- Click on the Save and continue button.
02. Select an installation profile
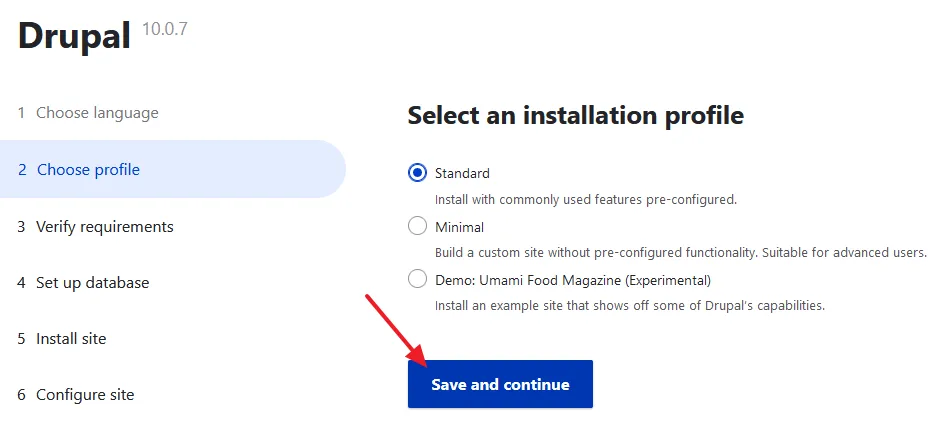
You have three options to choose (1) Standard (2) Minimal (3) Demo. The Demo option also installs demo content of a functional site Umami Food Magazine. Select Minimal only if you’re an advanced user.
- I have selected Standard option.
- Click Save and continue button.
03. Verify Requirements
The Verify requirements is skipped here because there are no warnings and errors.
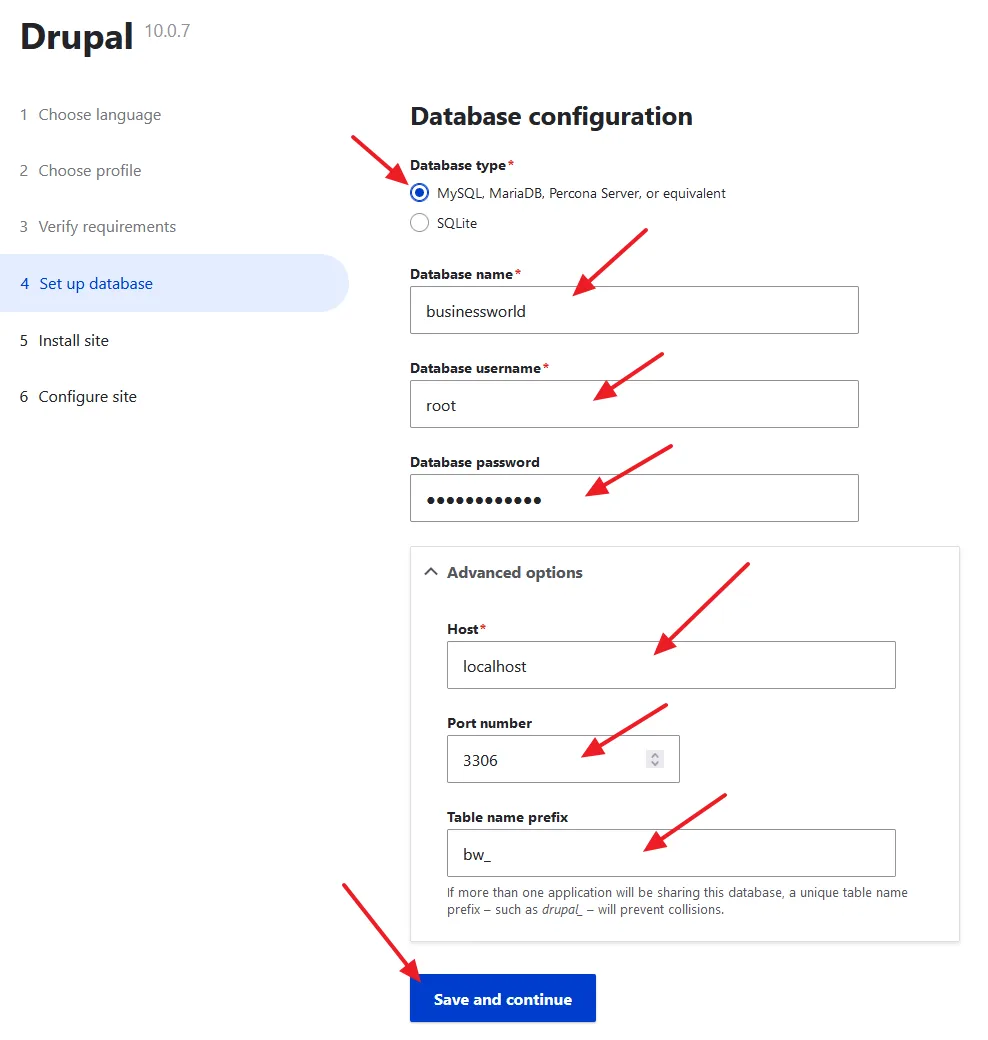
04. Database Configuration
- On the Database type choose MySQL MariaDB, Percona Server, or equivalent.
- In the Database name enter the database name that you have created on the phpMyAdmin.
- In the Database username type root (If you haven’t changed).
- In the Database password enter the password of phpMyAdmin root user. If you haven’t set password for root user, then leave this field empty.
Expand the Advanced options.
- In the host enter localhost.
- In the port number enter 3306.
- Enter a Table name prefix for your phpMyAdmin database tables. The Table name prefix is added to the beginning of your database tables like bw_user, bw_content, bw_posts, etc. Here I have created Table name prefix from the site name Business World i.e. b from Business and w from World.
- Click on the Save and continue button.
05. Install Site
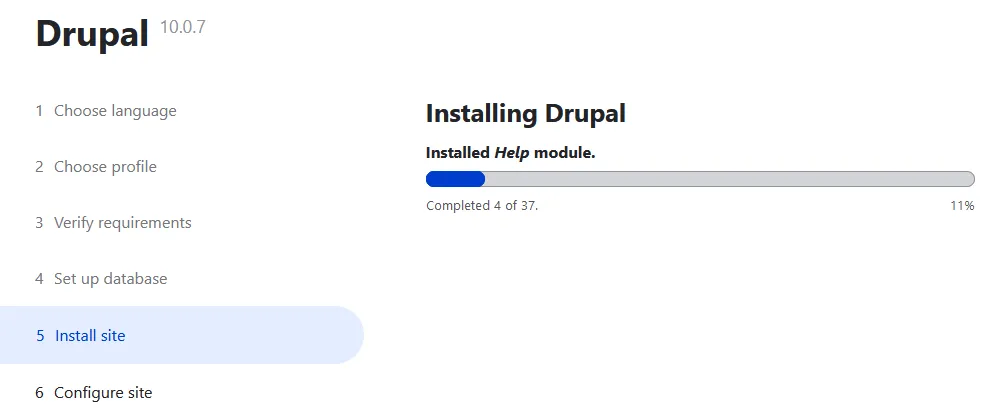
If Drupal successfully communicates with your database, the installation will begin. It may take few minutes, so be patient while Drupal installation is finished.
06. Configure Site
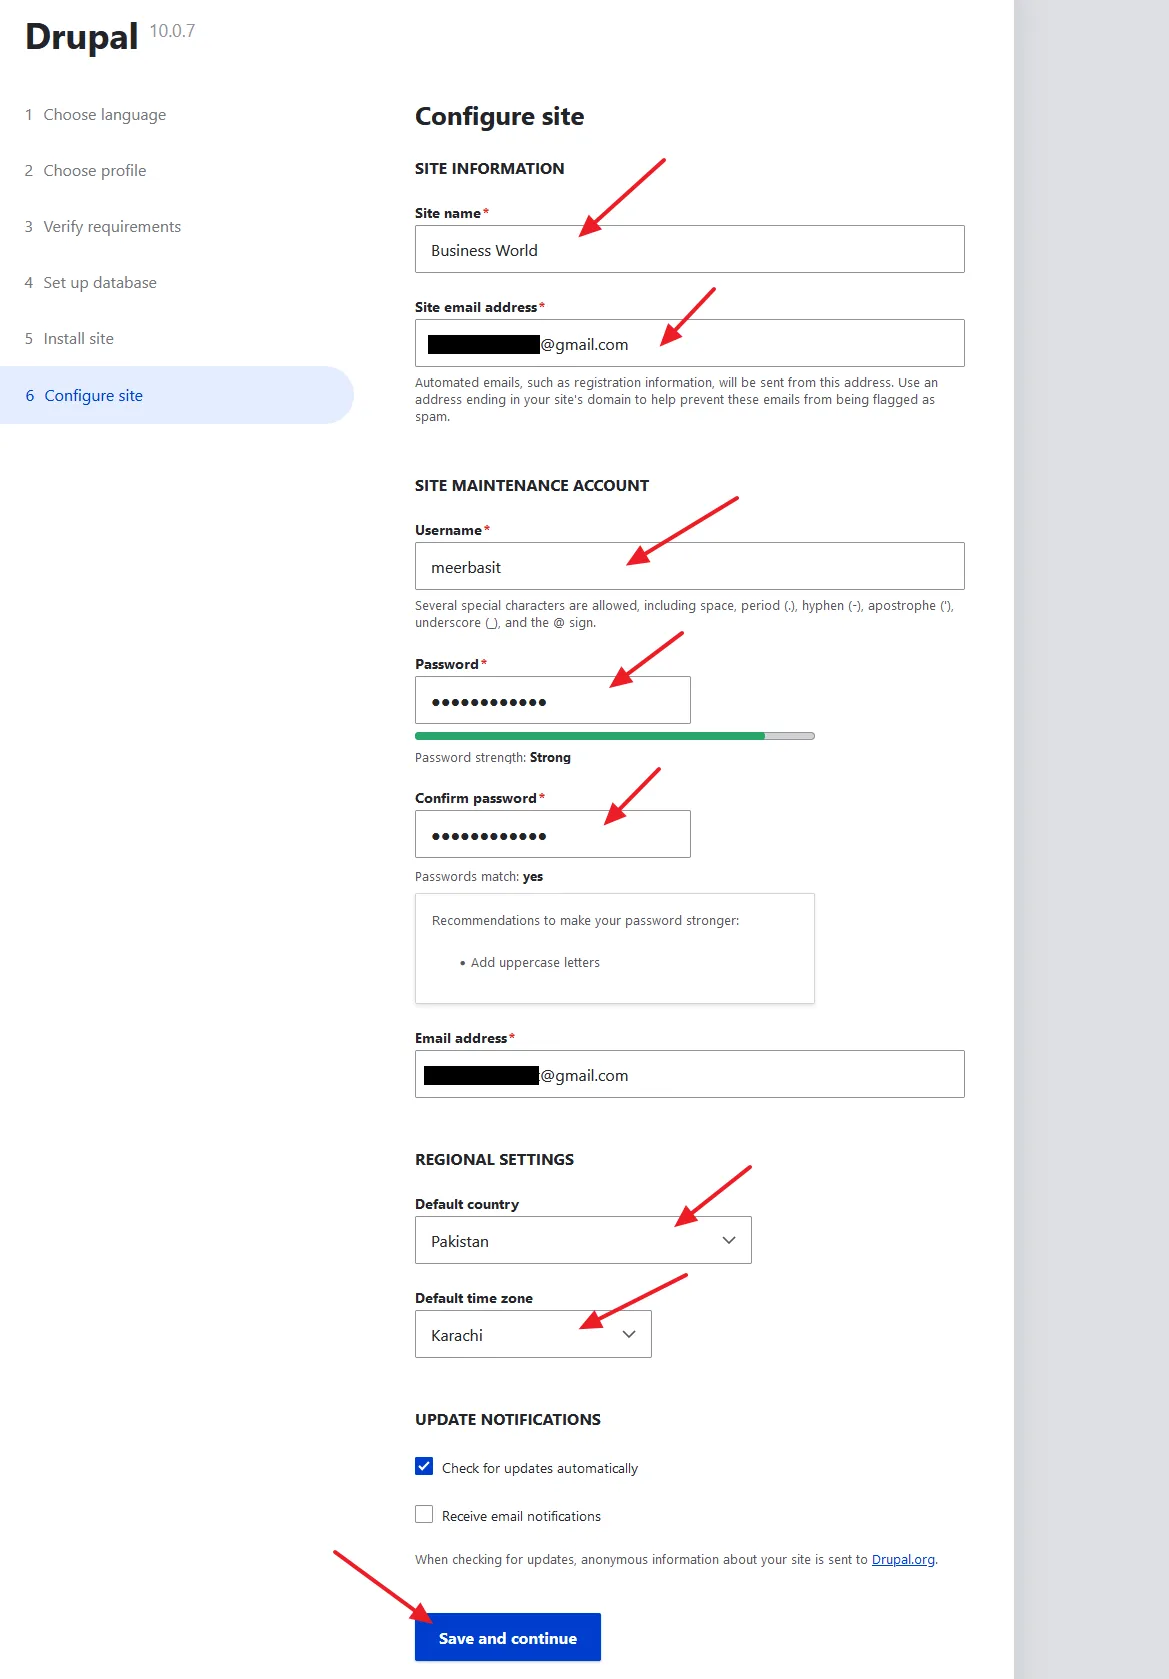
The Drupal is installed on XAMPP, now it is time to configure your site.
SITE INFORMATION
- In the Site name enter the name of your Drupal site.
- Enter your Email Address in the Site email address.
SITE MAINTENANCE ACCOUNT
- Enter a Username, Password, and Email Address for your Drupal site’s admin user account.
REGIONAL SETTINGS
- Select your Default Country.
- Select your Default time zone.
Click Save and continue button.
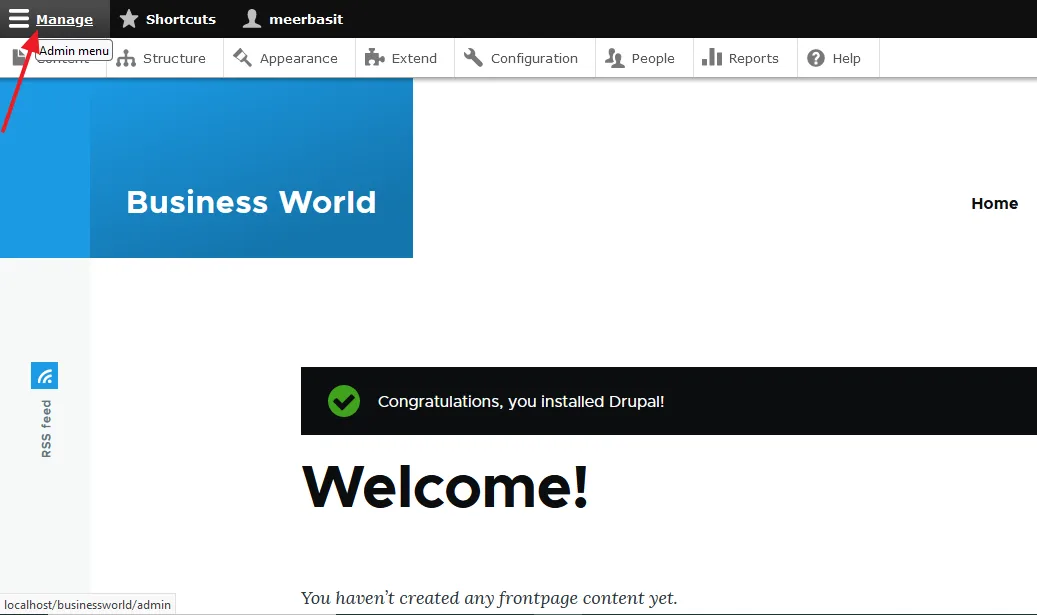
- You will be redirected to the front-end of your Drupal Site. You can open your Drupal site via this URL: http://localhost/site_name, for example, http://localhost/businessworld.
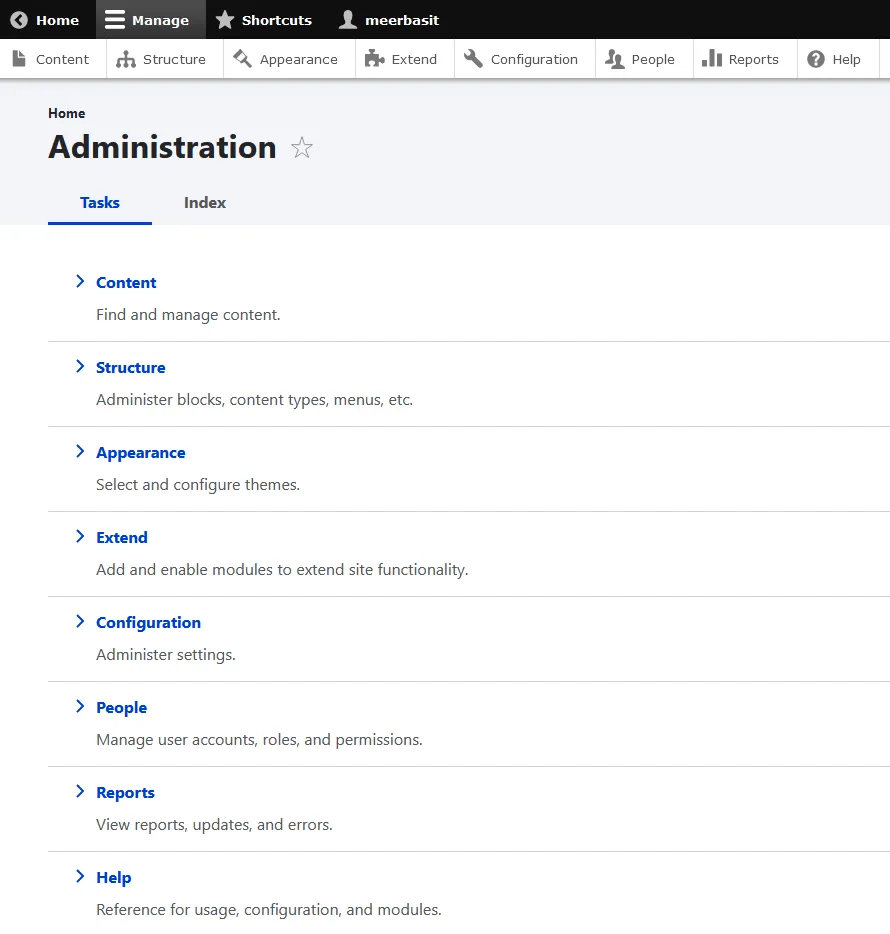
- Click on the Manage link, located at top-right corner to open your sites admin section, as shown in the next step.
- This is how the admin section of your Drupal site looks like. Each and everything related to your site is controlled and maintained via admin section. You can create/edit/remove posts, setup and configure site settings, edit/add themes, create/delete/mange users, view reports, and many more.
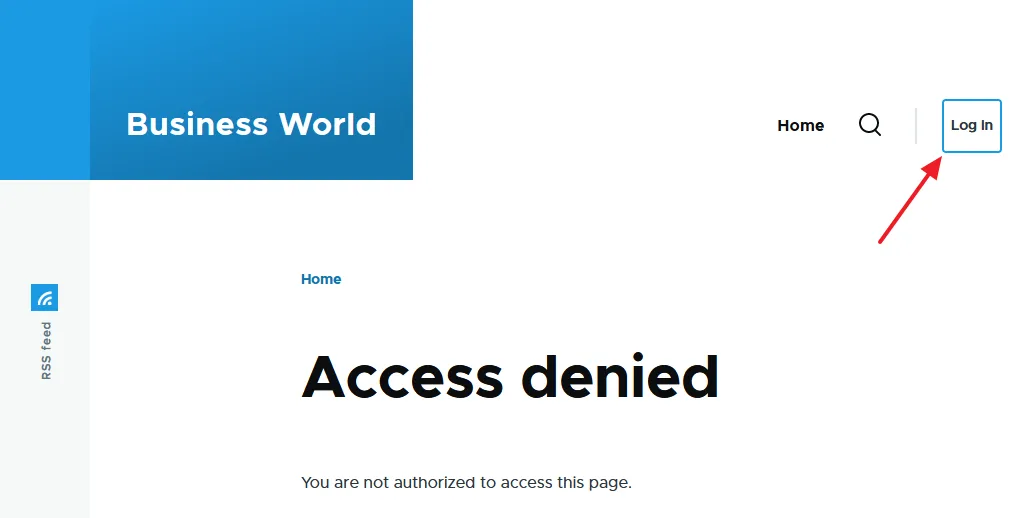
If you’re logged out of admin section, you have to enter the Username and Password to log in, as shown in the next step.
- You can open the Drupal admin section via this URL: http://localhost/site_name/admin, for example, http://localhost/businessworld/admin.
- Click on the Log In button.
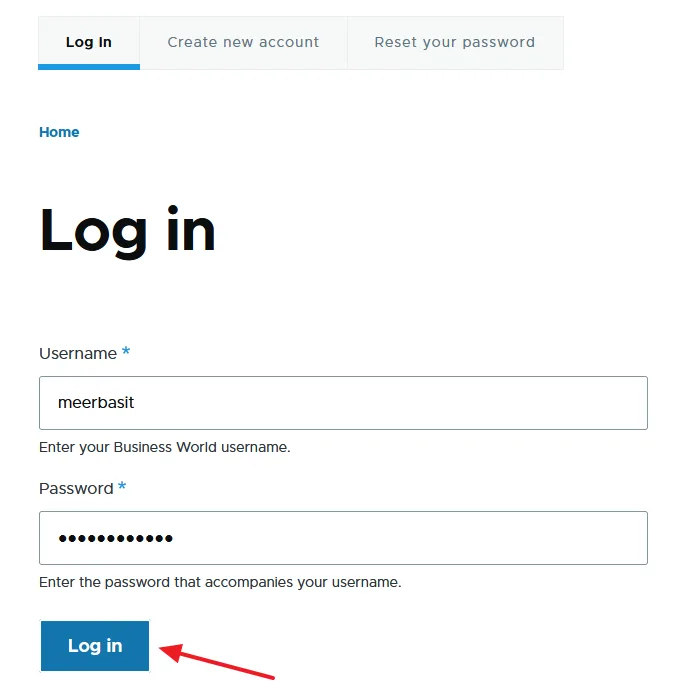
- Enter your Username and Password.
- Click on the Log in button.
So it was all about installing Drupal on XAMPP server. Hope you would have liked this post. If you like this post then don’t forget to share this post with other people. Share your feedback in the comments section below.

Also Read
- How to Buy Domain & Hosting Step-by-Step
- How to Install Typo3 CMS on XAMPP in Windows
- How to Install Joomla on XAMPP | Beginner’s Guide
- How to Install WordPress on XAMPP | Beginner’s Guide
- How to Install ExpressionEngine on XAMPP in Windows
- How to Install OpenCart on XAMPP in Windows
- How to Install ProcessWire CMS on XAMPP in Windows
- How to Install Dropback CMS on XAMPP in Windows
- How to Install Composr CMS on XAMPP in Windows


Leave a Reply