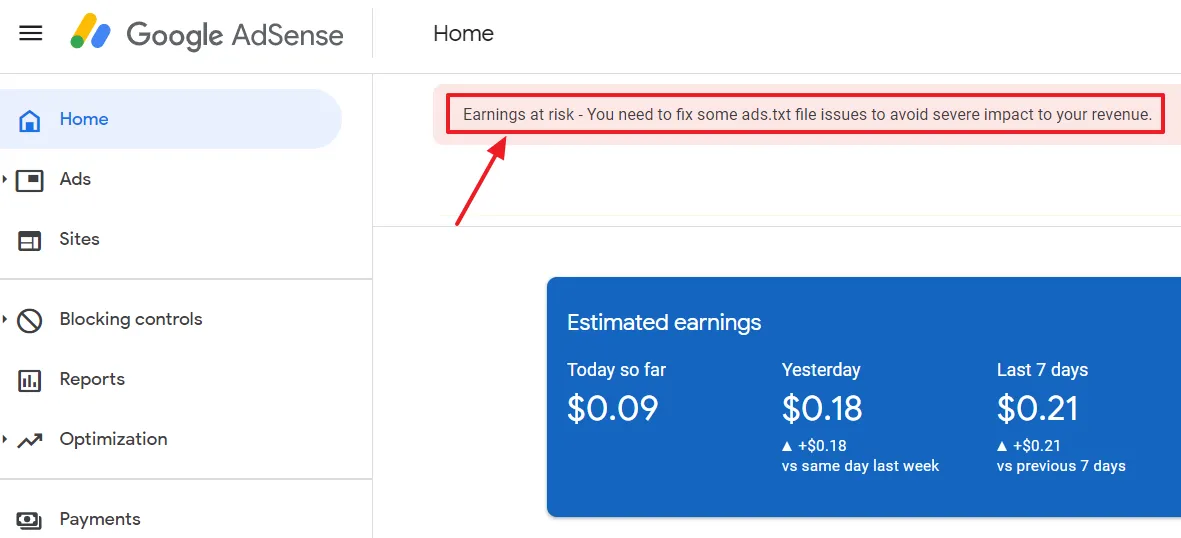
Is Blogger blog monetized with Google AdSense and it is showing you the warning/alert, “Earnings at risk – One or more of your sites does not have an ads.txt file. Fix this now to avoid severe impact to your revenue.“? You are in the right place.
In this tutorial, I will guide you step-by-step on how to get rid of “Earnings at risk – One or more of your sites does not have an ads.txt file” warning.
If you’re a WordPress user, then follow this tutorial:
Following topics will be covered in this post:
- What is the Cause of Earnings at Risk Warning?
- What is Ads.Txt?
- How to Add Custom Ads.txt On Blogger
- How to Redirect Your Naked Domain to WWW
- Test Your Ads.Txt
RELATED
- How to Set Up Blogger Settings | A to Z
- How to Pick a Right Blogger Template?
- Introduction to Theme Customize Settings in Blogger
01. What is the Cause of Earnings at Risk Warning?
People have posted hundreds of thousands of queries on Google forums to get the solution of the “Earnings at Risk” Google Adsense warning, but they are getting the same answer from Google i.e. “Add customs ads.txt”. When people get this response they say, “I have added the custom ads.txt, but I am still getting the warning, Earning at risk“.
Do you know that Google is CORRECT! Though you add “ads.txt”, but forgotten to setup a “naked redirect”. A Domain without “www” is called naked domain like “example.com”, “https://example.com”, “http://example.com”. Once you redirect your naked domain to “www” you will get rid of “Earnings at Risk” warning from Google AdSense within few hours.
In order to redirect your naked domain to “www” Google asks you to add 4 A Records in your domain’s DNS Settings. In this post, I have shown in detail (1) What are those 4 A Records (2) How to add 4 A Records in your domain’s DNS Settings.
02. What Is Ads.txt?
Ads.txt or Authorized Digital Sellers is an IAB (Interactive advertising Bureau) initiative to help you ensure that your digital ad inventory is only sold through sellers such as AdSense, who you’ve identified as authorized.
Creating your own ads.txt file gives you more control over who’s allowed to sell ads on your site/blog and helps prevent counterfeit (imitate) inventory from being presented to advertisers.
03. How To Add Custom Ads.txt on Blogger
In this section, I will guide you on how to add Custom Ads.txt on Blogger.
Custom Ads.txt file includes:
google.com, pub-0000000000000000, DIRECT, f08c47fec0942fa0Replace pub-0000000000000000 with your AdSense Publisher ID, the other three variables i.e. “google.com”, “DIRECT”, and “f08c47fec0942fa0” are same for all.
Follow the steps to get your Publisher ID from AdSense:
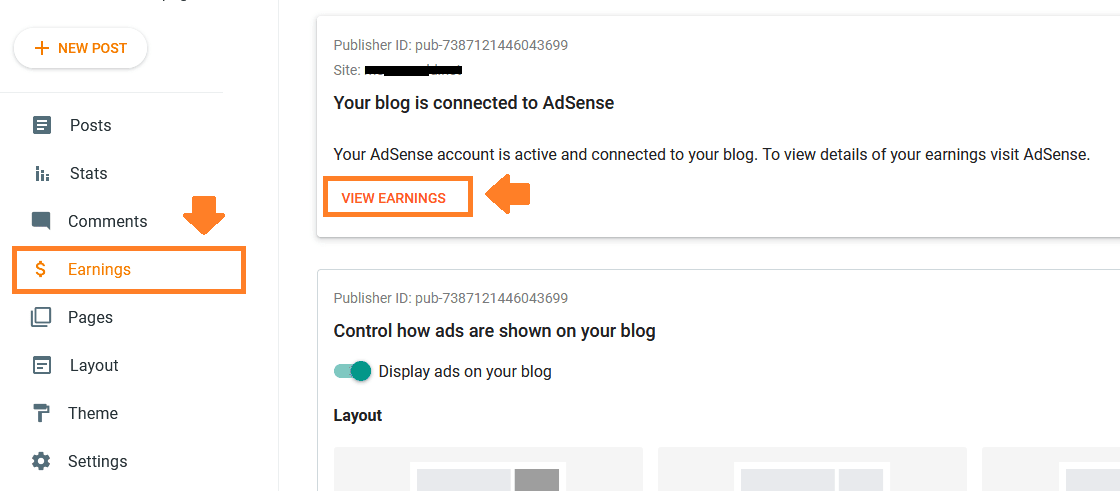
- Login to your Blogger Dashboard & click “Earnings“.
- Click “VIEW EARNINGS” or you can directly open AdSense account from https://www.google.com/adsense/.
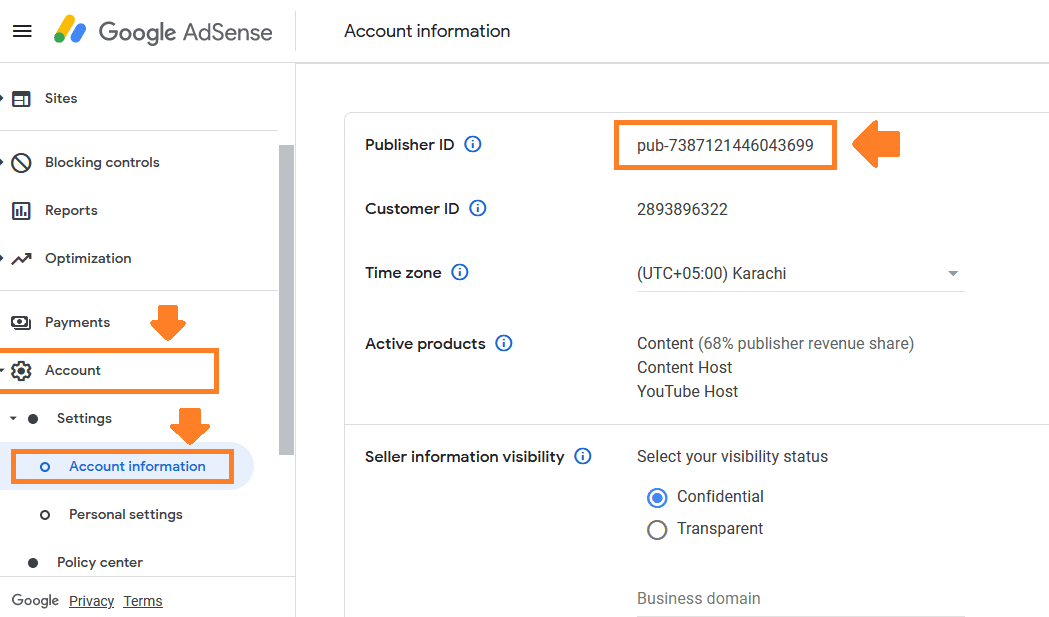
- On your AdSense Account and click the “Account” from the sidebar.
- Expand the Settings tab and click “Account Information“.
- Copy the “Publisher ID“.
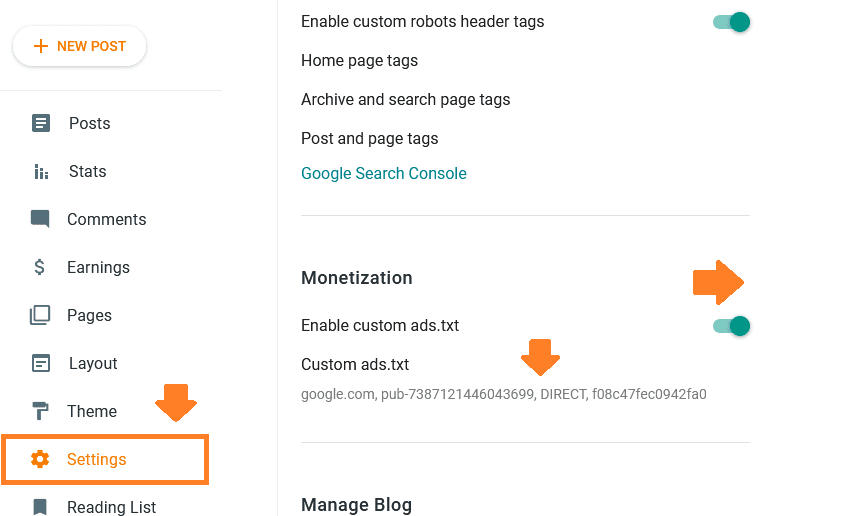
- Now go back to Blogger Dashboard and click Settings from the sidebar.
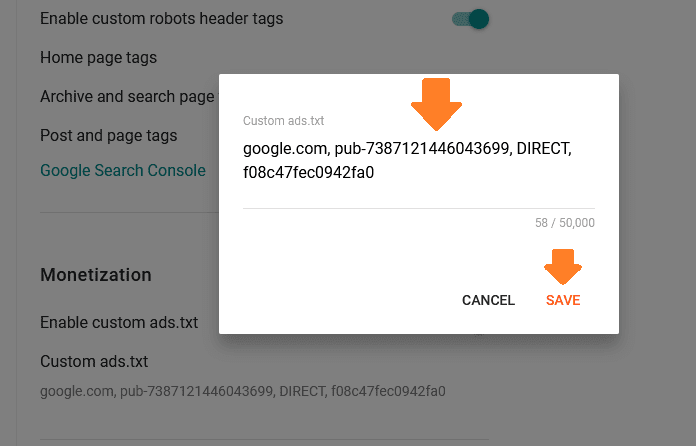
- Scroll down to “Monetization” section.
- Turn the slider towards your right to enable the “Enable custom ads.txt“.
- Click the “Custom ads.txt“. A popup will appear. Paste the custom ads.txt text there, as shown in the next step.
Paste the following code in the Custom ads.txt. Only Replace the pub-0000000000000000 with your Publisher ID that you have copied from Google Adsense account. Other information will remain same.
google.com, pub-0000000000000000, DIRECT, f08c47fec0942fa0- Click SAVE.
04. How To Redirect Your Naked Domain To WWW
In this section, I will guide you on how to redirect your naked domain to “www”.
Below are the 4 A Records” that you have to add on your domain’s DNS Settings in order to redirect your naked domain to “www”.
- @ 3600 In A 216.239.32.21
- @ 3600 In A 216.239.34.21
- @ 3600 In A 216.239.36.21
- @ 3600 In A 216.239.38.21
For Your Understanding:
- The “@” means root site. It is the value of “Host” column. It points to your website.
- The “3600” is the TTL for each record. TTL stands for Time-To-Live. 3600 means 60 minutes.
- There are 4 Google IP addresses which are called Value.
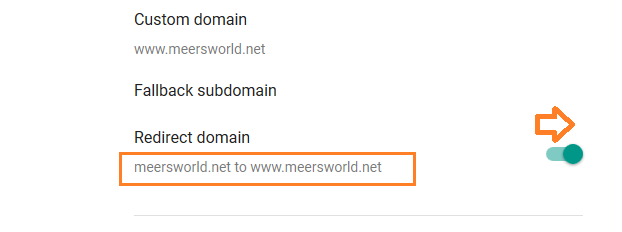
If you are a Blogger user first enable the “Redirect domain” option from Settings.
- Go to Blogger Settings.
- Under the Publishing section, turn on the “Redirect domain” option.
Add 4 A Records
Follow these four steps to add the above 4 A Records in your domain’s DNS Settings:
- Login to your domain hosting account(cPanel) where your domain is hosted.
- Find DNS Settings or DNS Zone File icon.
- Click “MANAGE” button to add the 4 A Records.
- Click “+ ADD RECORD” to add A Record one by one.
Here, I am guiding you on how to add 4 A Records in DNS Settings of a domain hosted on Namecheap. You can get lot of help from this.
- Sign-In to your Namecheap account.
- Go to your “Domain List” section.
- Click the “Manage” button OR home icon under the Products label.

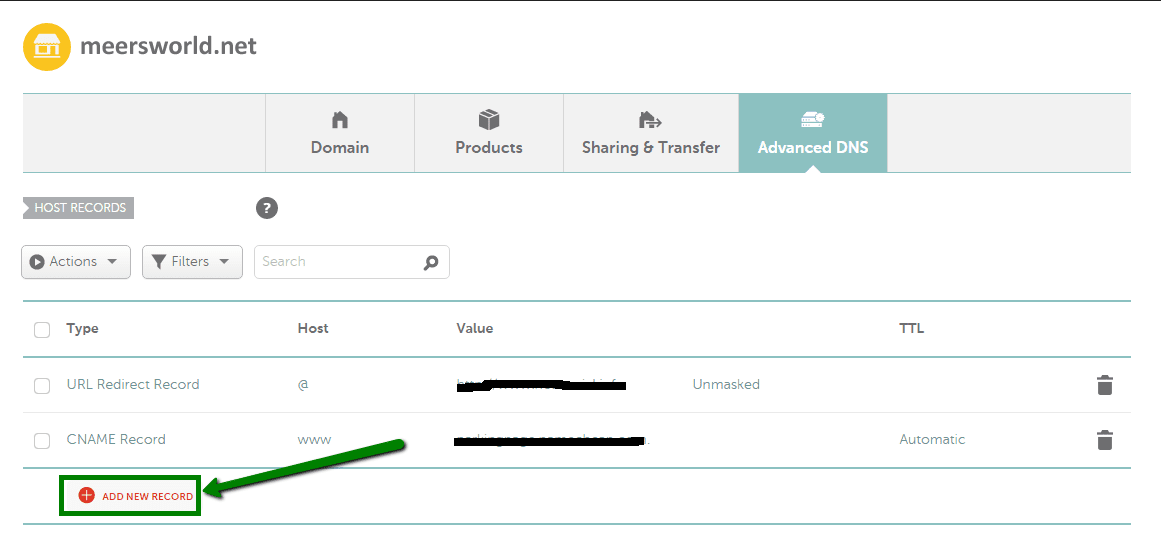
- Click the “Advanced DNS” tab.

- Click “+ ADD NEW RECORD” link.
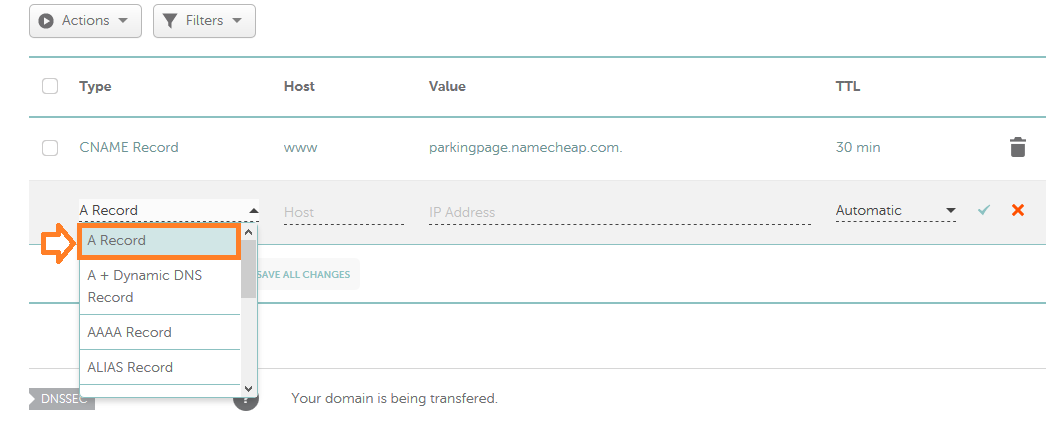
- Choose “A Record“.
Now add these 4 A Records one by one. Click the Tick icon to save the A Record.
- @ 3600 In A 216.239.32.21
- @ 3600 In A 216.239.34.21
- @ 3600 In A 216.239.36.21
- @ 3600 In A 216.239.38.21
The “@” means root site. It is the value of “Host”column. It points to your website. The “3600” is the TTL for each record. TTL stands for Time-To-Live. 3600 means 60 minutes. There are 4 Google IP addresses which are called “Value“.

Here you can see that I have added the 4 A Records successfully.

05. Test The Ads.txt File
Once you add “Custom ads.txt” and redirect your naked domain to “www”, it is time to test whether your ads.txt is accessible or not.
- Open your website and add “/ads.txt” at the end of its URL.
- Try to access “ads.txt” without “www” & with “www”.
Here are some of the examples. Replace “example.com” with your website’s domain. Your ads.txt should be accessible with all the combinations listed below.
- example.com/ads.txt
- http://example.com/ads.txt
- https://example.com/ads.txt
- www.example.com/ads.txt
- http://www. example.com/ads.txt
- https://www. example.com/ads.txt
If your naked domain is redirected successfully to “www” your “ads.txt” will be accessible on your browser, as shown below.

Check your Google AdSense after few hours, you will not see the “Earning at risk” warning anymore.
So it was all about resolving the warning Earnings at Risk from your Google AdSense account. If you like this post then don’t forget to share with other people. Share your feedback in the comments section below.

Also Read
- How To Redirect Naked Domain To WWW If Your Domain Hosting Doesn’t Provide DNS Hosting
- How To Display Google Ads On Blogger – Step By Step | Monetize A Blogger Blog
- How To Fix Valuable Inventory: No Content Google Adsense Error | Google Adsense Approval
- Solved: Auto Ads Might Not Work Well With the Current Theme


Leave a Reply