Do you want to put your image on top of YouTube thumbnail or blog post’s featured image? You’re in the right place.
In this tutorial, I will guide you step-by-step on how to put an Image on top of thumbnail/featured image on Photoshop by removing its background. When a background of an image is removed it becomes transparent, you can place a transparent image anywhere.
You must have seen on YouTube video thumbnails and featured images of blog posts/article that people put their picture on top of the main picture alongside title for gaining attention of the visitors and personal branding.
01. How to Put Image on Top of Thumbnail
Follow the below steps to put an image on top of thumbnail or featured image on Photoshop. In this tutorial, I am using a picture of mine that I will put on top of a brick wall background.
- Open Adobe Photoshop on your computer.
- First open the picture on Photoshop that you want to use as background.
- Place (drag) the picture that you want to put-on-top of the background image.
- Adjust its Size and Position.
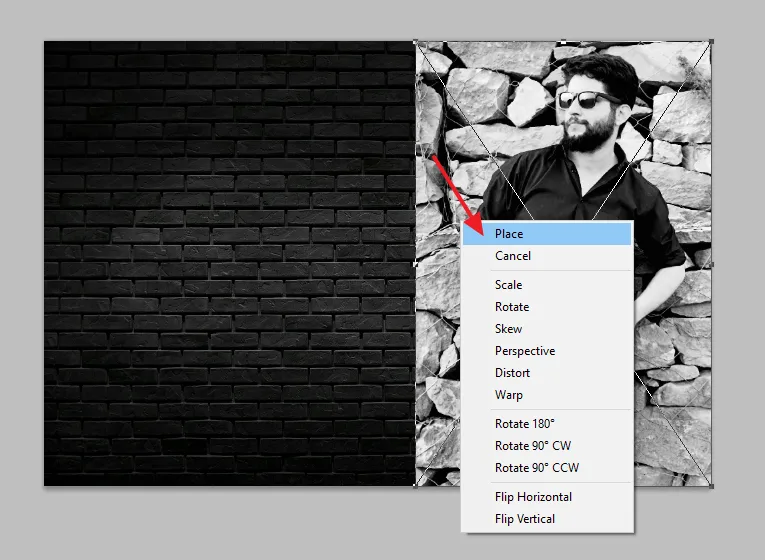
- Right click on your picture and click Place.
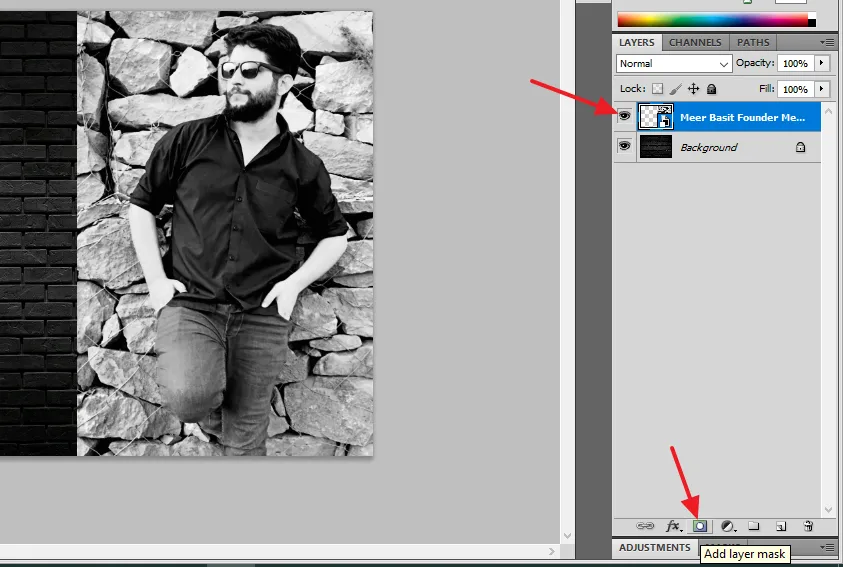
- At your right side, on the LAYERS tab, select the layer of your top image.
- Click on the Add layer mask icon, located at the bottom.
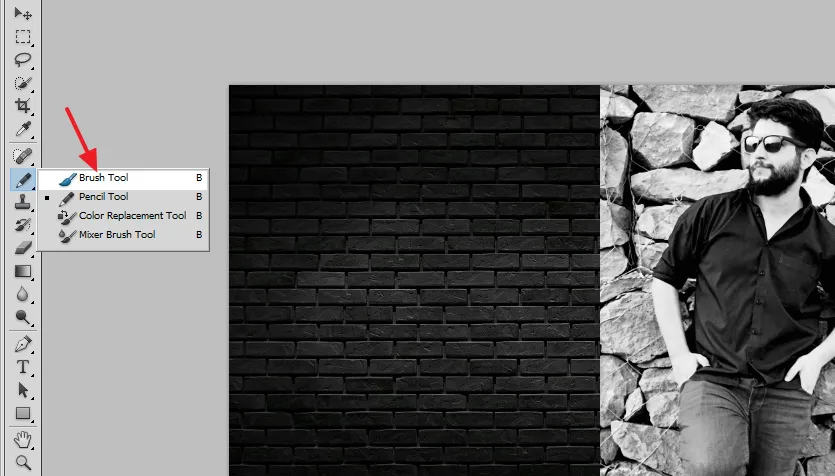
- Select the Brush Tool from Toolbar, located at your left side. The Brush is used to remove the background of your top image.
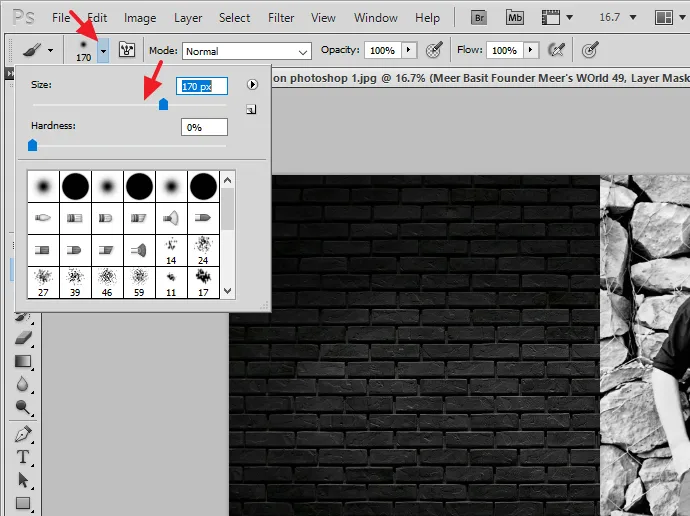
- Select the Size of the Brush. Adjust the size of Brush accordingly. You can change its size anytime.
- Press Mouse button and drag the Brush on background of your top image. You can see that the background of top image is being removed.
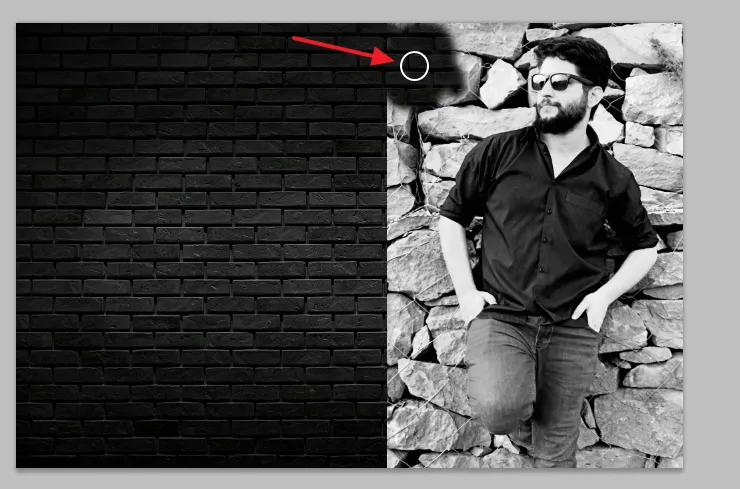
- If you need to Zoom In the image press Ctrl and + symbol, & Press Ctrl and – symbol to Zoom Out. Zoom In helps you to remove the background with great accuracy.
- At your right side, on Layer mask thumbnail you can see the removed region in black color.
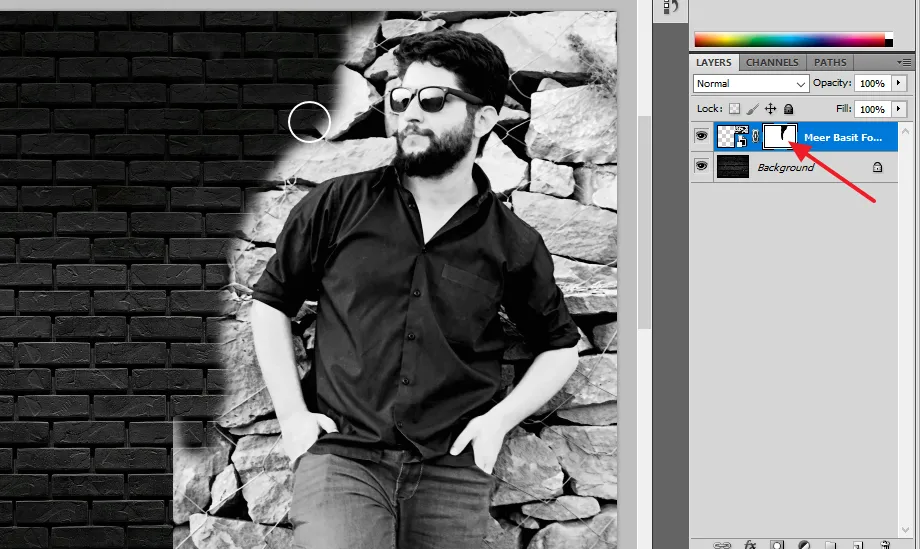
- I have removed the background of my top image completely.
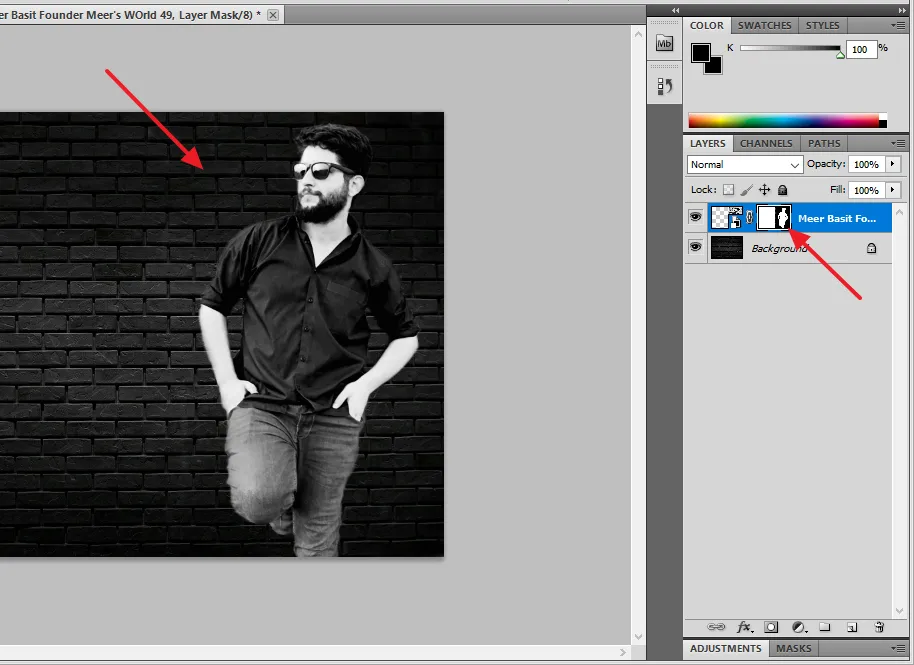
02. How to Highlight Top Image with Border
To highlight the top image some content creators add border to it. That’s why I am also guiding you on how to add border to highlight the top image.
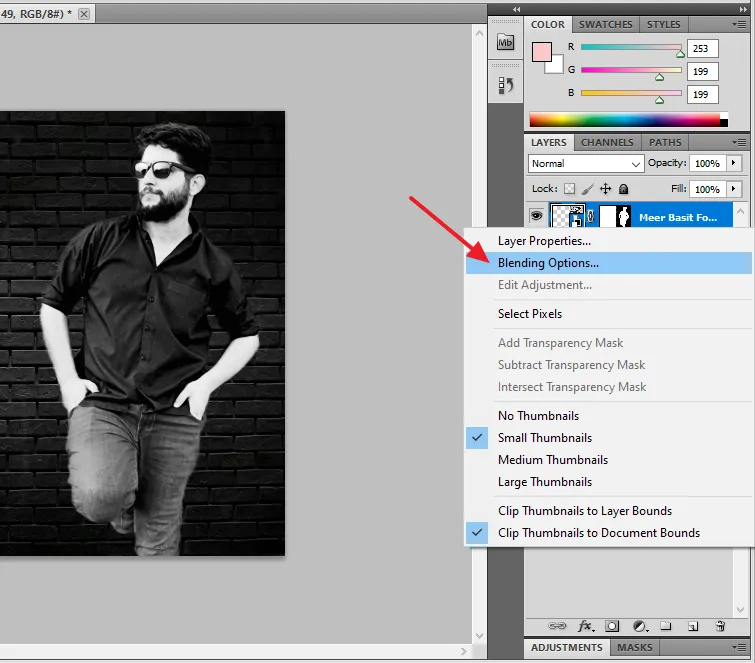
- There are two boxes on your top image’s layer, right-click on the Smart Object Thumbnail.
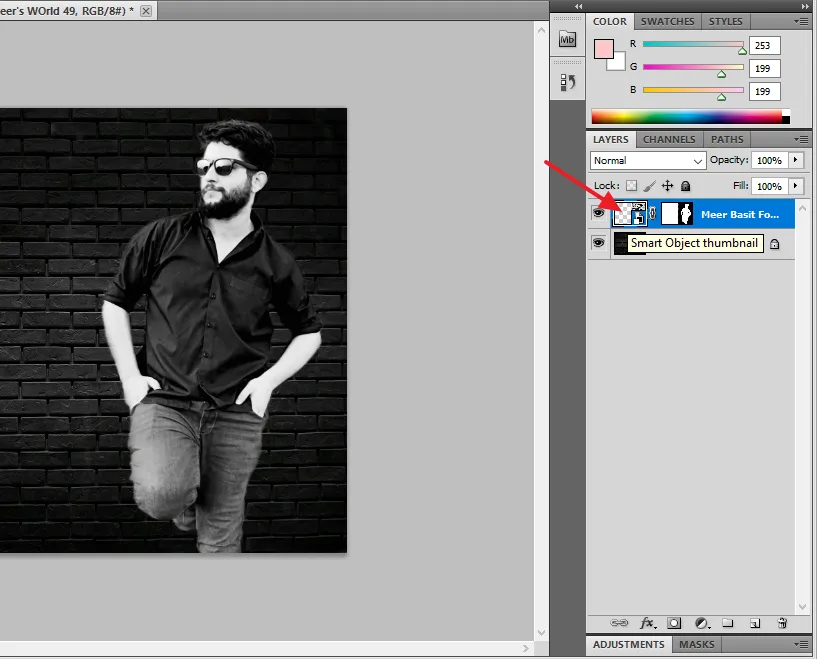
- Click on the Blending Options…
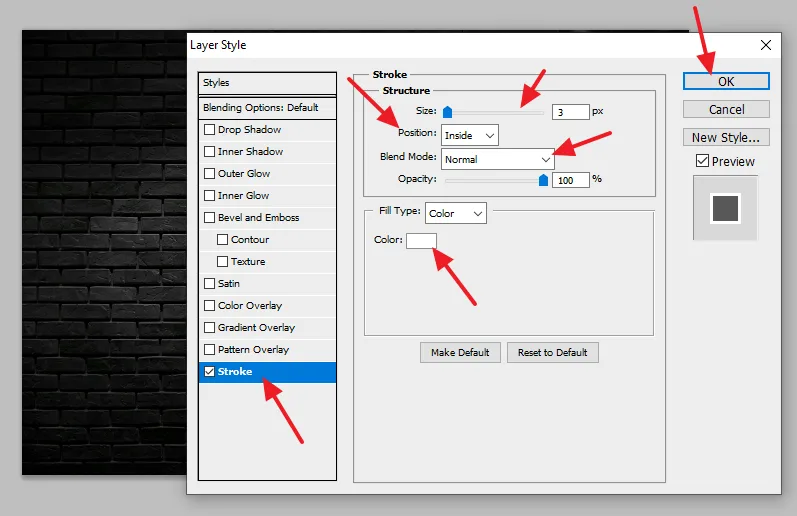
First check (tick) the Stroke style from the left side (Styles). Its properties will appear at your right side.
- Select the Size of the border in pixels.
- Select the Position Inside.
- Blend Mode should be Normal.
- Choose Fill type Color.
- Pick the Color of the border.
- Click on the OK button.
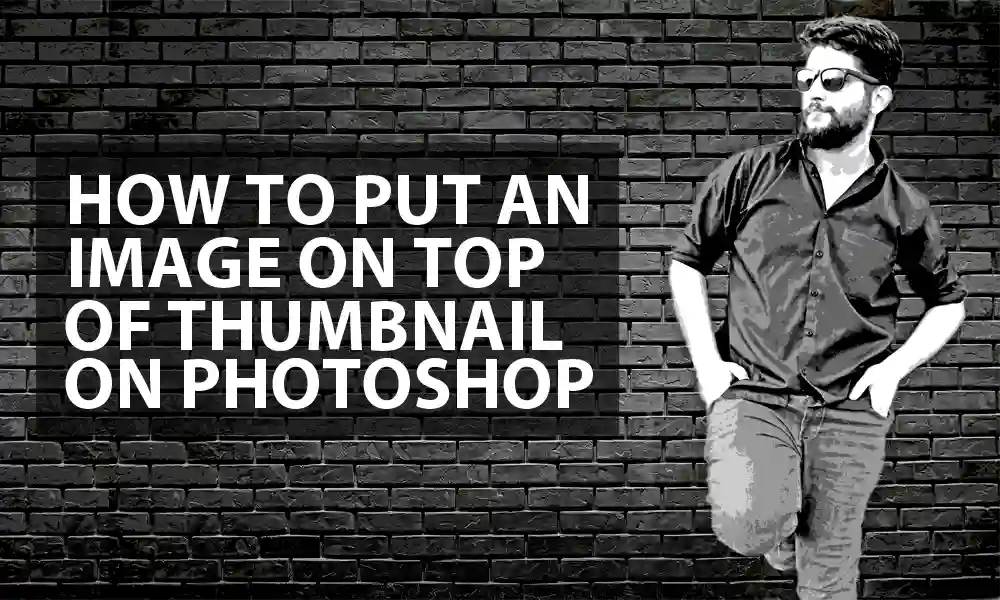
- You can see that I have highlighted the picture by adding the border using Stroke style. If the border gets distorted using this method, you can draw the border manually by using the Brush Tool.

If you like this post then don’t forget to share with other people. Share your feedback in the comments section below.

Also Read



Leave a Reply