Do you want to learn how to add schema markup using Google Tag Manager? You’re in the right place.
Google Tag Manager (GTM) is a powerful, free tool offered by Google that simplifies the process of managing and deploying tags on your website or mobile app without the need to modify the code directly.
A tag is a snippet of JavaScript or tracking code used for analytics, marketing, and other purposes. Common examples include Google Analytics, Facebook Pixel, and custom event tracking.
With GTM, users can manage all their tags in one place through an intuitive web-based interface. This reduces reliance on developers for minor updates and ensures quicker deployment of tracking solutions, ultimately saving time and resources.
Topics
- Key Features of Google Tag Manager
- What is a Schema Markup?
- Benefits of Using GTM for Schema Markup
- How to Add Schema Markup Using Google Tag Manager
- Test the Tag (Schema Markup)
- Conclusion
RELATED
- How to Optimize for “Near Me” Searches for Local Services
- Content Marketing Mistakes to Avoid: A Comprehensive Guide
- Best Content Marketing Tools for Beginners
- How to Optimize Your Blog for Voice Search
- Using Google My Business for Small Businesses: Complete Guide
- Understand On-Page SEO and Off-Page SEO
- How to Create Sitemap in WordPress & Submit on GSC
|| Looking for amazing mobile-optimized responsive themes starting from $2? Find Here. Looking for a fast-performance web-hosting? Get Here.
01. Key Features of Google Tag Manager
Below are some of the key features of Google Tag Manager:
- Ease of Use: No need to edit code directly, making it accessible even for non-technical users.
- Centralized Management: All tags are managed from a single dashboard.
- Version Control: GTM tracks changes, allowing you to revert to previous configurations if needed.
- Debugging Tools: Built-in preview and debug modes ensure accuracy before deployment.
- Integration Capabilities: Seamlessly integrates with Google tools like Analytics, Ads, and external platforms.
02. What is a Schema Markup?
Schema markup is structured data code added to a website to help search engines understand the content and context of the information presented. It enhances your website’s visibility in search results by enabling rich snippets like star ratings, FAQs, event details, and more.
Common schema types include:
- Organization Schema: Business details.
- FAQ Schema: Frequently Asked Questions.
- Product Schema: Details of a product, including reviews and prices.
- Event Schema: Information about events, including dates and locations.
If you don’t know how to create schema markup, go to the Create Schema Markup section of this tutorial:
03. Benefits of Using GTM for Schema Markup
Below are some benefits of using GTM for schema markup:
- No need to manually edit HTML files.
- Handle all schema and tags from one platform.
- Easily update or add new schema types as your website grows.
- Apply schema to specific pages without affecting others.
04. How to Add Schema Markup Using Google Tag Manager
GTM provides an efficient way to implement schema markup without modifying your website’s source code. Here’s a step-by-step guide:
- Navigate to Google Tag Manager.
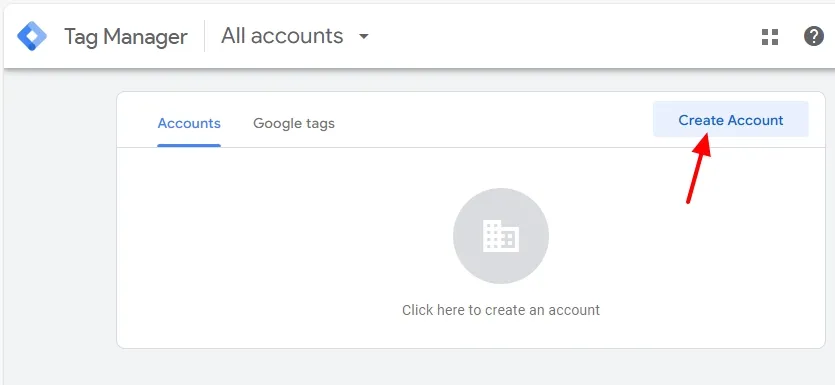
- If you don’t have an account, click on the Create Account button.
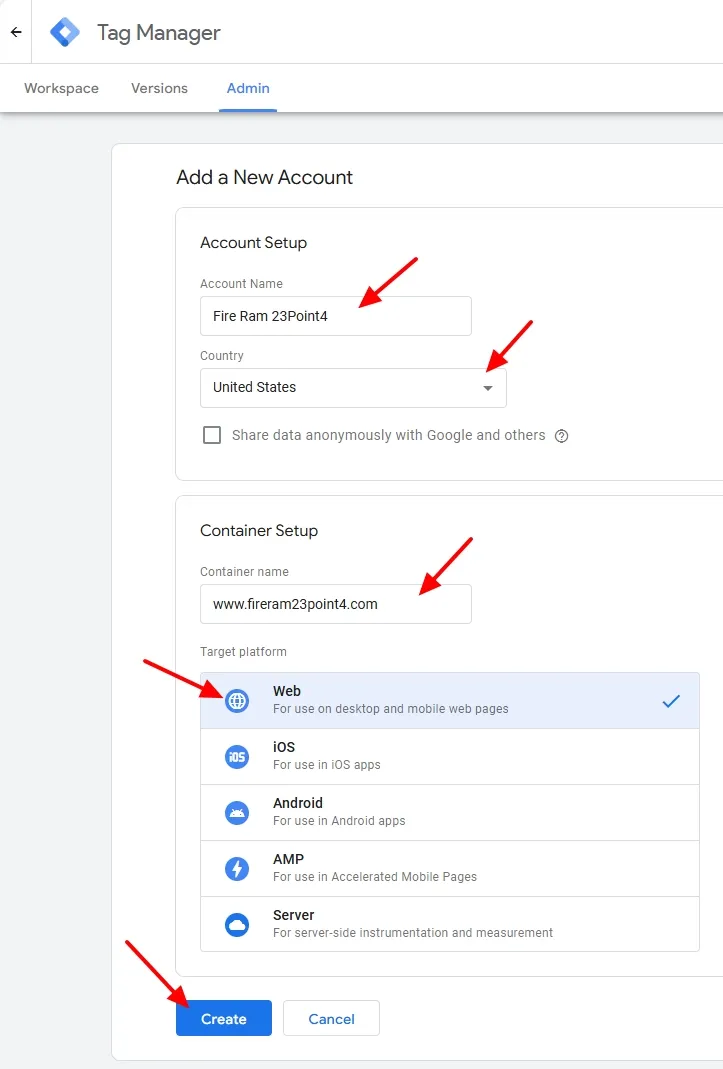
- Enter an Account Name.
- Select the Country.
- In the Container name enter the URL of your website.
- Select the Target platform. I am selecting Web.
- Click on the Create button.
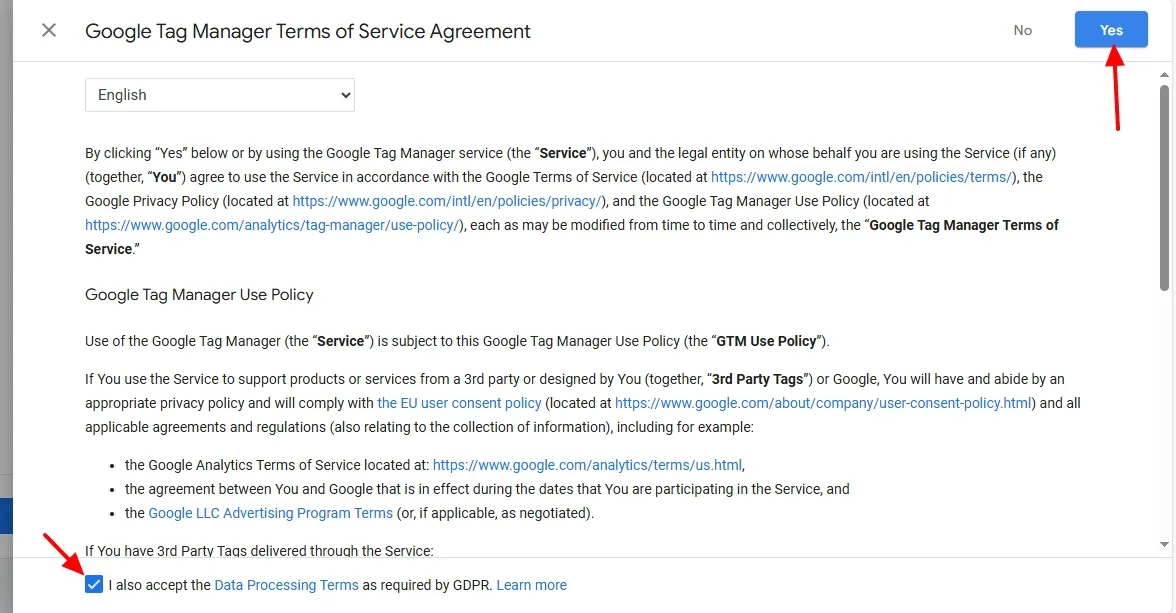
- Check/Tick “I also accept the Data Processing Terms as required by GDPR.“
- Click on the Yes button, located in the top-right corner.
It will create a workspace/account for you on Google Tag Manager, as you can see in the next step.
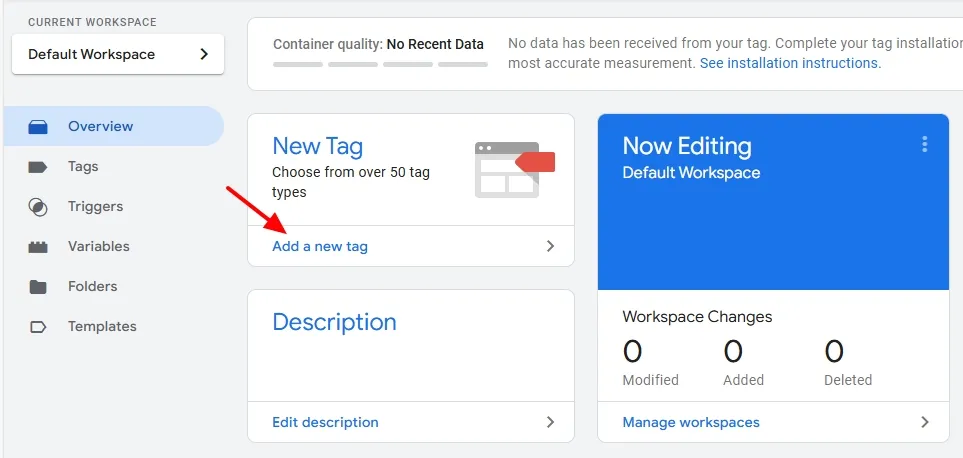
- On your Workspace, inside the New Tag section click on the Add a new tag link. You can also create a new tag from the Tags section.
- Inside the Tag Configuration click on the Tag Icon.
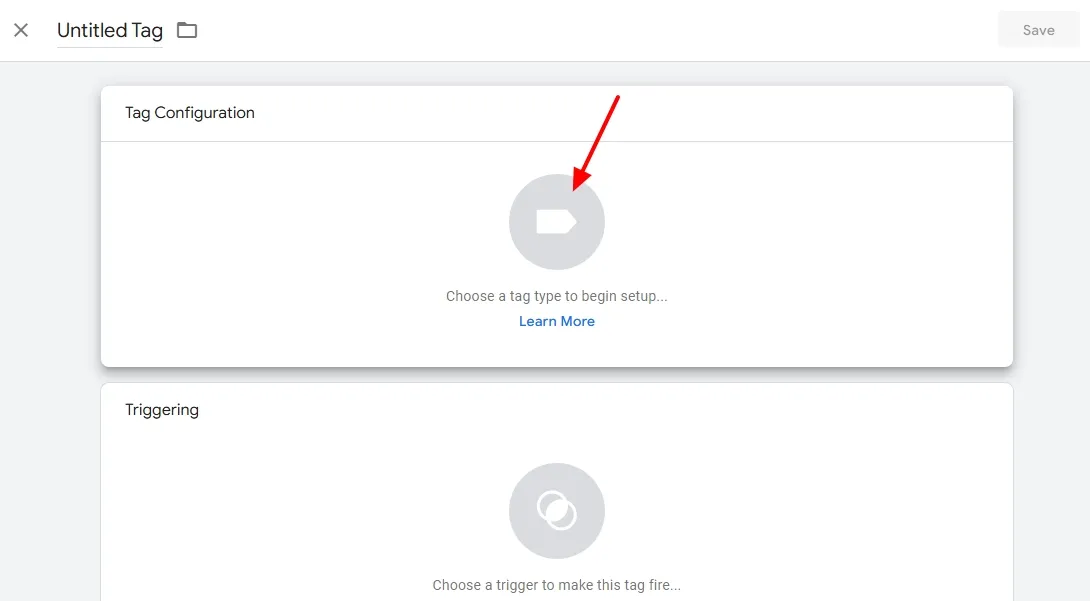
- It will show you a list of tag types. Scroll down to Custom section and click on the Custom HTML.
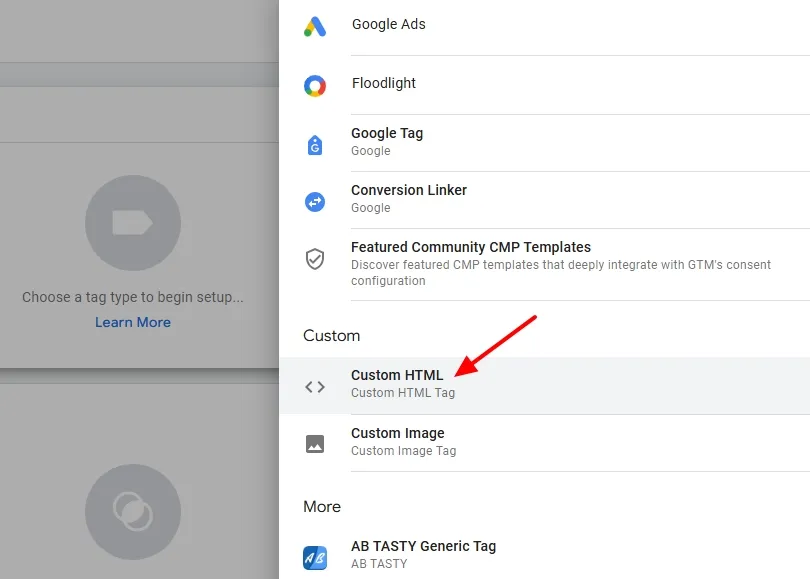
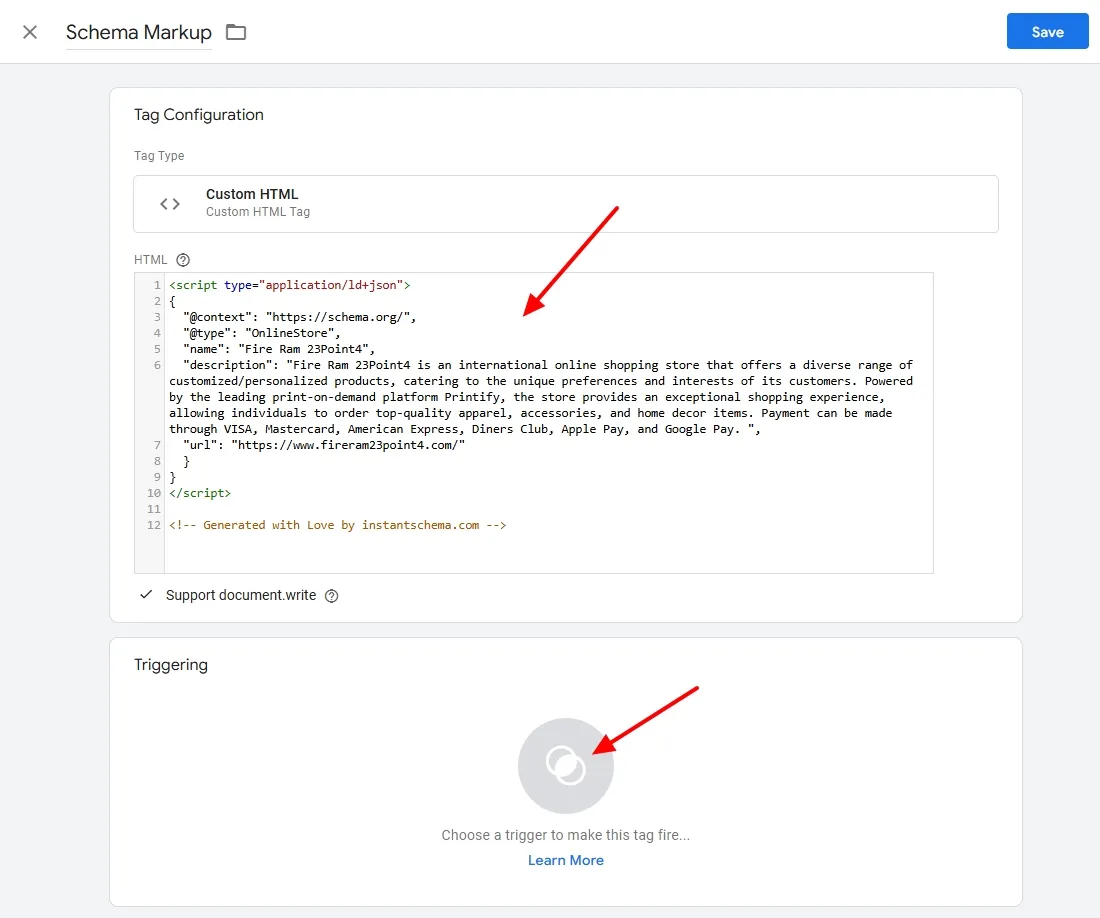
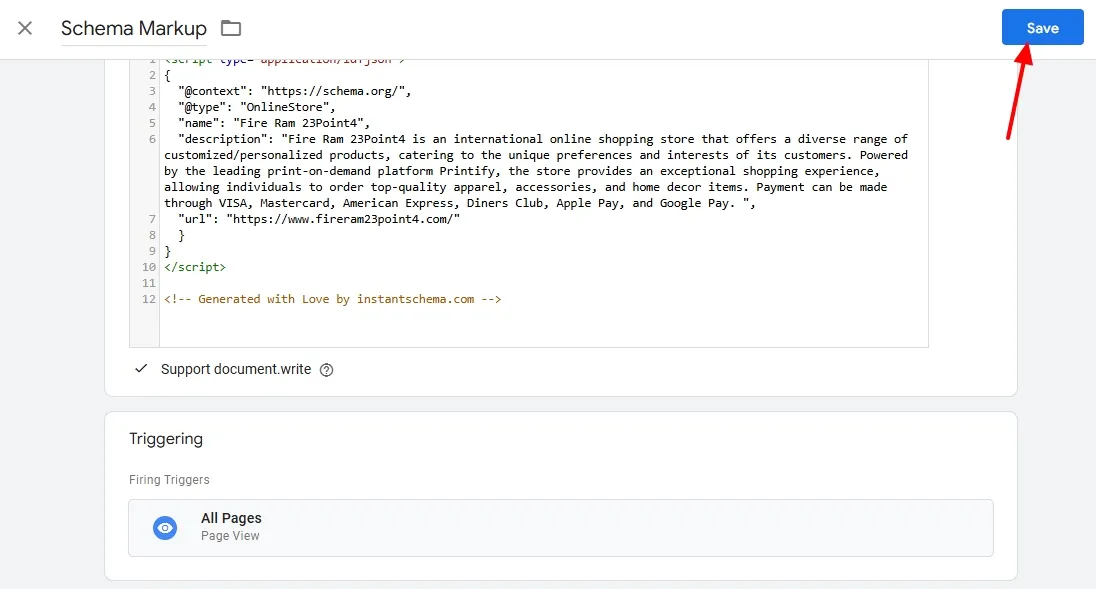
- In the HTML section, paste the schema markup code.
Now move to the Triggering section to choose a trigger.
- Click on the Trigger icon.
| What is a Trigger? A trigger in Google Tag Manager is a rule that defines when and where a specific tag should fire on your website or app. Triggers work in conjunction with tags to execute actions like tracking page views, button clicks, form submissions, or other user interactions. For example, a “Page View” trigger fires a tag when a user visits a specific page, while a “Click” trigger fires when a button is clicked. |
It shows the three most used triggers i.e. All Pages, Consent Initialization – All Pages, and Initialization – All Pages.
- I will choose All Pages trigger. If you want to use other than these three triggers, click on the Plus(+) icon located in the top-left corner.
| The All Pages trigger in Google Tag Manager fires tags on every page of your website, making it ideal for tags that need to be active sitewide, such as Google Analytics or tracking pixels. The Consent Initialization – All Pages trigger in Google Tag Manager is used to manage and fire tags related to user consent before any other tags on the page. Its primary purpose is to ensure compliance with privacy regulations like GDPR and CCPA by setting up and handling user consent preferences as early as possible. The Initialization – All Pages trigger in Google Tag Manager fires tags as early as possible during a page’s load process, before any other triggers or tags. It is typically used for critical setup tasks like setting variables or configurations that other tags rely on. |

- Click on the Trigger Icon.
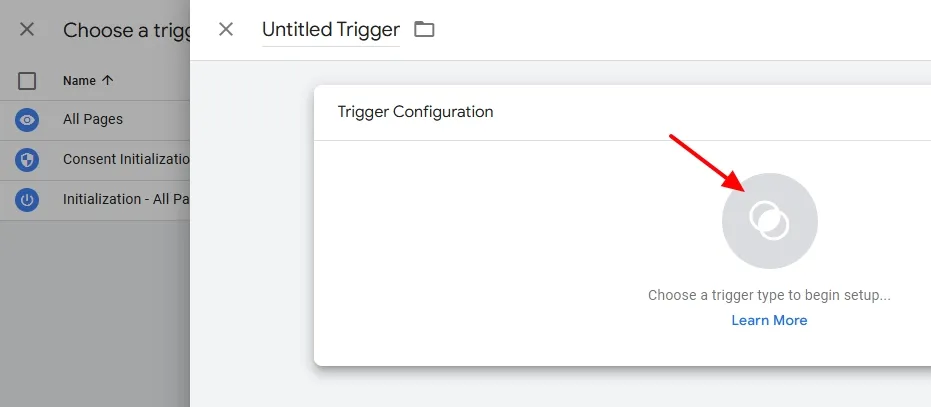
You can see a list of trigger types like Dom Ready, Windows Loaded, All Elements, Just Links, and many more. To learn more about them visit Google’s resource Trigger Types.
- I will go back to the previous page because I want to add the All Pages trigger.
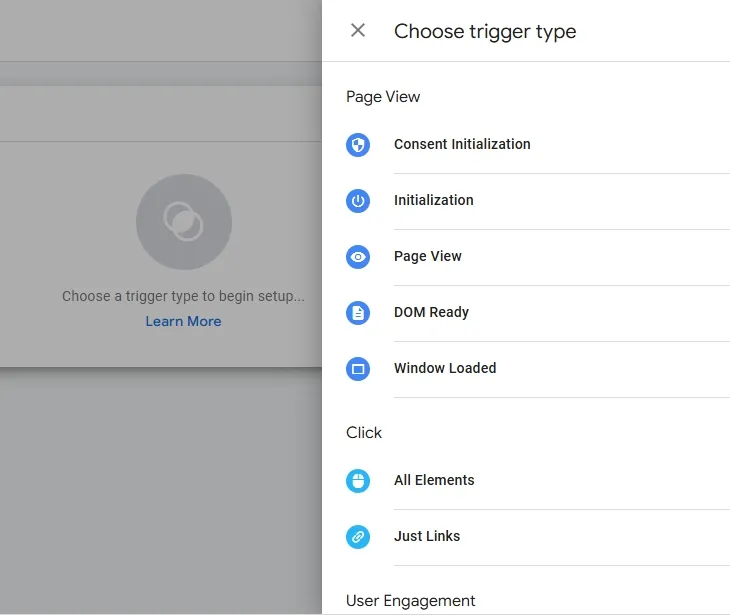
- Click on the All Pages trigger.

- Click on the Save button.
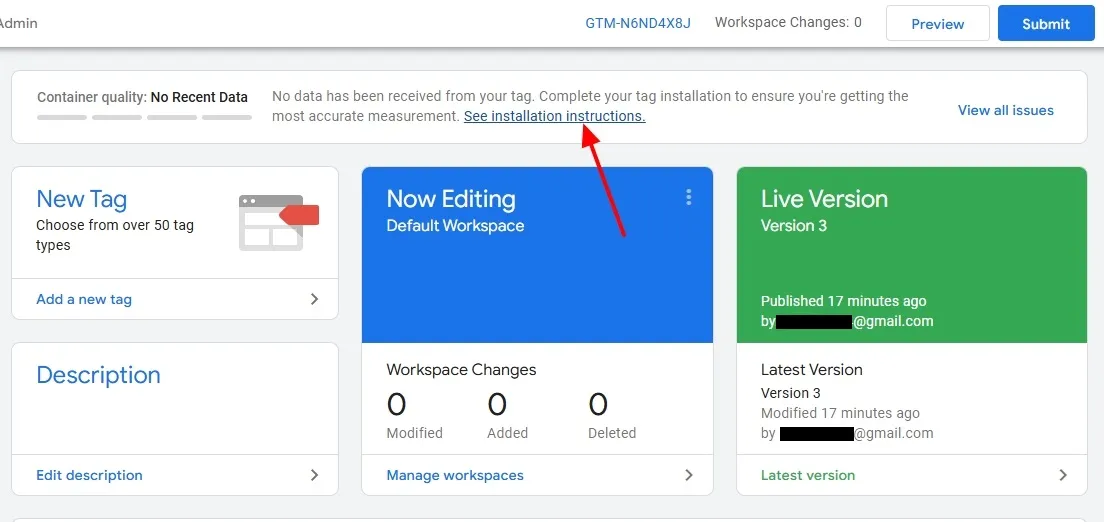
On Workspace, it is showing that “No data has been received from your tag. Complete your tag installation to ensure you’re getting the most accurate measurement“. It means that your website is not connected with Google Tag Manager.
- Click on the See installation instructions link.
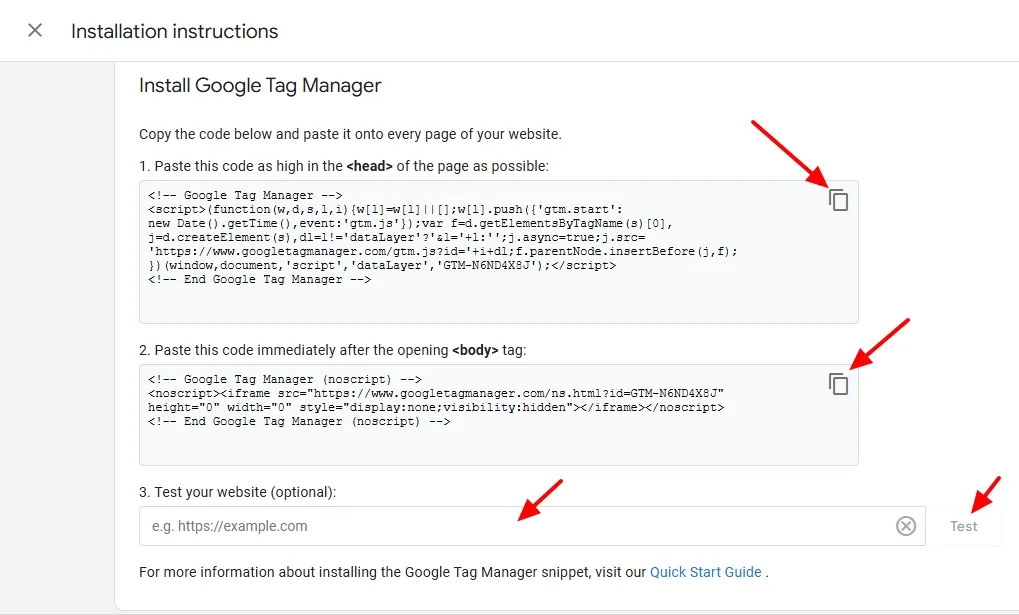
- To connect your website with Google Tag Manager Copy and Paste the codes in the <head> and <body> sections of the website’s theme.
- Paste the First code in the <head></head> section, and the Second code immediately after the opening <body> tag.
- After adding the codes, paste the URL of your website into the Test your website (optional) field, and click on the Test button. It shows a Green Tick if the connection is successful.
Before Submit, click on the Preview button in GTM Workspace to enter debugging mode. Tag Assistant helps you make sure that your Google tags are working correctly. Visit the pages where the schema should appear to confirm that the tag fires correctly.
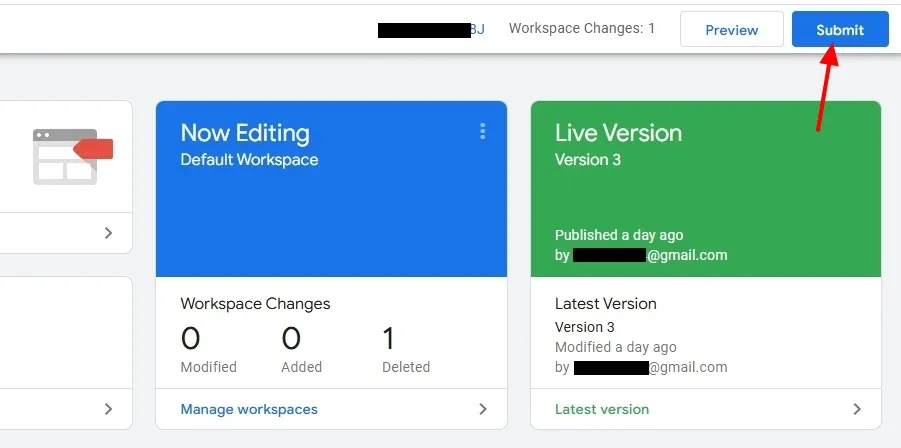
- After Previewing is done, click on the Submit button.
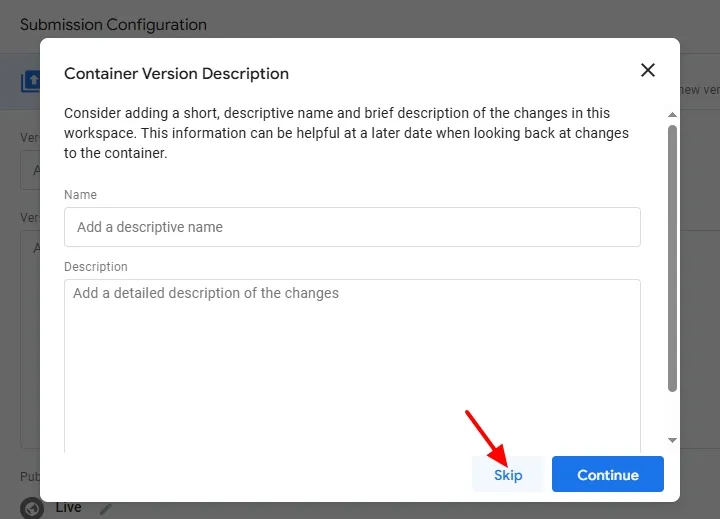
- If you wish you can add Container Version Description, I am skipping here.
- Wait for a while before they publish your version!
| A Version in Google Tag Manager is a snapshot of your container’s configuration at a specific point in time. Every time you publish or save changes, a new version is created. Versions allow you to track changes, revert to previous setups if needed, and ensure consistency in your tag implementation. |

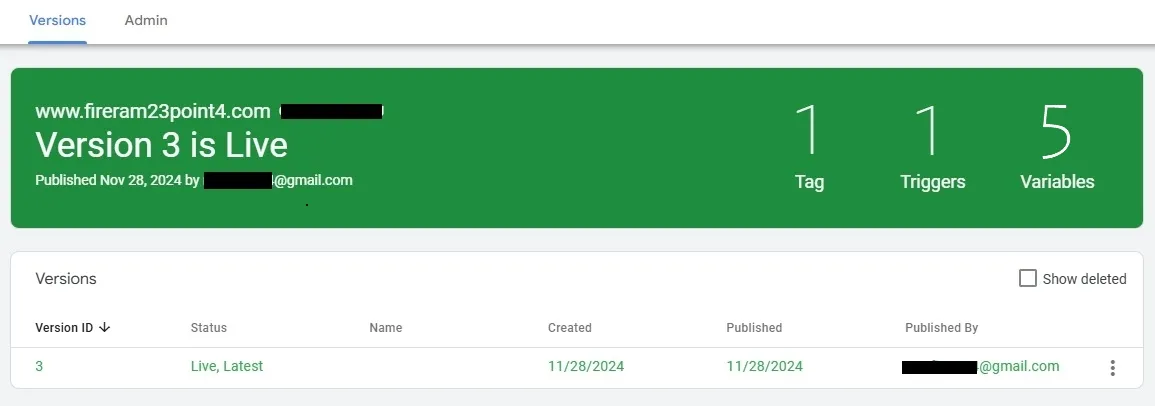
- The Version is Live. It is showing Number of tags, triggers, and variables.
- Go back to the Workspace tab.
05. Test the Tag (Schema Markup)
You have successfully created a new tag for schema markup, added a trigger, and connected the website to Google Tag Manager, now it is time to test the schema markup using testing tools.
You can use Google’s Rich Results Test or the Schema Markup Validator to ensure the schema is implemented and error-free.
01. Using Google’s Rich Results Test
This tool checks if your schema markup qualifies for rich results in Google Search.
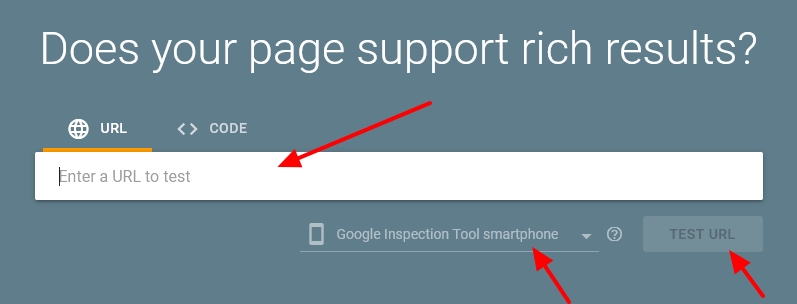
- Visit the Rich Results Test tool.
- Enter the URL of the webpage.
- Click Test URL or Test Code.
- Review the results:
- Valid Schema: Displays supported rich result types (e.g., FAQ, product).
- Errors or Warnings: Lists issues to fix, such as missing or improperly formatted fields.
02. Using the Schema Markup Validator
This tool validates all schema types for compliance with the structured data standards.
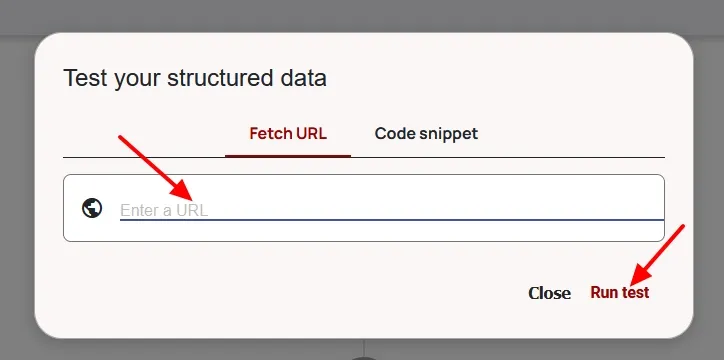
- Visit the Schema Markup Validator.
- Enter the URL.
- Click Run Test.
- Review the output:
- Valid Schema: Confirms the markup adheres to schema.org standards.
- Errors: Highlights issues, such as incorrect properties or missing required fields.
- Warnings: Points out optional fields that could improve the schema.
06. Conclusion
Google Tag Manager streamlines the process of adding structured data to your website. By using GTM to implement schema markup, you can enhance your site’s visibility in SERPs while maintaining efficiency and accuracy. This approach eliminates the need for coding expertise, making it an ideal solution for businesses and website managers looking to improve their SEO performance.
If you like this post then don’t forget to share with other people. Share your feedback in the comments section.
Also Read
- What is Dwell Time in SEO & How It Differs from Bounce Rate?
- How to Ensure Backlinks are Placed on High Quality Sites?
- How to Know If Backlinks are Helping or Hurting Your Website?
- Why Does it Take So Long to Get Traffic on New Blogs, Even With Good Content, and SEO?
- How To Link Website To Google Search Console | Sign Up
- How To Sign Up & Link Website With Google Analytics 4 (GA4)


Leave a Reply