Do you want to create a sitemap for your WordPress website? You’re in the right place. In this tutorial, I will guide you step-by-step on how to create sitemap in WordPress using Yoast SEO plugin and how to add your sitemap on Google Search Console.
A sitemap is an XML file that lists the URLs for a website that are available for crawling. It is a way of organizing a website, identifying the URLs and the data under each section. It tells the search engines about pages on their site that are available for crawling.
Crawling is the process in which search engine crawlers such as bots or spiders discover new and updated pages of your website in order to display in search results. Crawlers extract page links in order to find more page links associated with them. A search engine is a website through which people search world wide web such as Google, Bing, DuckDuckGo, Yahoo, etc.
Yoast SEO is one of the leading and reliable WordPress plugins for search engine optimization, helps your website to rank higher on search engines. You can create your XML sitemap by turning on the “XML sitemaps” option on Yoast SEO, as I have shown in this tutorial.
Following topics will be covered in this post:
- How To Install Yoast SEO
- How To Create XML Sitemap
- How To Add Sitemap URL In Google Search Console
01. How To Install Yoast SEO
In this section, I will guide you on how to install Yoast SEO WordPress plugin on your website.
- Login to your WordPress admin section.
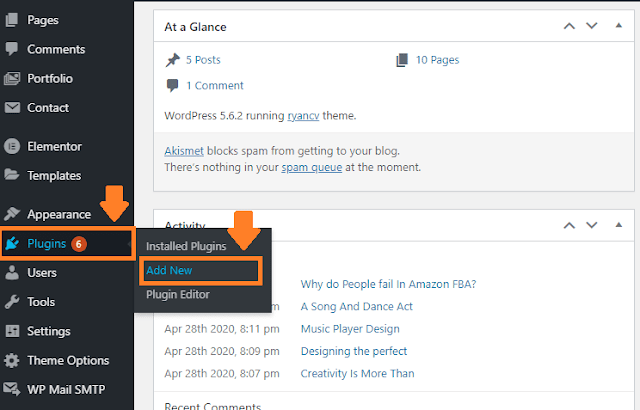
- Go to Plugins from the sidebar.
- Click on the Add New.
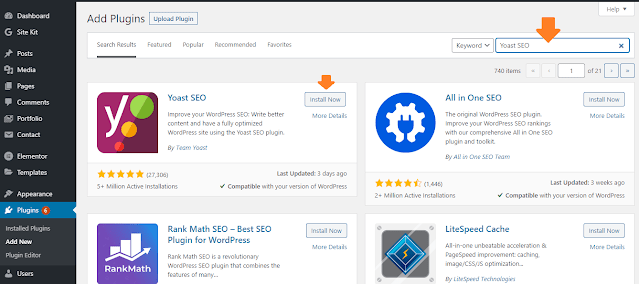
- In the plugin search bar type “Yoast SEO“.
- Click on the Install Now button.
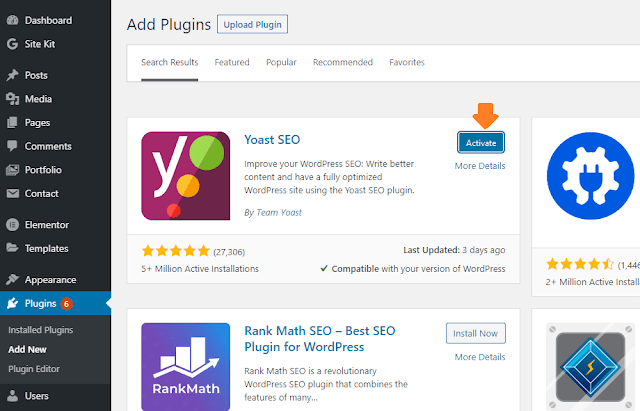
- Click on the Activate button.
To know more about how to configure, setup, and use Yoast on your website, read this tutorial: How to Install & Set Up Yoast SEO Configuration.
02. How To Create XML Sitemap in WordPress
You have installed YoastSEO in your WordPress site, now I will guide you on how to create XML sitemap in WordPress using Yoast.
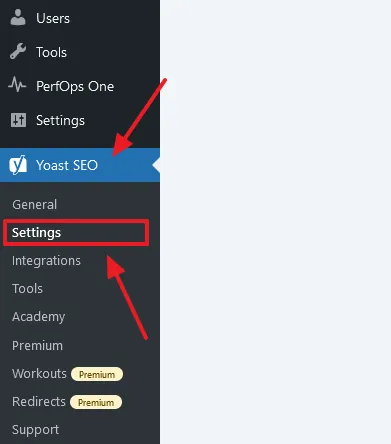
- Go to Yoast SEO from the sidebar.
- Click on the Settings.
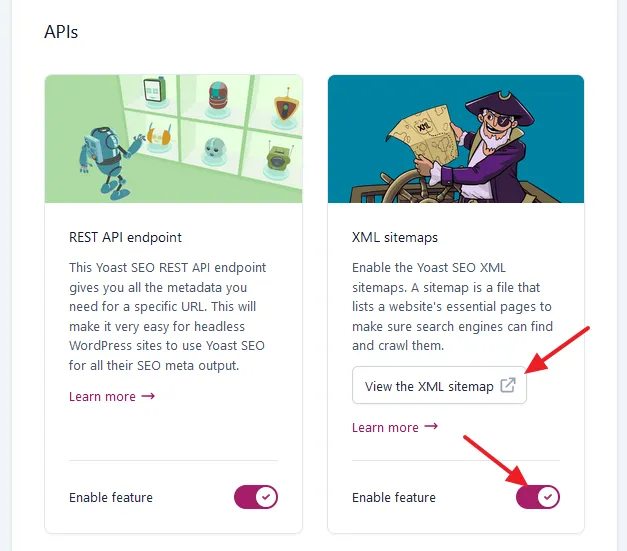
- Scroll down to APIs section
- Turn on Enable feature. It will generate the XML sitemap for your WordPress website.
- Click on the View the XML sitemap to open the list of XML sitemaps of your site.
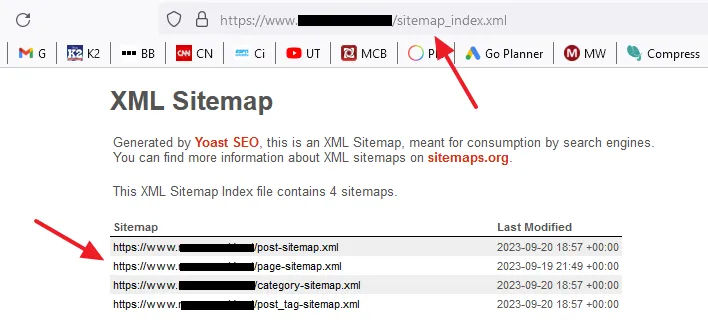
You can see that the XML sitemaps of your WordPress website. The main sitemap URL will be like this:
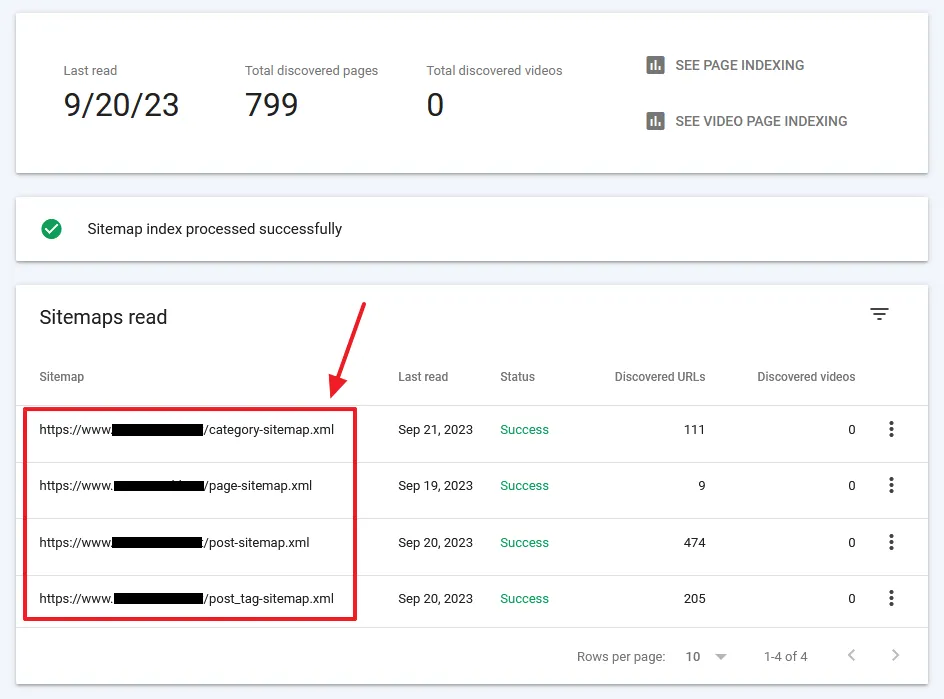
https://your_domain_name/sitemap_index.xmlYoast creates four XML sitemaps i.e. post-sitemap.xml, page-sitemap.xml, category-sitemap.xml, and post_tag-sitemap.xml. When you open these links you can see the detail list of URLs inside them.
How To Add Sitemap In Search Console
Google Search Console is the most widely used free SEO tool and a web service by Google. Its tools and reports help you to measure your website’s search traffic and performance. You can maintain, monitor and troubleshoot your website’s presence in Google search results.
If you don’t have a Google Search Console account, read this tutorial:
If you have a Google Search Console account follow these steps to add your sitemap on it.
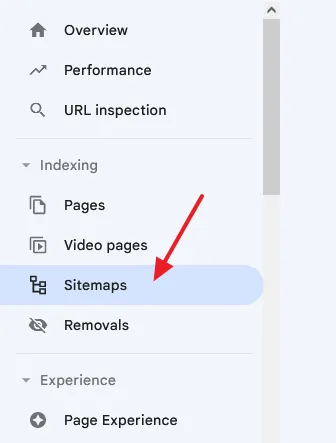
- Click on the Sitemaps from the sidebar.
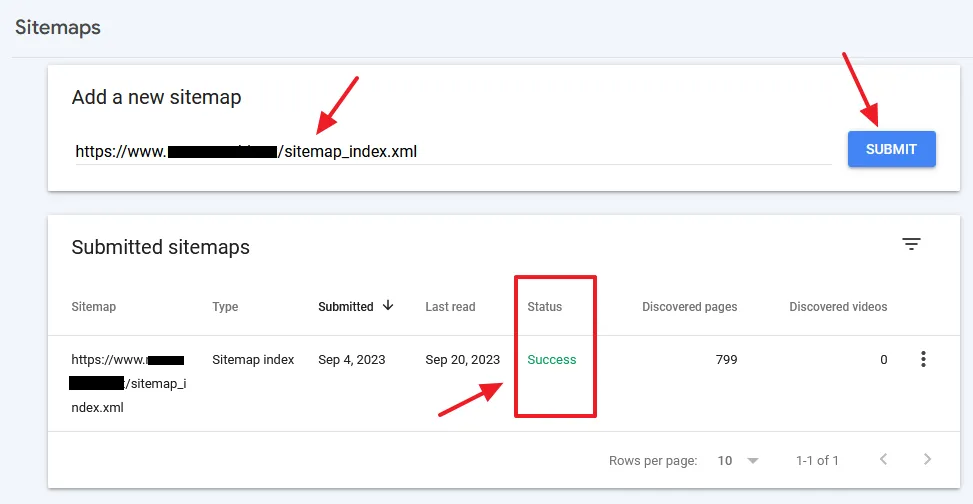
- Under the Add a new sitemap paste the main sitemap URL, which Yoast SEO generated.
- Click on the SUBMIT button. You can see that the Status is “Success” means sitemap has been submitted successfully. The Discovered pages shows the number of URLs of your site it has discovered.
- Click anywhere on the submitted sitemap row to expand the details.
All the four XML sitemaps of your website are automatically submitted with the main URL. You can see that how many URLs each sitemap contains. The most important sitemap is post-sitemap.xml that contains the URLs of your posts.
To check the URL indexing of your site click on the SEE PAGE INDEXING. It shows you which URLs of your website are indexed on Google and which are not. Pages that aren’t indexed can’t be served on Google.
If you like this post then don’t forget to share with other people. Share your feedback in the comments section below.

Also Read


Leave a Reply