Do you want to sign up for Rakuten LinkShare affiliate network? You’re in the right place. In this tutorial, I will guide you step-by-step on how to sign up for Rakuten LinkShare, how to configure payment methods, and how to apply for affiliate programs.
Rakuten LinkShare is one of the oldest and popular affiliate marketing service providers. It was formally known as Rakuten Marketing. As a Rakuten affiliate you have the opportunity to join the top affiliate programs of various brands/advertisers and earn stunning commissions.
The Rakuten LinkShare is a free-to-join affiliate network. You can apply from any part of the world, does not matter whether you are from United States, UK, Australia, India or Pakistan because it offers three type of payment methods to its affiliates i.e. Bank Transfer(Wire Transfer/Direct Deposit), PayPal, & Check. If PayPal is not available in your country you can receive your payments directly in your local bank account.
Following topics will be covered in this post:
- How To SignUp For Rakuten LinkShare
- How To Complete Account Profile
- How To Configure Payment Methods
- How To Apply For Affiliate Programs
01. How To Sign Up For Rakuten LinkShare
Follow the steps to sign up for Rakuten LinkShare affiliate network.
- Go to Rakuten Advertising publisher Registration Page.
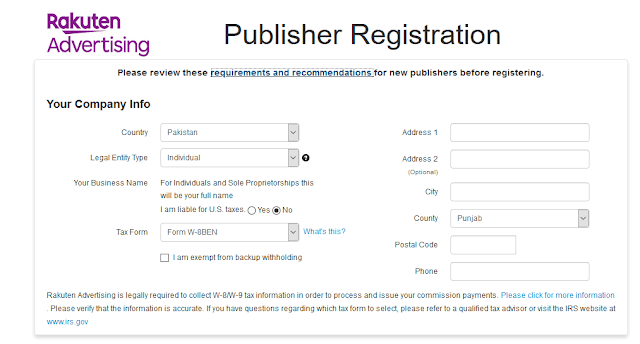
Enter your Company/Website Info:
- Choose your Country means where you or your business/company are located.
- Choose Legal Entity Type. It can be individual, company, corporation, non-profit, organization. etc, that has legal rights.
- On I am liable for U.S taxes select Yes if you are a U.S citizen. Choose No if you are not a U.S citizen.
- On Tax Form choose Form W-9 if you are a U.S citizen. Choose Form W-8BEN if you are not a U.S citizen. There are 3 other type of forms for Non-U.S citizens.
- Enter your Address.
- Enter your City name.
- Choose your County. Province is alternative for County.
- Enter the Postal Code of your City.
- Enter your Phone No.
Contact & Account Info:
- Enter your First Name, and Last Name.
- Enter your Email.
- Choose a Security Question.
- Enter a Username & Password.

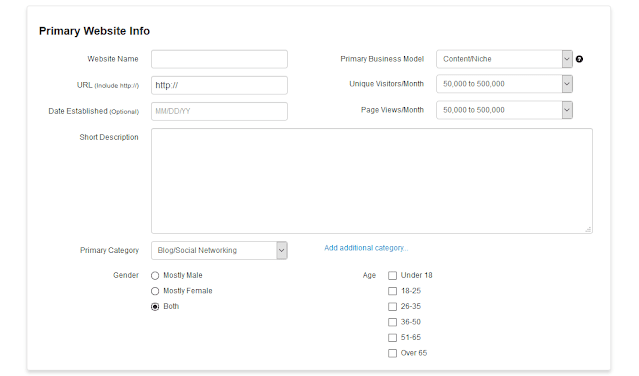
Primary Website Info:
- Enter your Website Name.
- Enter the URL of your website.
- Choose Primary Business Model.
- Choose Unique Visitors/Month. If your website/blog is linked with Google Analytics you can find monthly unique visitors there.
- Choose Views/Month. You can find them on your blog stats or Google Analytics.
- Enter the Short Description about your blog/website.
- Choose the Primary Category of your website.
- Select the Gender. It means your majority website visitors, whether they are male or female. You can find on Google Analytics.
- Choose Age means which age group visits your website most. You can find on Google Analytics.
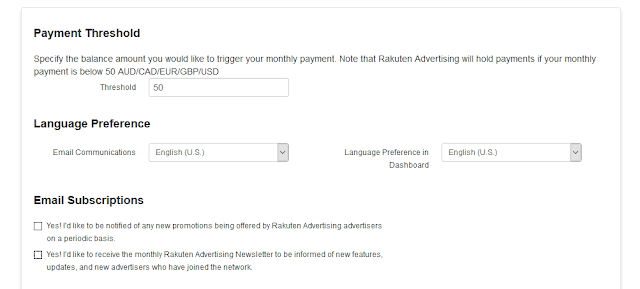
- Enter the Payment Threshold. Let’s suppose you set payment threshold $70. Once your earnings reach $70 or more it will be paid to you once in a month.
- Choose Language Preference.
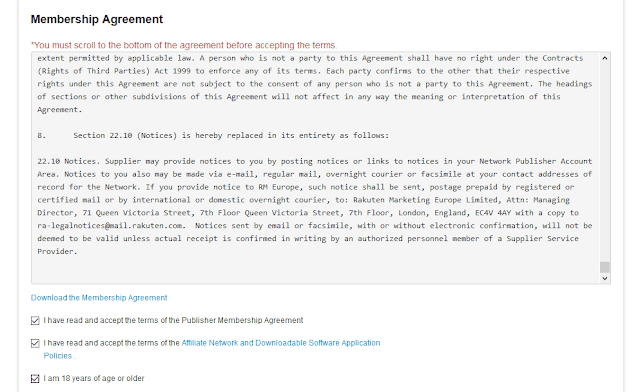
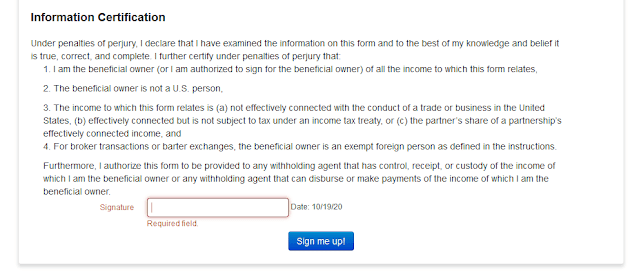
- Scroll down to Membership Agreement and accept the terms of the Publisher Membership Agreement.
- In the Signature box enter your full name which will be your signature.
- Click on the Sign me up! button.
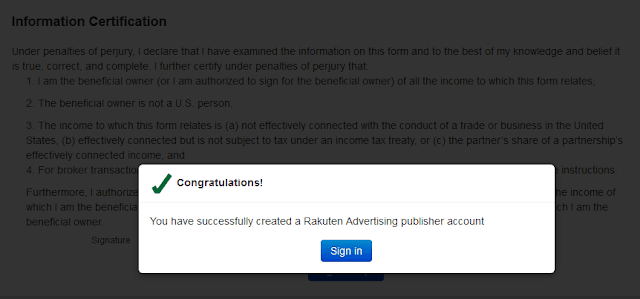
- You will get Congratulations! Message.
- Check your Email (Inbox), you will receive Username & Password.
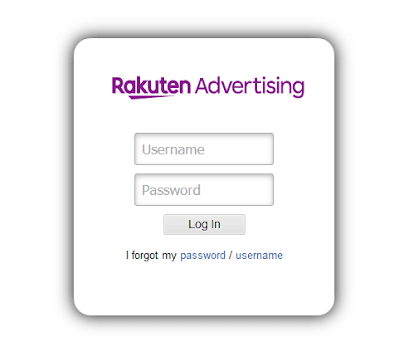
- To Sign-In, go to this link: https://cli.linksynergy.com/cli/publisher/home.php.
- Enter your Username & Password.
- Click on the Log In button.
02. How To Complete Account Profile
Follow the steps to complete your account profile.
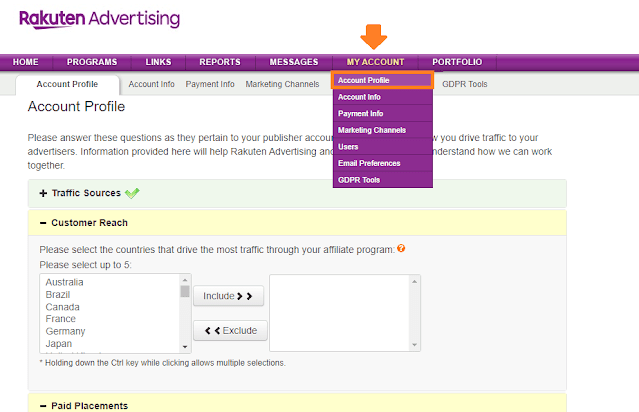
- Click on MY ACCOUNT tab.
- Click on the Account Profile and answer the questions.
03. How To Configure Payment Methods
Follow the steps to configure payment methods on your Rakuten LinkShare account.
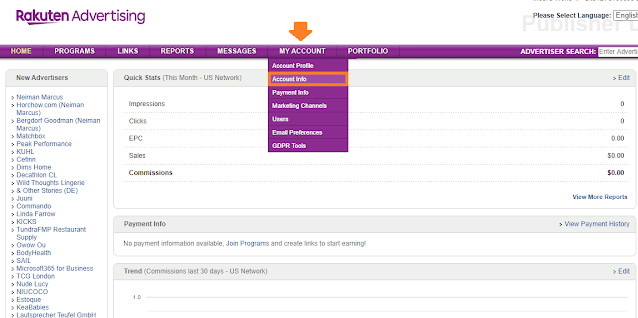
- Click on MY ACCOUNT tab.
- Click on Account Info.
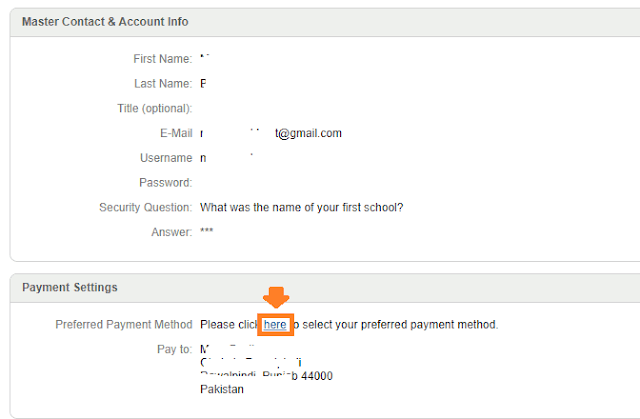
- Scroll down to Payment Settings section.
- Click on the “here” link.
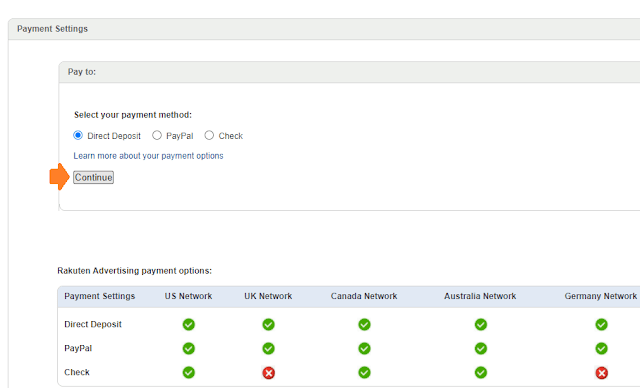
Rakuten LinkShare offers 3 payment methods i.e. Direct Deposit, PayPal, and Check. Direct Deposit means your earnings will be sent directly to your local bank account. Here I will guide you on how to link/add your local bank account to Rakuten LinkShare account.
- Select Direct Deposit.
- Click on the Continue button.
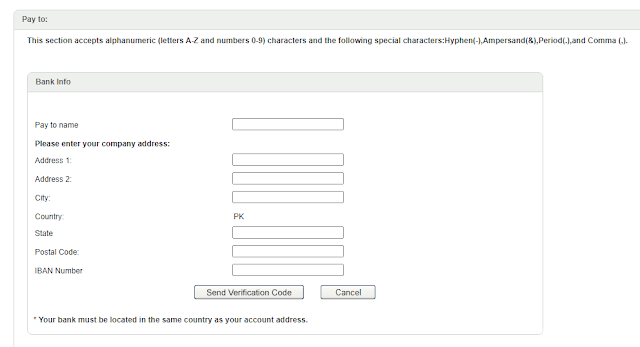
- In Pay to name enter your Bank Account Title, mostly it is your official name. It is written on your checkbook and ATM card as well.
- Enter your Address.
- Enter your City name.
- Enter your State name. In some countries State is called Province.
- Enter the Postal Code of your city. If you don’t know than search in Google.
- Enter your IBAN Number. IBAN is used for international transactions.
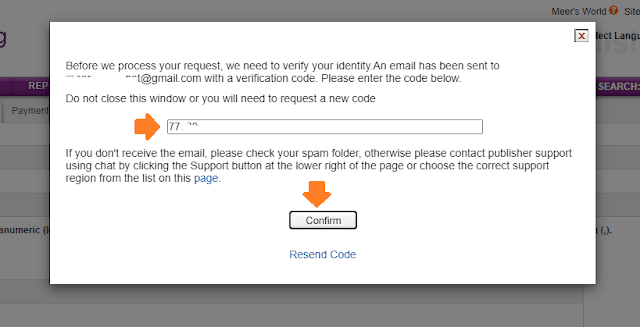
- Click on the Send Verification Code.
- It will send a verification code to your email address. Copy the verification code from email and Paste here.
- Click on the Confirm button.
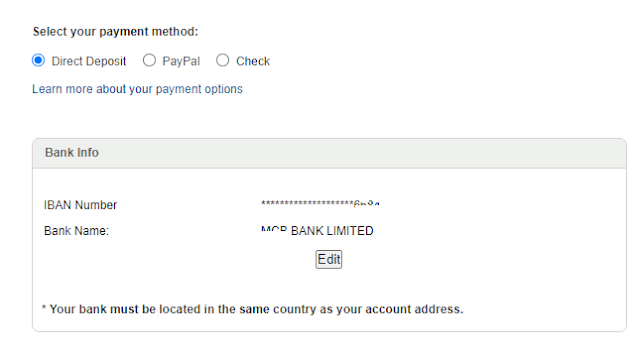
- You can see that a local bank account has been successfully linked to Rakuten LinkShare. I had only provided the IBAN Number, it has also extracted the bank name as well.
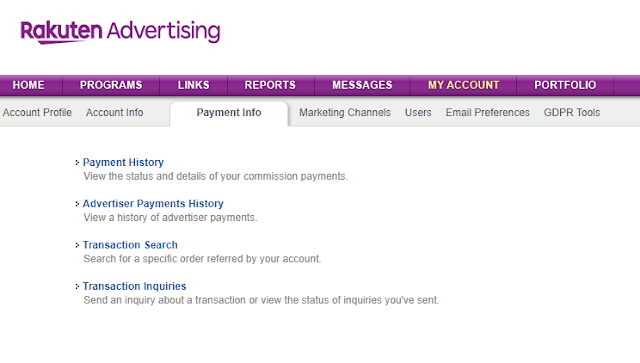
- You can check your Payment History under the Payment Info section.
04. How To Apply For Affiliate Programs
Follow the steps to apply for affiliate programs on Rakuten LinkShare.
- Go to PROGRAMS tab to open the list of advertisers.
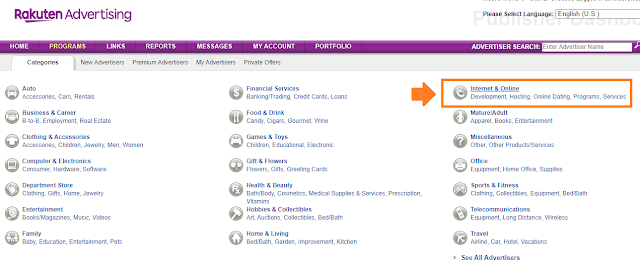
- Click on the Categories to find the relevant advertisers.
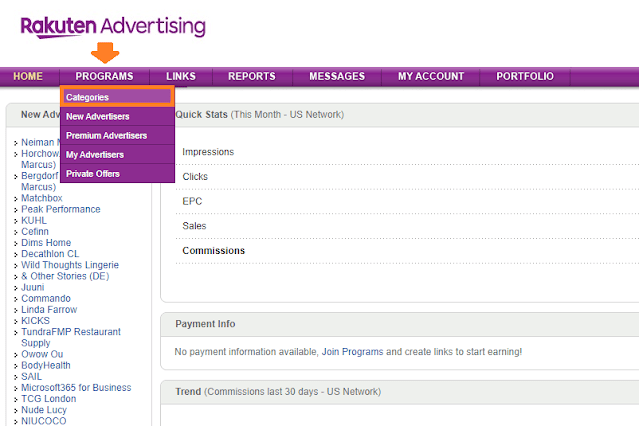
- You can see the list of categories. Click on the category of your interest.
- Here I have clicked on the Internet & Online.
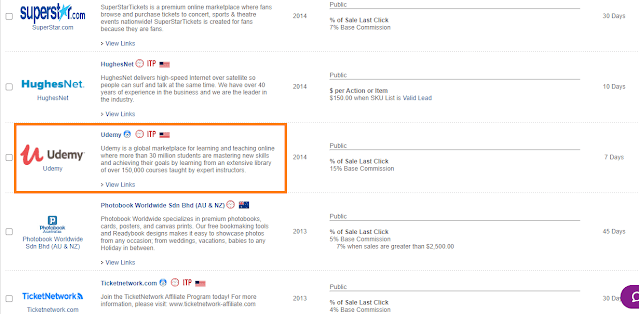
- Click on the advertiser whose affiliate program you want to apply.
- You can see some information about advertise here like joining year, Base Commission. & Cookie Period.
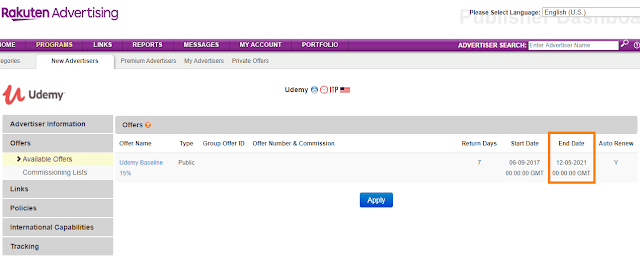
- On “Available Offers” you can see Baseline Commission. You can see when was this affiliate program started and when will it end. Auto Renew tells you whether it will be automatically renewed or not if it reaches its End Date.
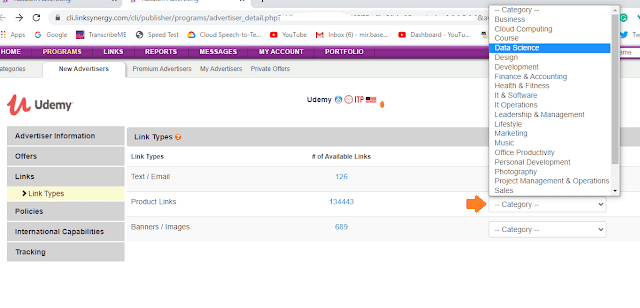
- In “Links” section you can get different type of links like Text/Email links, Product banners links, & General banners links.
- The “# of Available Links” shows you the number of available links.
- If you want to get the link of specific product banner, click on the Category dropdown list & choose the category. Here I have chosen the “Data Science”.
- It will show you all the links with banners. You can use Filter feature to optimize your search. Every banner will have its HTML code. Your referral link will be inside that code.
- Copy the HTML code of banner and Paste in your blog/website.
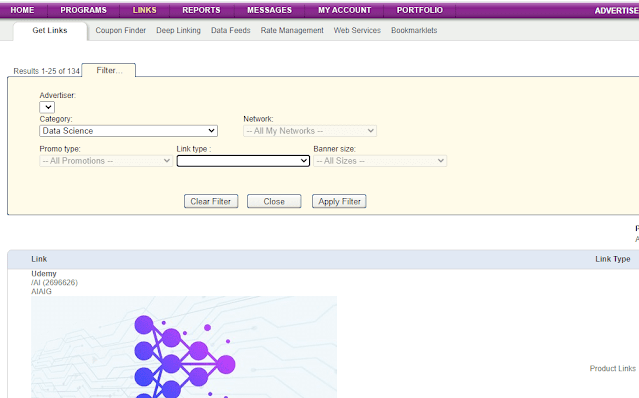
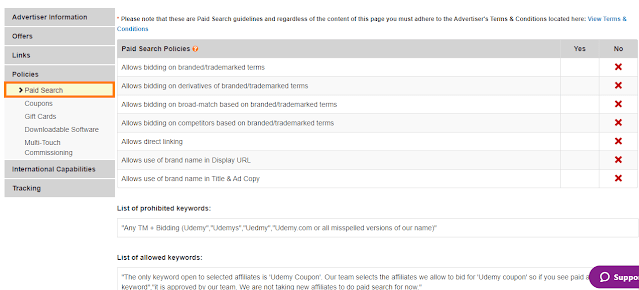
- On “Policies” section you can see what is allowed and what is not.
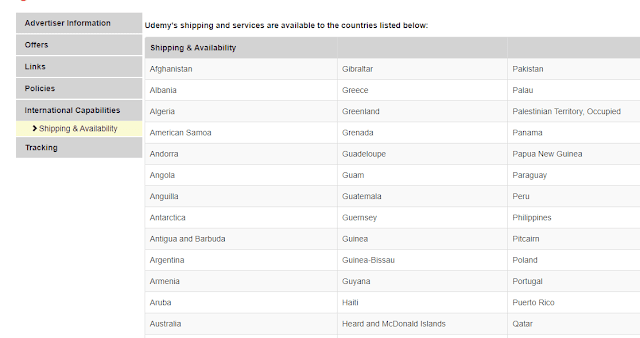
- On “International Capabilities” you can get the advertiser’s shipping information like for which countries its services are available. It helps you to choose an affiliate program according to the traffic of your website.
- In order to apply for advertisers affiliate program click on the Apply button.
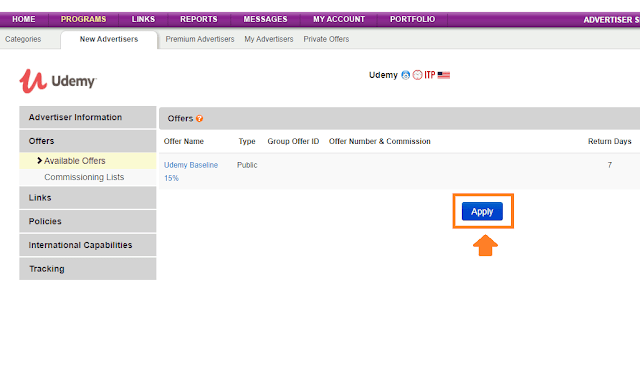
- Some advertisers approve your request without review, but some advertisers manually review your request and then either approve or reject.
- Tick the advertiser’s Terms and Conditions and click on the OK button.
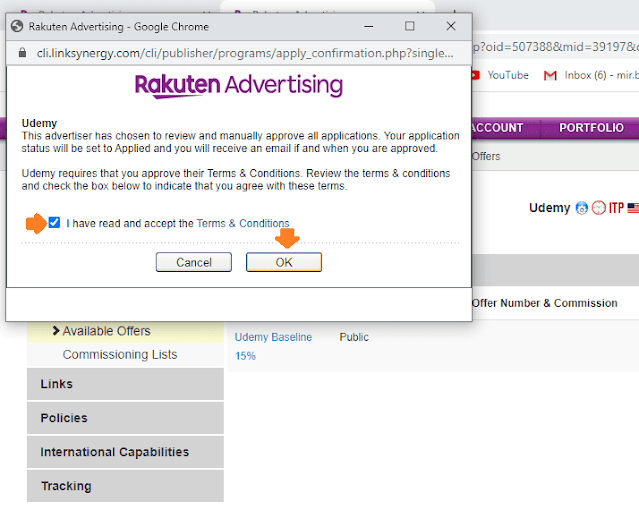
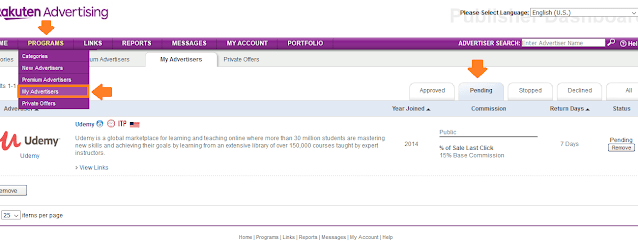
You will also get an email whether your request is accepted or rejected. You can also check the status on My Advertisers section.
- Click on the PROGRAMS.
- Click on the My Advertisers.
- Click on the “Pending”, “Approved”, “Stopped” or “Declined” to check the status of your request.
On Home section you can check the brief summary of your Stats. To check the detailed performance and stats go to REPORTS section. There is lot more for you to explore on your Rakuten Advertising account.
If you like this post then don’t forget to share with other people. Share your feedback in the comments section below.
Also Read
- How To Join Amazon Affiliate Program From Pakistan Or Anywhere – Step By Step | Payoneer
- How To Receive Payments From CJ Affiliate via Payoneer
- Fiverr: Best Affiliate Program | Complete Introduction To Fiverr Affiliate Program
- How to Sign Up for Udemy Affiliate Program on LinkShare
- How to Sign Up for Fiverr & Create Your First Gig


Leave a Reply