Do you want to create a transparent background image on Adobe Photoshop? You’re in the right place. In this tutorial, I will guide you step-by-step on how to create a PNG image on Adobe Photoshop.
Transparent image or PNG image refers to an image that is clear and can take the effect of any images behind it. For example your desktop has blue background, when you put a PNG image on the desktop its background will change into blue.
Follow the steps to create a transparent background image on Adobe Photoshop:
- Open the Adobe Photoshop.
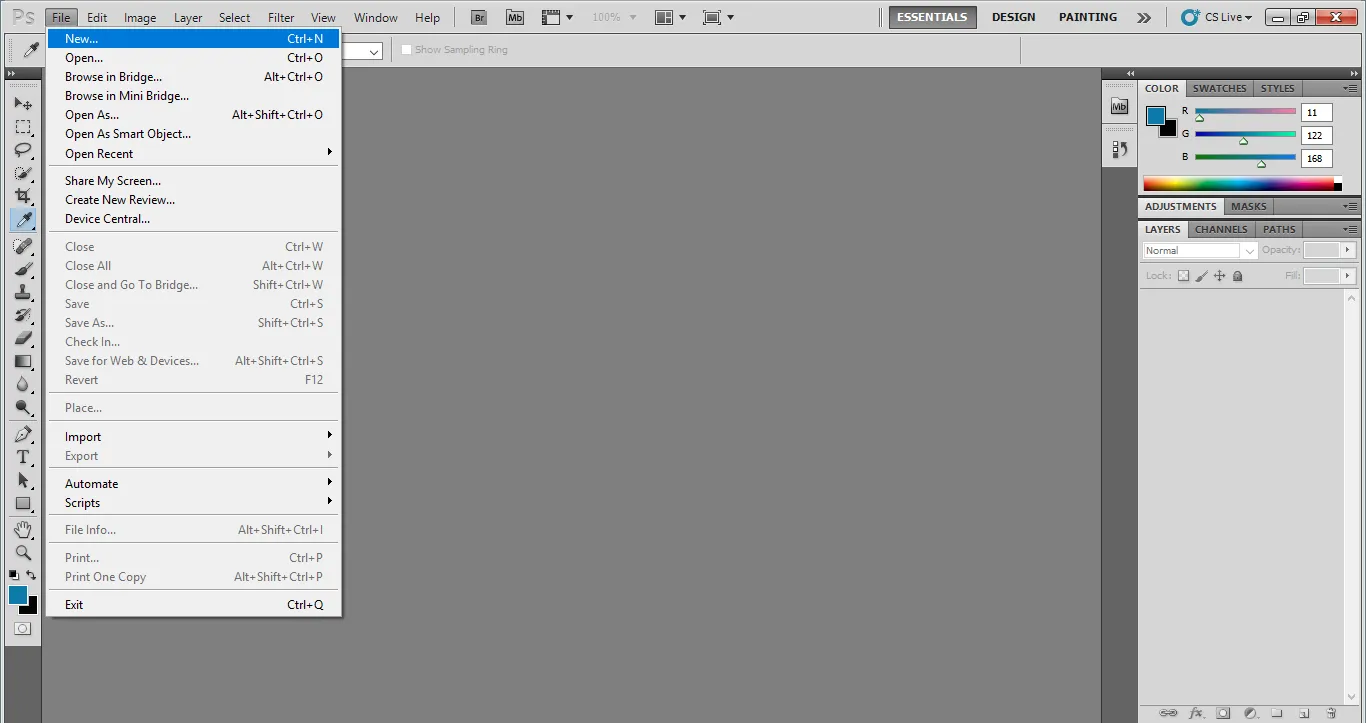
- Go to File tab and click on New…
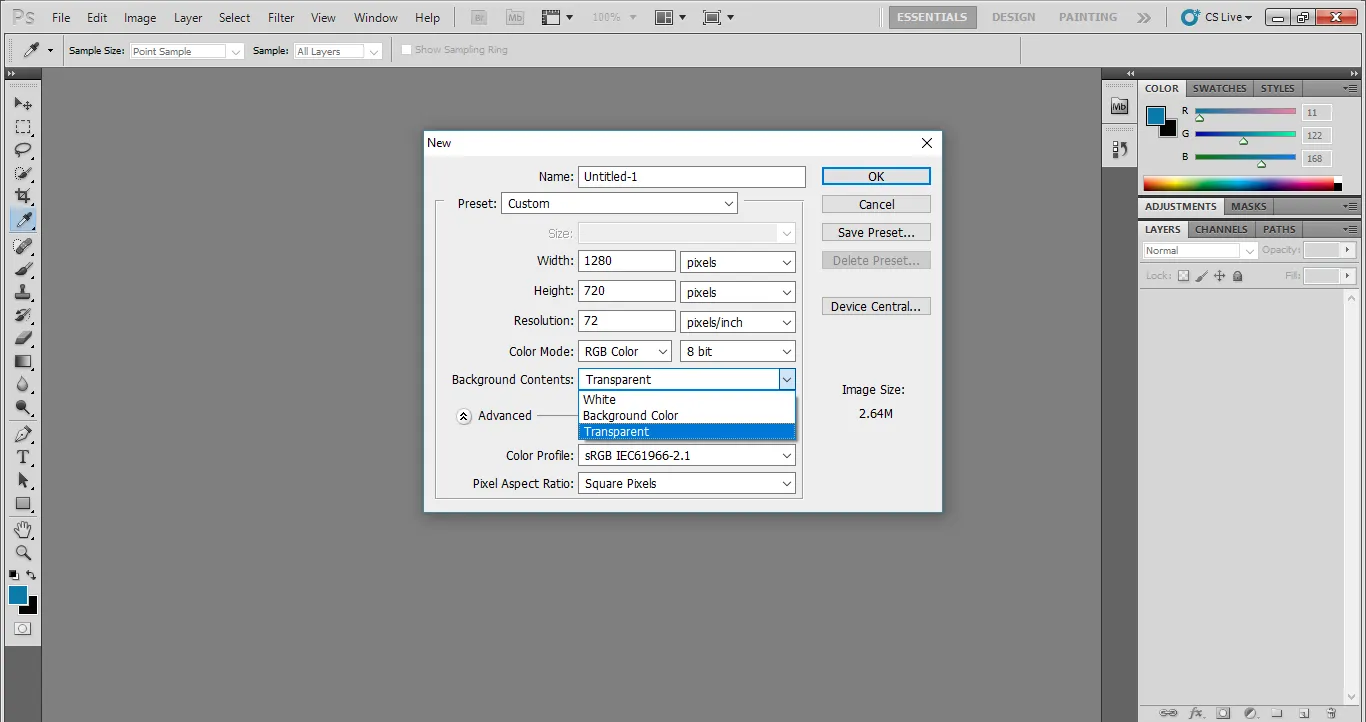
- Click on the Background Contents dropdown list and select Transparent.
- Now you have got a transparent background. You can write anything on it. You can also put image(s) over it.

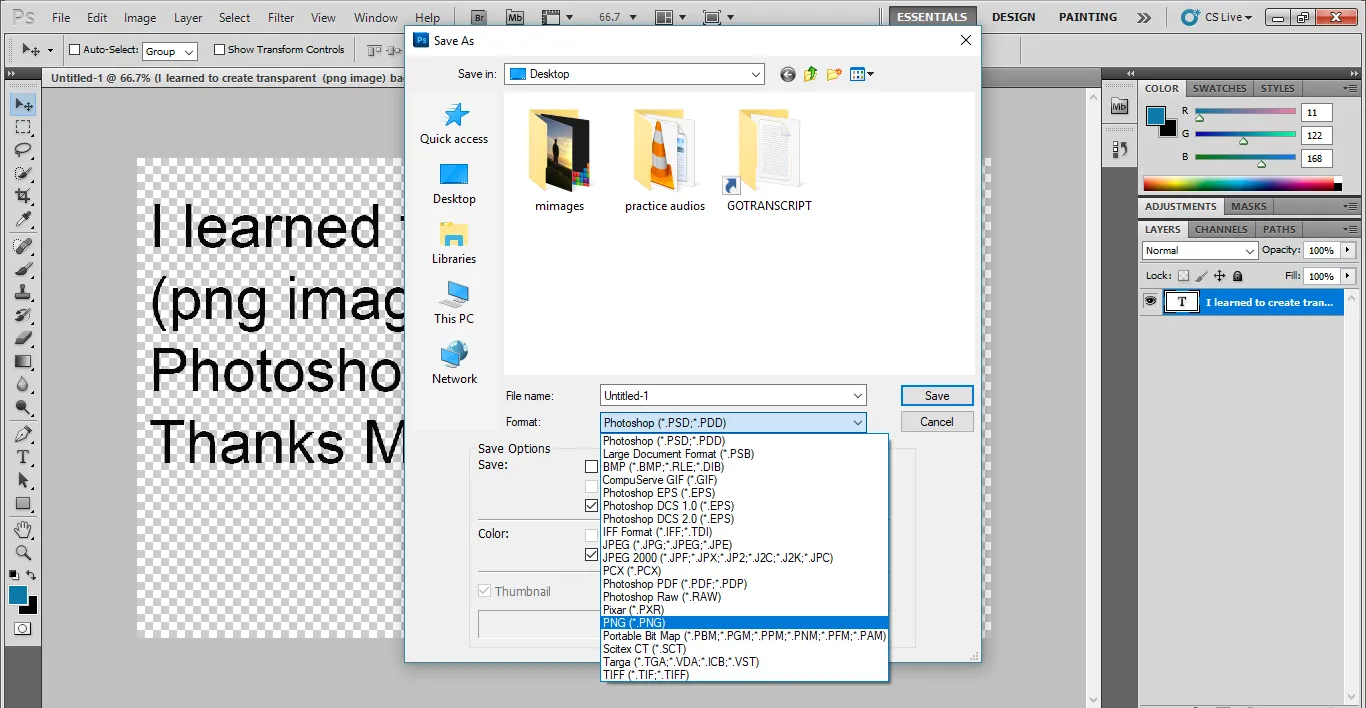
- Go to File tab and click on the Save As.
- On Format select the PNG.
- Click on the Save button.
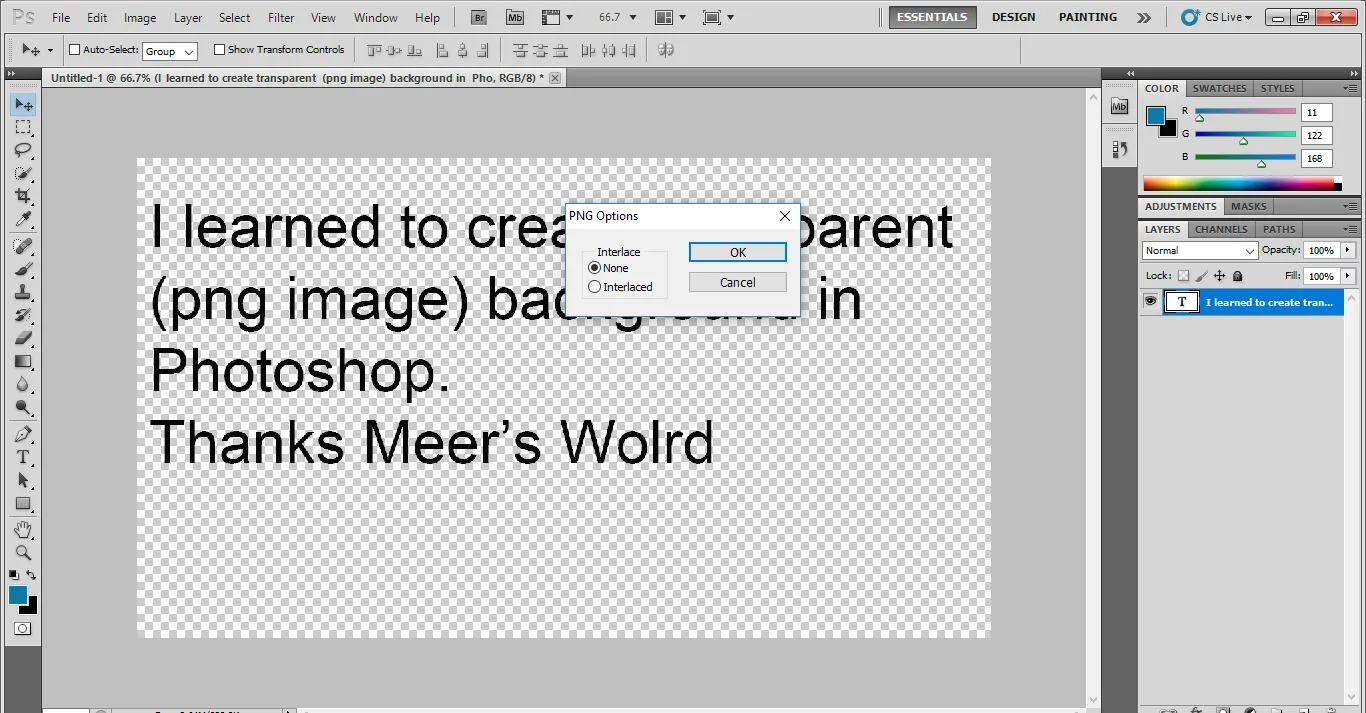
- When you will click on the Save button, a pop up window will appear with two options to select interlace.
- Select the None (First Option).
- Click on the OK button.
- The PNG image is ready. You can place it anywhere. Its background is changed automatically according to background/container color.

If you like this post don’t forget to share with other people. Share your feedback in the comments section below.

Also Read
- How To Swap Faces In Photoshop | Step By Step | Quick & Easy Replace One Face With The Other
- How To Put An Image On Top Of Background On Photoshop For YouTube Cover
- How To Make PNG Image Step By Step In Photoshop | Remove Background Of Image | Transparent Background
- How to Spot Hidden Object from Optical Illusion Pictures




Leave a Reply