Do you want to know how to transform JPEG image to PNG image on Photoshop? You’re in the right place.
In this tutorial, I will guide you step-by-step on how to transform a JPEG image to PNG image by removing its background.
PNG images are those image which have transparent backgrounds. Wherever you place a PNG image its background adopts the background color.
Final Result


How to Transform JPEG to PNG on Photoshop
Follow the steps to transform JPEG to PNG on Photoshop.
- Open a picture on Photoshop.
- Right Click on the Layer (Layer 0).
- Click on the Layer From Background…
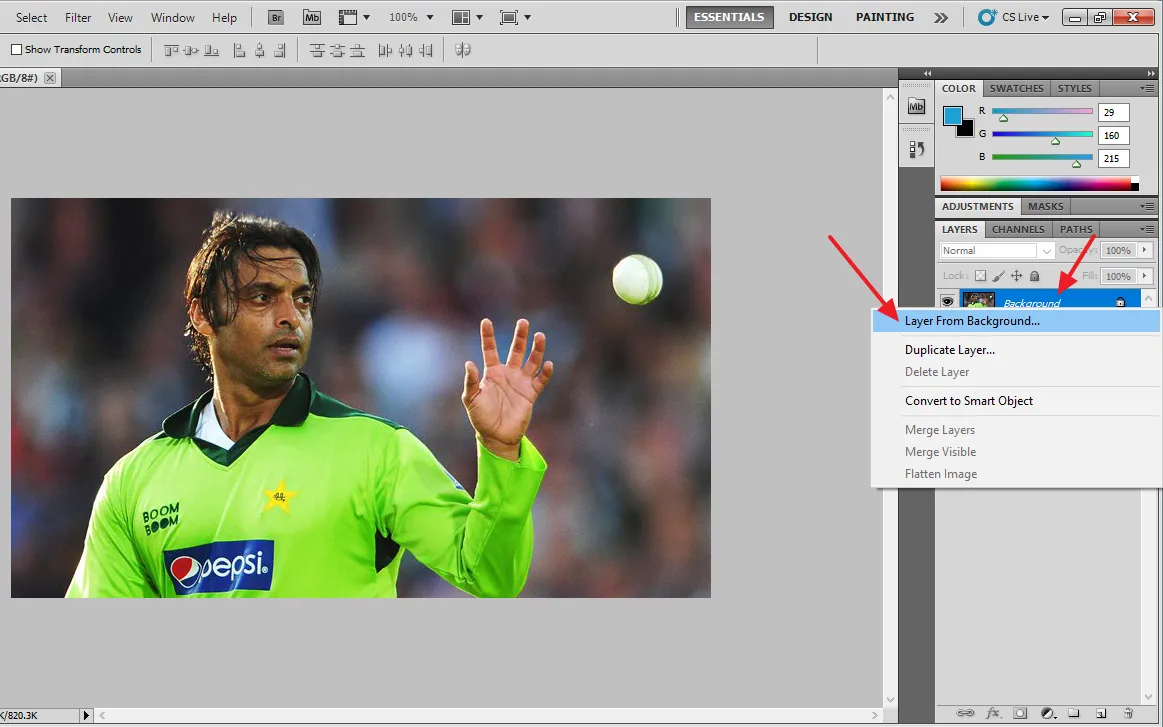
- Right Click on the Layer.
- Click on the Duplicate Layer…
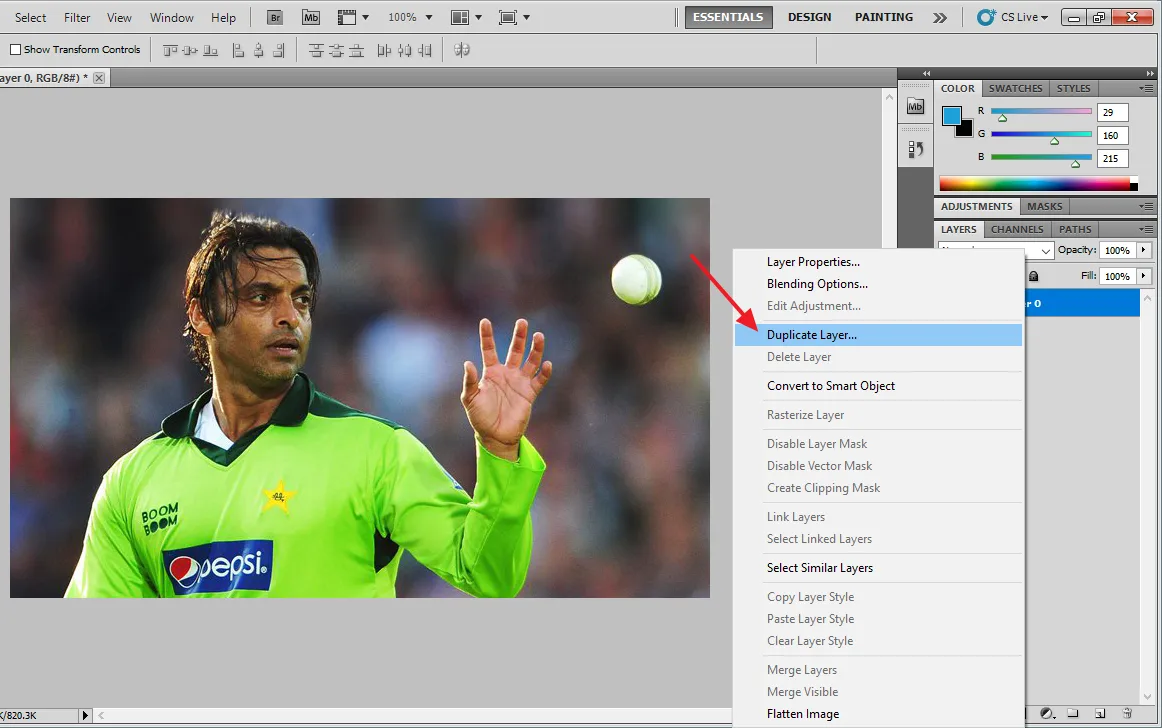
- Select the Magic Wand Tool from the toolbar.
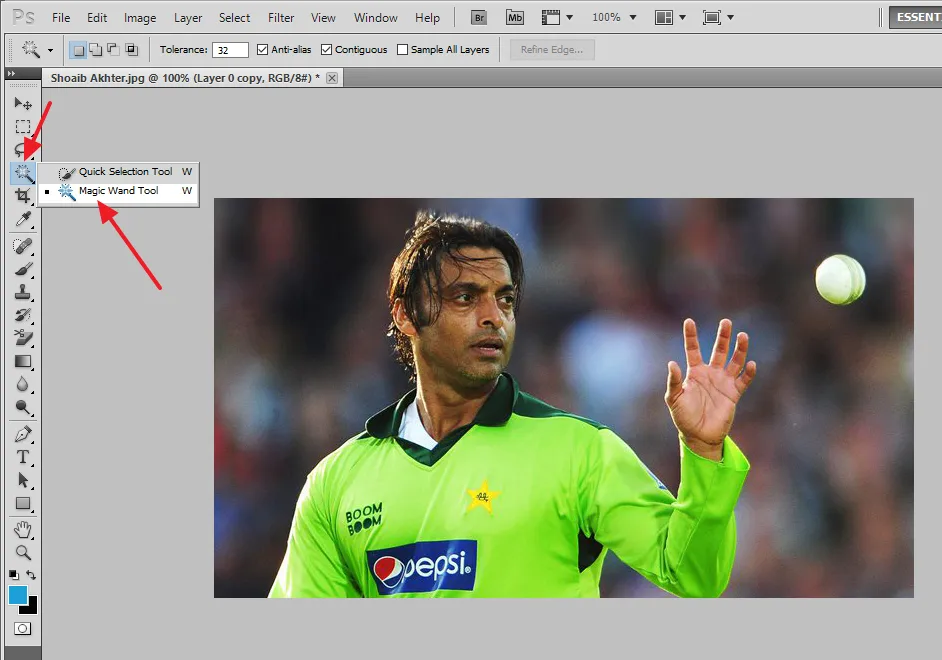
- Uncheck the Main layer (Layer 0).
- Select the Copied Layer.
- Select Magic Wand Tool and click anywhere on the background.
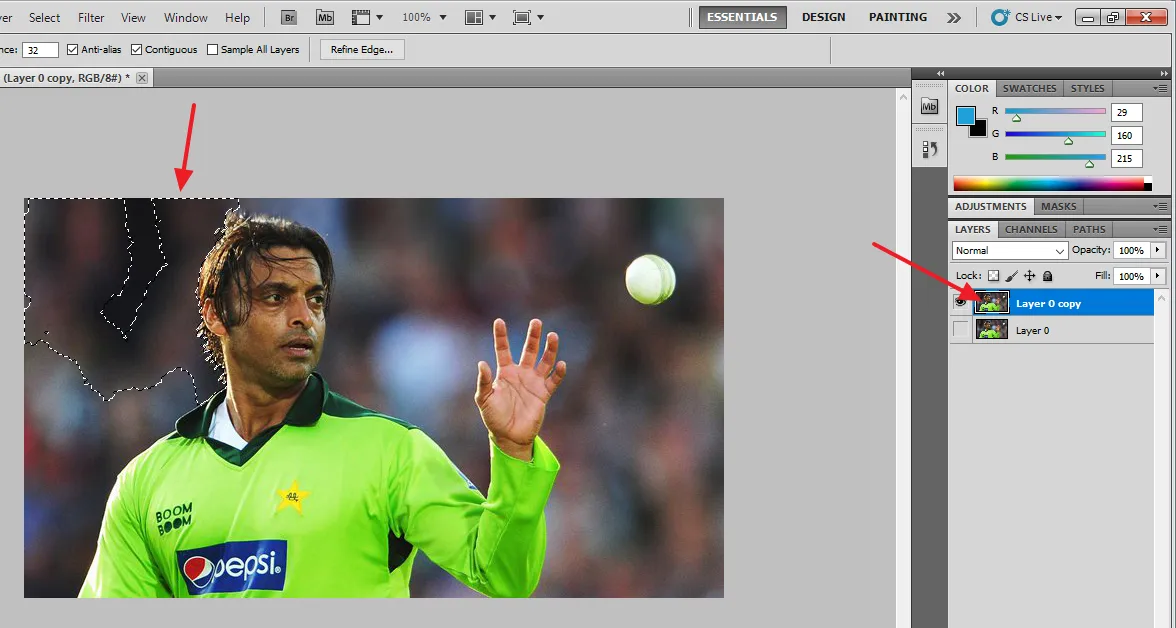
- Press the Delete Button from your keyboard. Do it for all the areas that you want to remove.
Note: If your image has a simple background like one color background. You can delete background in just one click.
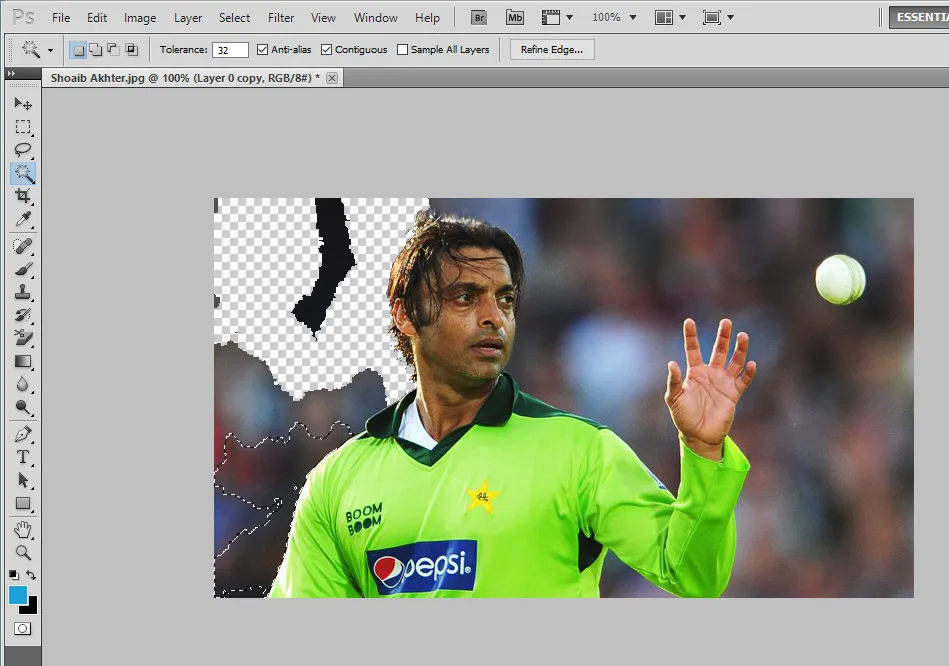
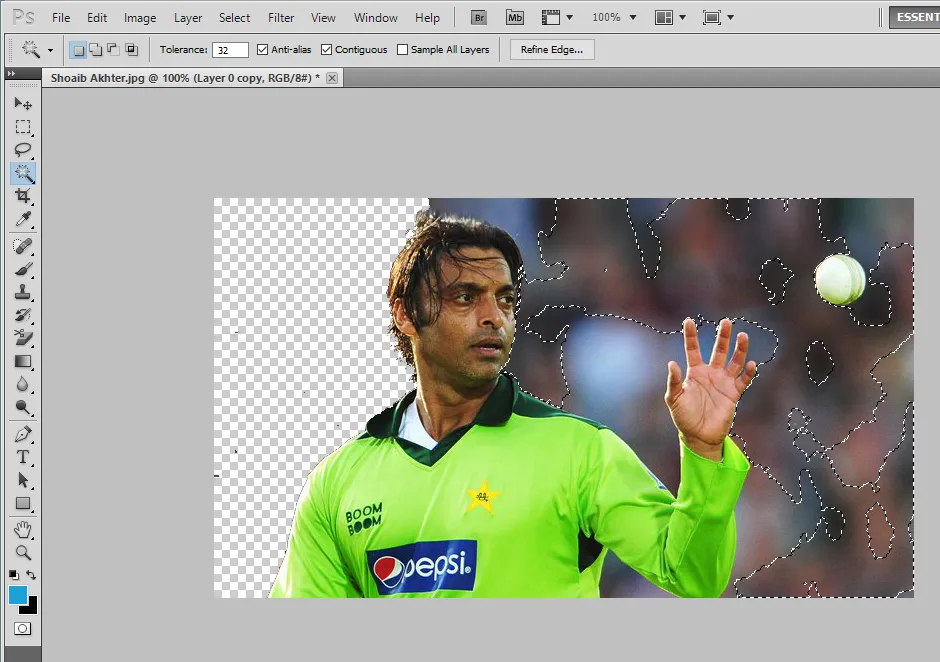
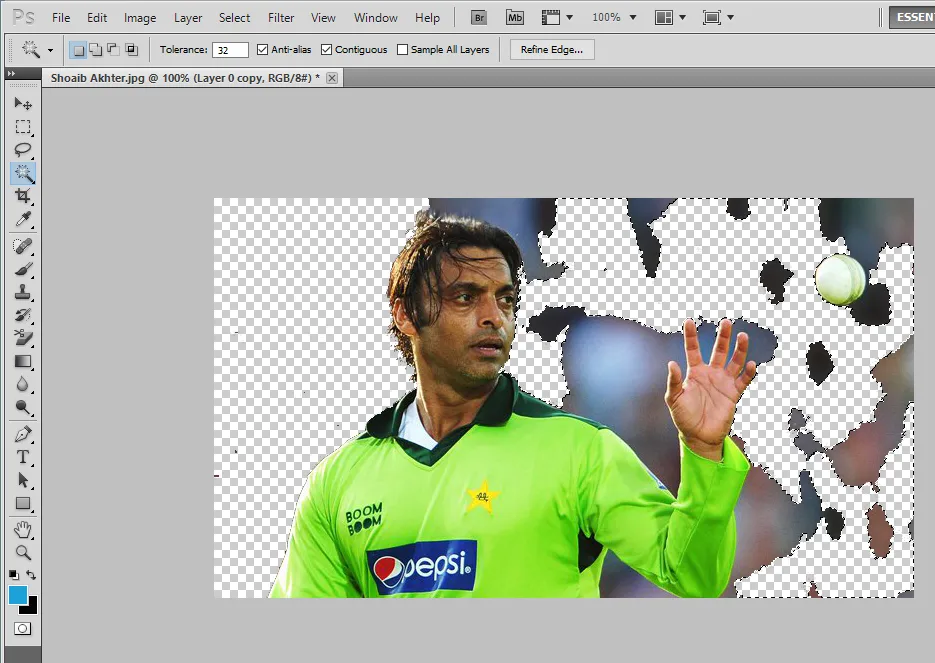
- In order to verify whether the background is fully cleared or not, I will do a check.
- Select the Rectangle Tool from the toolbar.
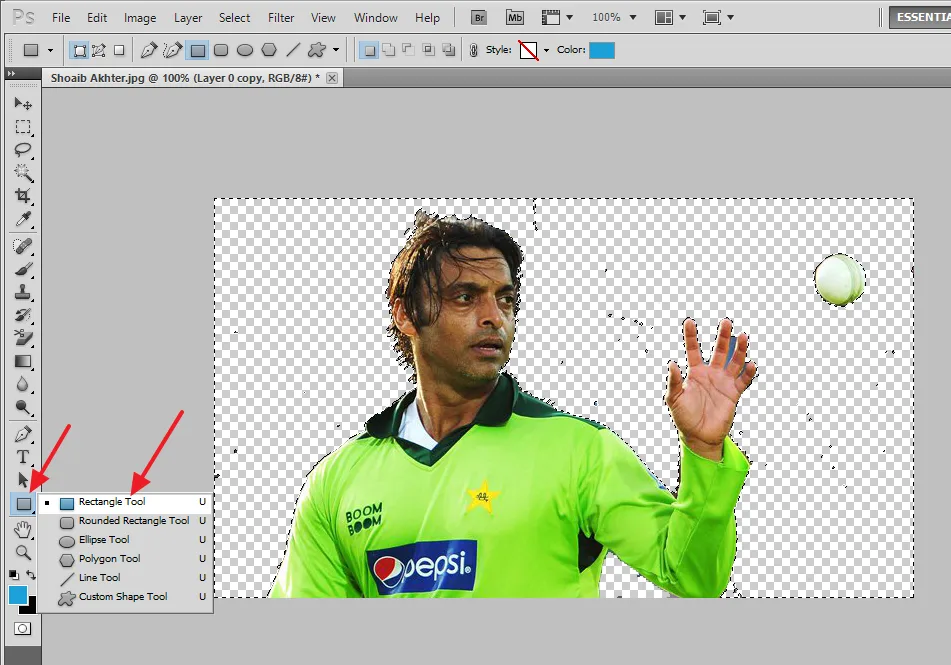
- Create a Rectangle over the picture, as shown below.
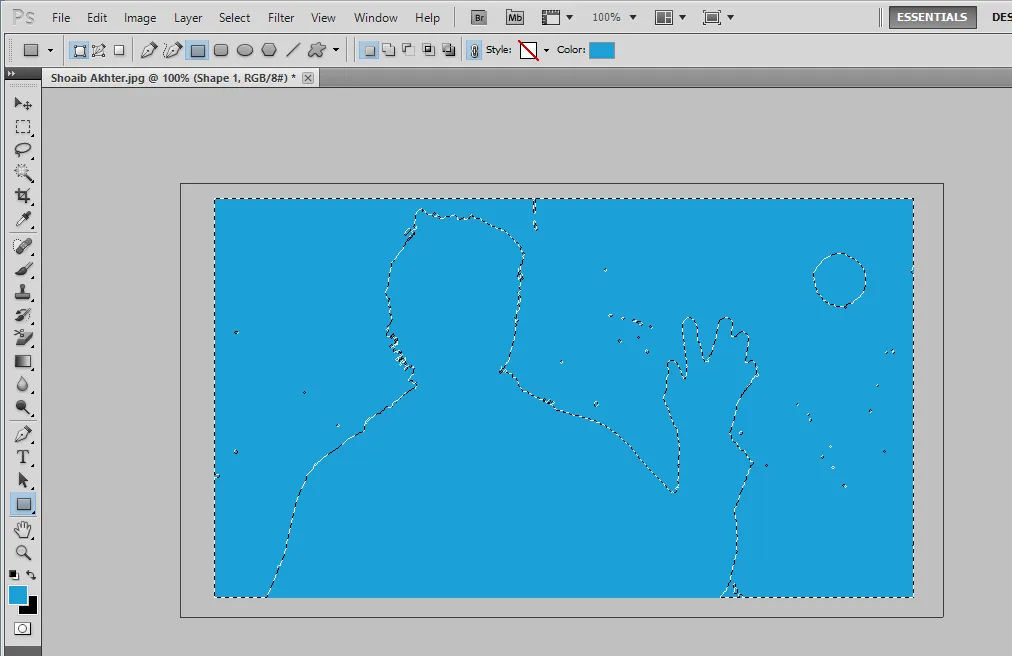
- Move the Copied Layer (Layer 0 Copy) over the Rectangle Layer by dragging.
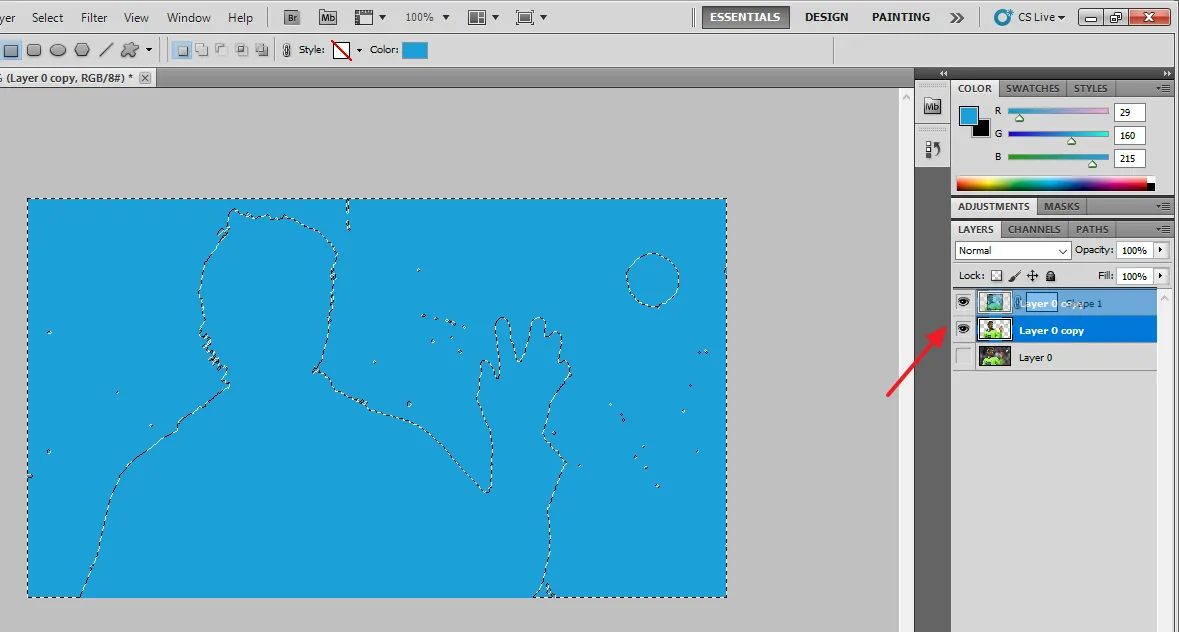
- The Copied Layer will be moved to top.
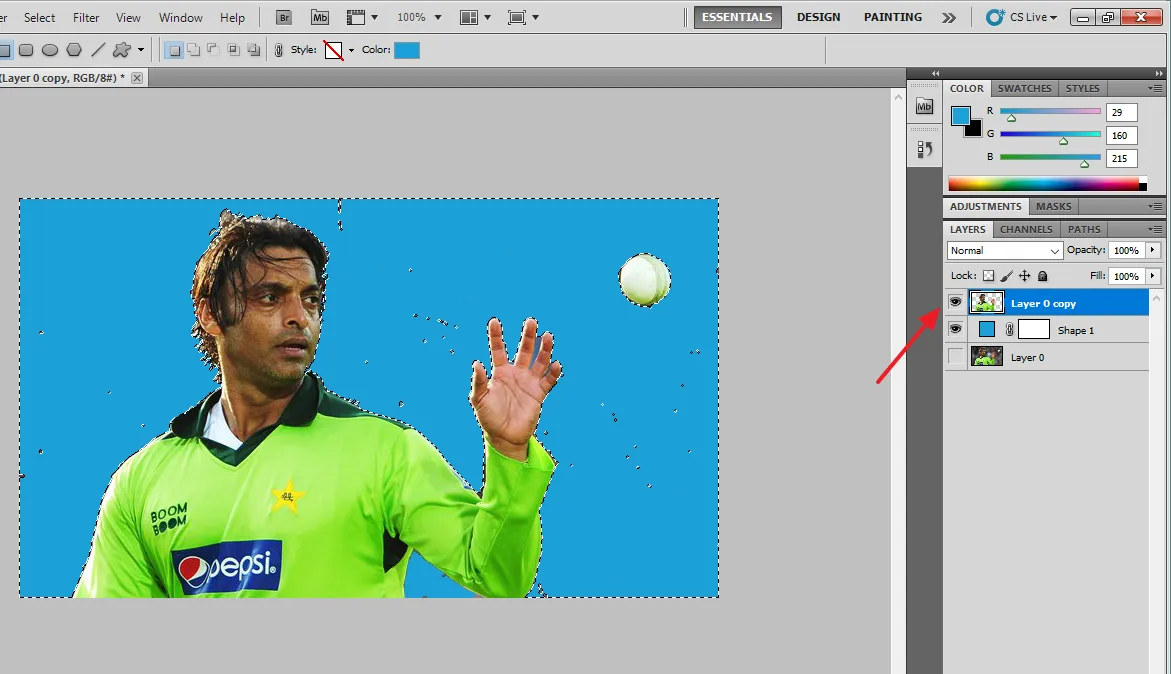
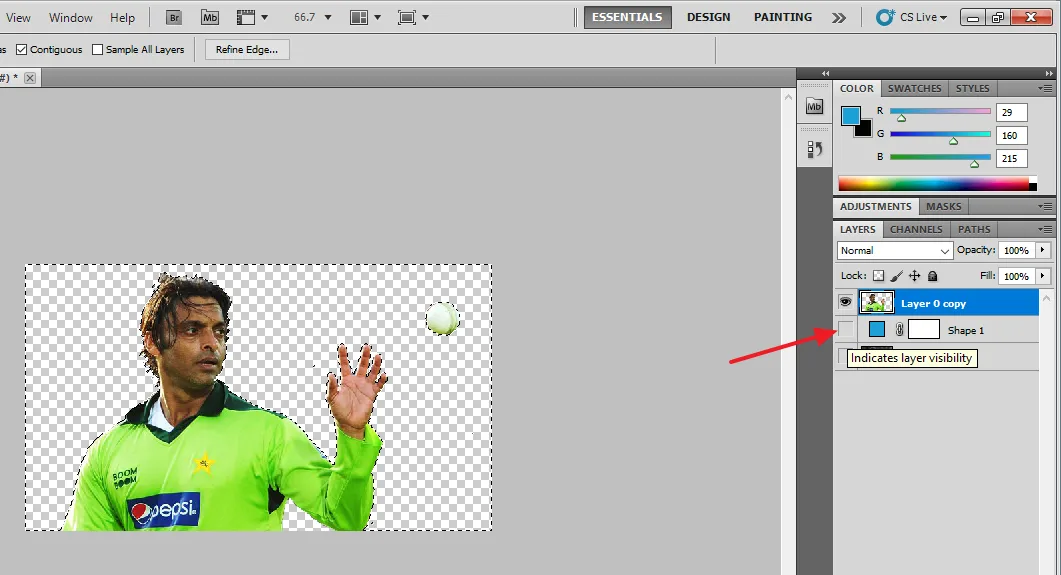
- Now all the background spots will be visible to you. Zoom the picture and find all the background spots and delete them.
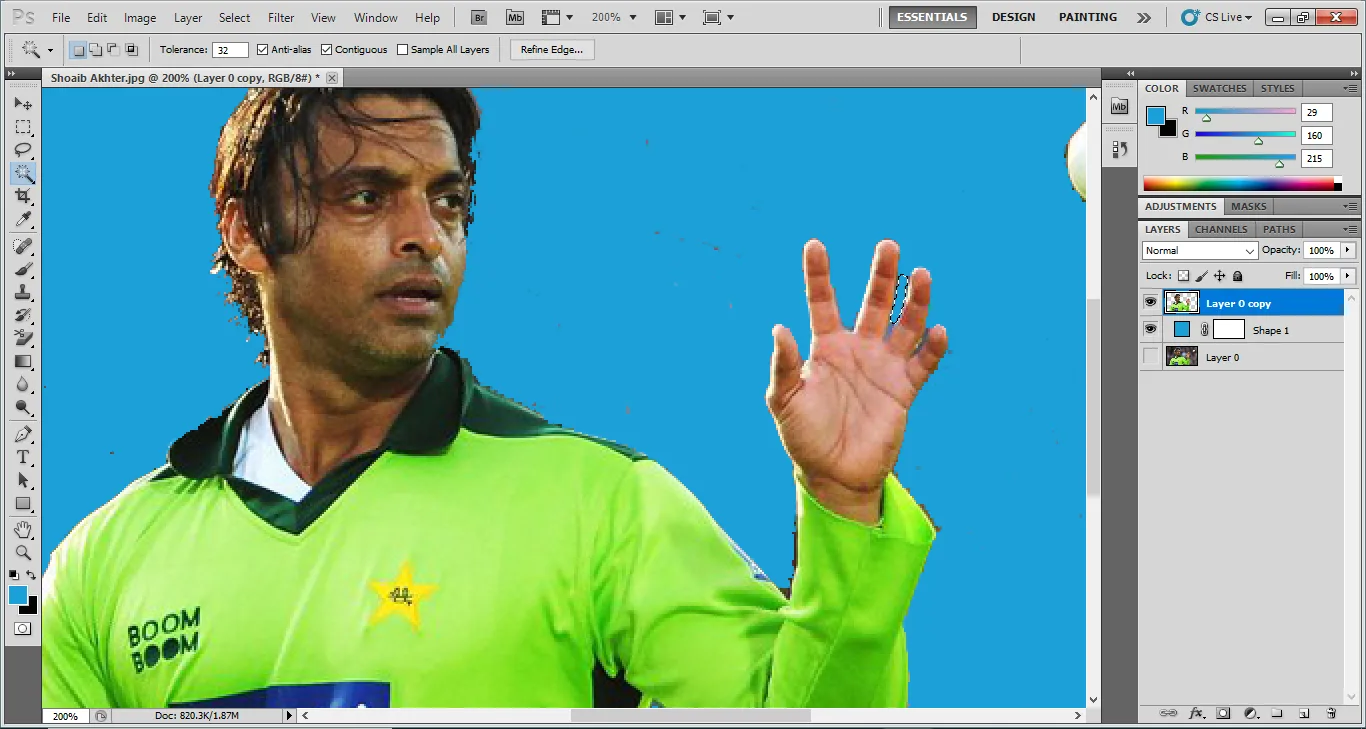
- After deleting all the background spots uncheck the Rectangle Layer.
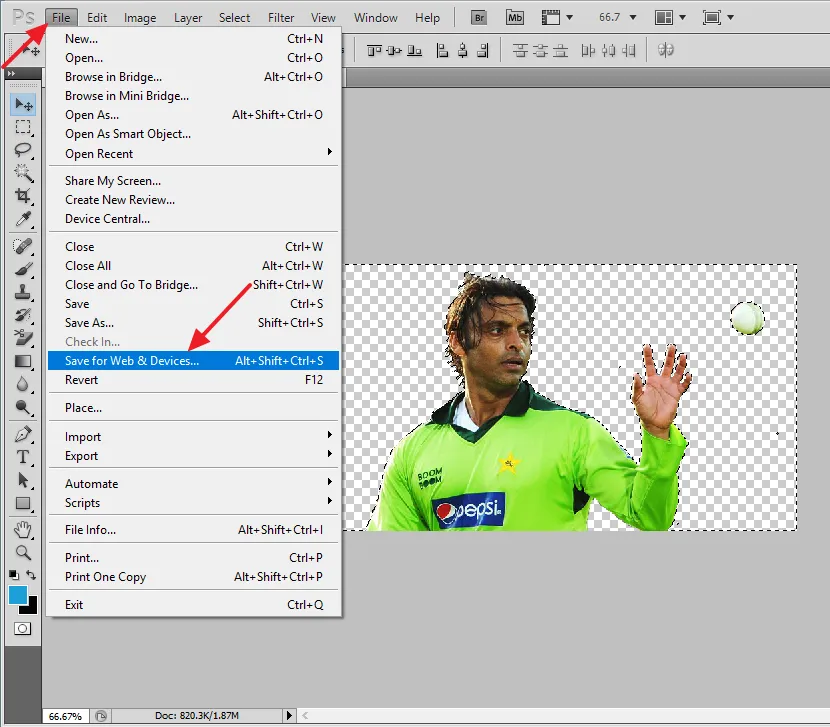
- Go to File tab.
- Click on the Save for Web & Devices...
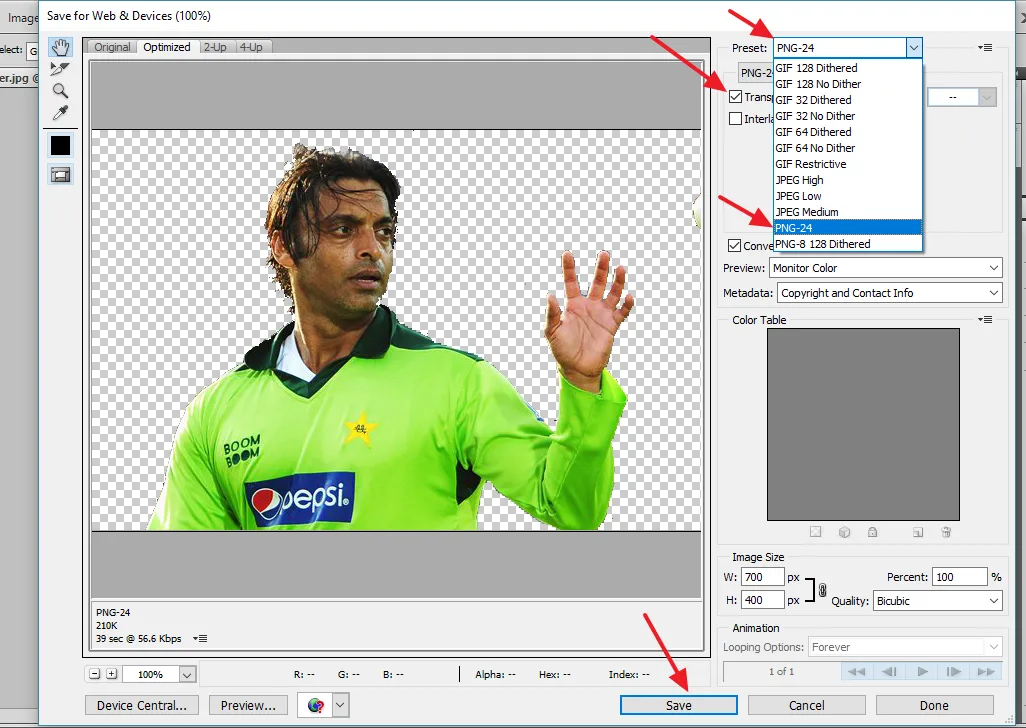
- On Preset: select the PNG-24.
- Tick the Transparency.
- Click on the Save button.
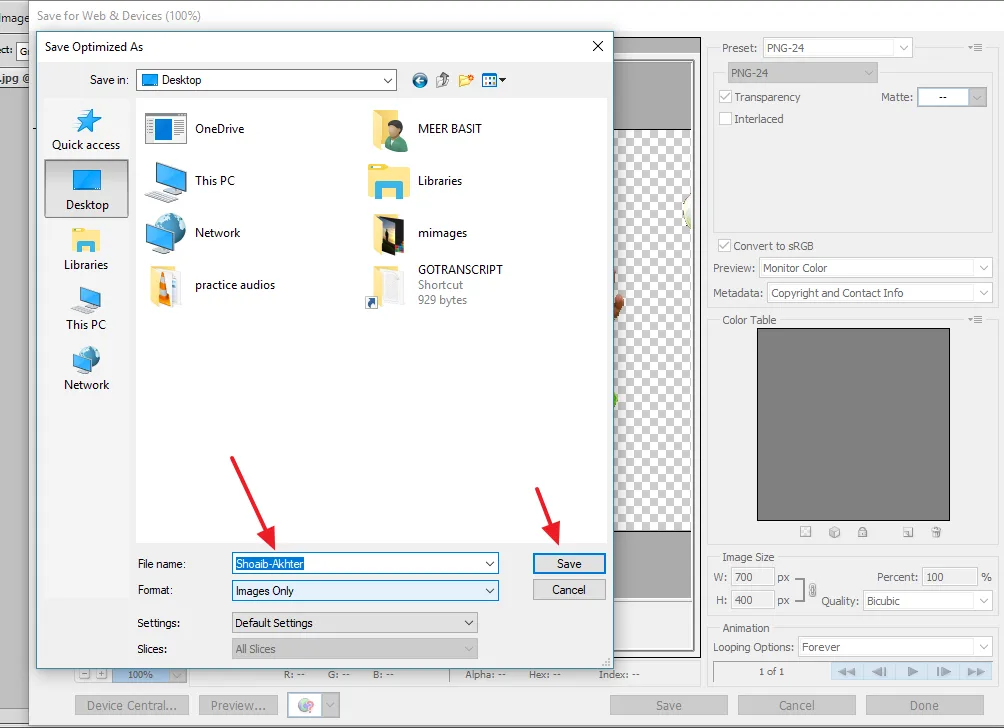
- In the File name: enter a meaningful name to your image.
- On Format: Choose Images only.
- Click on the Save button.
You have successfully transformed a JPEG image to PNG. If you like this post then don’t forget to share with other people. Share your feedback in the comments section below.
Also Read



Leave a Reply