Do you want to sign up for CJ Affiliate network and setup Payoneer payment method? You’re in the right place.
In this tutorial, I will guide you step-by-step on How to sign up for CJ Affiliate network, How to fill the Tax Information, How to set up Payoneer payment method, & how to use the CJ affiliate e.g. Applying to an affiliate program, Getting Affiliate Links, & Getting banner code.
CJ affiliate formerly known as Commission Junction, is one of world’s largest and most established affiliate marketing networks. It is free-to-join affiliate network and can be joined from any part of the world. It supports three payment methods i.e. Direct Deposit, Check, & Payoneer (for non-US citizens).
Payoneer is one of the leading payment gateways to receive your online payments in any part of the world. It creates virtual accounts for you in the banks of US, UK, Japan, Singapore, Australia, etc, where you receive money and can transfer to your local bank account.
For non-US citizens CJ affiliate offers Payoneer as the payment method. If you have not created a Payoneer account yet, follow this tutorial: How To Create Payoneer Account – For Beginners.
Following topics will be covered in this post:
- How to Sign Up for CJ Affiliate Network
- How to Fill Tax Information on CJ Affiliate
- How to Set Up Payoneer Payment Method
- How to Use CJ Affiliate Network
RELATED
01. How to Sign Up for CJ Affiliate Network
In this section, I will guide you step-by-step on how to sign up and create CJ Affiliate account.
- Go to CJ Affiliate Join Page.
- Go to PUBLISHERS section.
- Click on the SIGN UP button.

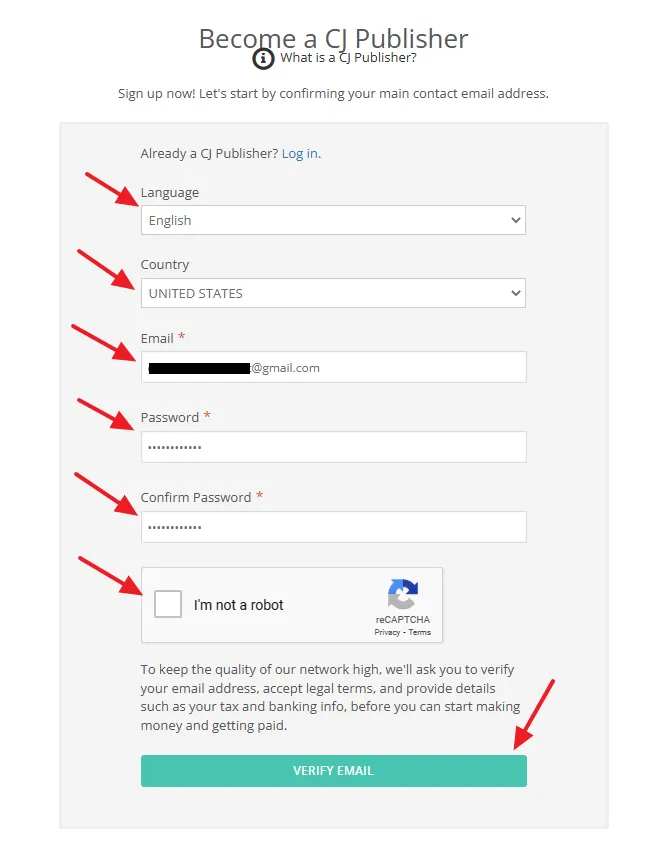
- Choose Language.
- Choose your Country like, Pakistan, India, United States, etc.
- Enter your Email address. It must an active email account.
- Enter a secure Password.
- Click on the VERIFY EMAIL button.
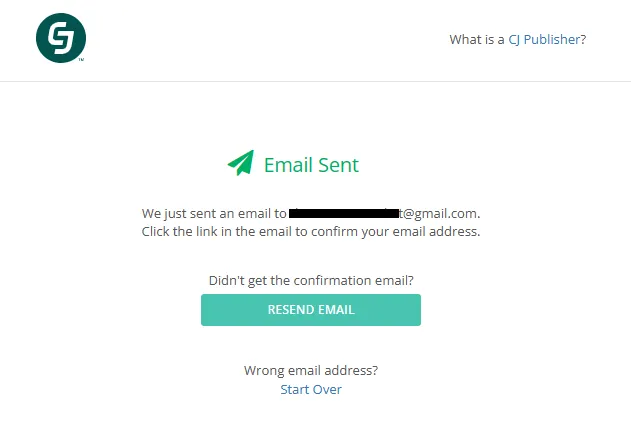
- CJ Affiliate will send you a verification email to confirm your email address.
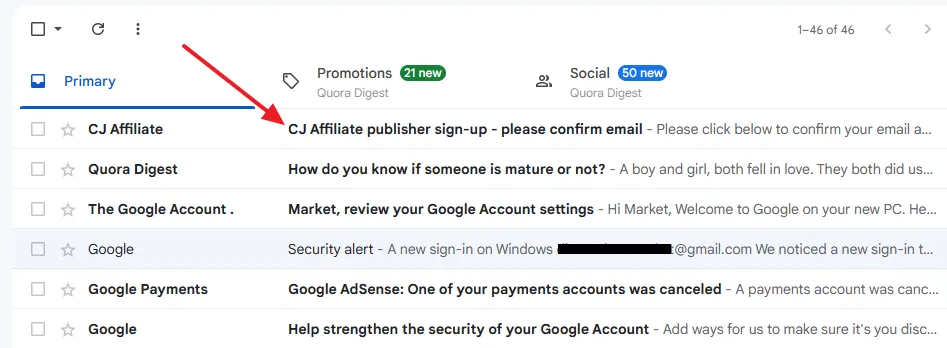
- Open your email account and click on the confirmation email sent by CJ Affiliate.
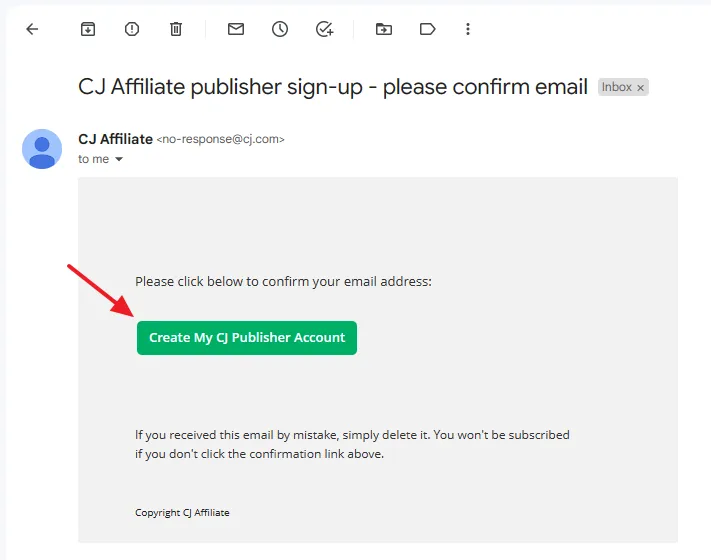
- Once you open the email, click on the Create My CJ Publisher Account button.
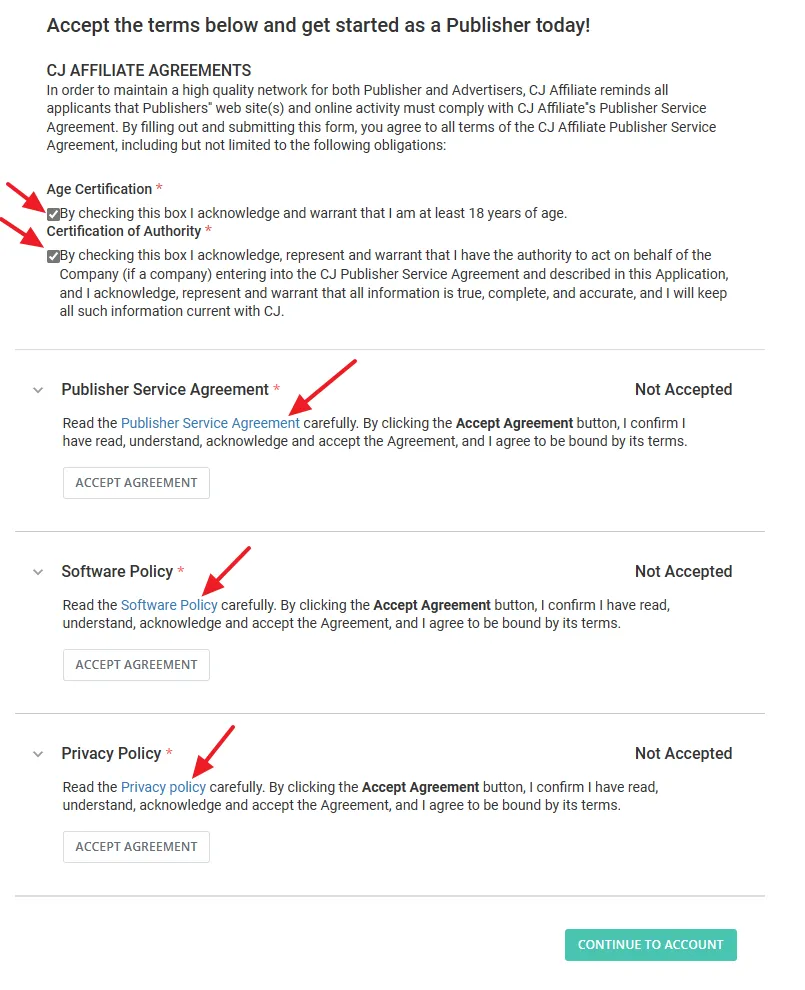
Accept terms of CJ Affiliate.
- Check the Age Certification. You must be at least 18 years old.
- Check the Certification of Authority.
- Click on the Publisher Service Agreement link.
- Click on the Software Policy link.
- Click on the Privacy Policy link.
- When you click on the three links their corresponding ACCEPT AGREEMENT buttons will be activated.
- Click on the ACCEPT AGREEMENT buttons one by one.
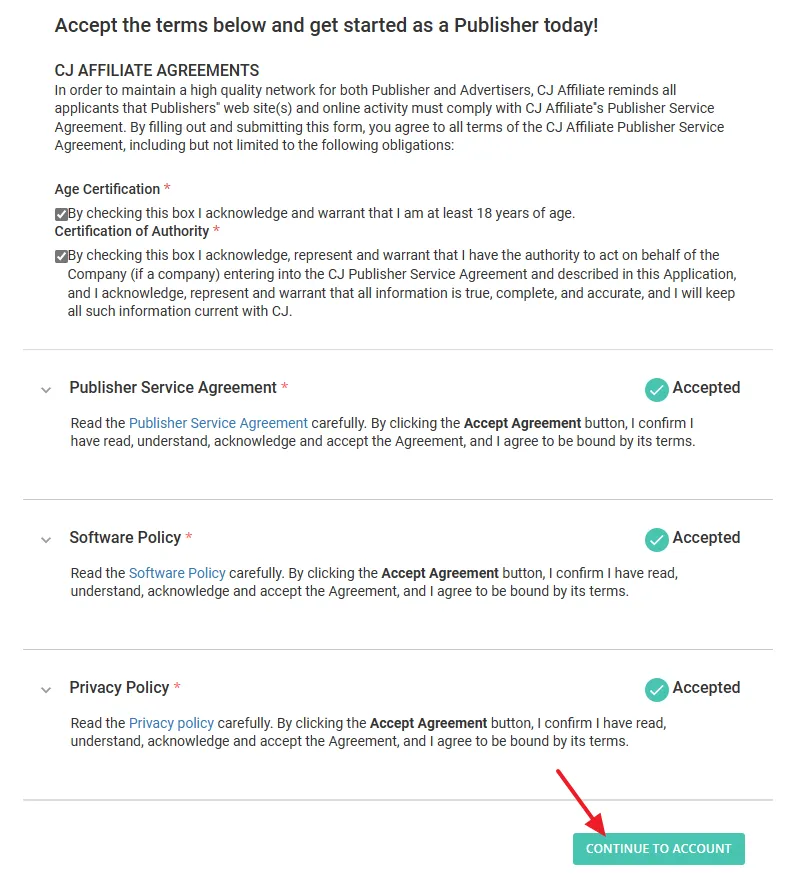
- After you click on the ACCEPT AGREEMENT buttons you will see Checkmark followed by Accepted label in front of Publisher Service Agreement, Software Policy, and Privacy Policy.
- Click on the CONTINUE TO ACCOUNT button.
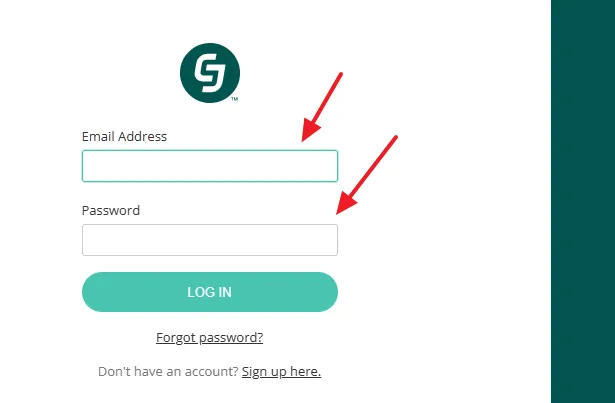
- You will be redirected to CJ Affiliate Login Page.
- Enter your Email Address and Password.
- Click on the LOG IN button.
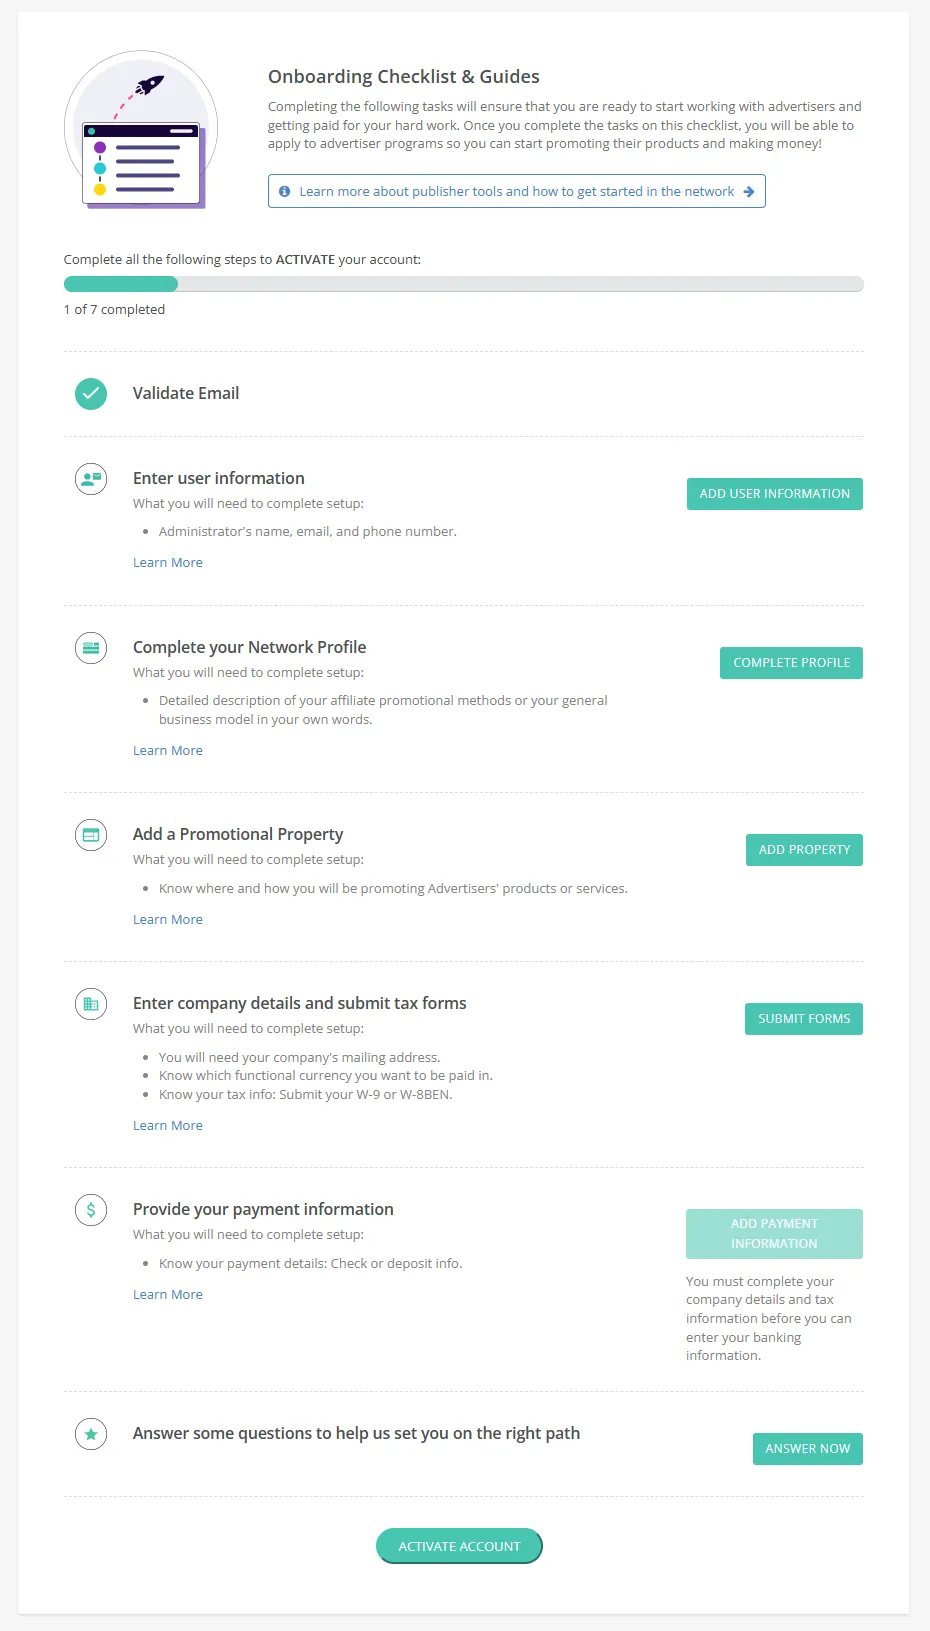
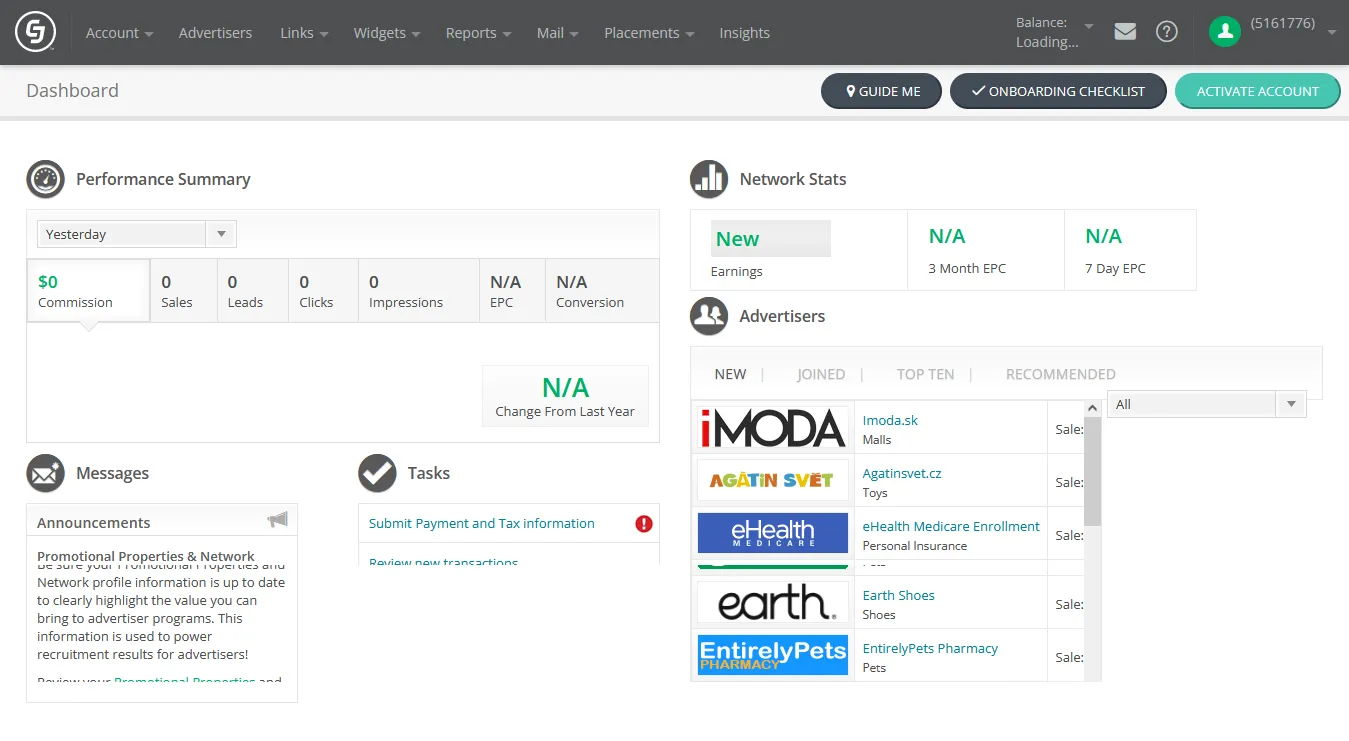
On your CJ Affiliate account you will be shown Onboarding Checklist. After you complete all the 7 steps you can Activate your CJ Affiliate account i.e. Enter User Information, Complete Your Network Profile, Add a Promotional Property, Enter Company Details & Submit Tax Forms, and Provide Your Payment Information.
This is the Dashboard of your CJ Affiliate account. You can go to Account Settings, Advertisers, Links, Widgets, Reports, Mail, Placements, and Insights from the Menu. It also shows Performance Summary, Network Stats, Advertisers, Messages, Tasks, and many more..
02. How to Fill Tax Information on CJ Affiliate
In this section, I will guide you step-by-step on how to fill the Tax information on your CJ Affiliate account.
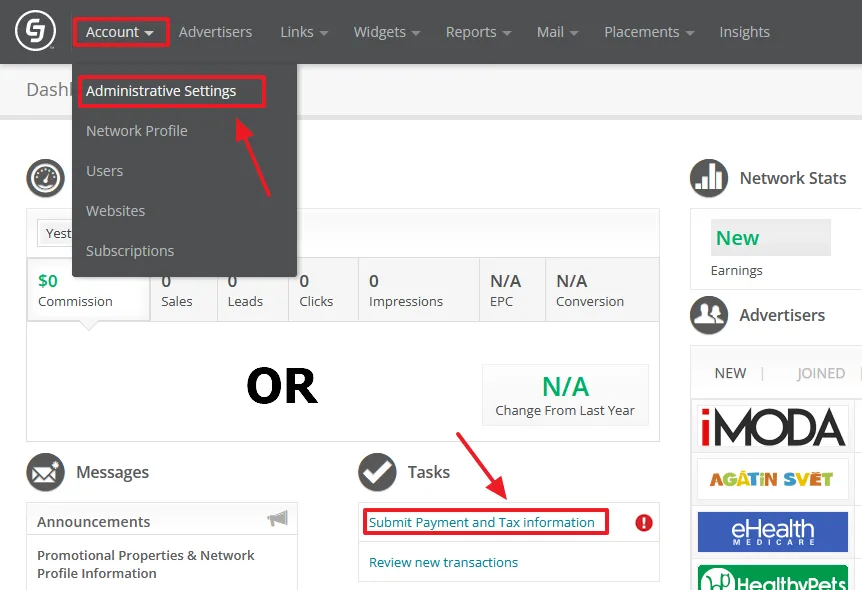
- Click on the Account tab.
- Click on the Administrative Settings. You can also go to Administrative Settings from the Tasks section Submit Payment and Tax Information.
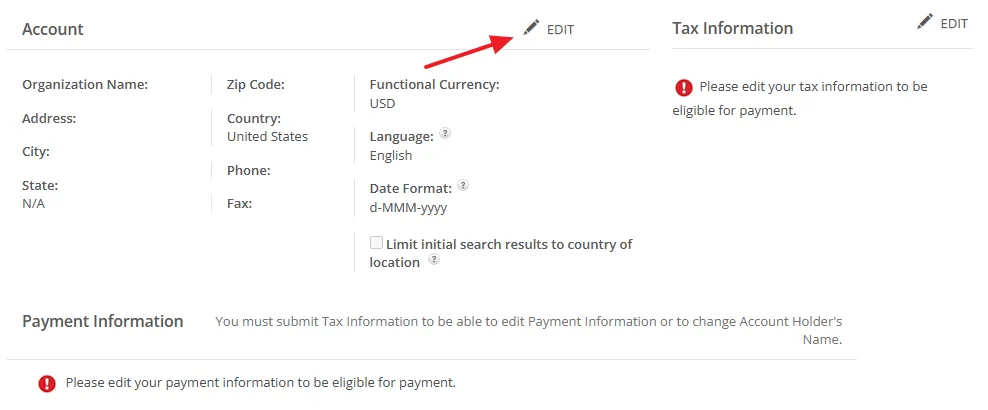
- First of all go to Account section and click on the EDIT link.
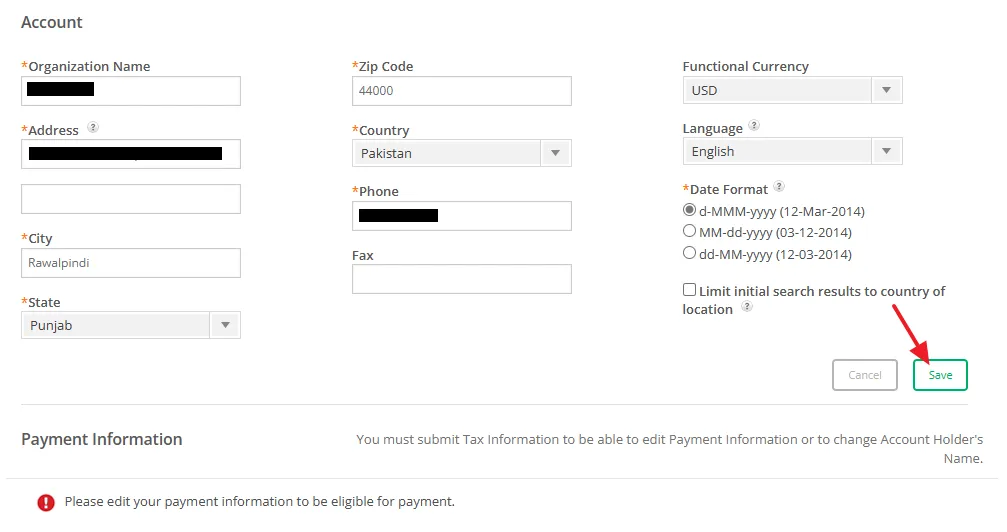
- Provide your Account details like, Organization Name (Company or Website), Address, Zip Code, Country, Phone, City, State, and Date Format.
- Click on the Save button.
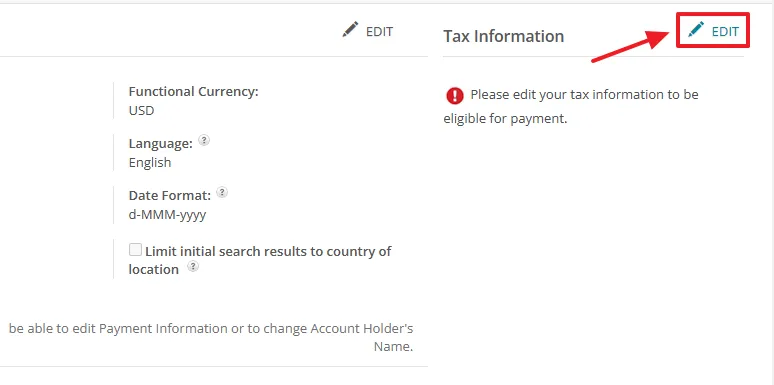
- After completing the Account details go to Tax Information section and click on the EDIT link.
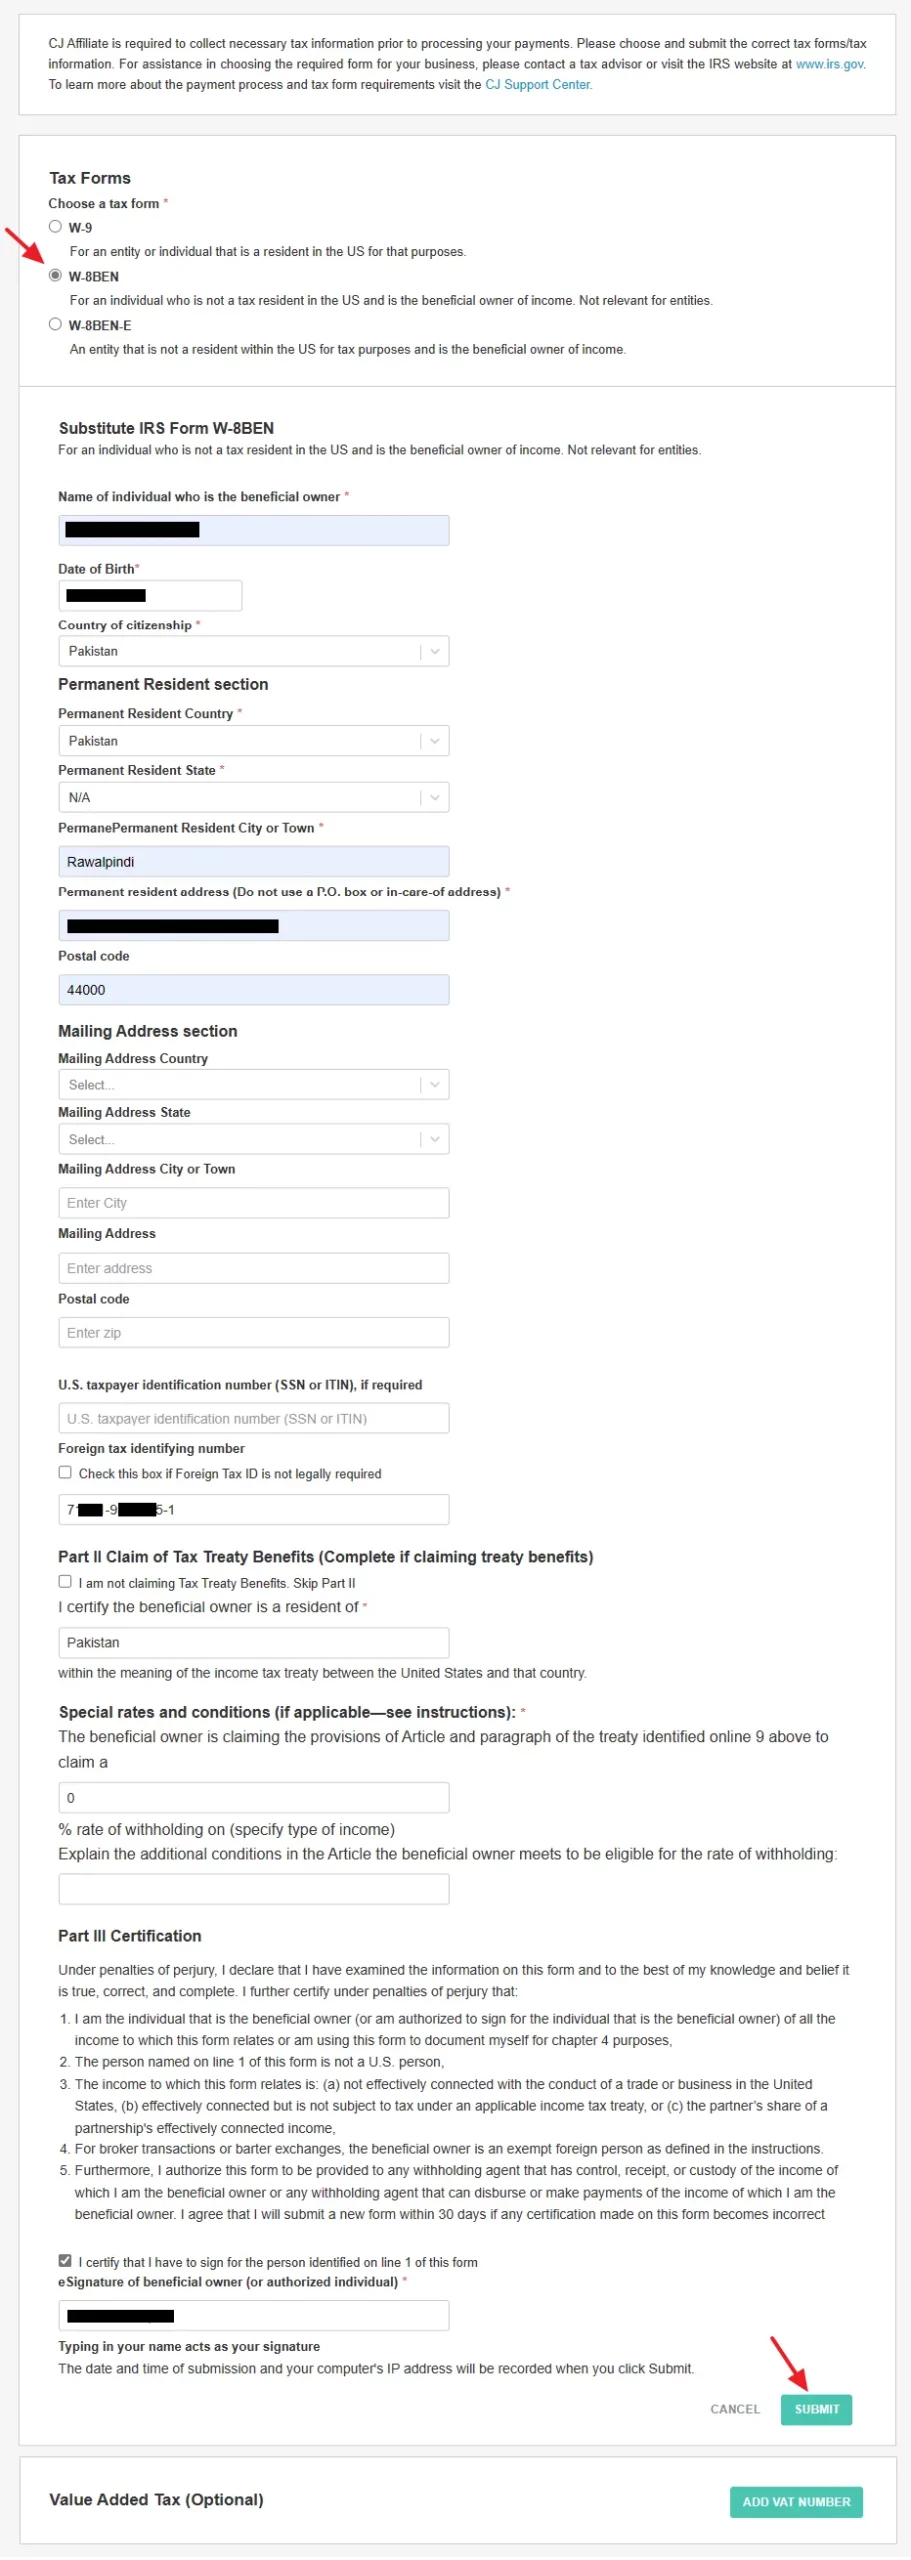
Select your Tax form.
- If you’re US citizen select W-9 form.
- If you’re not a U.S. citizen and an individual select W-8BEN form. The W-8BEN-E form is similar to W-8BEN, but it is for an entity (company, organization, etc).
Here I have selected the W-8BEN form.
- In the Name of Individual who is the beneficial owner enter your Name.
- Enter your Date of Birth.
- Choose Country of Citizenship.
- Choose Permanent Resident Country.
- Choose Permanent Resident State.
- Enter your City name.
- Leave the U.S. taxpayer identification (SSN or ITIN) field empty.
- In the Foreign Tax identifying Number enter your National Identity Card Number that uniquely identifies you as the citizen of the country.
- If your country is part of Income Tax Treaty with the United States, fill the Part II: Claim of Tax Treaty Benefits. The countries listed in this treaty are taxed at a reduced rate or are exempt from U.S. income taxes on certain income. You can check your country on United States Income Tax Treaties.
- On Part III, tick the, “I certify that I have to sign for the person identified on line of this form“. Enter your Name as your Signature in the eSignature of beneficial owner (or authorized individual). The Date, Submission Time, and IP Address of your computer is also recorded when you click on the Submit button.
- Click on the Submit button.
03. How to Set Up Payoneer Payment Method
In this section, I will guide you step-by-step on how to set up Payoneer payment method on your CJ Affiliate account.
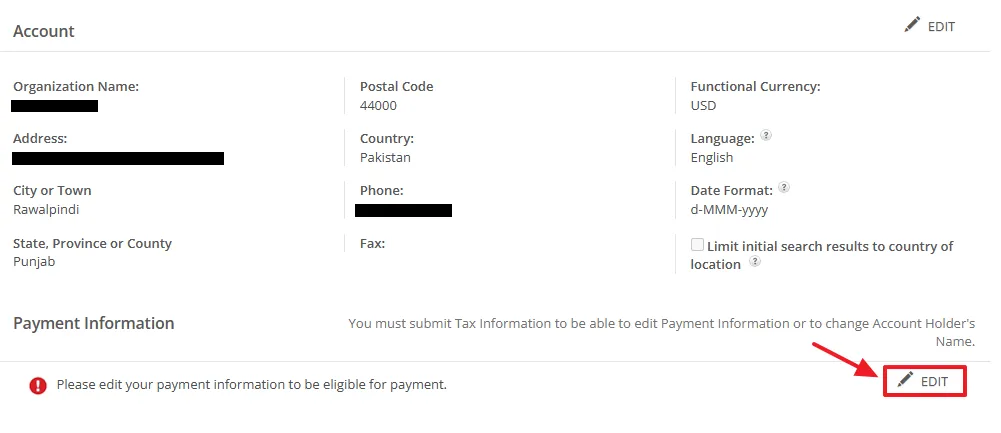
- Go to Payment Information section located below the the Account section, on Administrative Settings page.
- Click on the EDIT link.
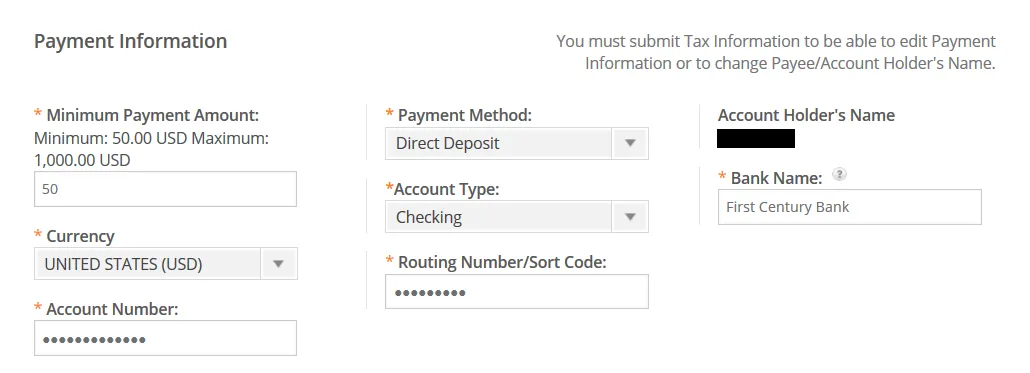
In the Minimum Payment Amount enter the amount from $50 to $1000.00. As soon as your earnings/commissions reach Minimum Payment Amount it will be sent to your Payoneer account.
To get the below information from your Payoneer account go through the Section 01: How to Get the Details of Receiving Account of this tutorial: How to Get Paid Via Payoneer Receiving Accounts. Copy the Information from your Payoneer USA Receiving account and fill the below form.
- In Currency choose UNITED STATES (USD).
- In the Account Number enter the Account number of your Payoneer USA Receiving account.
- In Payment Method select the Direct Deposit.
- In the Account Type select the Checking.
- In the Routing Number/Sort Code enter the Routing (ABA) of your Payoneer USA Receiving account.
- In the Account Holder’s Name enter the Beneficiary name of your Payoneer USA Receiving account.
- In the Bank Name enter the Bank name of your Payoneer USA Receiving account. It must be First Century Bank.
04. How to Use CJ Affiliate Network
In this section, I will quickly guide you on how to use the CJ Affiliate network.
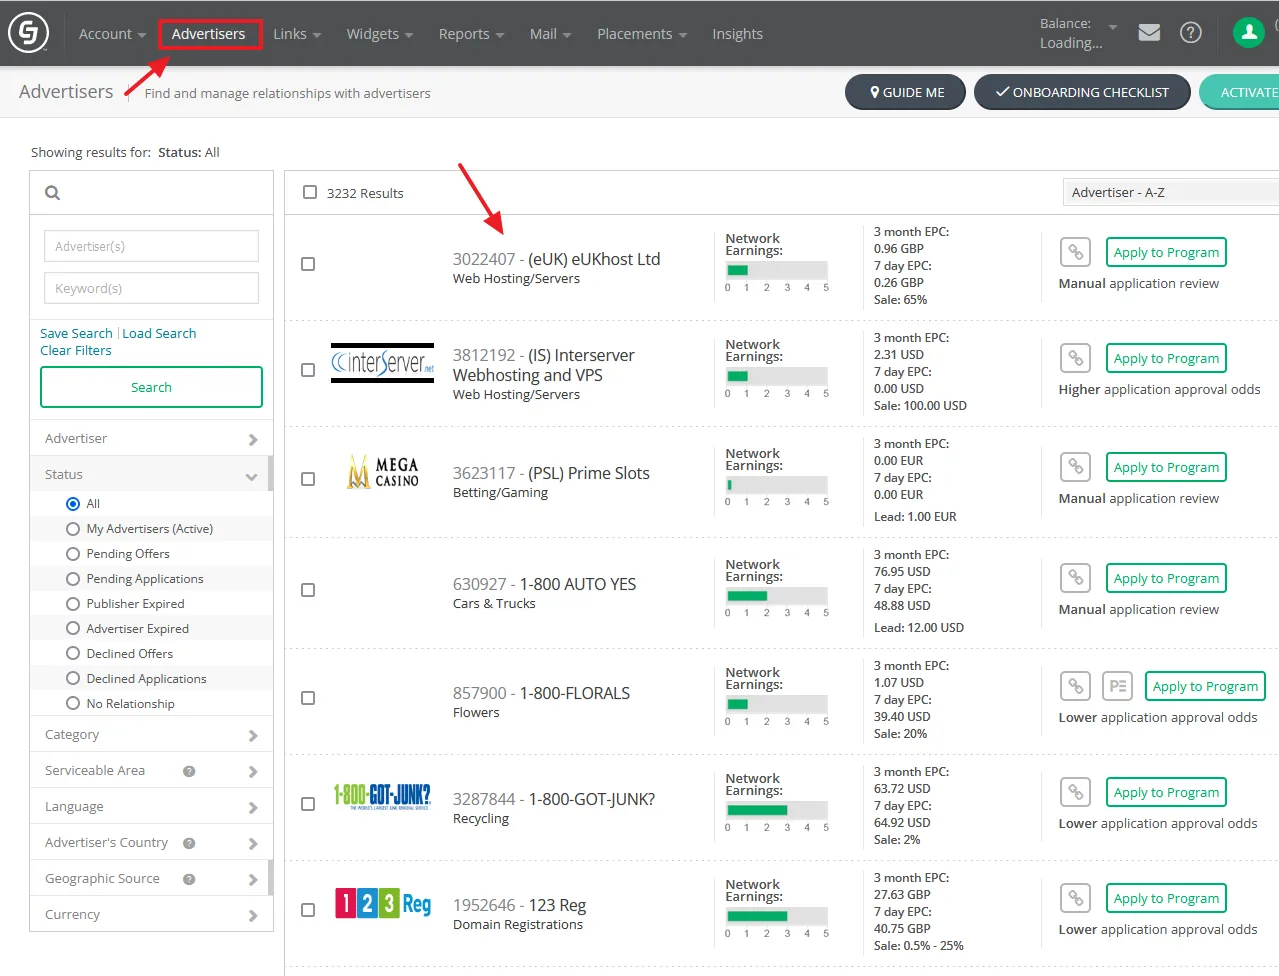
- Click on the Advertisers tab from the Menu. You can see all the Advertisers registered on CJ Affiliate.
- From the sidebar under the Status, you can filter Advertisers by All, My Advertisers (Active), Pending Offers, Pending Applications, Declined Applications, Category, Serviceable Area, Language, Advertiser’s Country, etc.
- To list down the filtered Advertisers, first select the Status and then click on the Search button.
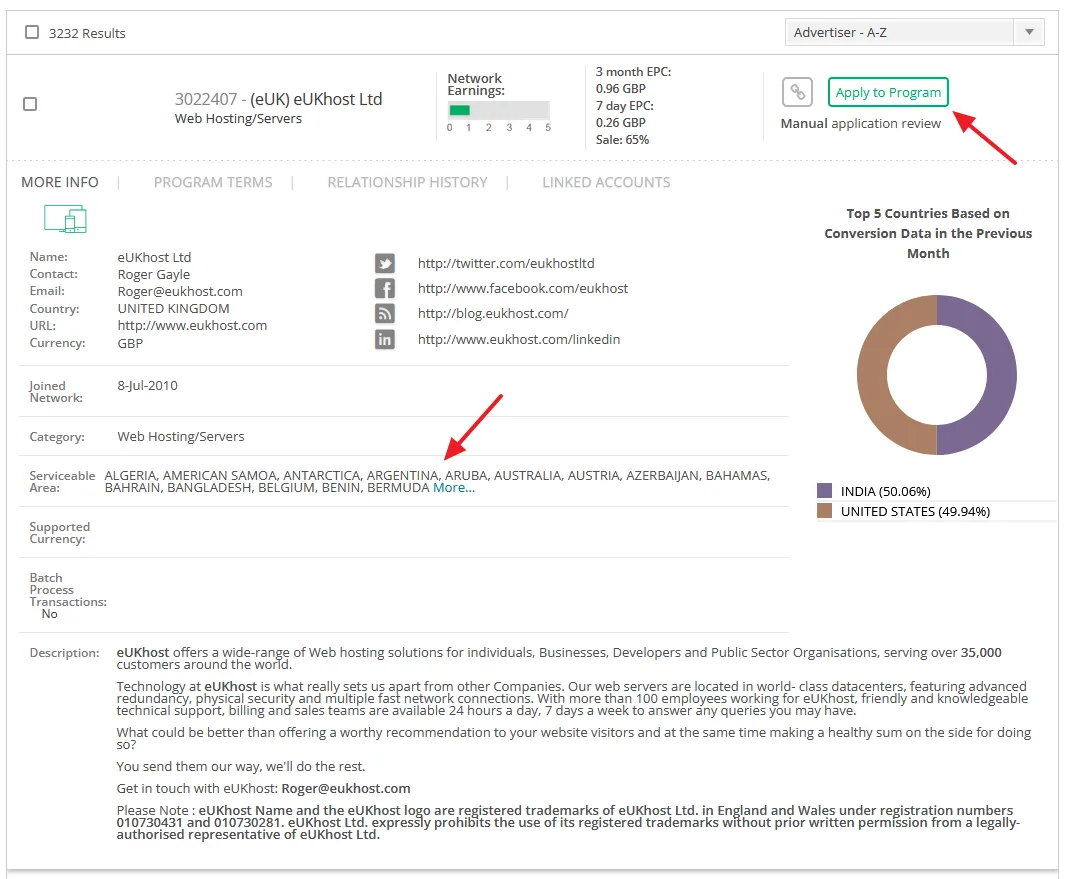
- Before you Apply to an affiliate program, click on its Title to expand the details.
- You can see Network Earnings, 3 month EPC, Name, Contact, Email, Country, Website URL, Currency, Social Media links, Category, Serviceable Areas, Description, and more.
- If you think the company is right for you or if you can target the audiences of Serviceable Areas, click on the Apply to Program button.
- Some companies will accept your request instantly, but most will say that,“This advertiser approves publishers manually. Your application status will be set to Pending Application and the advertiser will contact you if approved. This company checks the application manually.” So, you have to wait for their response.
- Some Advertisers may directly send you an offer to join their Affiliate Program. It is up to you whether you accept their offer or not. These offers will be listed in the Pending Applications.
- To accept an offer click on the Accept Offer button.

- Once you Accept the offer or your Request is accepted by an Advertiser, you can get link, code, and banners to put on your website or to share through Social Media platforms.
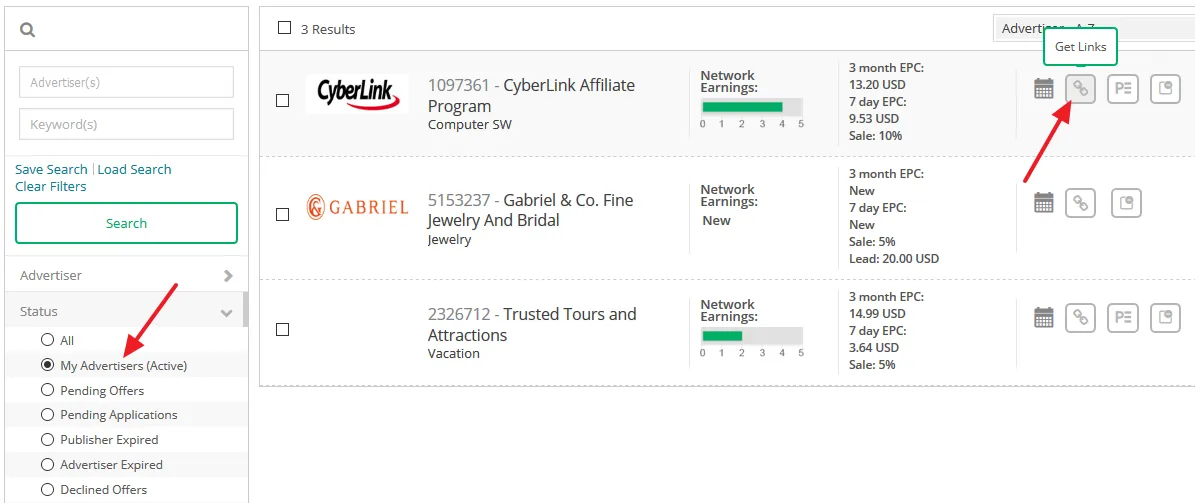
- You can list down your connected advertisers by selecting My Advertisers (Active) from the Status section.
- To get the affiliate links of an advertiser click on the Get Links button.
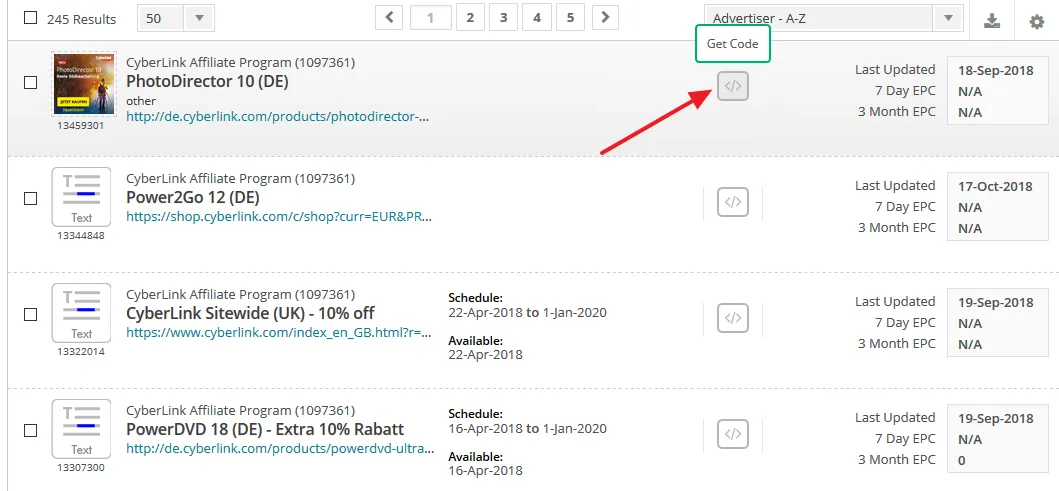
- All the available banners and offers will be listed.
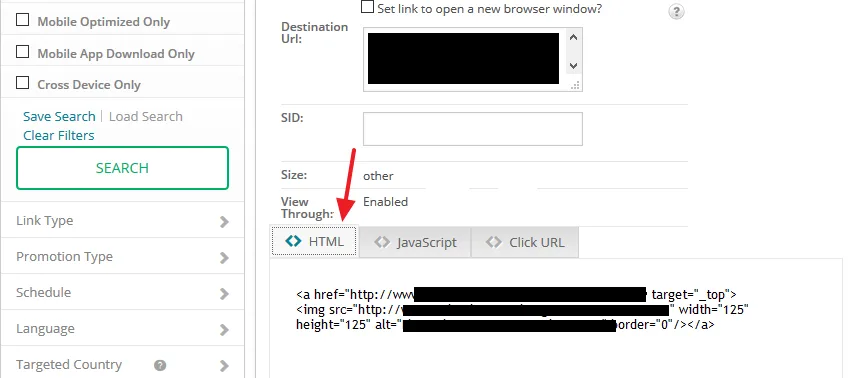
- Click on the Get Code (</>) button to get the code of the banner. The banner codes also contain your affiliate links.
- There are three tabs HTML, JavaScript, and Click URL. The HTML tab contains HTML Code of the banner, and JavaScript tab contains the JavaScript code of the banner. The Click URL tab contains only your affiliate link for a product or service.
You can explore lot more on CJ Affiliate account. If you like this post then don’t forget to share with people. Share your feedback in the comments section below.
Also Read
- All You Need To Know About Amazon Prime Student | Sign Up, Conditions, Benefits, Discount
- How To Join Amazon Affiliate Program From Pakistan Or Anywhere – Step By Step | Payoneer
- How To Make Money Via TikTok | Advertise With TikTok | Earn Money Online
- How to Sign Up for Fiverr & Create Your First Gig
- How To Sign Up & Use Impact Radius Affiliate Network



Leave a Reply