Do you want to know how to run Disk Cleanup on Windows 10? You’re in the right place. In this tutorial, I will guide you step-by-step on how to run Disk Cleanup on Windows 10 in two ways.
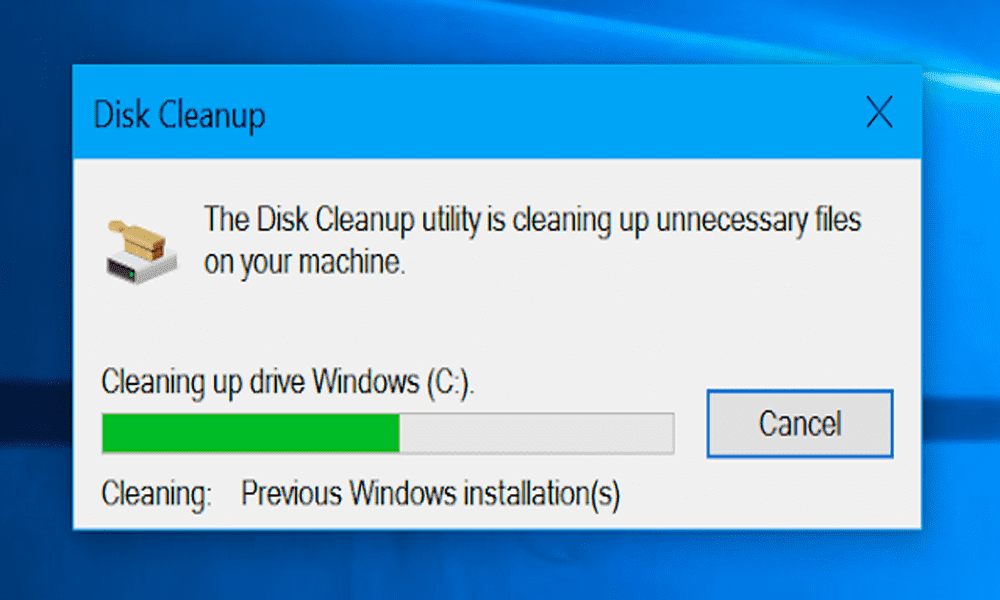
Disk cleanup is used to scan the disks on your computer and remove unnecessary files by deleting them. It is very useful especially if you noticed that your computer is running slower than usual.
01. Run Disk Cleanup From cPanel
Follow the steps to run the Disk Cleanup from your cPanel account.
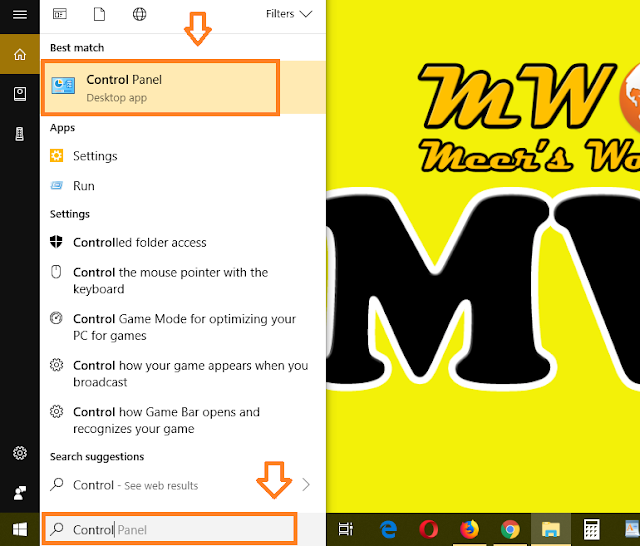
- Click on Windows Search Bar, located at bottom-left corner.
- Type Control Panel in the Search Bar.
- Click on the Control Panel from the listed results.
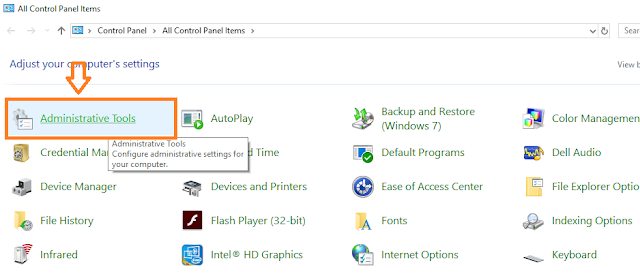
- Click on the Administrative Tools.
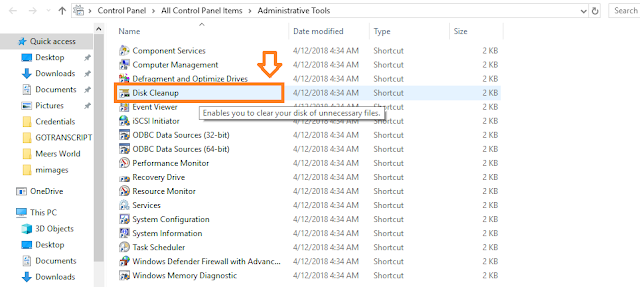
- Click on the Disk Cleanup.
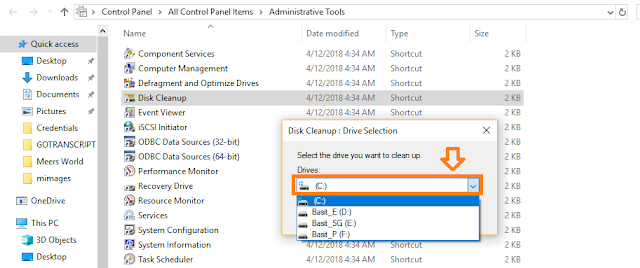
- Choose the Drive. Normally you run Disk Cleanup on C: drive because the Windows, Updates, and Software are installed in it.
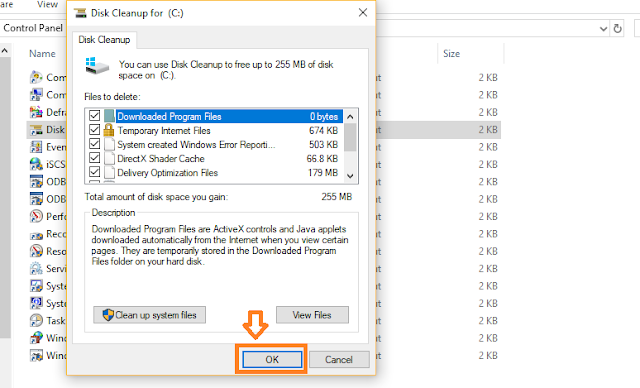
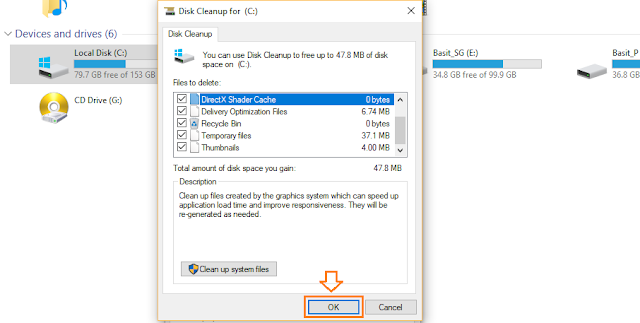
- You can see the files and folders taking the disk space. The Disk Cleanup also shows you the amount of disk space you can free by deleting the files.
- Tick the boxes and click on the OK button.
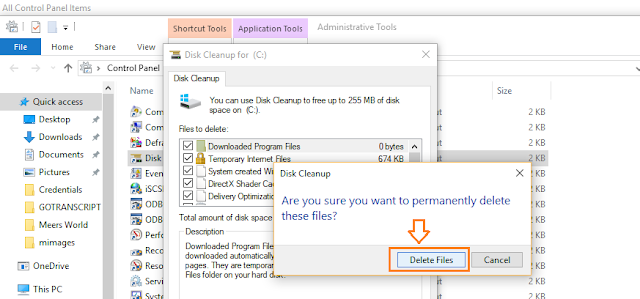
- Click on the Delete Files button.
02. Run Disk Cleanup Directly From a Drive
Follow the steps to run the Disk Cleanup directly from your disk drives.
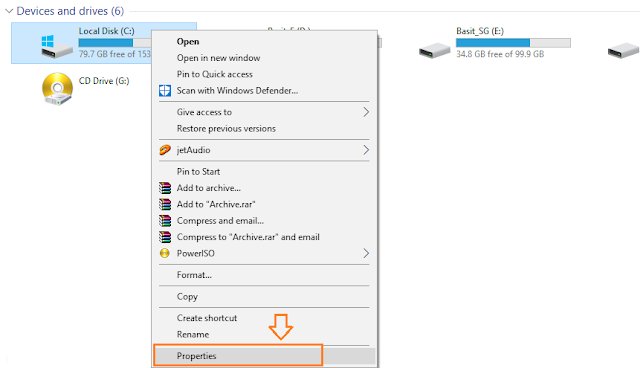
- Right-click on a Drive on which you want to run the Disk Cleanup.
- Click on the Properties.
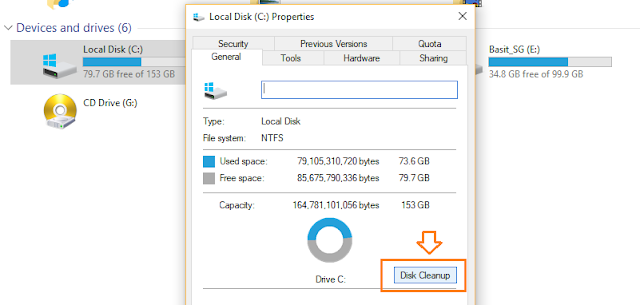
- Click on the Disk Cleanup button.
- Select the files and folders that you want to delete and cleanup.
- Click on the OK button.
If you like this post then don’t forget to share with people. Share you feedback in the comments section below.

Also Read
- How To Defragment Hard Disk In Windows 10? | Improve Computer Efficiency
- How To Shrink A Volume Or Partition In Windows 10 | Disk Partitioning
- How To Turn On/Off Windows Defender In Windows 10 | Real Time Protection
- How To Turn-Off Recent Items & Frequent Places From Quick Access In Windows 10
- How To Run Windows 10 In Safe Mode – Troubleshoot | Reset, Restore, Recovery



Leave a Reply