Do you want to get verified on Instagram to show Blue Tick (Verified Badge) next to your username? You’re in the right place.
In this tutorial, first I will guide you about the requirements (eligibility) of getting a Verification Badge on Instagram, and then how to submit a Verification Request on Instagram to show blue tick next to your username.
A Verified Badge on Instagram is a blue tick that appears next to your username. It tells that this Instagram account is authentic and belongs to a public figure, celebrity, influencer, blogger, gamer, athlete, or a famous brand. A Blue Tick helps Instagram users to find the real accounts of public figures, celebrities, and brands they want to follow.
Following topics will be covered in this posts:
- Eligibility Requirements for Getting a Verified Badge on Instagram
- Required Documents
- How to Apply for Verification Badge on Instagram
01. Eligibility Requirements for Getting a Verified Badge on Instagram
Following are some of the eligibility requirements that you must consider before applying to Verification Badge on Instagram.
- Your Instagram account must represent a registered business, real person, or other entity.
- Your Instagram profile needs to embody the distinct presence of the brand, person, or company it represents. Instagram does not validate profiles with a general interest, for example, @catmemes.
- Your Instagram profile must be made public, have a profile picture, a bio, and at least one post that has been published.
- Your account must represent a popular brand, person, or other organization that is frequently searched. The organization, name, or individual must be mentioned in several news outlets.
02. Required Documents
During filling the Verification Form, Instagram asks you to submit a document through which it verifies your identity. You have to provide the copy of one of the documents listed below, whichever is available.
- Driver’s license
- Passport
- National identification card
- Tax filing
- Recent Utility Bill
- Articles of corporation (Read: What are Articles of corporation?)
03. How to Apply for Verification Badge on Instagram
In this section, I will guide you step-by-step on how to apply for Verification Badge (Blue Tick) on Instagram.
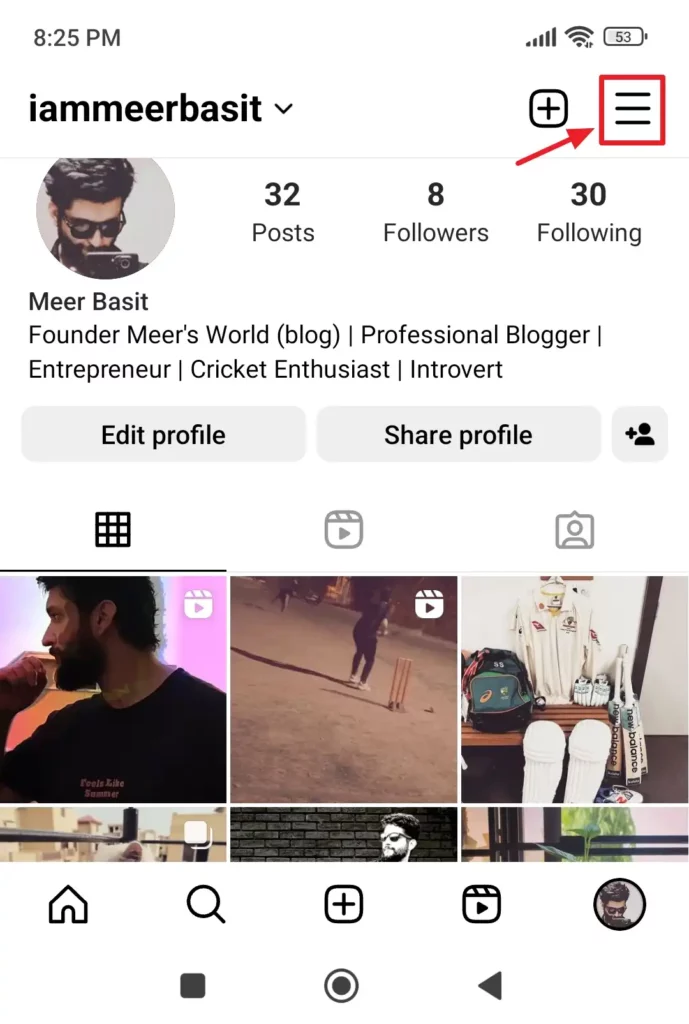
- Open your Instagram Profile.
- Tap on the Hamburger icon, located at your top right corner.
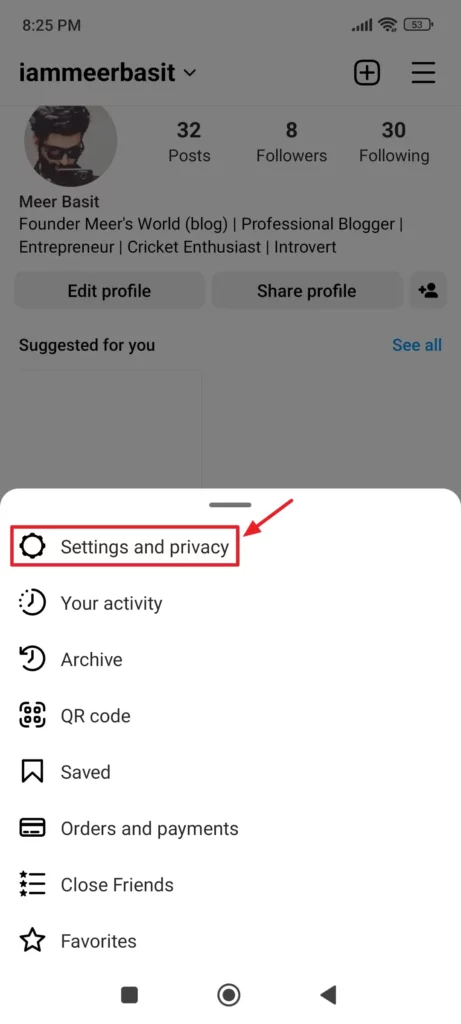
- Tap on the Settings and privacy.
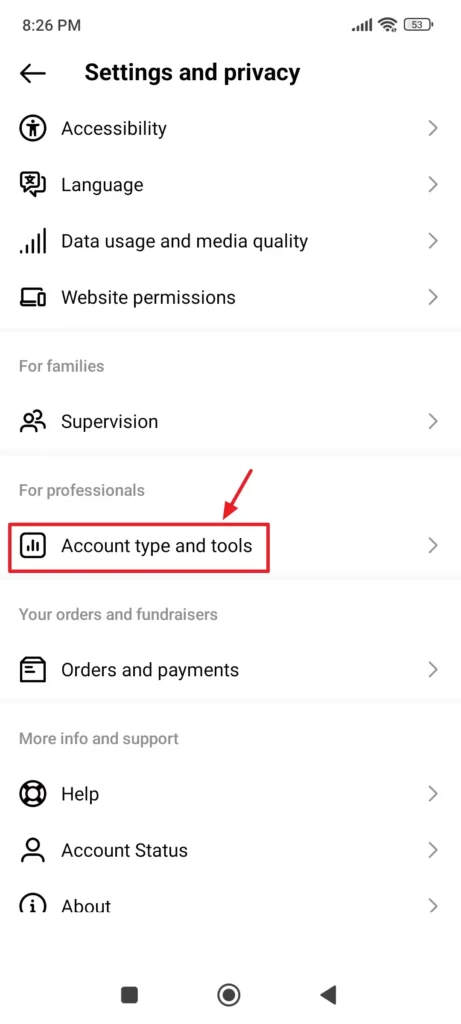
- Scroll-down to For professionals section.
- Tap on the Account type and tools.
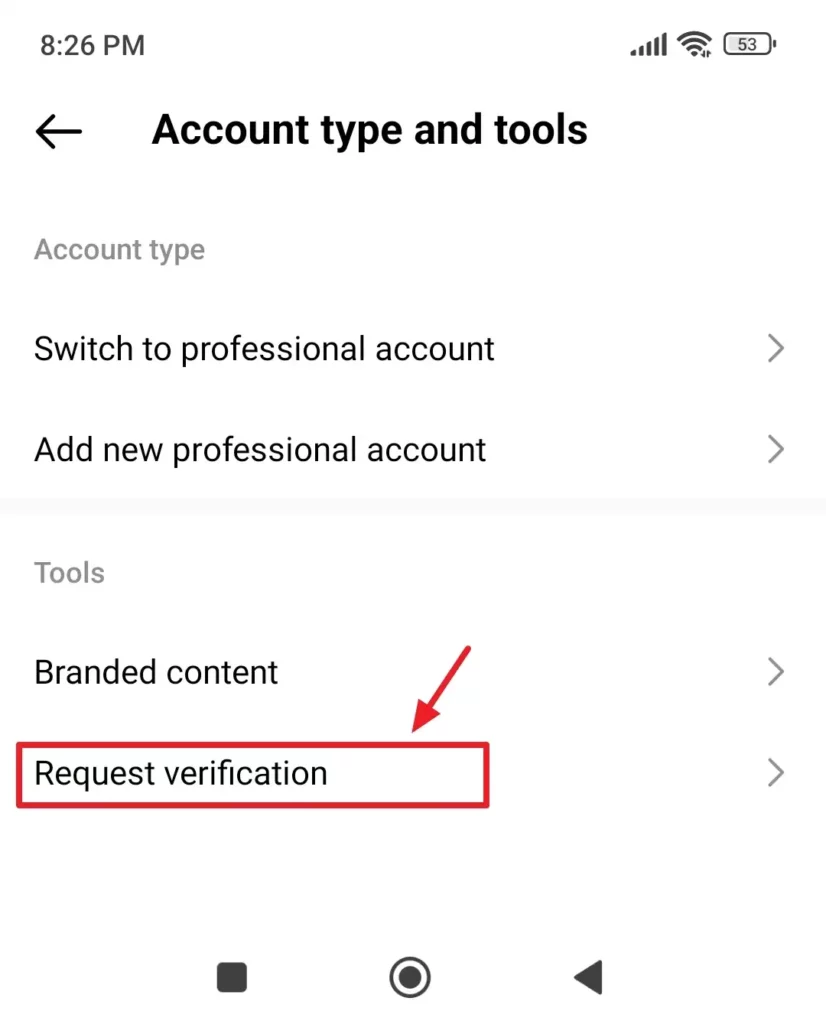
- Go to Tools section and click on the Request verification.
- Enter your Instagram Username and Full name.
- Select the Document type through which Instagram will verify your identity. You have following options: Driver’s license, Passport, National identification card, Tax filing, Recent Utility Bill, and Articles of corporation. After selecting the Document Type, tap on the Add file button to upload.
- Select your Category to confirm your notability. You have following category options: News/media, Sports, Government and politics, Music, Fashion, Entertainment, Digital creator/blogger/influencer, Gamer, Global business/brand/organization, and other.
- Choose your Country/Region.
- Remaining fields are optional i.e. Audience, Also known as, and Links.
- Click on the Submit button.

Once Instagram reviews your verification request you’ll receive a notification whether your account has been verified or not. If your request is denied, you can submit a new request after 30 days.
If you like this post then don’t forget to share with your friends. Share your feedback in the comments section below.

Also Read
- How To Hide/Block Instagram Posts & Stories Of Someone Without Unfollowing Him
- How To Monitor Facebook Messenger & Instagram With This Simple Hack
- How To View Full Size Instagram Profile Picture | Private & Public
- How to Buy Blue Internet Checkmarks on Tumblr
- How to Create a Pin, Idea Pin, & Board on Pinterest
- How to Memorialize Facebook Account
- Winning The Instagram Marketing Race: Strategies To Outshine Your Brand’s Competitors
- How to Fix Instagram Error “Your Post Could Not be Shared. Please Try Again”



Leave a Reply