Do you want to swap faces on Photoshop by editing someone’s head/face to another body/person? You are in the right place. In this tutorial, I will guide you step-by-step on how to swap the faces on Photoshop.
Adobe Photoshop is such an amazing photo editing tool that you can make wonders. You can do those things that you have never imagined. Swapping the faces is also one such thing that you can do on Photoshop and show amazing results.
Below is the final output of face swapping. At your left is Pakistani cricketer Yasir Shah. I have swapped the face of Yasir Shah with the Lionel Messsi, a world famous footballer from Argentina.

How to Swap Faces on Photoshop
Before you swap faces, make sure that at least the direction of faces should be same, not necessarily 100 percent.
- Open the picture on Photoshop whose face you want to swap.

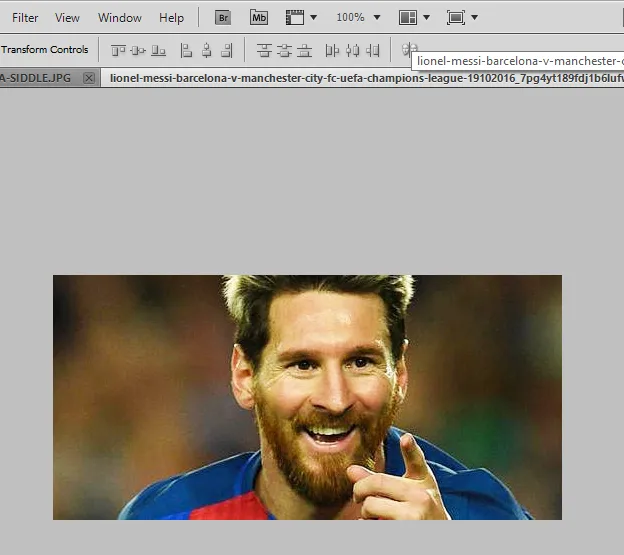
- Open the other picture on a new tab of Photoshop with which you want to swap the face.
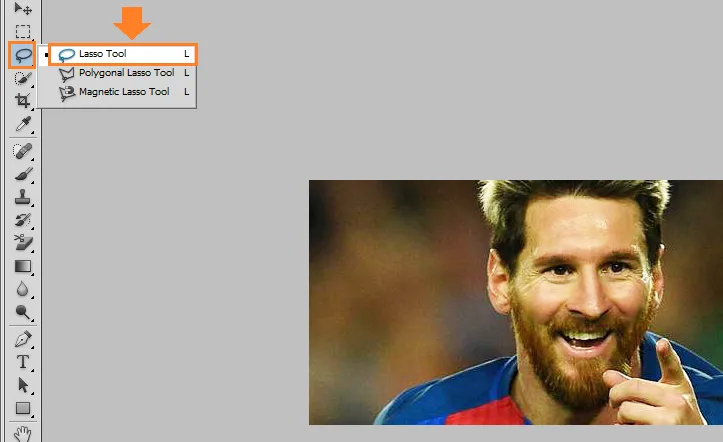
- Go to Tools Bar and select the Lasso Tool.
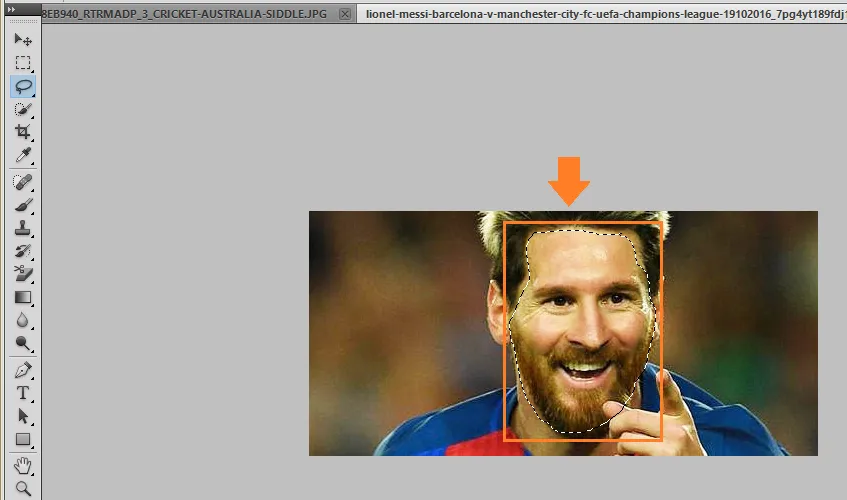
- Select the face only, not ears and hair.
- Start from any point and end at the same point.
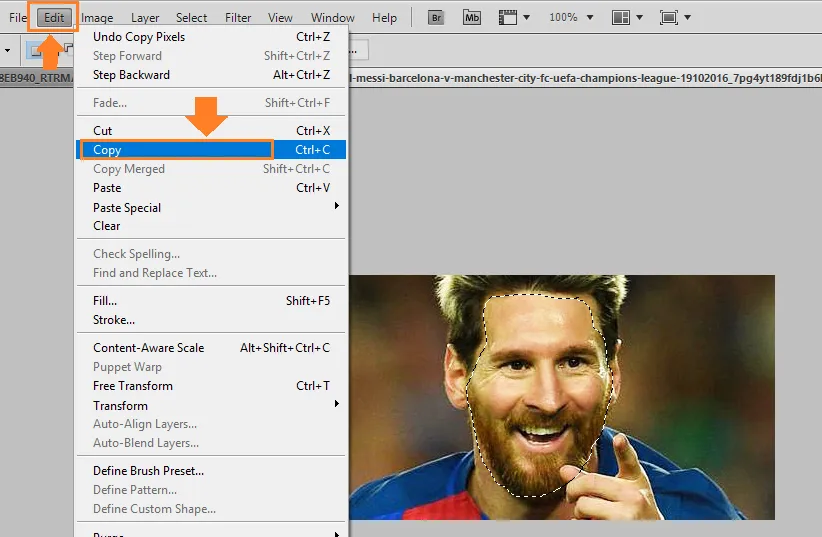
- Go to Edit tab and click on the Copy.
- Go to other tab.
- Open the Edit tab again & click on the Paste or press Ctrl + V.
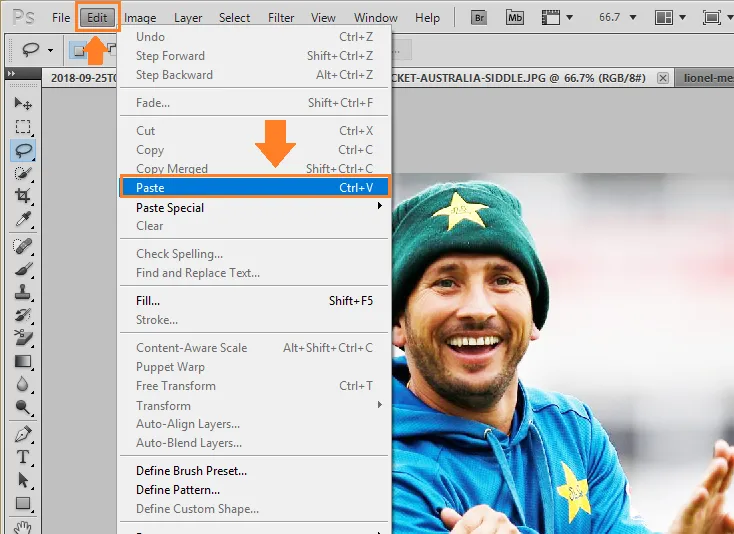
- Right click on the face that you have just pasted and click on the Free Transform. You can do it from Edit tab as well.
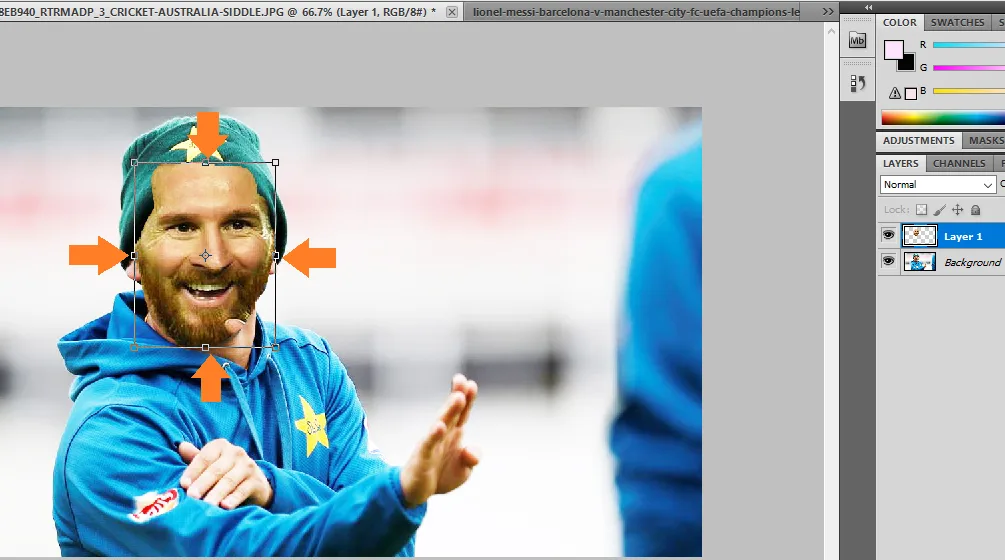
- You can drag, rotate, increase & decrease the size of the face.
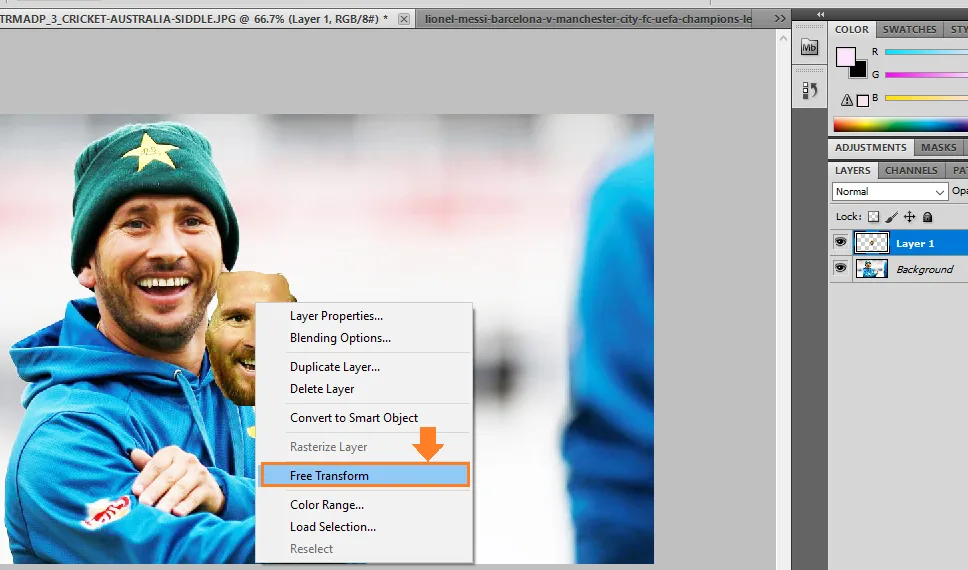
- Now drag the face over the other face. Adjust the size & direction.
- Decrease the Opacity, so that you can see the background face.
- Adjust the eyes of both the faces.
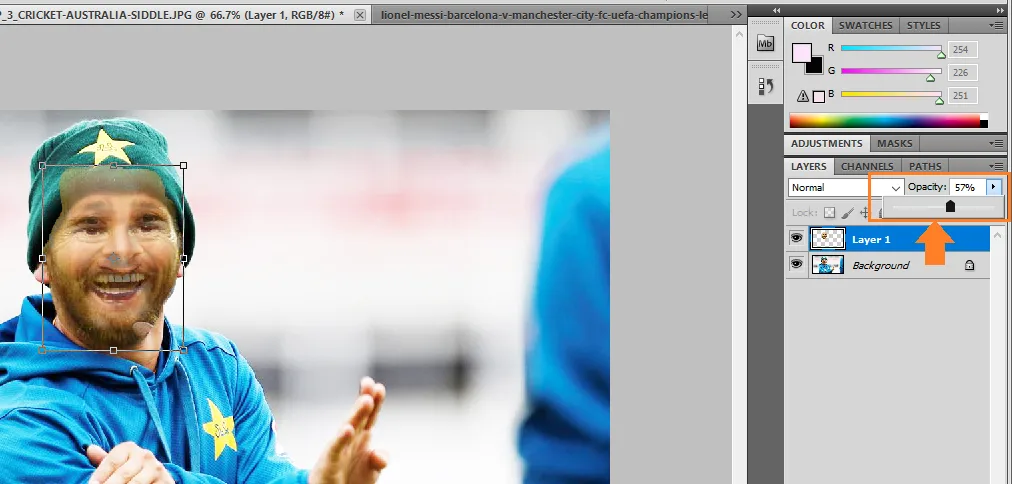
- You can see that I have adjusted the eyes almost perfectly.
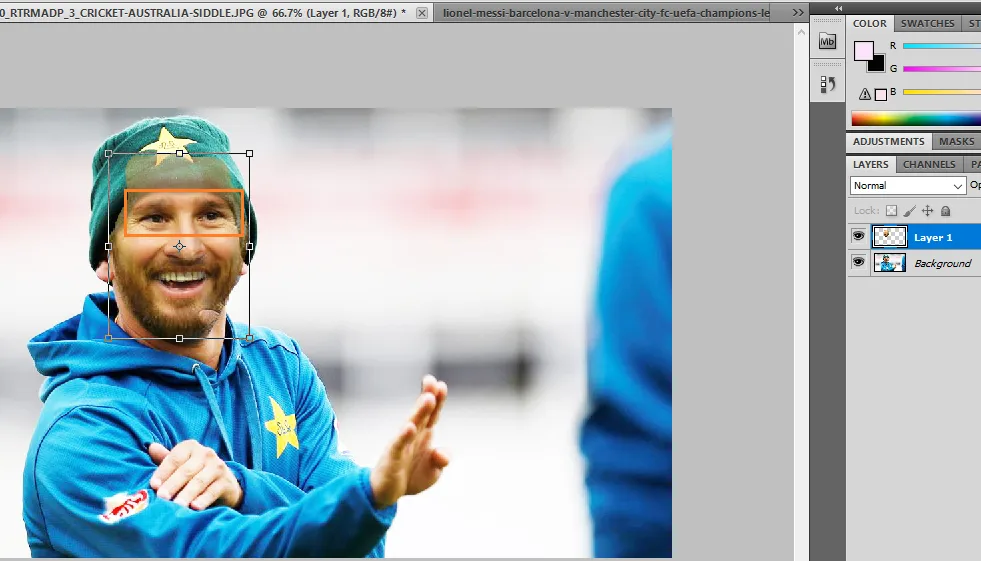
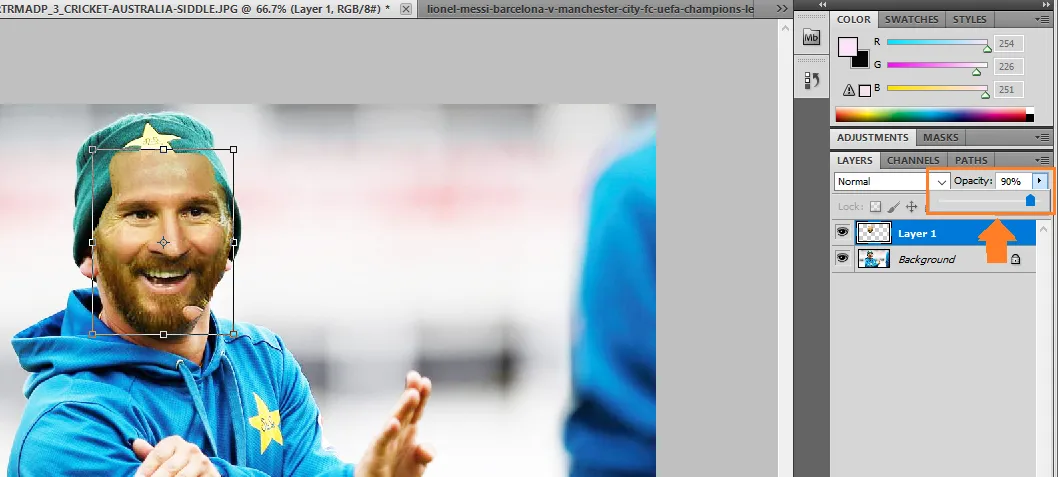
- Now increase the Opacity. I have increased it to 90%. After that press the Enter, so that it will be placed there.
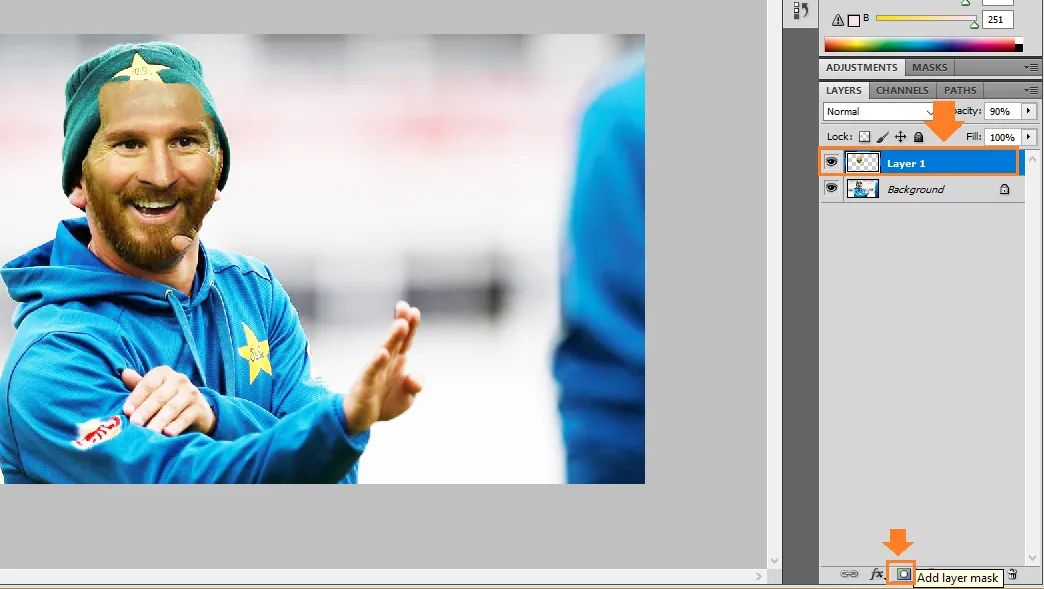
- Select the Layer 1, by default it would have been selected.
- Go to the bottom & click on the Add layer mask icon.
- Go to Tools Bar and select the Brush Tool. Choose the size of the Brush accordingly.
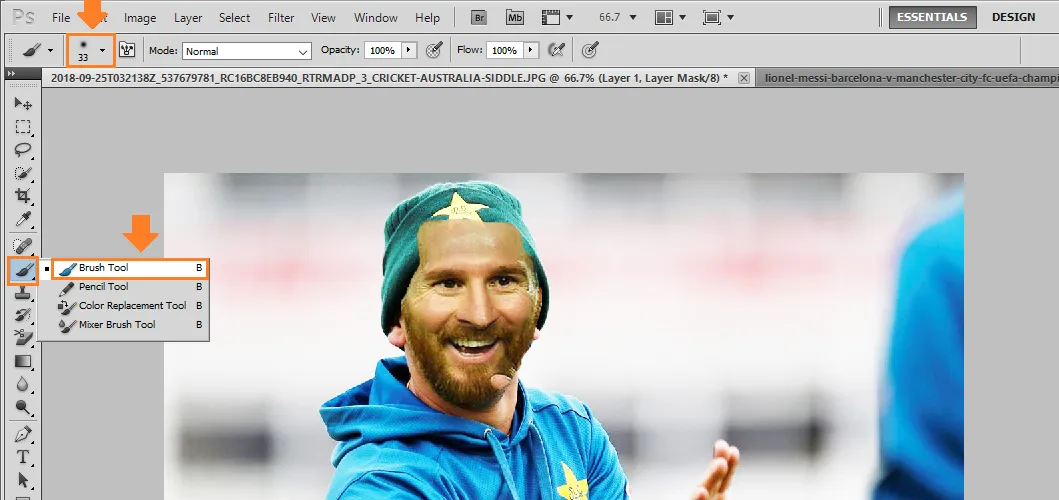
- Click and Drag the Brush to remove the unnecessary/extra parts of top face. As you drag the brush the background behind those parts will appear. Normally you start from sides of the face.
- It is better to zoom the picture when you edit because it becomes more clear and easier. Press Ctrl + to zoom.
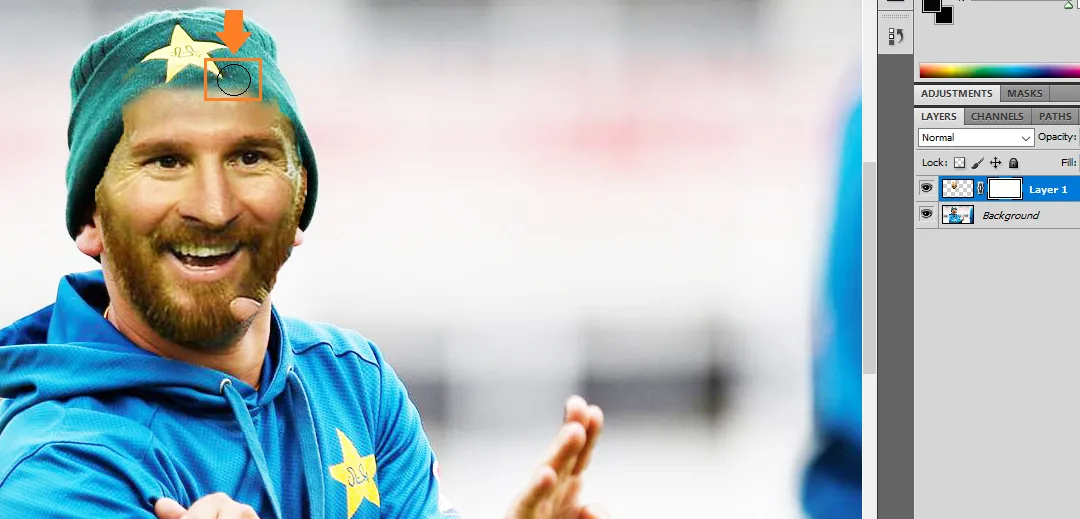
- Here is the final output. Yasir Shah has been transformed to Messi, & Messi is now a Pakistani cricketer :).

If you like this post then don’t forget to share with other people. Share your feedback in the comments section below.

Also Read


Leave a Reply