Do you want to show a responsive Contact Form on a separate page on your Blogger blog? You’re in the right place. In this tutorial, I will guide you step-by-step on How to add Contact Form code in a separate Blogger page and show it to visitors on your blog.
Contact Form is one of the important modules of a website that allows visitors of your blog to send messages. A message that is submitted via the Contact Form is sent to your Blogger email.
Following topics will be covered in this tutorial:
- How to Add Contact Form Code on Blogger Page
- How to Add Contact Form Gadget
- Hide the Contact Form Gadget
- View the Contact Form on a Separate Page
RELATED
- How to Set Up Blogger Settings | A to Z
- Introduction to Theme Customize Settings in Blogger
- How To Redirect Blogspot To Custom Domain | Set Up A Third Party URL
01. How to Add Contact Form Code on Blogger Page
In this section, I will create a separate page on Blogger with the name “Contact Us” and add Contact Form code in it.
- Click the Pages from the sidebar.
- Click + NEW PAGE button located on top.
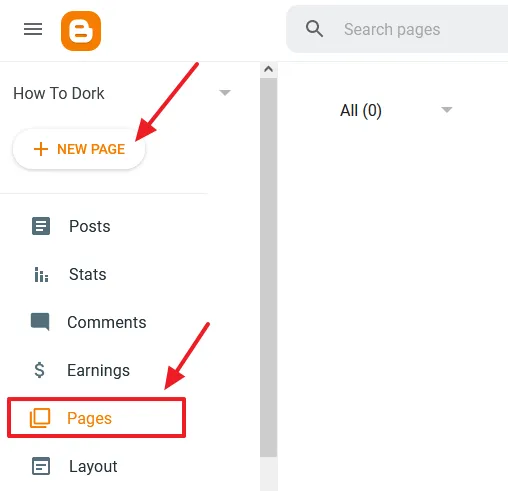
- In the page Title enter Contact Us.
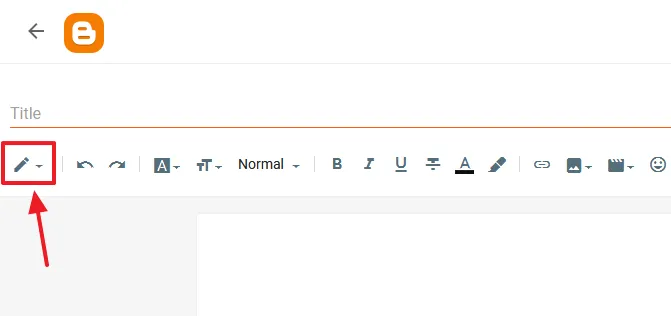
- Click the Edit Icon (Pencil) on HTML Editor to change its view from Compose to HTML.
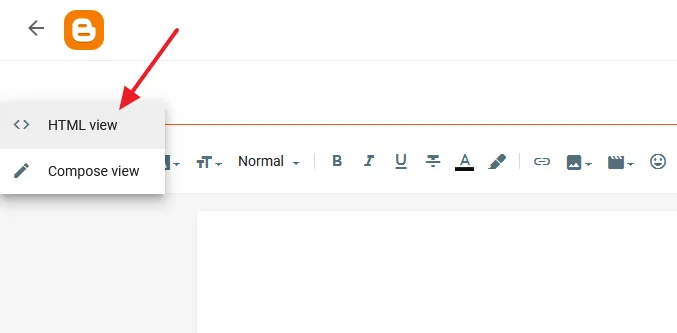
- Click the <>HTML view.
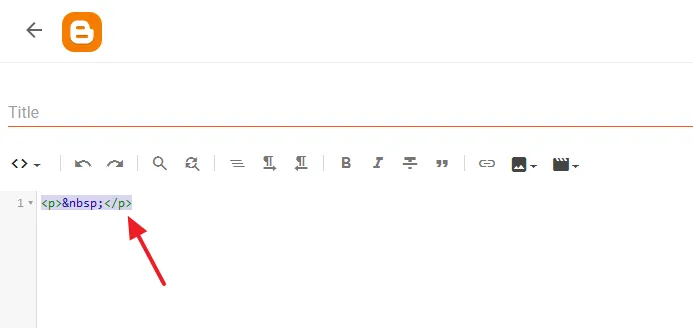
- Remove the existing code in HTML view before you paste the Contact Form code.
- Paste the Contact Form code in the HTML view that I have shared below.
- After you paste the code click the Compose view.
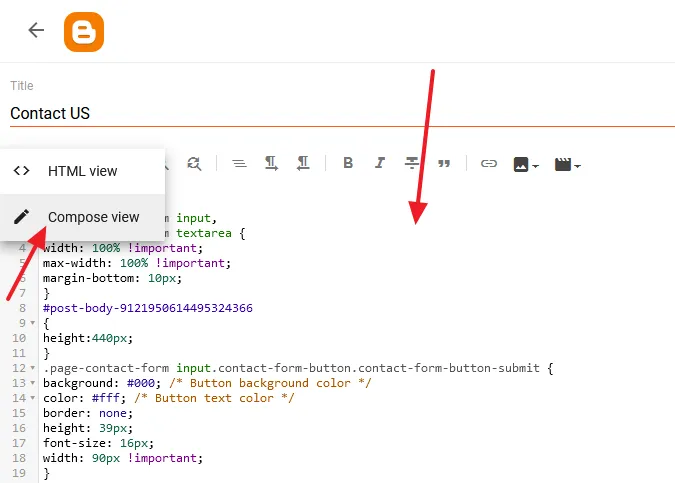
This is the code of Contact Form that you have to add in the HTML view of the page.
<style>
.page-contact-form input,
.page-contact-form textarea {
width: 100% !important;
max-width: 100% !important;
margin-bottom: 10px;
}
#post-body-9121950614495324366
{
height:440px;
}
.page-contact-form input.contact-form-button.contact-form-button-submit {
background: #000; /* Button background color */
color: #fff; /* Button text color */
border: none;
height: 39px;
font-size: 16px;
width: 90px !important;
}

.page-contact-form input.contact-form-button.contact-form-button-submit:hover {
background: #777; /* Button background hover color */
color: #fff; /* Button text hover color */
}

</style>
<br />
<div class="contact-form-widget page-contact-form">
<div class="form">
<form name="contact-form">
Name:<br />
<input class="contact-form-name" id="ContactForm1_contact-form-name" name="name" size="30" type="text" value="" />
E-mail: <span id="required">*</span><br />
<input class="contact-form-email" id="ContactForm1_contact-form-email" name="email" size="30" type="text" value="" />
Message: <span id="required">*</span><br />
<textarea class="contact-form-email-message" cols="50" id="ContactForm1_contact-form-email-message" name="email-message" rows="5"></textarea>
<input class="contact-form-button contact-form-button-submit" id="ContactForm1_contact-form-submit" type="button" value="Submit" />
<br />
<div class="contact-form-error-message" id="ContactForm1_contact-form-error-message">
</div>
<div class="contact-form-success-message" id="ContactForm1_contact-form-success-message">
</div>
</form>
</div>
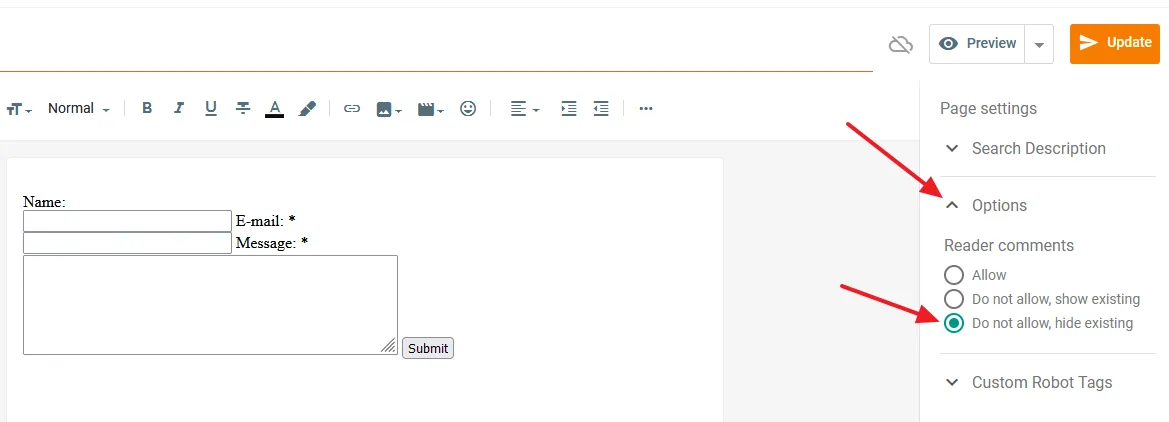
</div>- The code of the Contact Form is successfully added in the page. Now go to Options from the sidebar and turn off the readers comments on Contact Us page.
- Click Do not allow, hide existing.
- Click Publish or Update button, whichever appears.
02. How to Add Contact Form Gadget
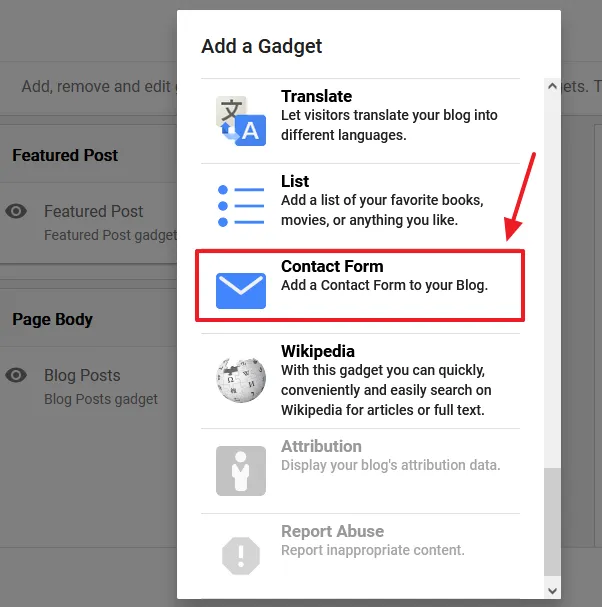
The Contact Form code has been added in a separate page, now you have to add the Contact Form gadget on your Blogger Layout. The Contact Form gadget provides the functionality to the Contact Form that you have added in the separate page.
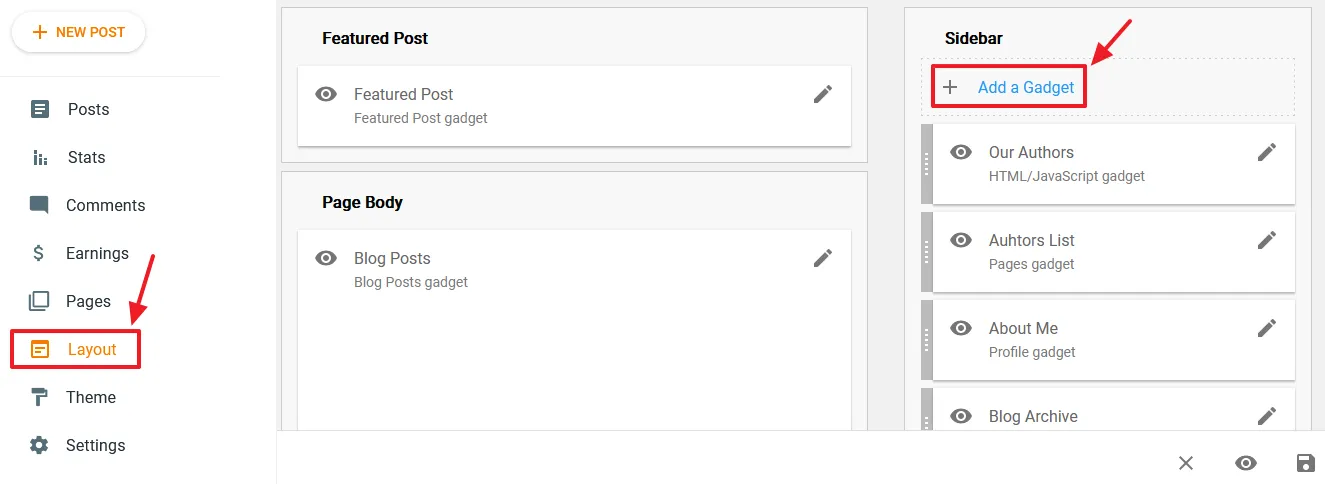
- Click the Layout from the sidebar.
- Click Add a Gadget link on the Sidebar section. If your theme doesn’t have sidebar you can add the gadget on some other section.
- Click the Contact Form gadget.
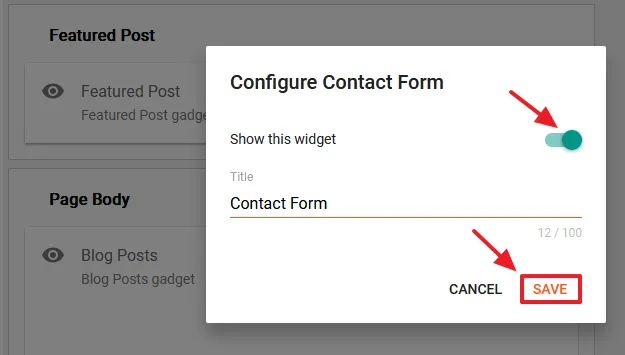
- Enable Show this widget.
- Click SAVE.
03. Hide the Contact Form Gadget
In this section, I will guide you on how to hide the Contact Form gadget because you don’t need to display it on your blog, you need its functionality in background. You can use a CSS code to hide the Contact Form gadget, as I have shared below.
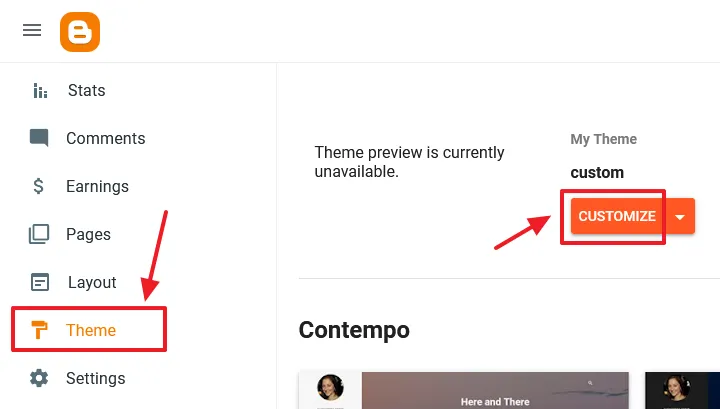
- Click Theme from the Sidebar.
- Click the CUSTOMIZE button.
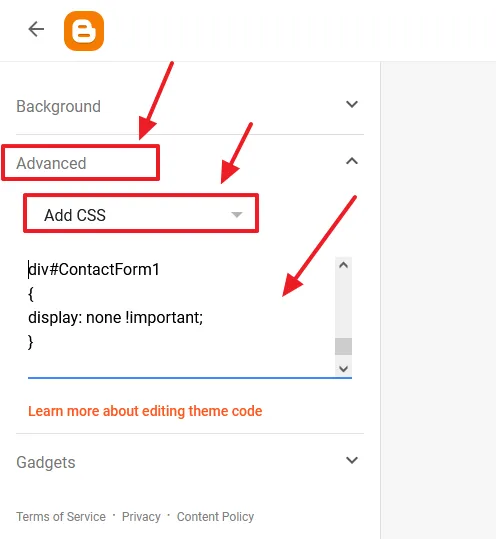
- Expand the Advanced tab.
- Select Add CSS option.
- Copy & Paste below CSS code in white space. Click Save after you paste the code.
div#ContactForm1
{
display: none !important;
}
04. View the Contact Form on a Separate Page
In this section, I will guide on how to get the Contact Us page link and view Contact Form.
- Go to Pages and hover mouse over the Contact Us page.
- Click the View (Eye) icon to see how your Contact Us page looks like, as shown in the next step.
- In order to copy the link of your Contact Us page right-click over View icon and click Copy Link. It would be like, “https://www.”Your Blog URL”/p/contact-us.html“.
- Provide a link to Contact Us page on your blog’s Menu (Navigation) from where visitors can easily access.

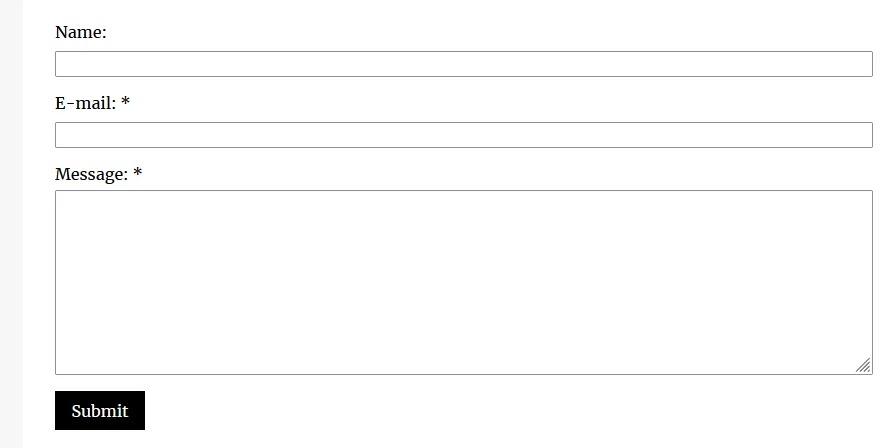
- This is how the Contact Us Form looks like on desktop devices. Submit a message to test whether it works or not.
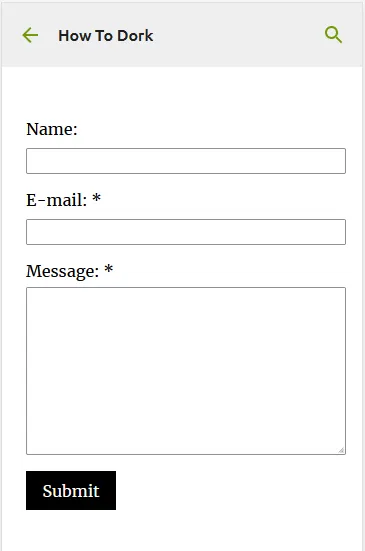
- The Contact Us form on mobile devices.
- If you like this post then don’t forget to share with people. Share your feedback in the comments section below.
Also Read
- How To Display Google Ads On Blogger – Step By Step | Monetize A Blogger Blog
- How To Configure Google Search Console On Blogger | Add Sitemap | Inspect URL
- How To Add & Test Custom Robots Txt On Blogger/Blogspot | Blogger SEO
- How To Configure/Set The Custom Robots Header Tags On Blogger | Blogger SEO
- How To Filter Blogger Posts By Authors | List of Authors Widget



Leave a Reply