Do you want to know how to enable the Hibernate option on Windows 10? You’re in the right place.
In this tutorial, I will guide you step-by-step on how to enable Hibernate option on Windows and how to hibernate your computer.
By default Windows 10 doesn’t show Hibernate on Power options because it is disabled. It only shows Sleep, Shutdown, & Restart options. Though you can use Sleep, but Sleep is used mostly when you are away for a very short time. On Sleep, the computer shuts down when battery is low or the power is switched-off. You can loss your unsaved data.
How to Enable Hibernate Option on Windows 10
Follow the steps to enable or turn-on the Hibernate option on Windows 10.
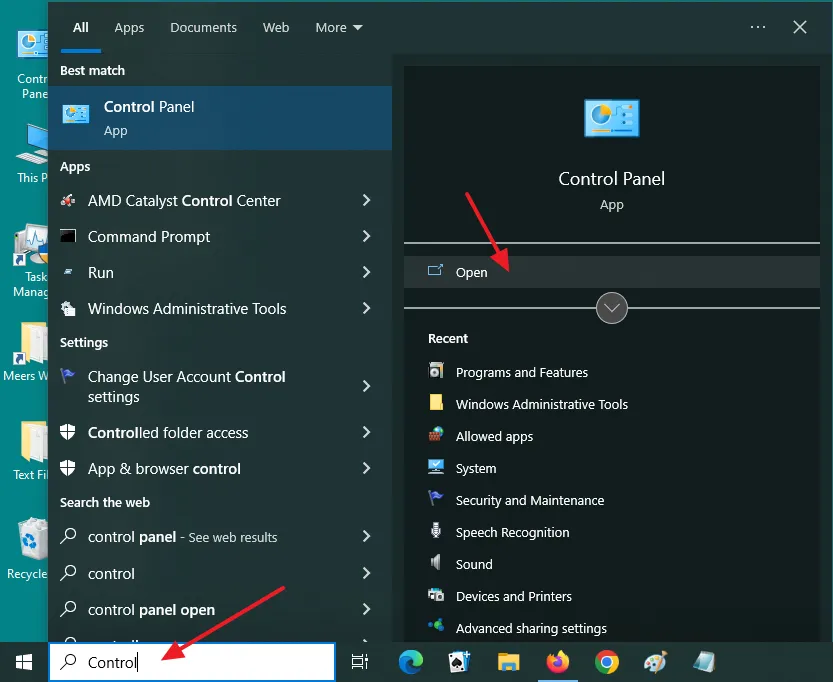
- Type Control Panel on Type here to search bar, located at the bottom-left corner of your desktop.
- Click on the Control Panel or Open.
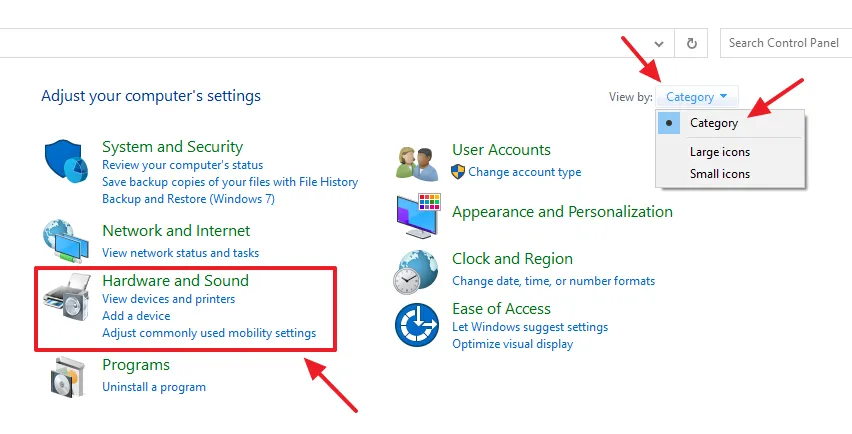
- First of all go to View by and select the Category option from the list.
- Click on the Hardware and Sound.
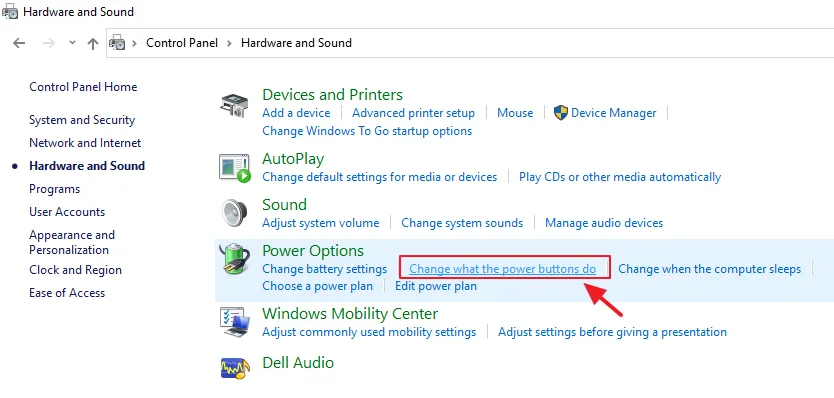
- Under the Power Options click on the Change what the power button do link.
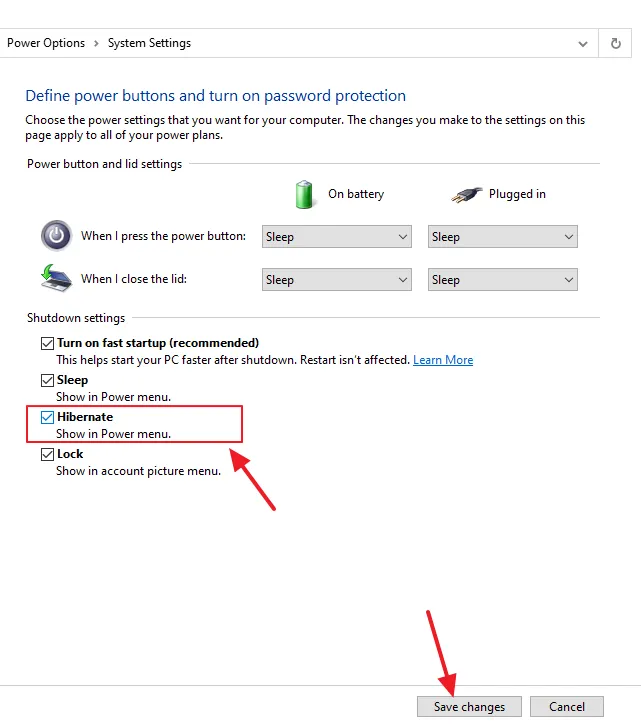
- On Shutdown settings you can see that Hibernate option is unchecked.
- Click on the Change setting that are currently unavailable link.
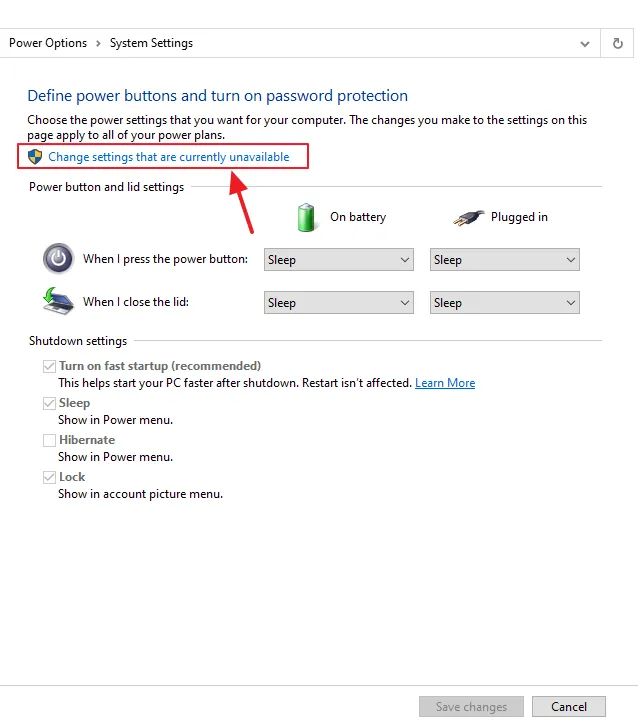
- Under the Shutdown settings, check (tick) the Hibernation option.
- Click on the Save changes button.
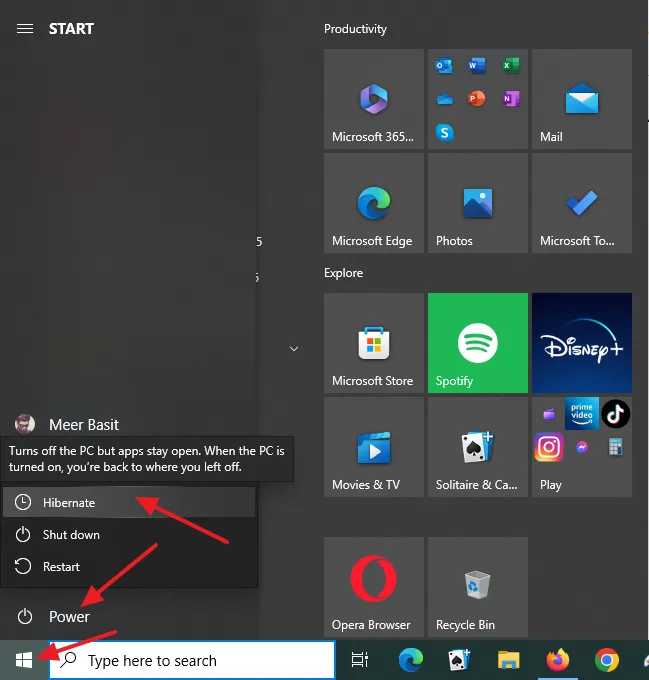
- Click on the Start icon, located at the bottom left corner of your desktop.
- Click on the Power icon. Now you can see that Hibernate option is available. The Hibernate option will also be available on Windows 10 Lock Screen.
If you like this post then don’t forget to share with other people. Share your feedback in the comments section below.
Also Read
- How To Lock Your Windows 10 PC | Protect Your PC
- How To Reset/Change The Admin Password In Windows 10
- How To Run Windows 10 In Safe Mode – Troubleshoot | Reset, Restore, Recovery
- How To Show Default Desktop Icons In Windows 10 – My Computer, Recycle Bin
- How to take Screenshot of Windows Login Screen | Snipping Tool



Leave a Reply