Do you want to take the screenshot of Windows login screen? You’re in the right place. In this tutorial, I will guide you step-by-step on how to take a screenshot of Windows login screen using the Snipping Tool.
On Windows, you can take a screenshot by pressing the PrintScr button, but for windows Login Screen the PrintScr doesn’t work.
Since every problem has its solution, you can still take a screenshot of Windows login screen using the Snippet Tool, a standard tool for taking screenshots.
Following topics will be covered in this post:
- Turn off the Real-Time Protection of Windows Defender
- Add Snippet Tool to Windows Registry
- Take a Screenshot of Login Screen Using Snippet Tool
01. Turn Off Real-time Protection of Windows Defender
Windows Defender’s real-time protection does not allow snipping tool to appear on Windows Login Screen, so before you add Snipping Tool to Windows Registry you must turn off Windows Defender’s real-time protection.
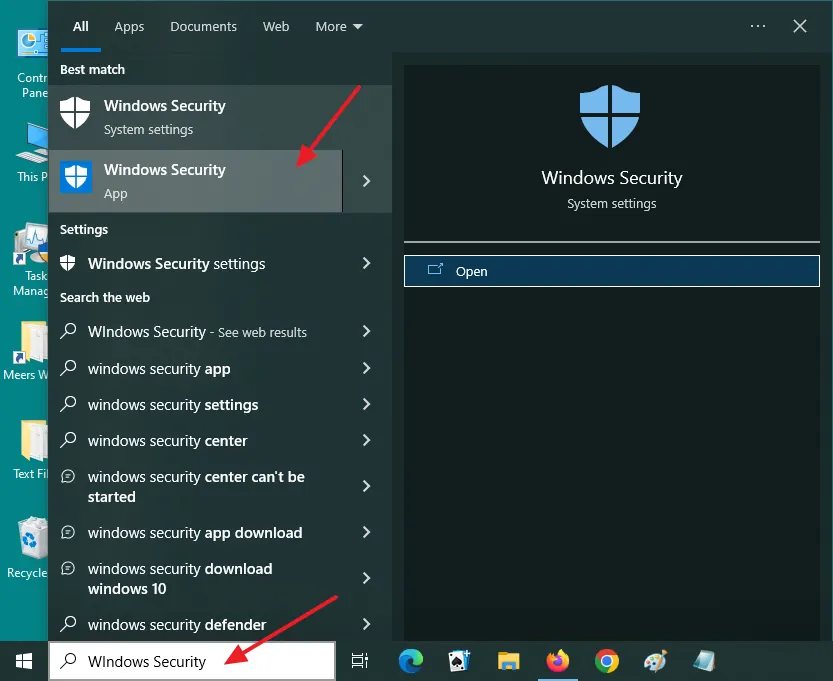
- Enter Windows Security in the Type here to search bar.
- Click on the Windows Security.
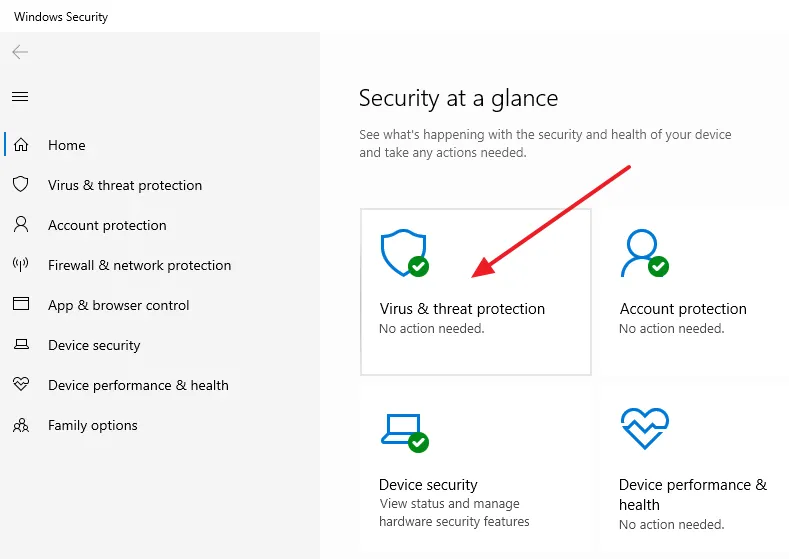
- Click on the Virus & threat protection.
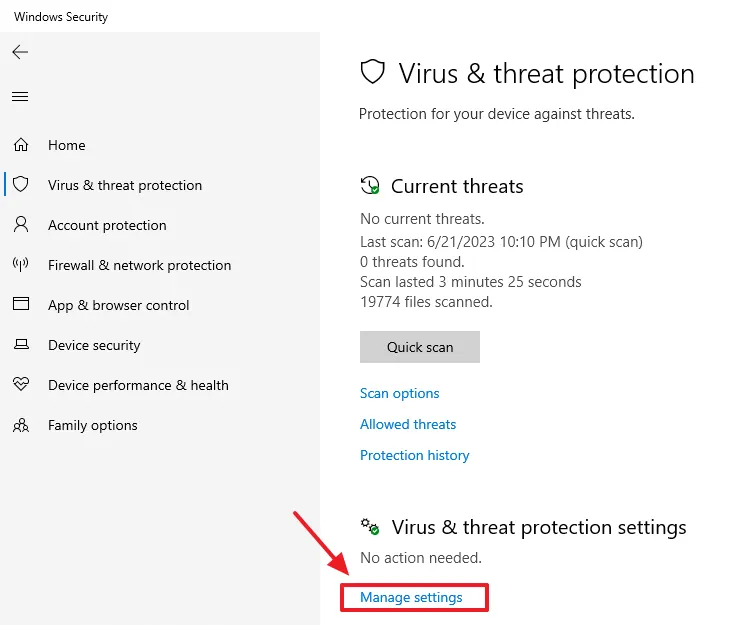
- Scroll-down to Virus & threat protection settings section.
- Click on the Manage settings.
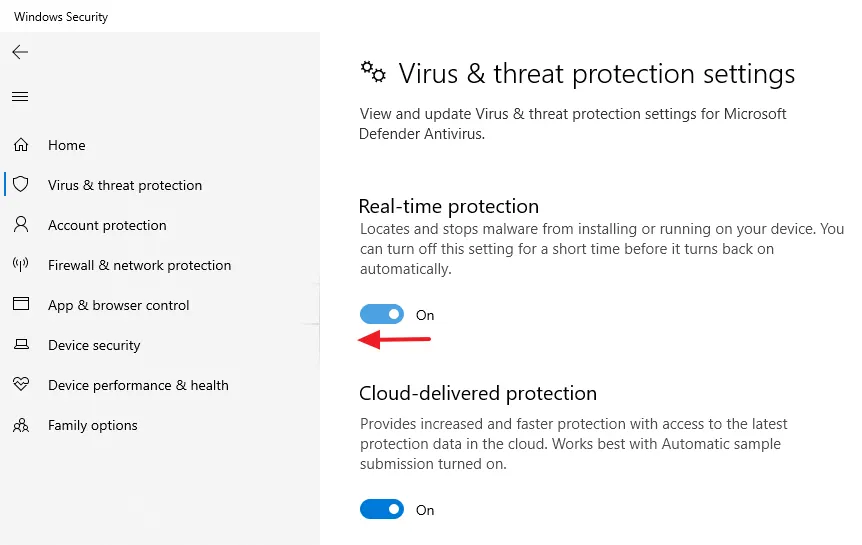
- Drag the Slider of Real-time protection towards your left to turn it off.
02. Add Snipping Tool to Windows Registry
In this section, I will guide you on how to add Snippet Tool to Windows Registry so that it will be available on Windows Login Screen.
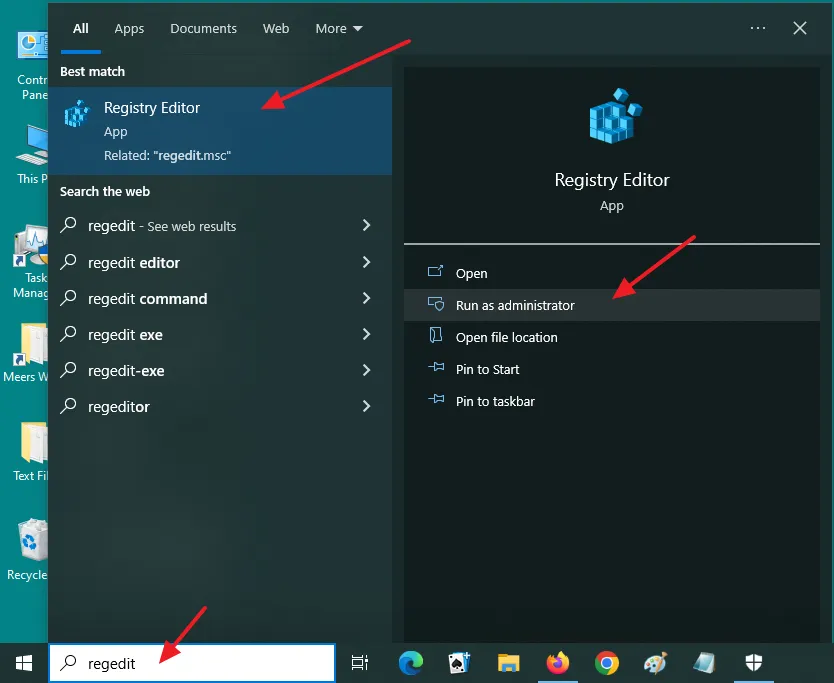
- On Windows Search Bar, located at the bottom-left corner of your desktop screen, type regedit.
- Select the Registry Editor and open it as Run as administrator.
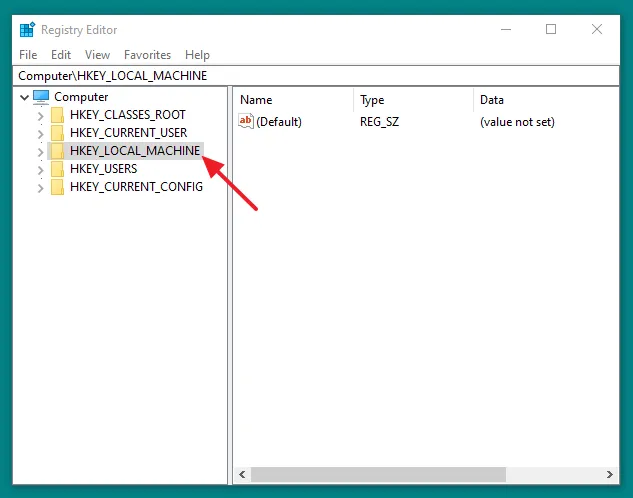
- Expand the HKEY_LOCAL_MACHINE directory.
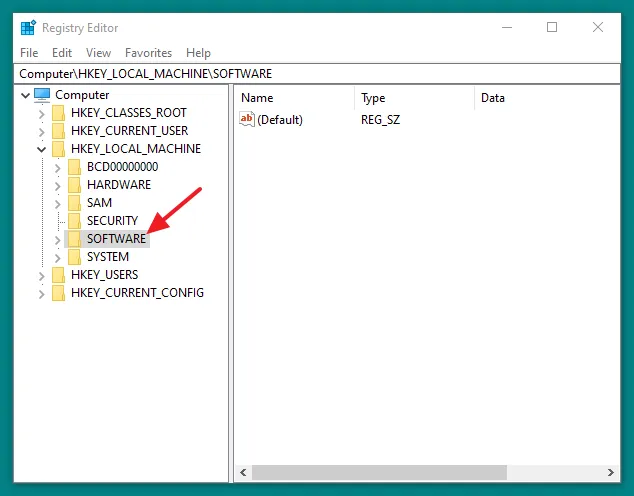
- Expand the SOFTWARE directory.
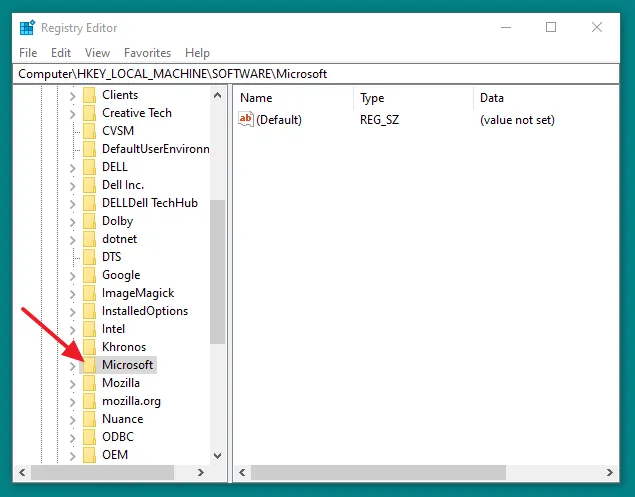
- Expand the Microsoft directory.
- Expand the Windows NT directory.
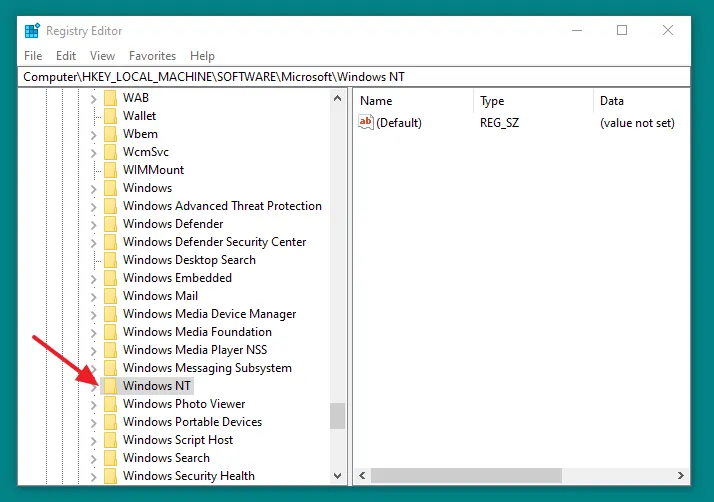
- Expand the CurrentVersion directory.
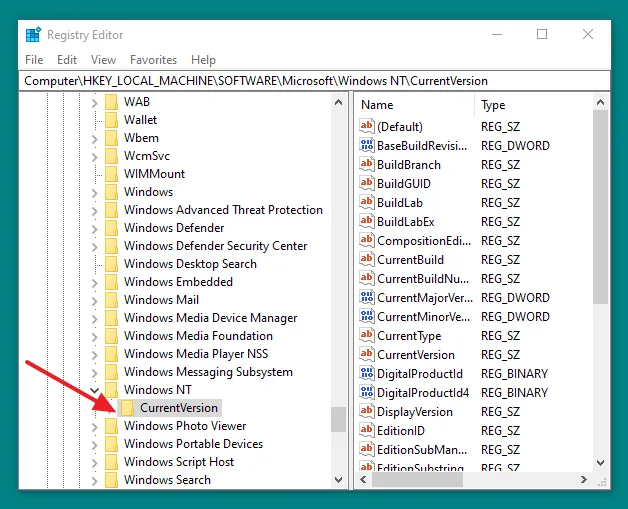
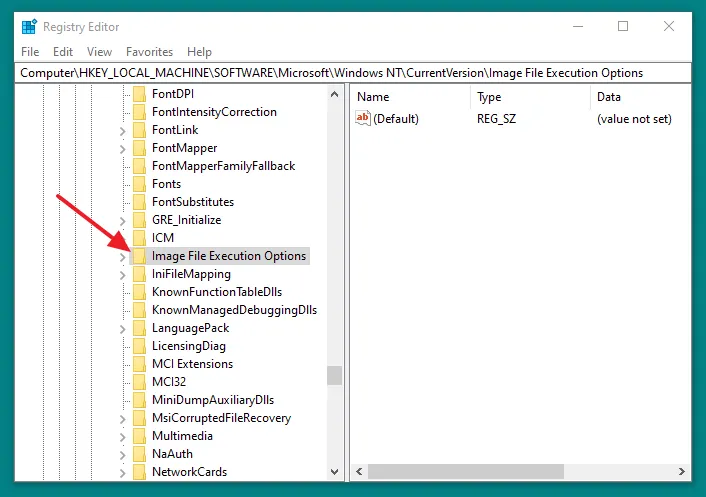
- Right-click on the Image File Execution Options directory.
- Hover over New and click on the Key.
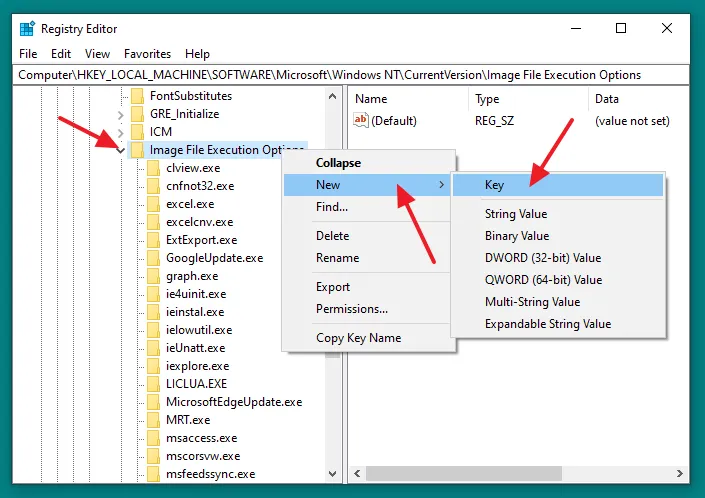
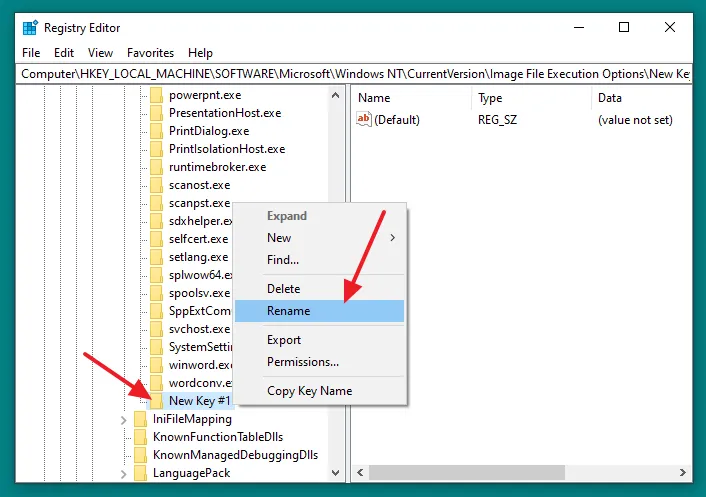
- A New Key is created. Right click on it and click on the Rename.
- Rename it to utilman.exe.
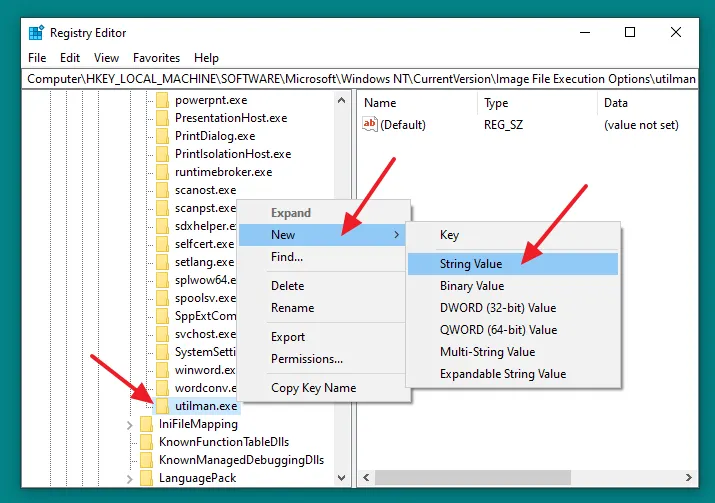
- Right-click on the utilman.exe.
- Hover over New and click on the String Value.
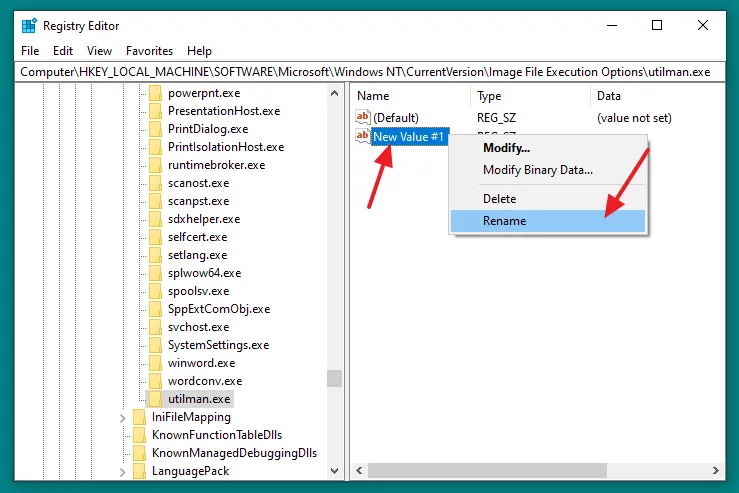
- Right click on New Value #1 and click on the Rename.
- Rename it to Debugger.
- Right-click on the Debugger and click on the Modify…
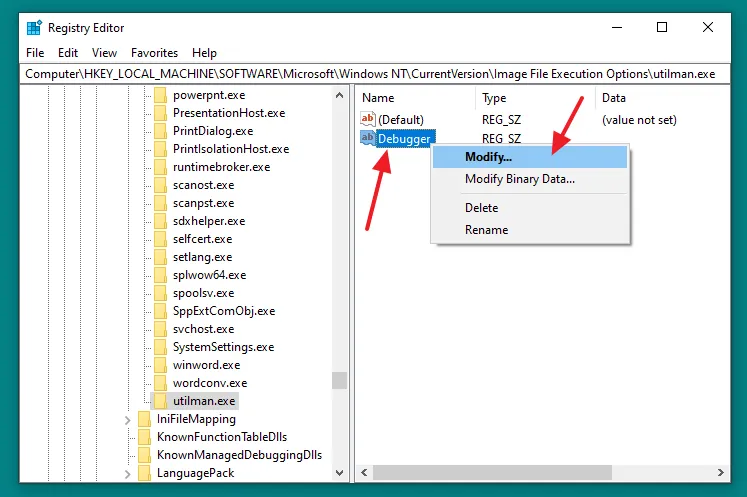
- In the Value data paste the path of Snipping Tool:
C:\\Windows\System32\SnippingTool.exe- Click on the OK button.
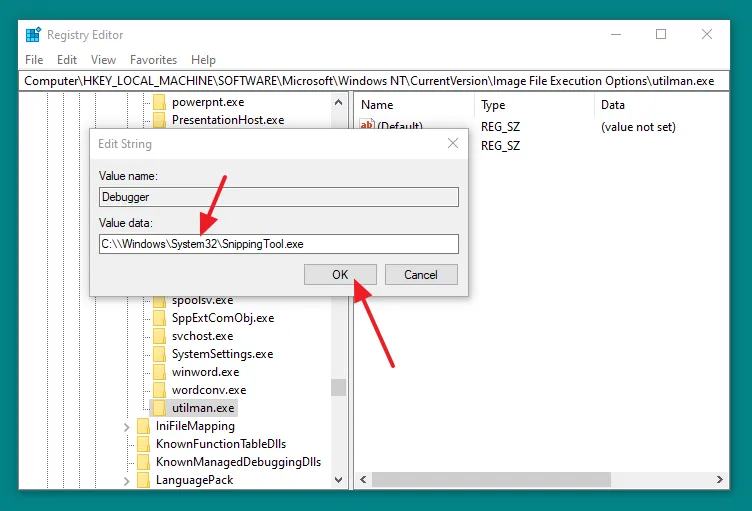
Note: If you turn on Windows Defender’s Real-time protection again, it might delete Debugger String. In that case you have to create the String “Debugger” again in the same manner.
03. Take a Snapshot With Snipping Tool
In this section, I will guide you step-by-step on how to take a snapshot of Windows Login Screen with Snipping Tool.
- Lock the screen by pressing the Windows Key + L.
- Click on Ease of access button.
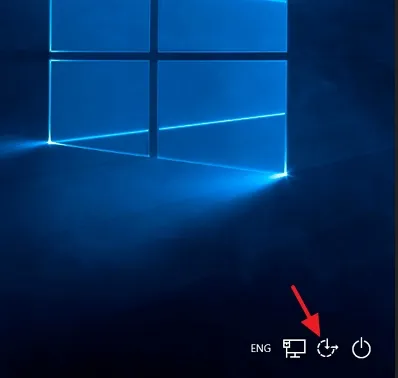
- The Snipping Tool will appear on top of your Login Screen.
- Select the Mode. There are 4 Modes i.e. Free-form Snip, Rectangular Snip, Window Snip, and Full-screen Snip.
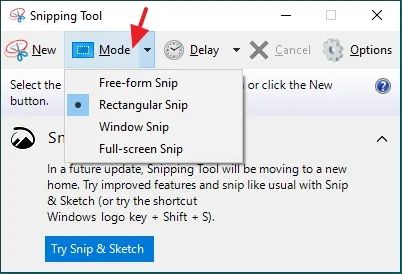
- After selecting the Mode click on the New to take the screenshot.
- With Free-form mode you can draw any shape and capture its screenshot. The Window and Full-screen modes capture the screenshot of whole screen. With Rectangular mode you can select the rectangular area and capture its screenshot.
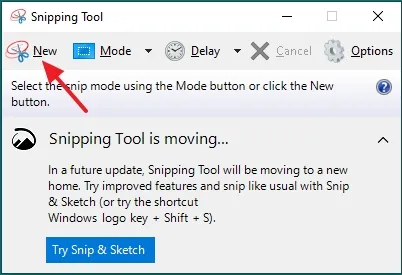
- The captured screenshot will be opened on the Snipping Tool.
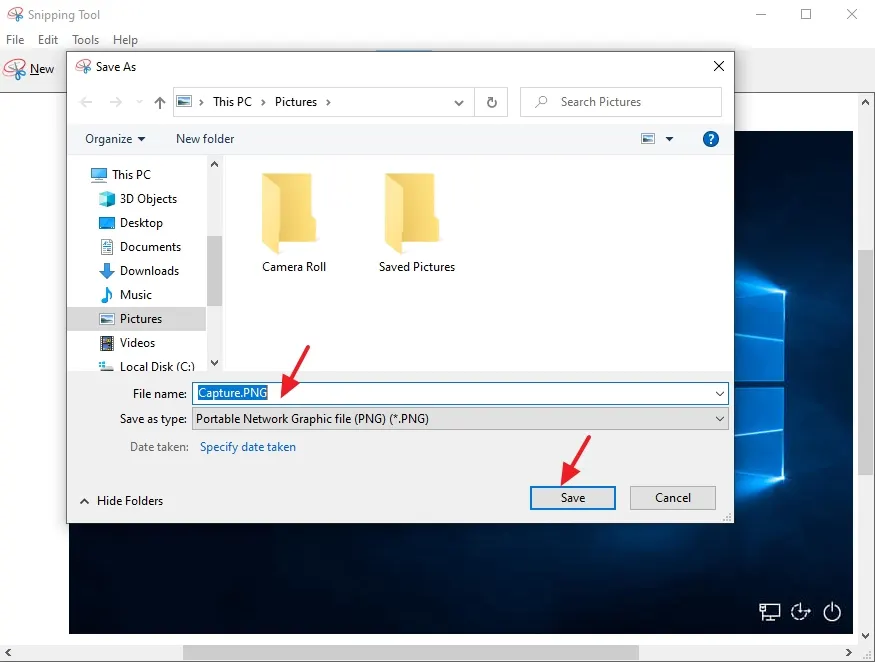
- Go to File and click on the Save As…
- Choose the Save Location on your computer where screenshot will be saved.
- Click on the Save button to save the screenshot to your computer.
Note: In some cases Windows doesn’t allow the Save As window to open. If it happens you can’t save the screenshot to your computer. You have to check your Windows security and hardware settings.
If you like this post then don’t forget to share with other people. Share your feedback in the comments section below.
Also Read
- How To Configure Gmail On Outlook | Grant Outlook Access To Gmail Account
- How To Defragment Hard Disk In Windows 10 | Improve Computer Efficiency
- How To Run Disk Cleanup On Windows 10? | Free Up Hard Disk Space On Windows 10
- How To Shrink A Volume Or Partition In Windows 10 | How To Do Partitioning In Windows 10?



Leave a Reply