Do you want to link/connect your Blogger blog to Google Analytics 4 account? You’re in the right place. In this tutorial, I will guide you step-by-step on how to sign-up for Google Analytics 4, and then how to link your Blogger blog with Google Analytics 4 by adding Measurement ID on Settings and Google Tag in the theme.
Google Analytics 4 (GA4) is the next generation of Google Analytics used to find out where readers are coming from and what they’re looking at on your blog. It uses Measurement ID to see how visitors interact with your site or in other words, it is used for tracking your blog.
With Google Analytics 4 you can get a deeper understanding of your customers, gives you the free tools you need to analyze data for your business in one place. It helps you to grow your business by analyzing what is working and what is not and how to fix.
Following topics will be covered in this tutorial:
- How to Sign Up for Google Analytics 4 (GA4)
- How to Add Google Tag in your Blogger Theme
- How to Add Google Analytics Measurement ID on Blogger
RELATED
- How to Set Up Blogger Settings | A to Z
- Introduction to Theme Customize Settings in Blogger
- How To Connect Blogger Blog to Google Search Console
- How To Link Google Analytics 4 to Google Search Console
01. How to Sign Up For Google Analytics
In this section, I will guide you on how to sign-up for Google Analytics 4 and get Measurement ID and Google Tag.
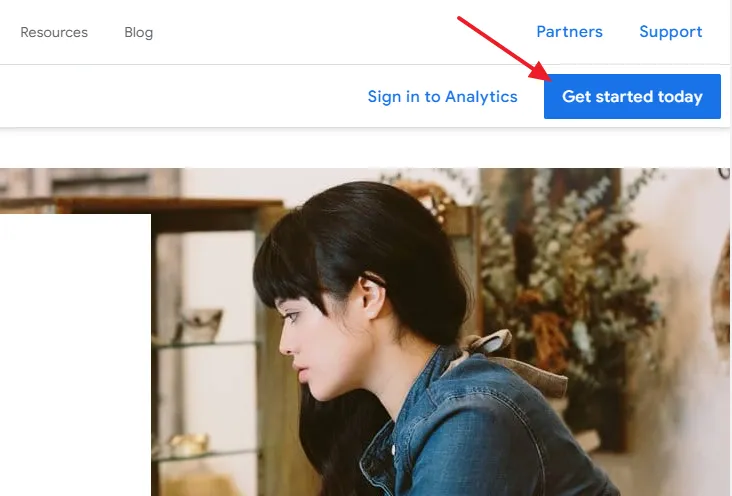
- Go To Google Analytics 4.
- Click the Get started today button.
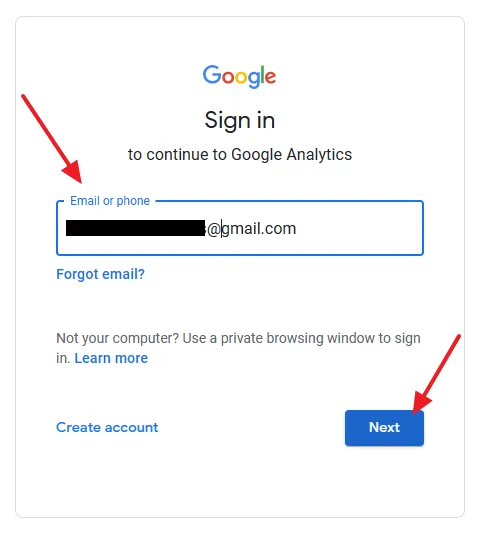
- Sign in to your Gmail account if you’re not already singed-in.
- Enter your Gmail ID and click Next.
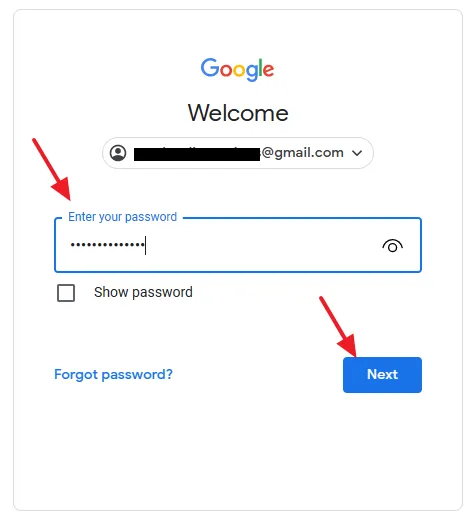
- Enter your Password.
- Click the Next button.
- On Welcome to Google Analytics page click the Start measuring button.

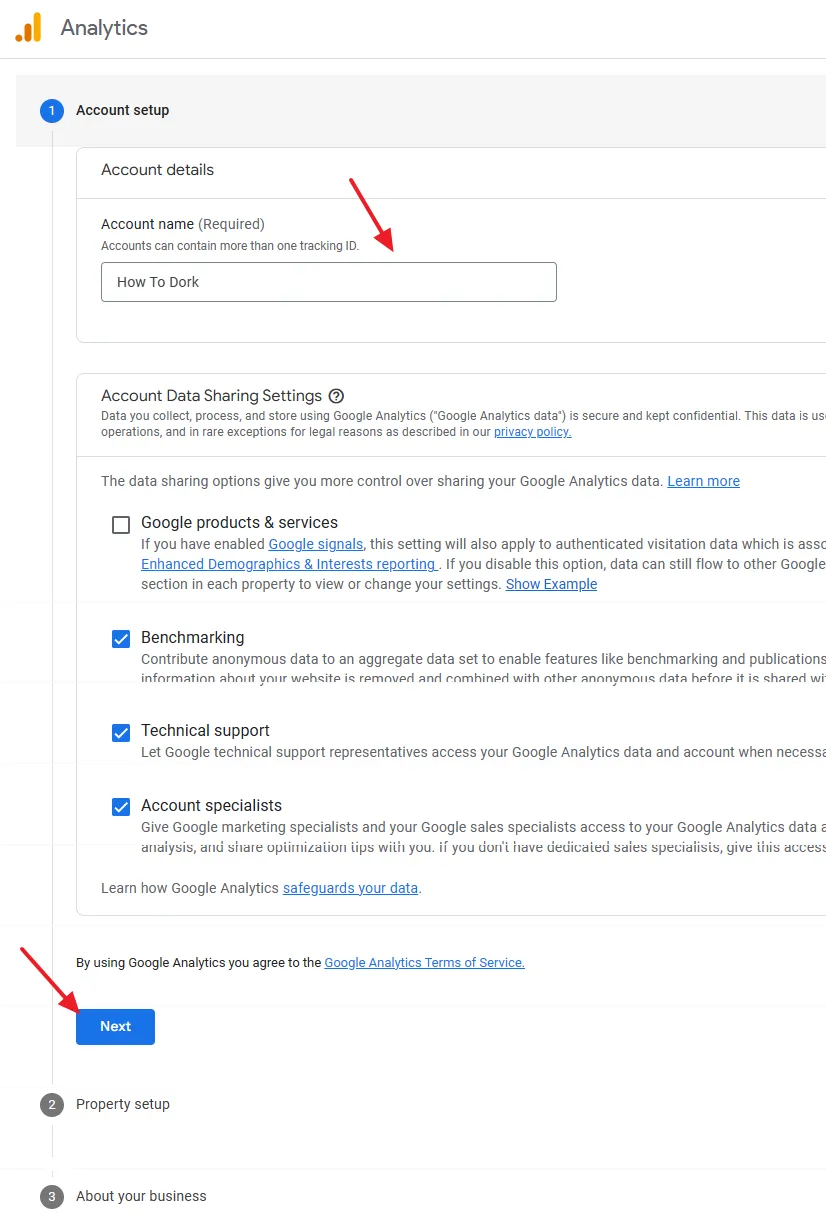
- Enter an Account name for your Google Analytics.
- Choose Account Data Sharing Settings.
- Click the Next button.
- In the Property name enter your blog/website name.
- Choose your Reporting time zone.
- Choose a Currency. Your AdSense earnings, Advertisement Cost, Sales Conversions, etc, will be shown in this currency.
- Click the Next button. Ignore the Show advanced options.
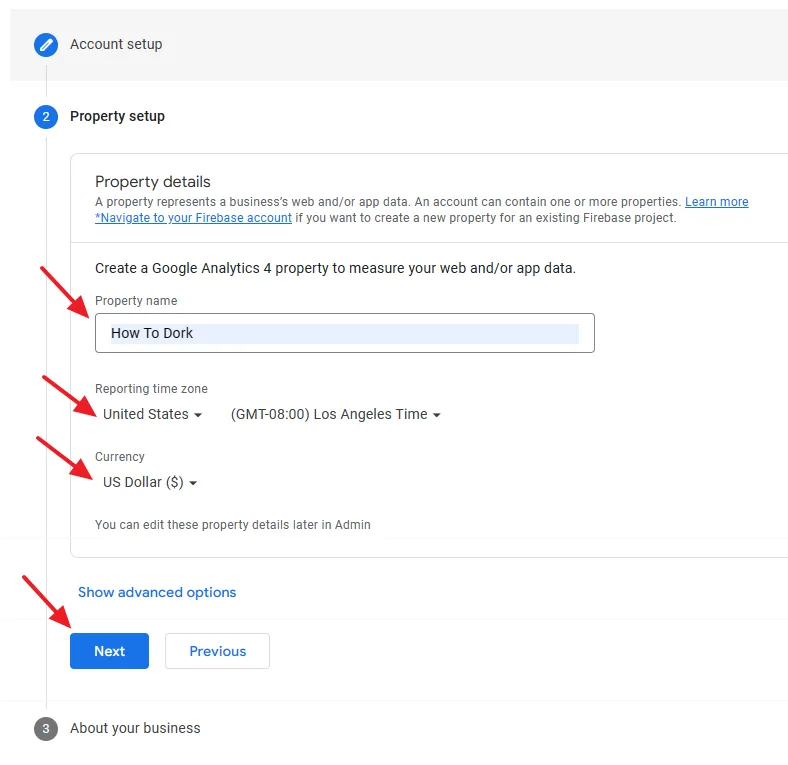
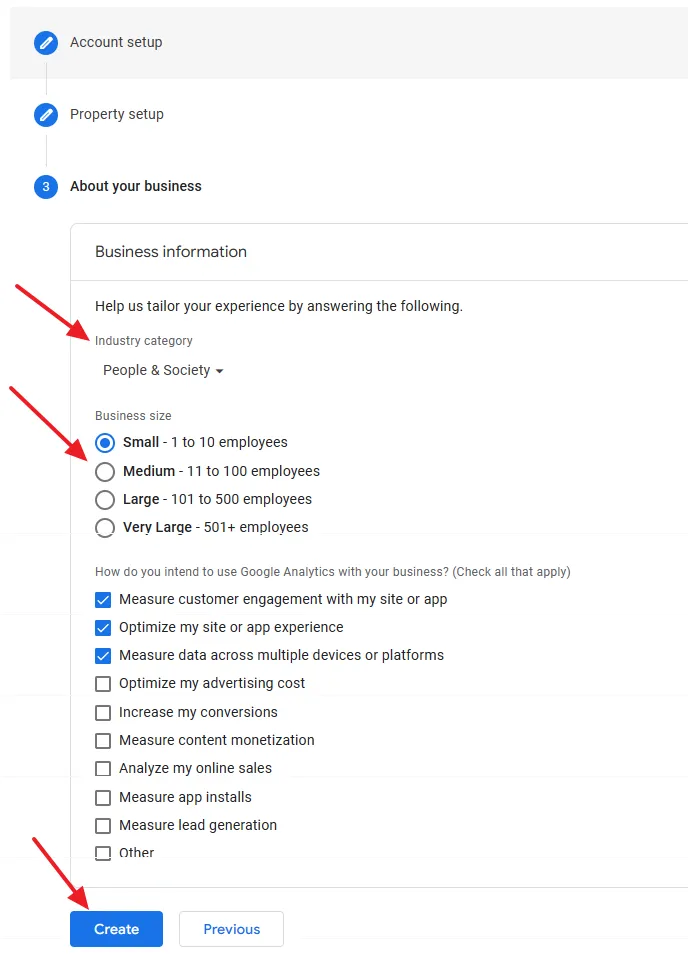
- On Industry category choose a category to which your blog niche belongs to.
- On Business size choose the size from the options. If you’re an individual, choose Small 1 to 10 employees.
- On “How do you intend to use Google Analytics with your business?” Choose the relevant options.
- Click the Create button.
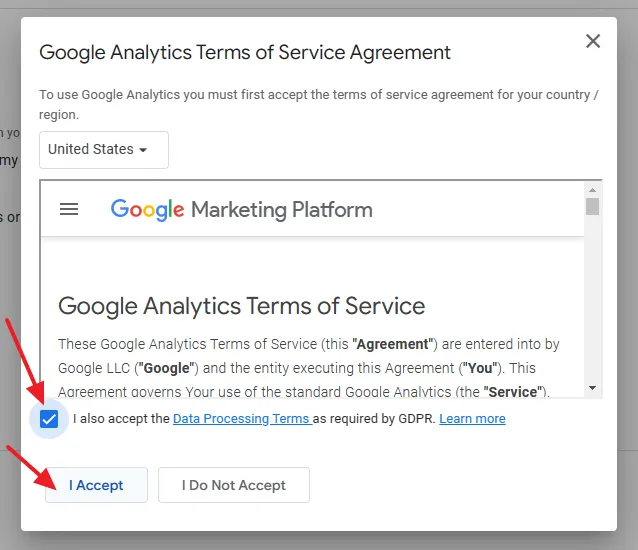
- Tick I also accept the Data Processing Terms a required by GDPR.
- Click the I Accept button.
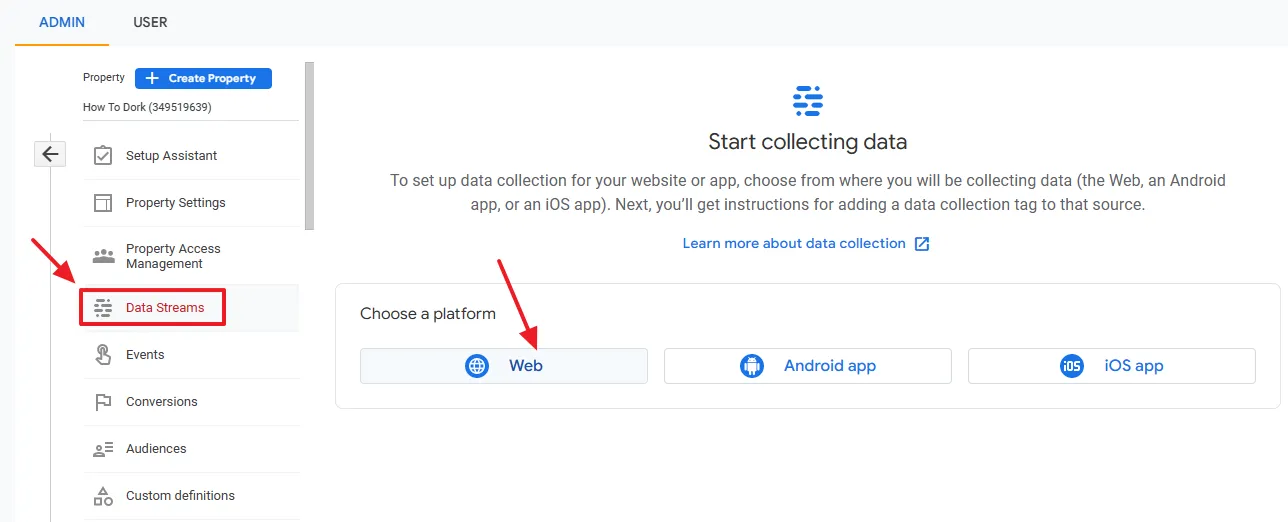
- You have successfully created the Google Analytics account. You will be redirected to Data Streams section on Google Analytics account to create a connection between your Blogger domain and Google Analytics.
- On Choose a platform click on the Web.
- On Website URL choose “https://“, and enter your Blogger blog’s URL like “example.blogspot.com”. If your blog URL contains “www” at the start, also add “www” like “www.example.blogspot.com”.
- Enter a Stream name. It can be your blog name.
- Click Create stream.
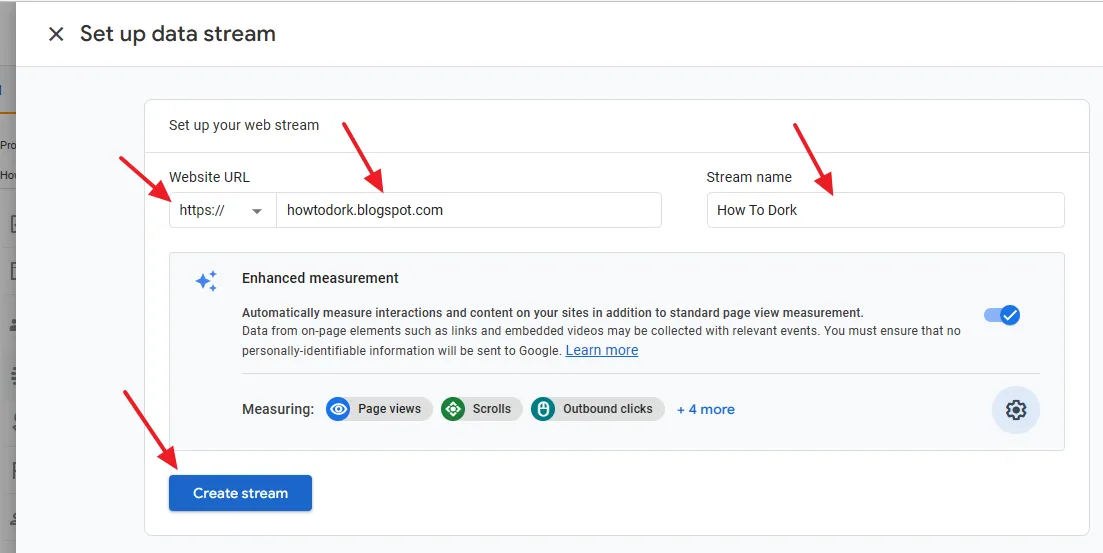
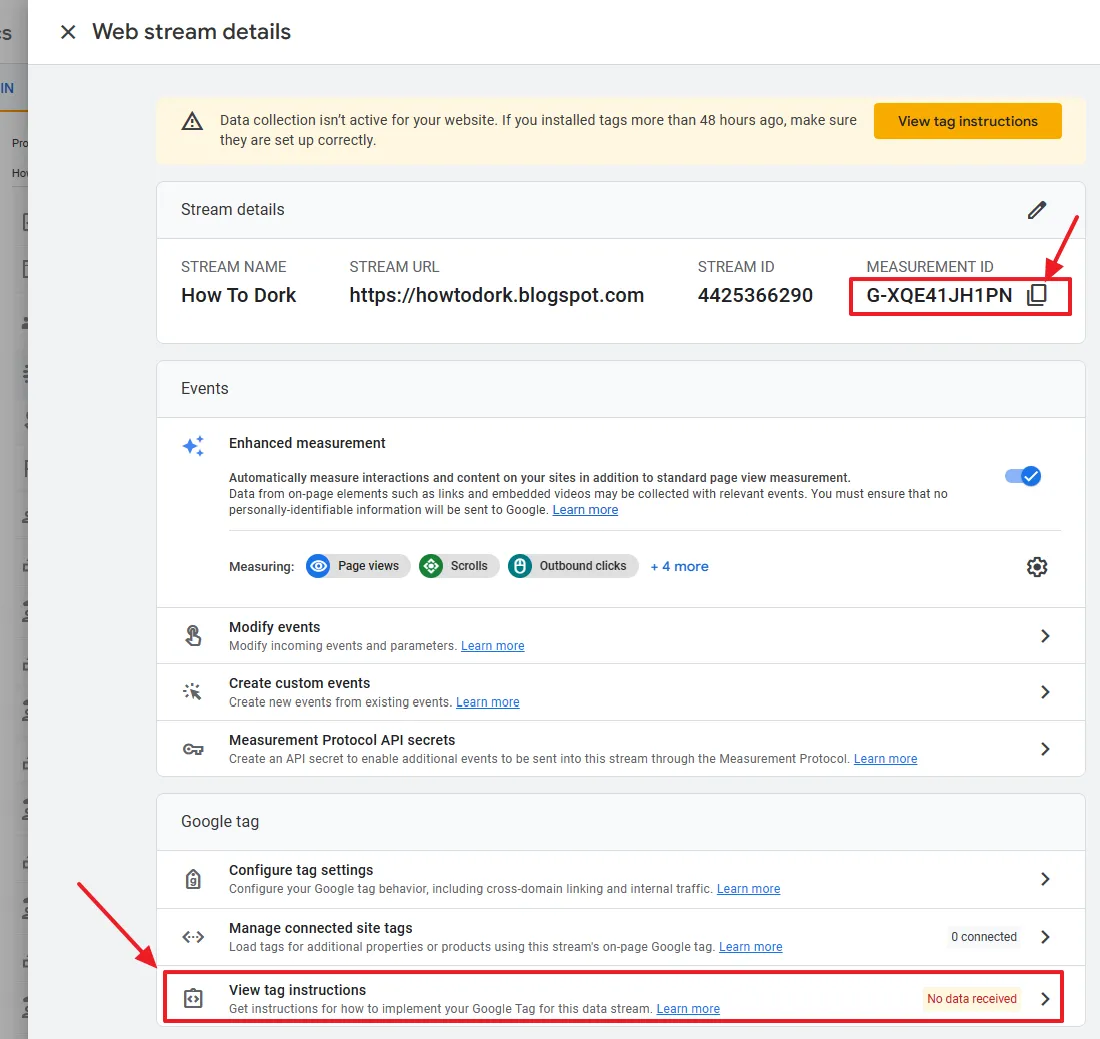
The Data Stream is created for your Blogger blog. Now you have to do two things in order to connect your Blogger blog to Google Analytics (1) Copy the MEASUREMENT ID and add on the Blogger Settings, as I have shown on the Section 3 below (2) Copy the Google Tag and paste/insert in between the <head></head> HTML elements of your Blogger theme, as I have shown on the Section 2 below.
- Scroll-down to Google tag section and click the view tag instructions.
02. How to Add Google Tag in Your Blogger Theme
In this section, I will guide you step-by-step on how to add Google Tag in your Blogger theme.
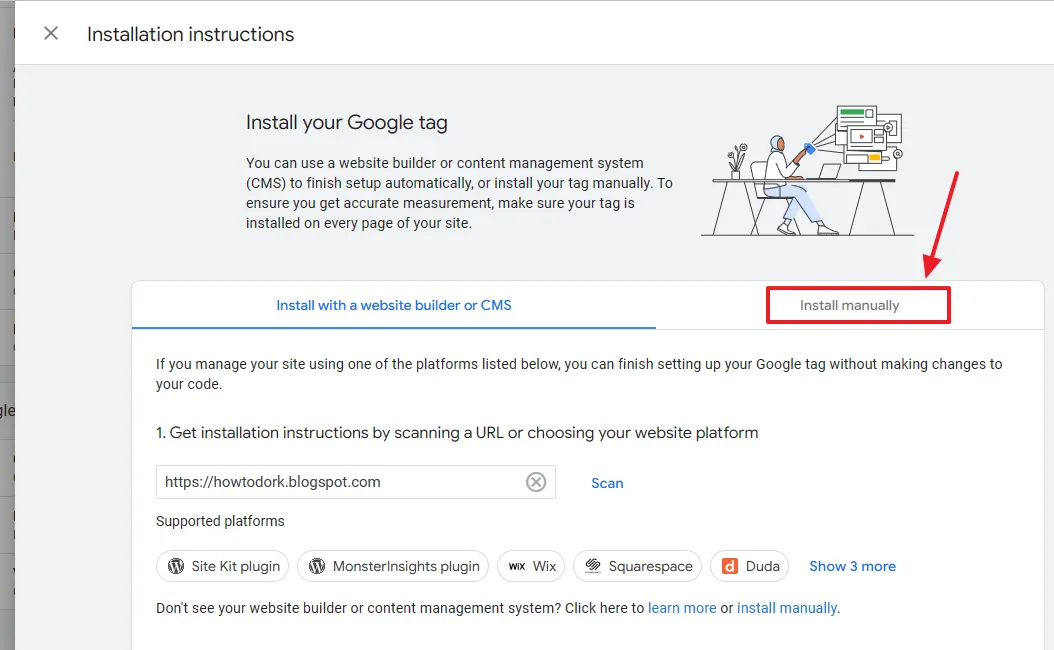
- As you will click View tag instructions, as shown above, this page will appear. Click on the Install manually tab.
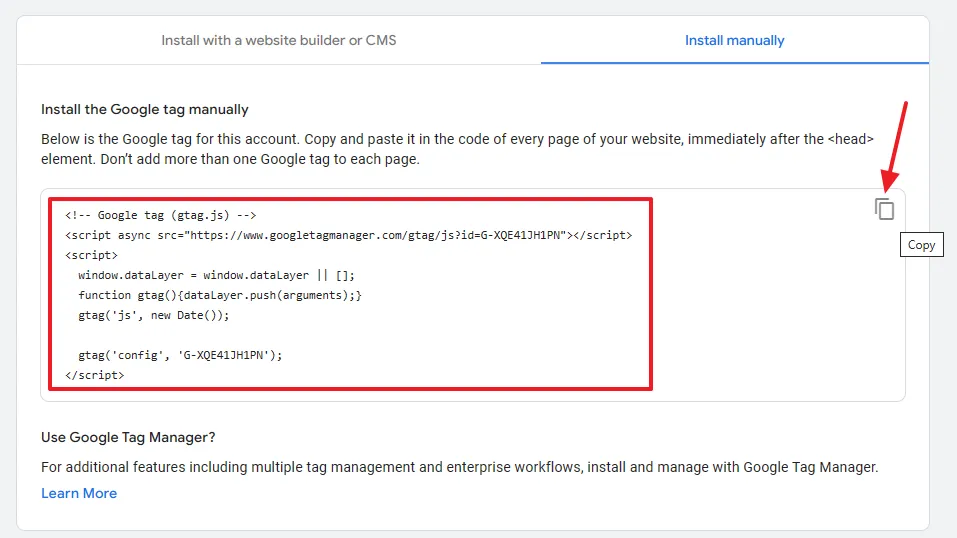
- Click the Copy icon to copy the Google tag.
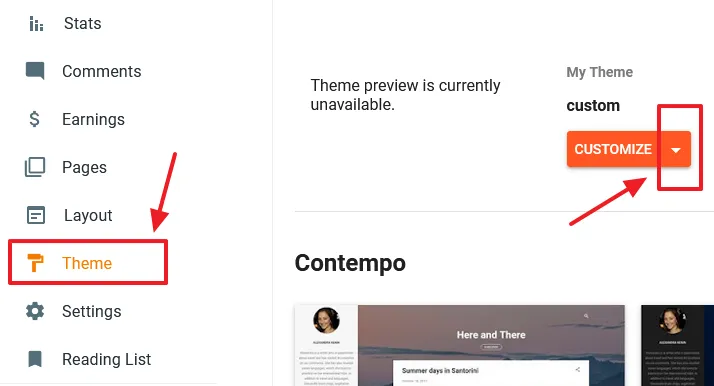
- Now go to your Blogger admin section and click the Theme from the sidebar.
- Click the “Downward arrow” attached to the CUSTOMIZE button.
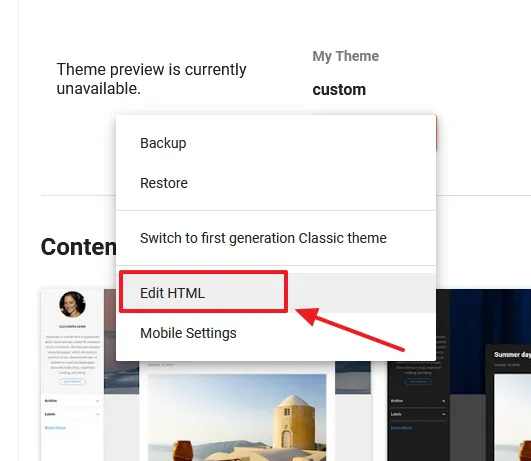
- Click the Edit HTML.
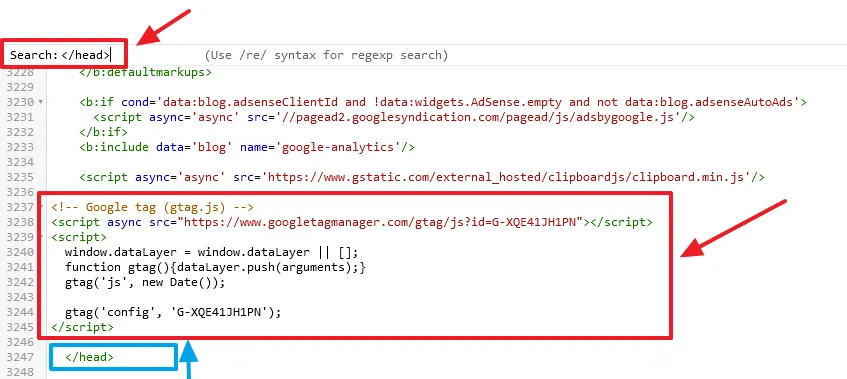
- Press Ctrl + F to open the Search Bar on your Theme Editor and look for </head> element.
- Just above the </head>element, as I have shown below, Paste the Google Tag script that you have copied.
- Save your Theme.
03. How to Add Measurement ID On Blogger
In this section, I will guide you on how to add Google Analytics Measurement ID on Blogger.
- Click Settings from the Sidebar.
- On Basics section, click on the Google Analytics Measurement ID.
- Paste the Measurement ID that you have copied in the Google Analytics Measurement ID.
- Click Save.
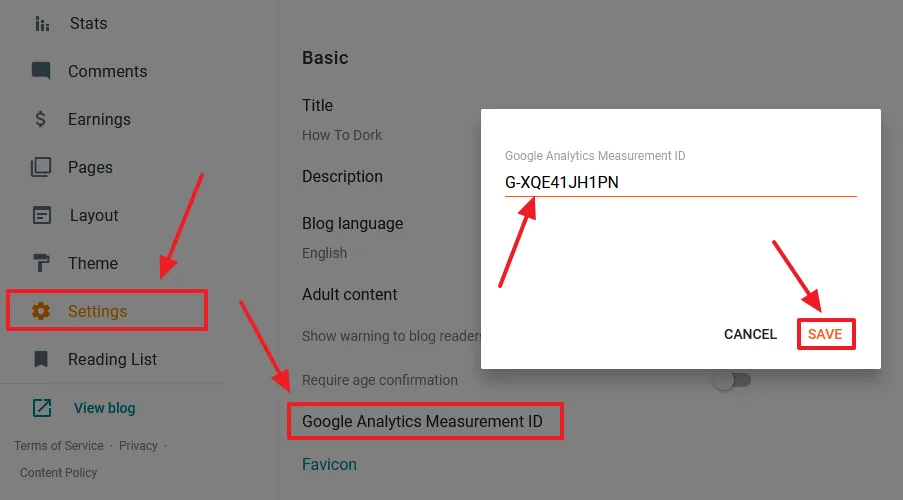
- You can see that the Measurement ID is added on the Blogger Settings.
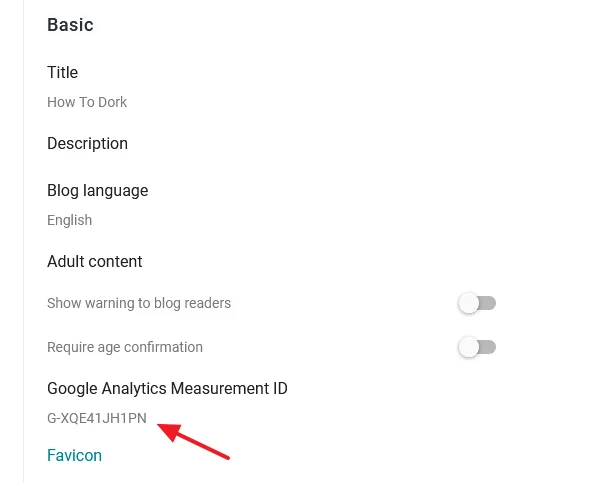
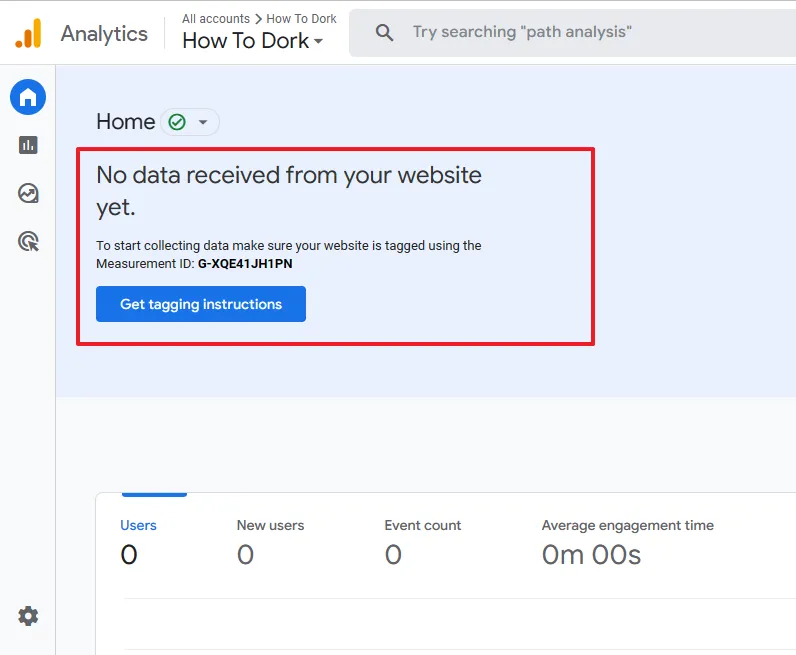
Now go to Google Analytics Homepage. You will see this message there, “No data received from your website yet.“. Ignore this message because your website/blog is already tagged by Measurement ID.
Check your Google Analytics account after a day or two, because initially it takes some time to track and collect your website data. Once it will start tracking your site you can check your blog’s analytics in detail like Users, Events Count, Realtime Users, Acquisition Overview, Engagement, Page Views, Organic Searched Keywords, and much more.
- Get access to all our Blogger Tutorials.
- If you like this post then don’t forget to share with other people. Share your feedback in the comments section below.


Leave a Reply