Do you want to know how to create and add signature in Outlook? You’re in the right place. In this tutorial, I will guide you step-by-step on how to create and add signature in Outlook.
Creating a professional signature for your email is very important particularly from marketing point of view. It builds trust among your mail recipients, your brand gets recognition, and adds information about you or your company like contact details, website information, important links, etc.
Though creating your Signature in Outlook is pretty simple, but at times it gets trickier and people don’t find the Signature creation icon or link on Outlook. You can Create or Edit your Signature only when you create a New E-mail on Outlook.
Step 1: Create Signature In Outlook
Follow the steps to create a signature in Outlook.
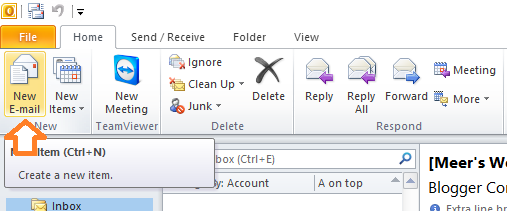
- Open Microsoft Office Outlook.
- Click on the New E-mail.
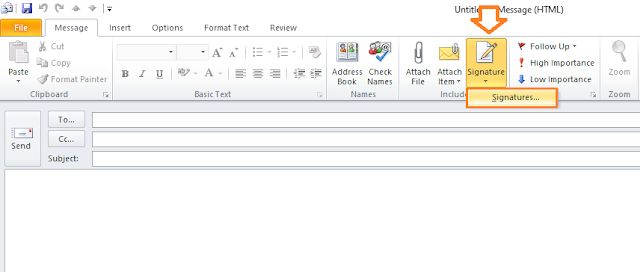
- Click on the Signature icon.
- Click on the Signatures…
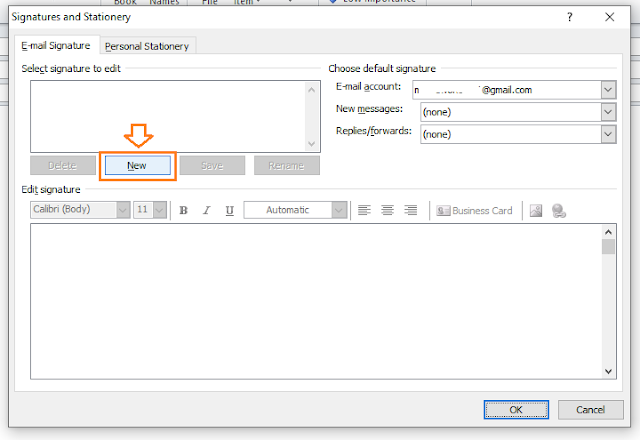
- Click on the New button.
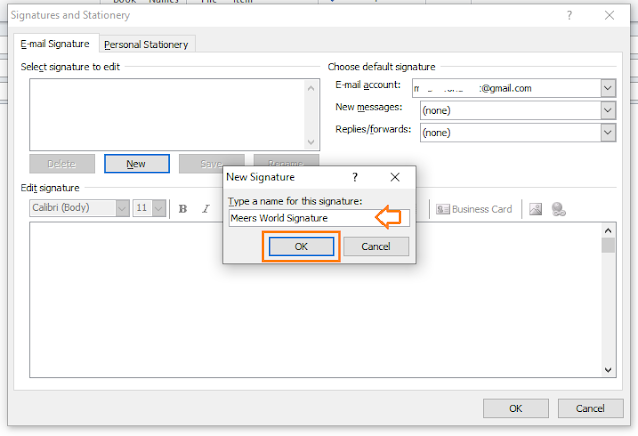
- Enter a relevant name to your Signature.
- Click on the OK button.
- Your newly named Signature will be listed. If it is already not selected, select it.
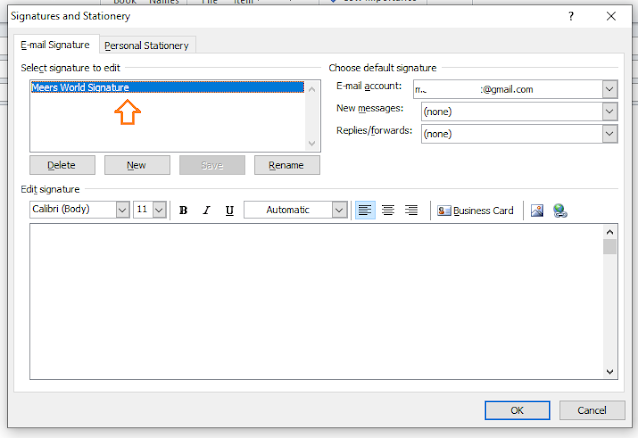
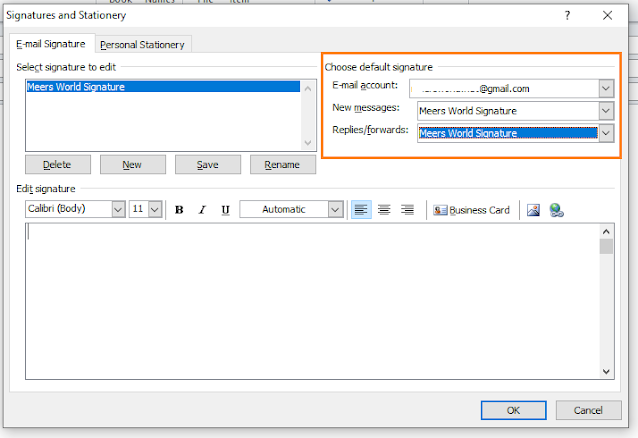
- At your right-side choose the default signature because you can add more than one email accounts in Outlook and you can create more than one signature in Outlook.
- Choose E-mail account for your selected Signature.
- Choose Signature for “New messages“.
- Choose Signature for “Replies/forwards“.
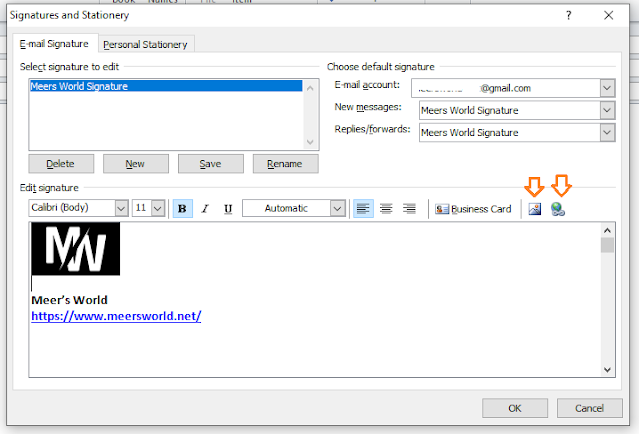
- You can add your Signature content in “Edit Signature“. You can add image, links, and style your content.
- Make sure that before you upload image here, first resize your image in your computer.
- Click on the OK button. You can Edit your Signature anytime by selecting it. You can take ideas from Signature templates and designs to create a professional Signature.
Step 2: How To Add Signature In Outlook
In the above section you have learnt about creating a signature in Outlook, now in this section, I will guide you on how to add signature in Outlook.
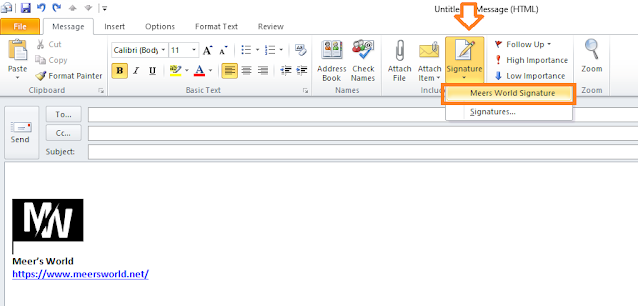
- When you create a new email on Outlook you will see a signature icon.
- Click on the Signature icon.
- Your Signature name will be listed there. Click on your signature it will be added to your email.
If you like this post then don’t forget to share with other people. Share your feedback in the comments section below.

Also Read
- How To Configure Gmail On Outlook 2007 | Enable POP On Gmail
- How To Fix Laptop Makes Loud Terrible Noise | Silence Your Laptop Fan
- How To Turn-Off Recent Items & Frequent Places From Quick Access In Windows 10
- How To Run Windows 10 In Safe Mode – Troubleshoot | Reset, Restore, Recovery, UEFI Settings




Leave a Reply