Do you want to create a Payoneer account to receive your online payments or money? You’re in the right place.
In this tutorial, I will guide you step-by-step on how to create/signup/register a Payoneer account.
Payoneer is one of the most widely used and secure online money transfer/receive financial service company. No matter whether you are a professional, blogger, or a freelancer, Payoneer offers multiple ways to get paid online by international clients.
You can receive and transfer money from any part of the world. It is absolutely free to join and there are no hidden fee charges for sign-up.
How Payoneer Works?
Payoneer creates virtual accounts for you in the banks of Western countries, like First Century Bank US. You are given Account Number, Routing Number, Swift Code, etc, for a particular currency.
Most of the International Clients, Affiliate Programs, and Freelancing Platforms pay you in the US Dollars.
Once a money is transferred to your Payoneer account you can withdraw to your local bank accounts in your country’s currency. The currency will be automatically exchanged following the international money exchange rates.
RELATED
How To Sign-Up For Payoneer Account
In this section, I will guide you on how to sign-up and create a Payoneer account.
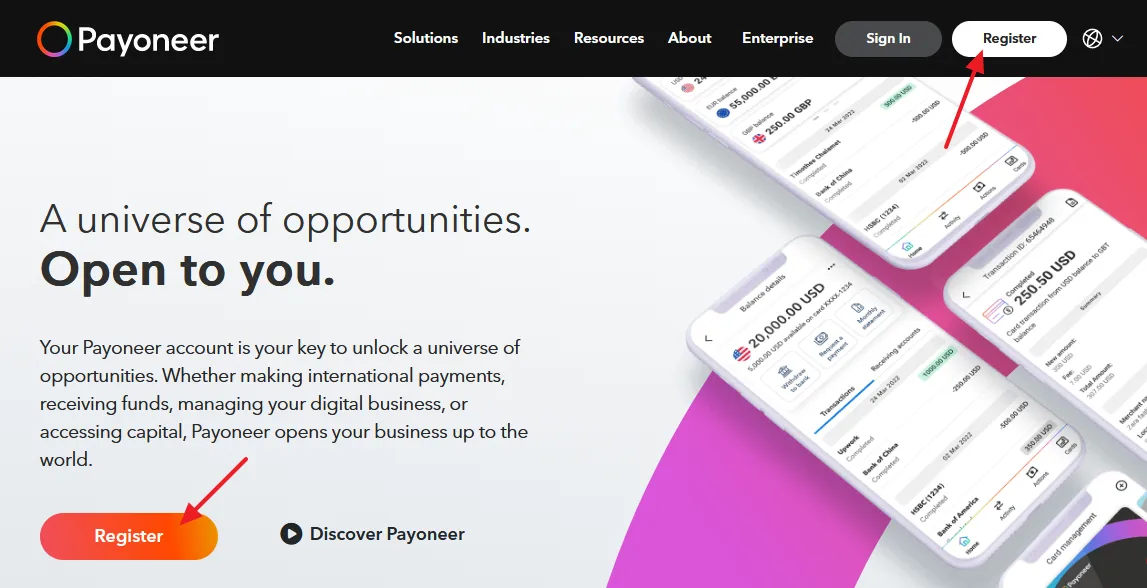
- Go to Payoneer Website.
- Click on the Register button.
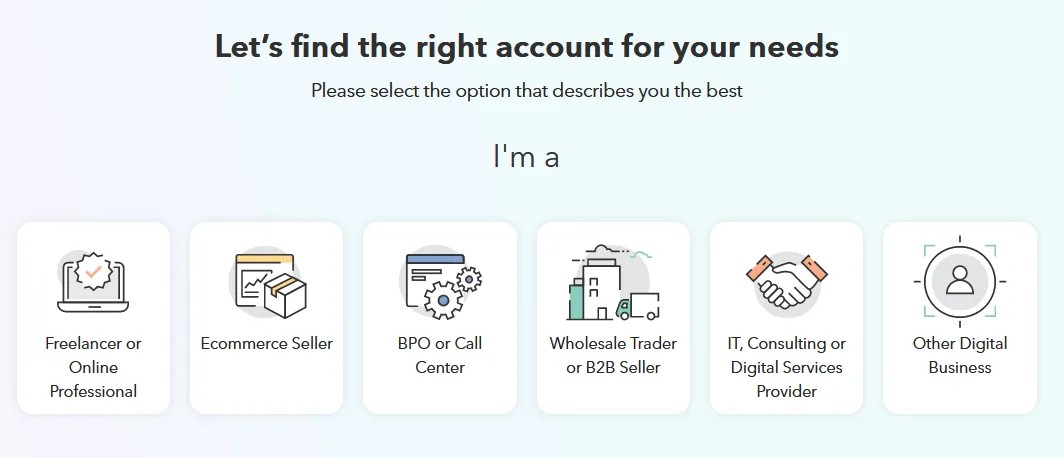
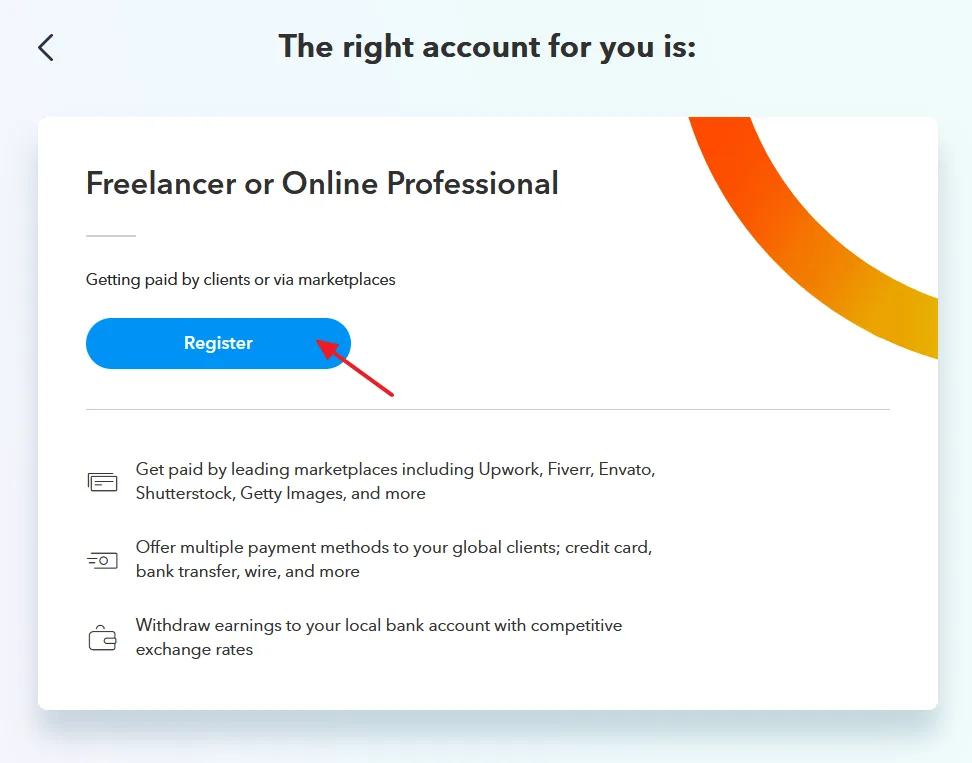
It will ask you to choose the right account for you. In other words, it is asking you, “What Are You?“.
- Depending on your profession or services, choose the most suitable option. It will show 6 options (1) Freelancer or Online Professional (2) Ecommerce Seller (3) BPO or Call Center (4) Wholesale Trader or B2B Seller (5) IT, Consulting or Digital Services Provider (6) Other Digital Business.
- Here I have chosen Freelancer or Online Professional.
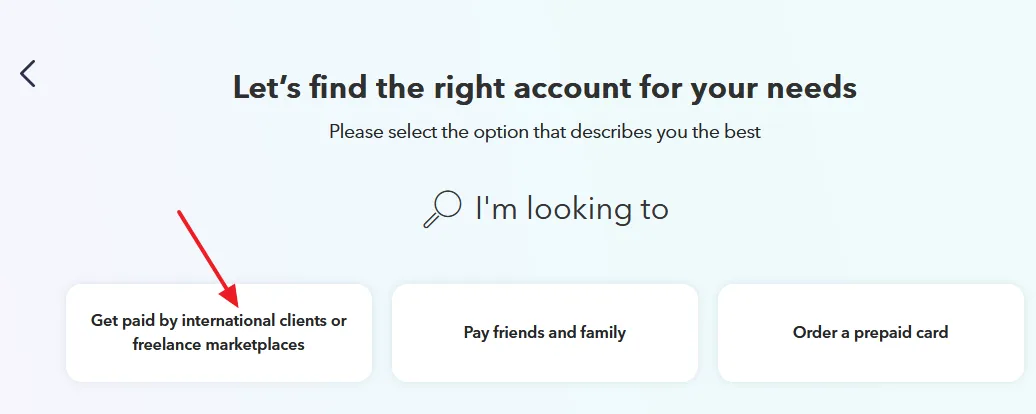
- Depending on the above chosen Option, it will show some more option/s that asks you, “What Are You Looking For?“.
- You can see here that for “Freelancer or Online Professional” account type it is showing three options (1) Get paid by international clients or freelance marketplaces (2) Pay friends and family (3) Order a prepaid card.
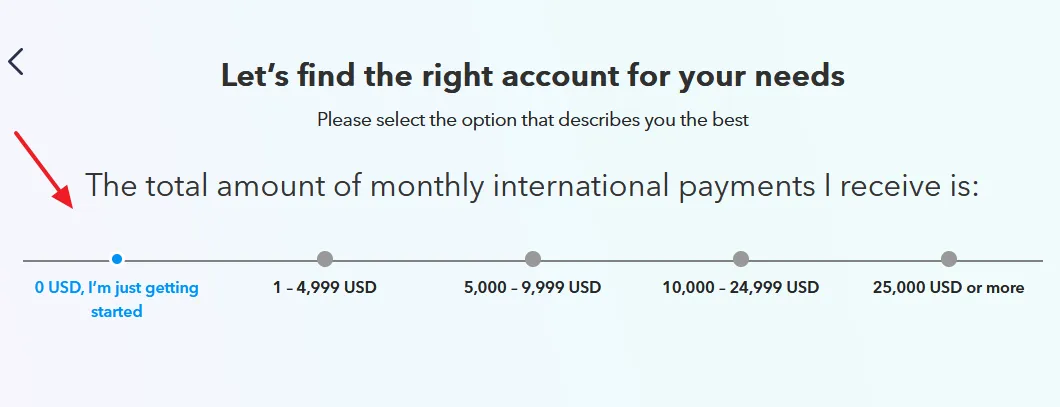
- In the next step, it might ask you about your monthly international payments, like how much money you receive or expected to receive per month.
- Chose your monthly payments range.
- Click on the “REGISTER” button to begin the Sign-Up process on Payoneer.
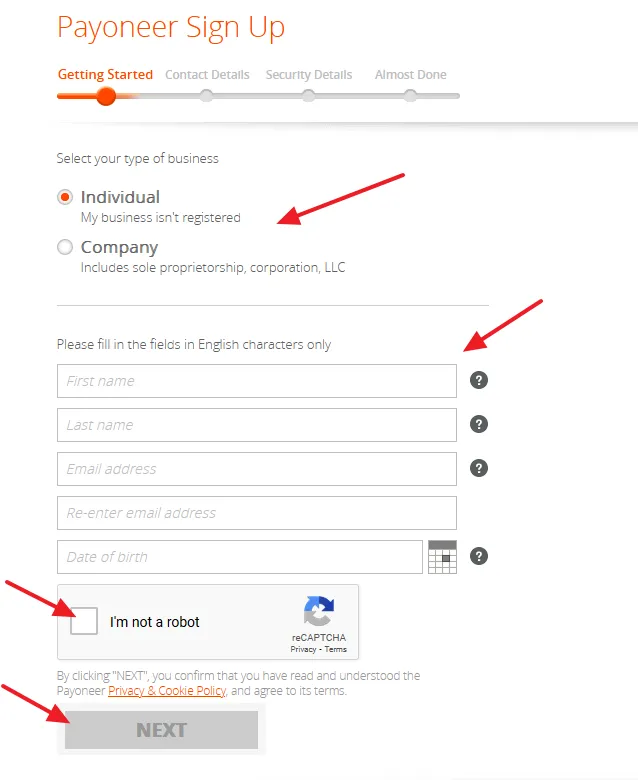
Step 1: Get Started
You can create two types of account (1) Individual (2) Company. Here I am creating an Individual Payoneer account. If you have a registered business choose Company.
- Enter your First Name & Last Name.
- Enter your Email Address.
- Enter your Date of Birth.
- Make sure to provide this information according to your official certificates, like Birth Certificate or National Identity Card.
- Click the NEXT button.
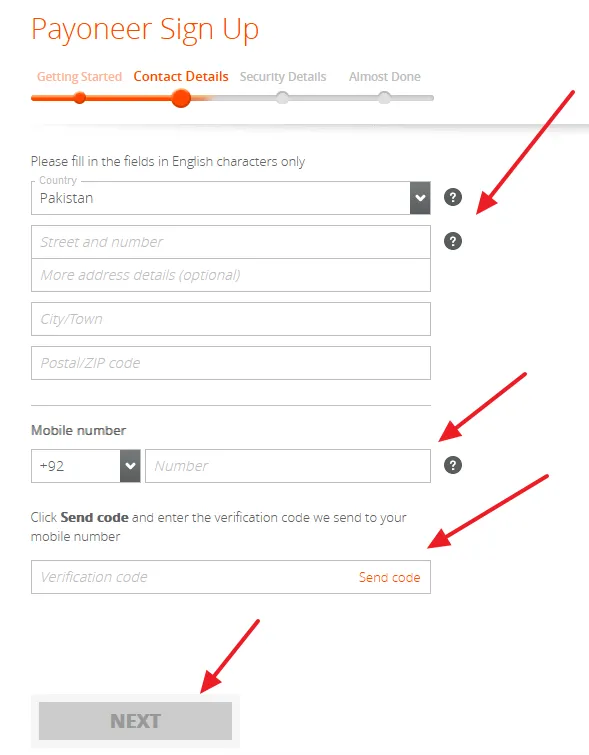
Step 2: Contact Details
In this section, provide your Contact Details. Make sure to provide the correct and accurate information.
- Choose your Country.
- Enter your correct & complete Address.
- Enter your City/Town name.
- Enter the Postal or Zip Code of your city. If you don’t know, Google it.
- Choose your Country Code and enter your Mobile Number where you can receive the verification code.
- Click the Send code link which is located inside the “Verification Code” textbox. It will send you a code via text message.
- Enter the code that you will receive on your phone in “Verification Code” textbox.
- Click the NEXT button.
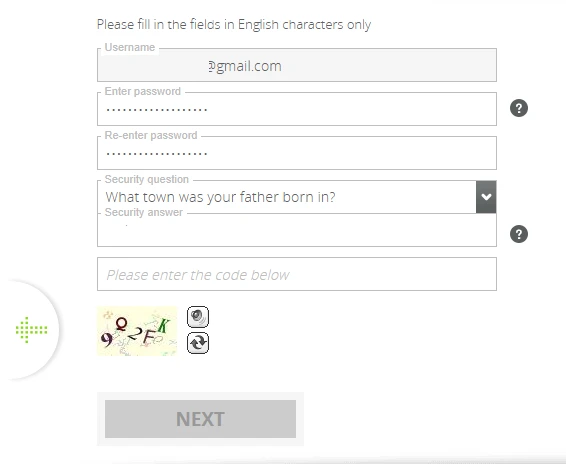
Step 3: Security Details
In this section, provide the account security details.
- Enter your Username. Username is your Email Address. Enter the same Email Address here that you have used in the Step 1.
- Enter a secure Password.
- Choose a Security Question and Enter the answer. Note down this question and save somewhere. This information is required when you forget your Password.
- Enter the Captcha(Code).
- Click the NEXT button.
Step 4: Almost Done
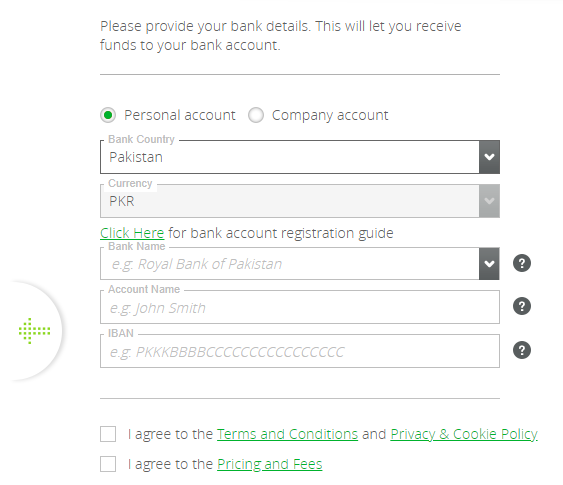
In this section, provide your local bank account details on which you will transfer money from Payoneer.
- Choose the type of your local Bank Account, whether it is your Personal account or Company account. I am choosing the Personal account.
- Choose your Bank Country, means where your bank is located.
- Choose the Currency of your country. It may be selected automatically.
- Enter your Bank Name.
- Enter the Account Name. It is the Title of your Bank Account, can be your official name. The Account Name is also written on your checkbook and ATM card.
- Enter the IBAN. IBAN is your International Bank Account Number, used for international transactions. For example, this is a Pakistani bank account number 0995 1463 3662 2134, the IBAN will be like PK69 MUCB 0995 1463 3662 2134. You can get your IBAN from your online bank account or you can request your bank to provide you the IBAN. You can also create IBAN by visiting your bank’s website.
- Tick “I agree to the Terms and Conditions and Privacy & Cookie Policy“.
- Tick “I agree to Pricing and Fees”.
- Click the NEXT button.
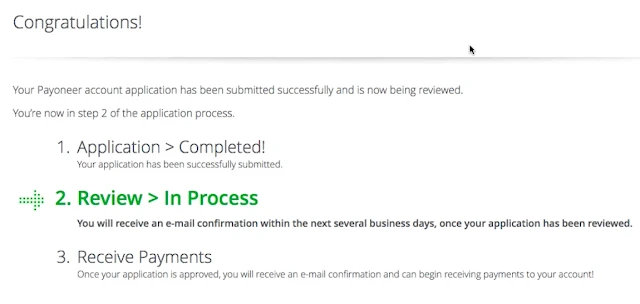
- It will redirect you to Congratulations Page. You have successfully signed up for Payoneer account. After a review Payoneer will send you an email whether your application is approved or not. In most of the cases the application is approved.
- Once your application is approved they might ask for your scan copy of National Identity Card or Birth Certificate just for the verification purpose. Once you upload and they verify your documents your Payoneer account will be fully verified.
- After you start receiving payments you become eligible to order Payoneer Prepaid MasterCard. It works just like any other MasterCard. The card is accepted worldwide, wherever MasterCard is accepted electronically.
If you like this post then don’t forget to share with the other people. Share your feedback in the comments section below. If you want to Earn-Online, read our step-by-step Tutorials.

Related Articles
- How To Withdraw Money In Payoneer To Local Bank Account – Step By Step
- How To Add/Delete Bank Account In Payoneer Step-By-Step
- How To Send/Cancel A Payment Request In Payoneer | Receive Money In Payoneer
- How To Receive Money Via Payoneer Global Payment Service | Earn Online
- How to Set Up Payoneer’s USA Checking Account in Amazon
- How to find your Customer ID & Bank Account No on Payoneer


Leave a Reply