Though it is pretty simple to set up Gmail on Outlook, but at times you get the error, “Your e-mail server rejected your login”. Despite you enter the correct password, Outlook prompts for password again-and-again.
In this tutorial we will guide you step-by-step on How to get rid of one of the below errors by configuring your Google account Security (2-Step Verification, App Passwords ) settings:
- “Log onto incoming mail server (imap): the server rejected your logon. Verify that your user name and password are correct“.
- “Something Went Wrong, We weren’t able to set up your Google account with IMAP. You may need to make changes to your Gmail settings“.
- Popup “Enter your username or password for the following servers“.
- “Log onto incoming mail server (POP3): Your e-mail server rejected your login. Verify your user name and password for this account in Account Settings. The server responded: -Err [AUTH] Username and password not accepted“.
- “Send test e-mail message: Your e-mail server rejected your login. Verify your user name and password for this account in Account Settings“.
These errors come during the setup of Gmail on Outlook or when you run the Send/Receive for an existing configured Gmail account.
Following topics will be covered in tutorial:
- What is the Cause of Error?
- Set Up 2 Step Verification & App Passwords
- How To Set Up Gmail in MS Outlook
01. What is the Cause of Error?
Google had announced that it is disabling the Less Secure Apps feature in Gmail account from 30th May 2022. After this deadline you may get the error “Your e-mail server rejected your login….” or the ones listed above, on Outlook.
Unless until you don’t update your Gmail Security settings Gmail would not allow Outlook to verify your username/password, as a result you won’t be able to receive emails in Outlook.
There are two ways to remove this error:
- Enable 2-Step Verification
- Generate App Passwords
Two-Step Verification
The 2-Step Verification adds extra security layer to your Gmail account in-case your password is stolen or someone tries to access your account. It verifies your phone number by sending a code as an SMS (text message). Once you get the code you have to add it in the 2-Step Verification settings.
The new versions of MS Outlook support 2-Step Verification, you don’t need to generate App password. Once the verification process is completed you can set up Gmail on Outlook and Send/Receive emails.
App Passwords
App Passwords feature generates a secure Password that you can use to sign in to Gmail account from apps on devices that don’t support 2-Step Verification. It grants complete access to your Gmail account.
You have to enter the password once, so no need to remember it or save somewhere.
02. Set Up 2-Step Verification & App Passwords
In this section you will learn how to configure 2-Step Verification & App Passwords settings in your Google Account.
- Go to your Gmail account.
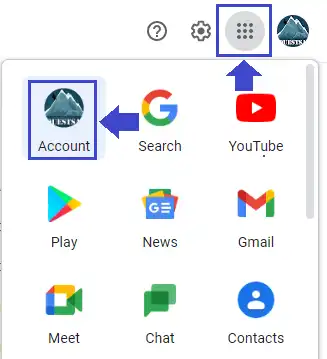
- Click Google Apps icon located at your top-right corner.
- Click Account.
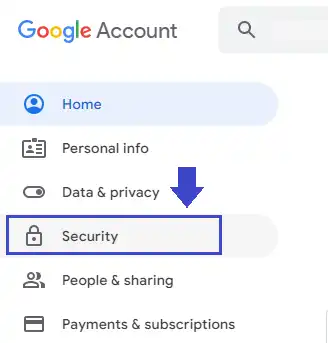
- On Google Account sidebar click the Security tab.
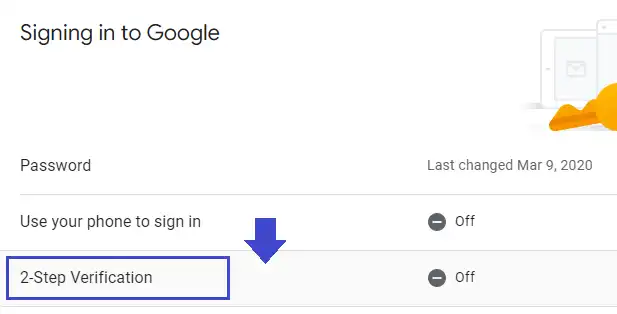
- Scroll down to Signing in to Google section.
- Click the 2-Step Verification row.
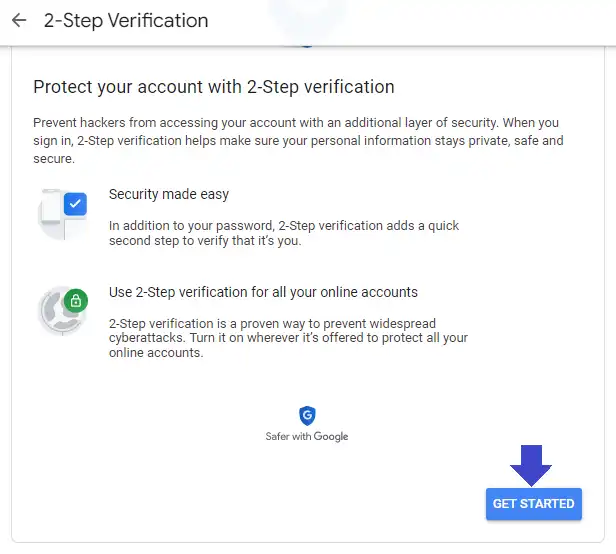
- You’re now in the 2-Step Verification settings.
- Click the GET STARTED button.
- Enter your Gmail Password & click Next.
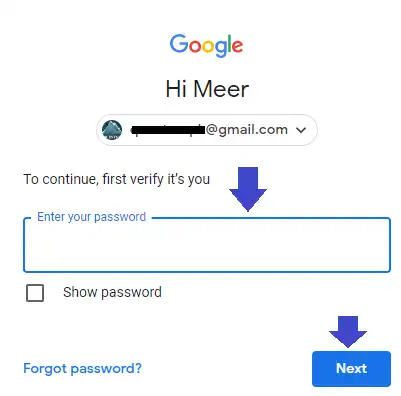
- Enter your active Phone number where you will receive the verification code.
- Choose Text message option to receive the code via SMS.
- Click Next.
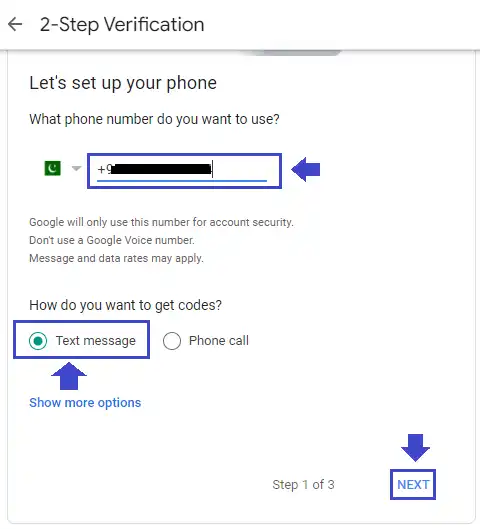
- Enter the verification code that you have received in your mobile phone.
- Click Next.
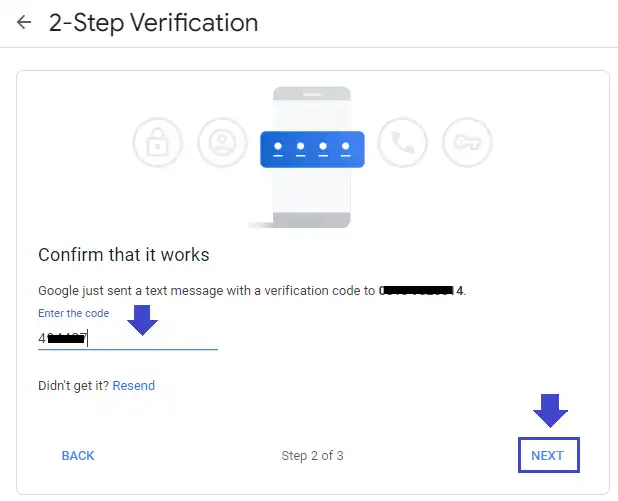
- The 2-Step Verification process is completed successfully now click the TURN ON to enable the 2-Step Verification.
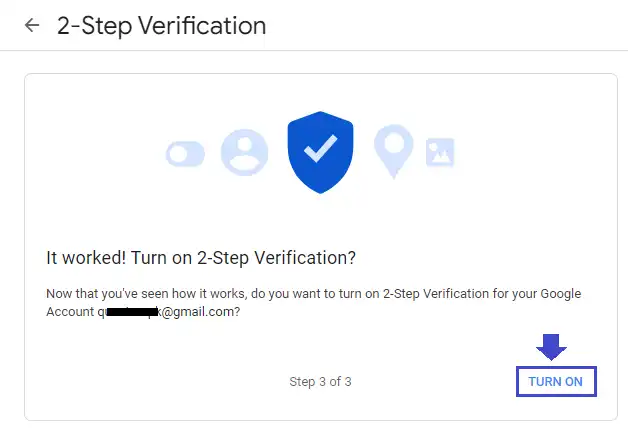
- The 2-Step Verification has been turned on. Click the “<- 2 Step Verification” link on top to go back to the Security page.

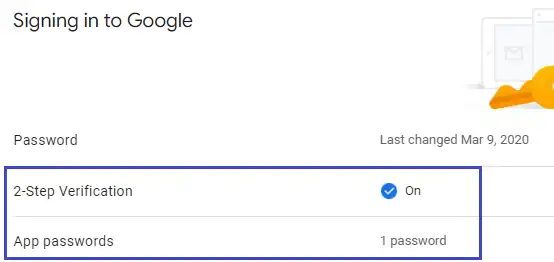
- On the Security page, again scroll down to Signing in to Google section. You can see that the 2-Step Verification is active in your Gmail account. If your Outlook supports 2-Step Verification you don’t need to create an App password, as mentioned earlier.
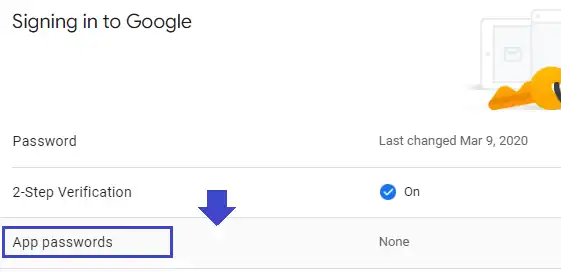
- Click the App passwords row to begin the process of generating a secure password.
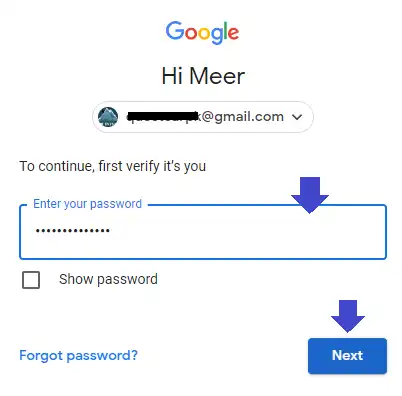
- Enter your Gmail Password.
- Click Next.
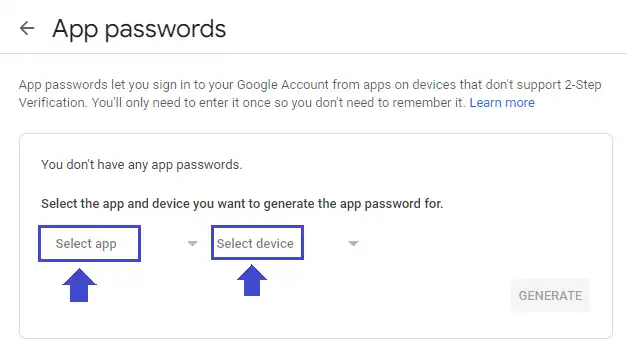
- Select an App and Device for which you want to generate the app password, as shown in the next step.
- App Options: Mail, Calendar, Contacts, YouTube, and Other.
- Device Options: iPhone, iPad, Blackberry, Mac, Windows Phone, Windows Computer, and Other.
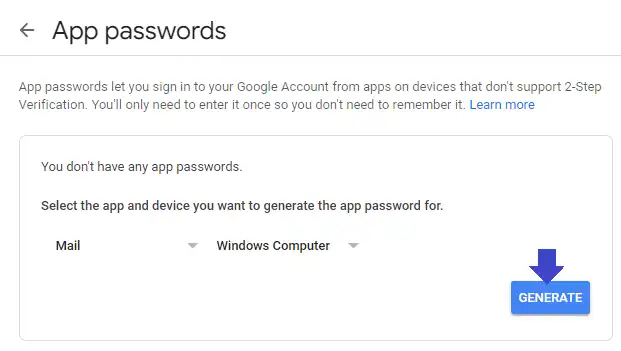
- Since we are creating for Outlook so we have chosen Mail. The device is Windows Computer.
- Click the GENERATE button.
- It will generate a secure password. Copy and Paste this password in your app (Outlook, Mailbird, etc) instead of Gmail password.
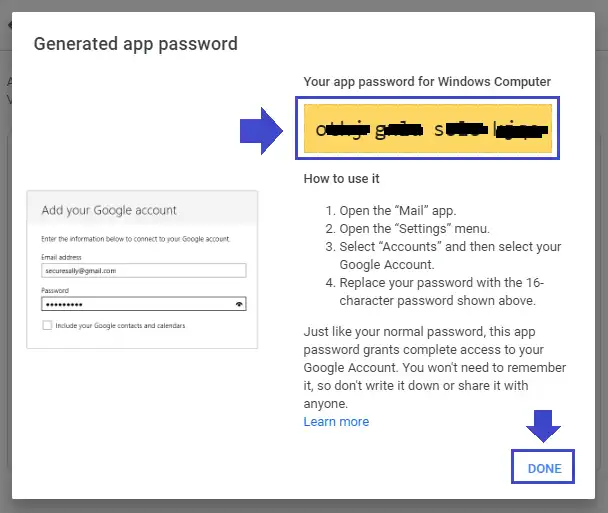
- You can create more than one App passwords.
- Click the “<- App passwords” on top to go back to Security page.
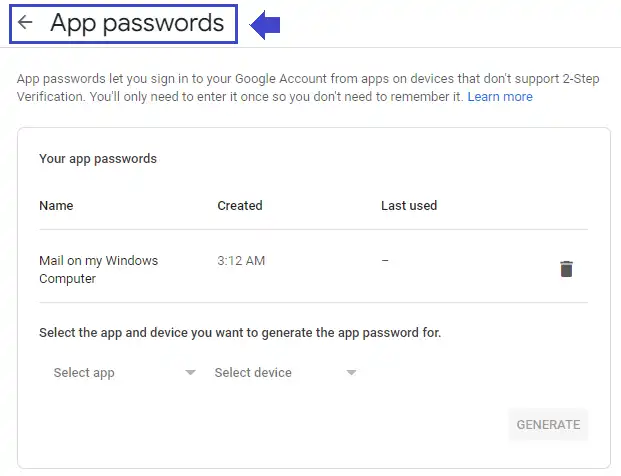
- Here you can see that both 2-Step Verification & App passwords have been set up for Gmail.
03. How To Set Up Gmail in Outlook
You’re done with security settings of Gmail account. In this section you will learn how to set up Gmail in Outlook via 2-Step Verification.
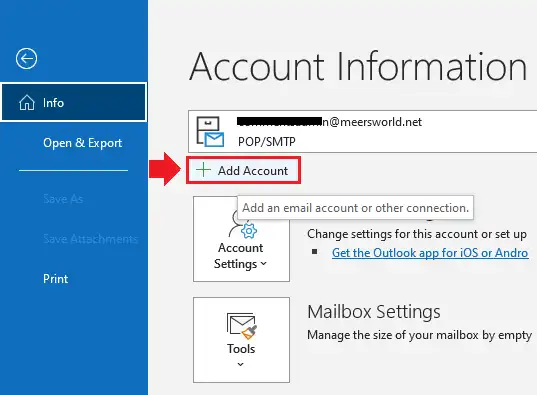
- Open your Outlook and click File, located at top-left corner.
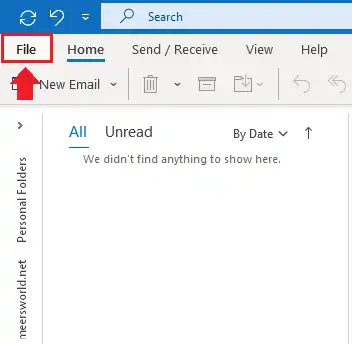
- Click + Add Account.
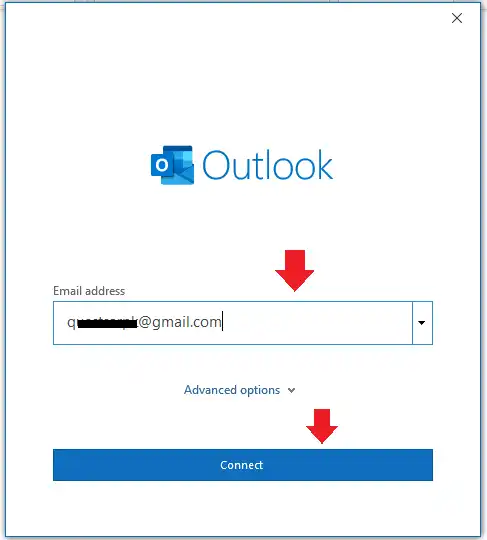
- Enter your Gmail address in the Email address.
- Click Connect.
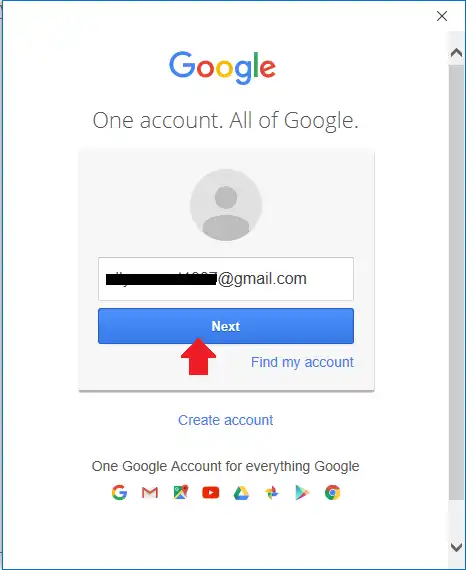
- Now Outlook will redirect you to Gmail sign-in. Your Gmail Address will already be filled.
- Click Next.
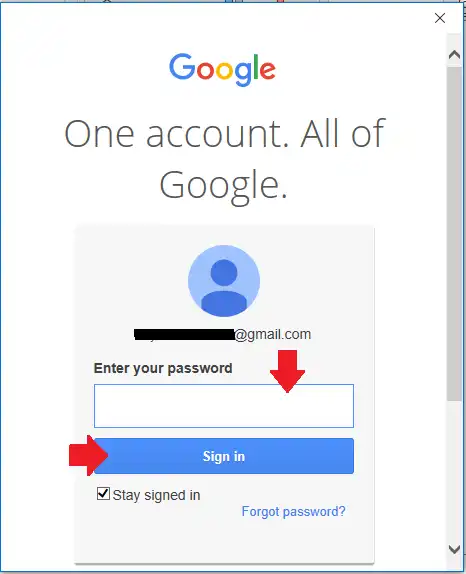
- Enter your Password.
- Click Sign in.
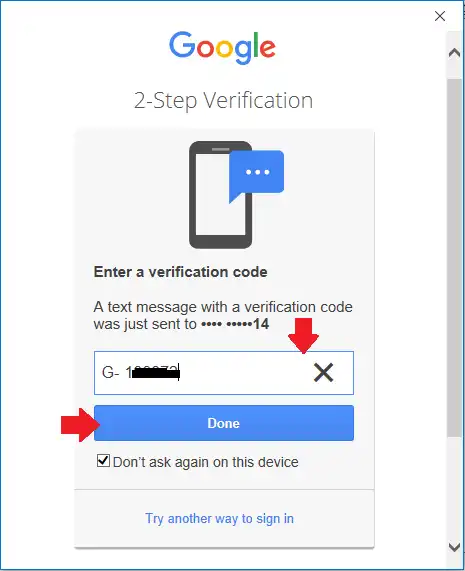
- Google will send a verification code your phone number.
- Enter the Verification Code and click Done.
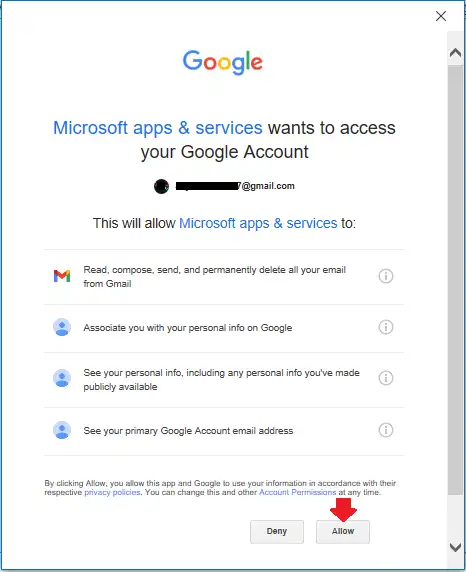
- Google wants your permission to allow Microsoft apps & services such as Outlook to access your Gmail account.
- Click Allow.
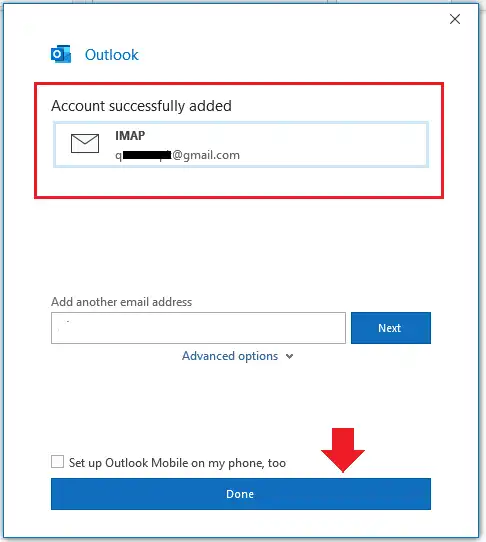
- If your Gmail account is successfully configured in Outlook you will get a message, “Account successfully added“.
- Click Done to finish the set up. If you want to set up Gmail on your phone, tick the checkbox “Set up Outlook Mobile on my phone, too“.
So it was all about solving the error, “Your e-mail server rejected your login”. We hope that your problem is solved. If you like this post then don’t forget to share with other people. Share your feedback in the comments section below.
Also Read
- How To Fix Laptop Makes Loud Terrible Noise | Silence Your Laptop Fan
- How To Turn-Off Recent Items & Frequent Places From Quick Access In Windows 10
- How To Run Windows 10 In Safe Mode – Troubleshoot | Reset, Restore, Recovery, UEFI Settings
- How To Make A Bootable USB Flash Drive For Windows 10 Without Third-party Tool
- How to Use Microsoft Office Free & Its Best Alternatives



Leave a Reply