Do you want to set up WP Mail SMTP for Brevo (formerly Sendinblue) SMTP mailer to send emails from your WordPress website? You’re in the right place.
In this tutorial, I will guide you step-by-step on how to install WordPress WP Mail SMTP plugin and How to set up the WP Mail SMTP for Brevo (Sendinblue) SMTP mailer.
WP Mail SMTP reconfigures the PHP function wp_mail() instead of the default PHP function mail() to use the third-party mailers such as Gmail, Outlook, Sendinblue, SMTP.com, SendGrid, etc, to send emails.
Brevo (Sendinblue) is one of the email services recommended by WP Mail SMTP. It offers 4 plans, a Free Plan, and 3 Paid Plans. The Free Plan offers 300 free emails per day which is enough for any normal site. In case your website needs more than 300 emails each day you can buy Paid Plans.
Following topics will be covered in this post:
- Why Doesn’t WordPress Send Emails?
- How To Install WP Mail SMTP Plugin
- How To Set Up WP Mail SMTP for Brevo Mailer in WordPress
01. Why Doesn’t WordPress Send Emails?
Why you need third-party plugins and email services for sending emails in WordPress? By default WordPress uses PHP mail function to send emails generated by WordPress site. Now the problem is that most of the WordPress hosting companies don’t have their servers properly configured for sending PHP emails.
If the proper authentication isn’t there, then emails either go in the SPAM folder or don’t get delivered at all. Because of this issue WordPress allows to use third-party plugins like WP Mailer SMTP and mailers like SMTP.com, Brevo, etc, to send emails.
02. How to Install WP Mail SMTP Plugin
In this section, I will guide you step-by-step on how to install WP Mail SMTP plugin in WordPress.
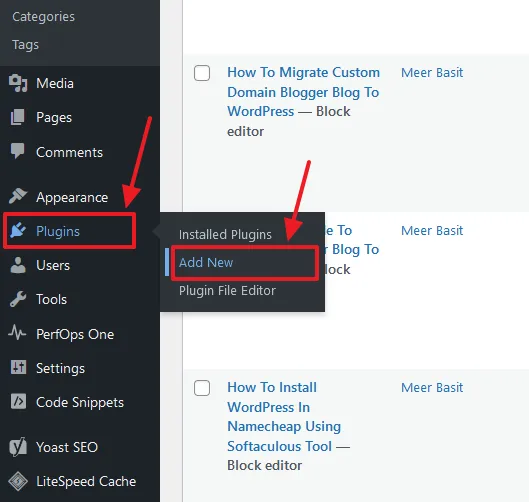
- Go to Plugins from the sidebar.
- Click on the Add New button.
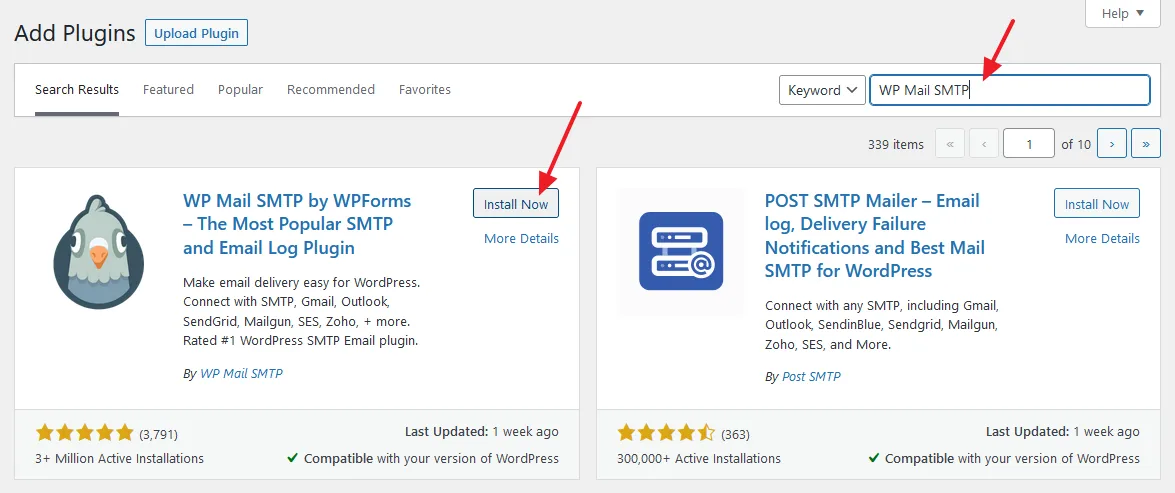
- In the plugin Search Bar, type WP Mail SMTP.
- The search results will list WP Mail SMTP by WPForms along with other SMTP plugins like Post SMTP Mailer, Jetpack, Easy WP SMTP, etc.
- Click on its Install Now button.
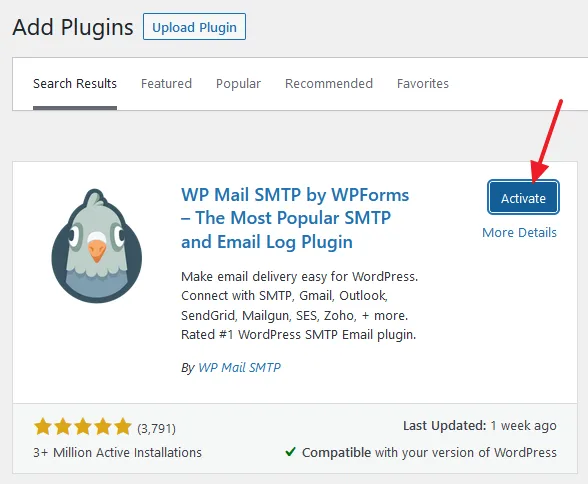
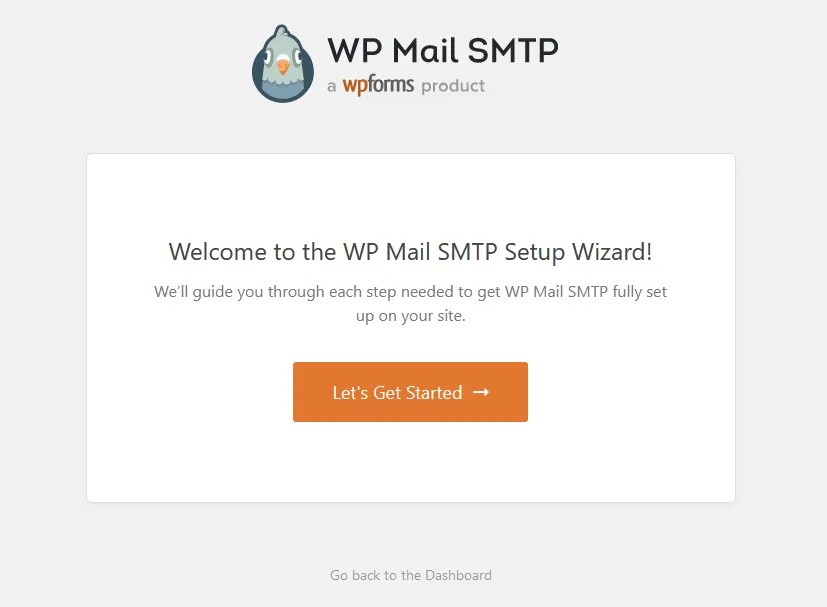
- Click on the Activate button. As you will click on the Activate button the WP Mail SMTP set up wizard will be opened, as shown in the next step.
03. How to Set Up WP Mail SMTP For Brevo Mailer
In this section, I will guide you step-by-step on how to set up WP Mail SMTP for Brevo (Sendinblue) SMTP Mailer.
- Click the on Let’s Get Started button.
01. Choose Your SMTP Mailer
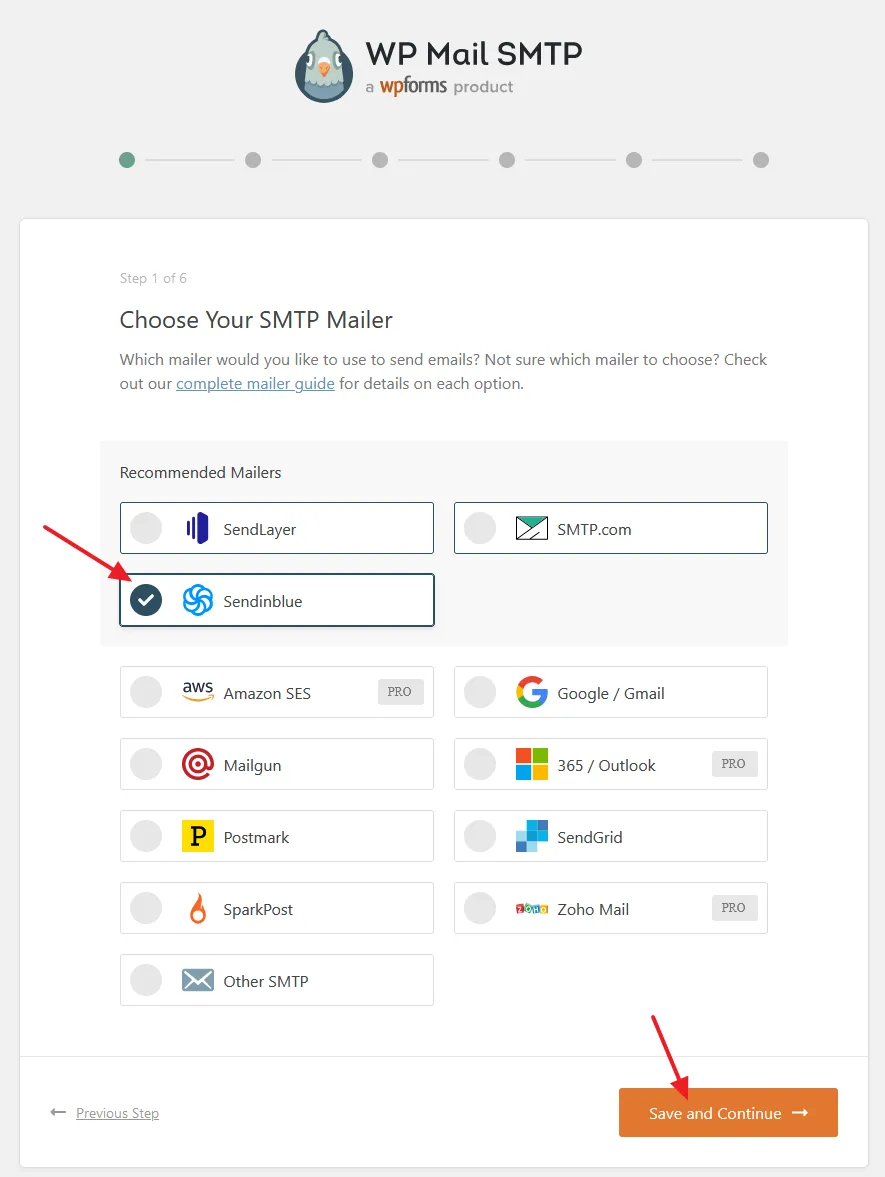
- Though you can see many SMTP mailers such as SMTP.com, SendLayer, Mailgun, SendGrid, Amazon SES, Gmail, Outlook, Zoho Mail, Postmark, SparkPost, & Other SMTP, but WP Mail SMTP recommends only three mailers i.e. SMTP.com, SendLayer, & Sendinblue (Brevo).
- Choose Sendinblue SMTP mailer.
- Click on the Save and Continue button.
02. Configure Mailer Settings
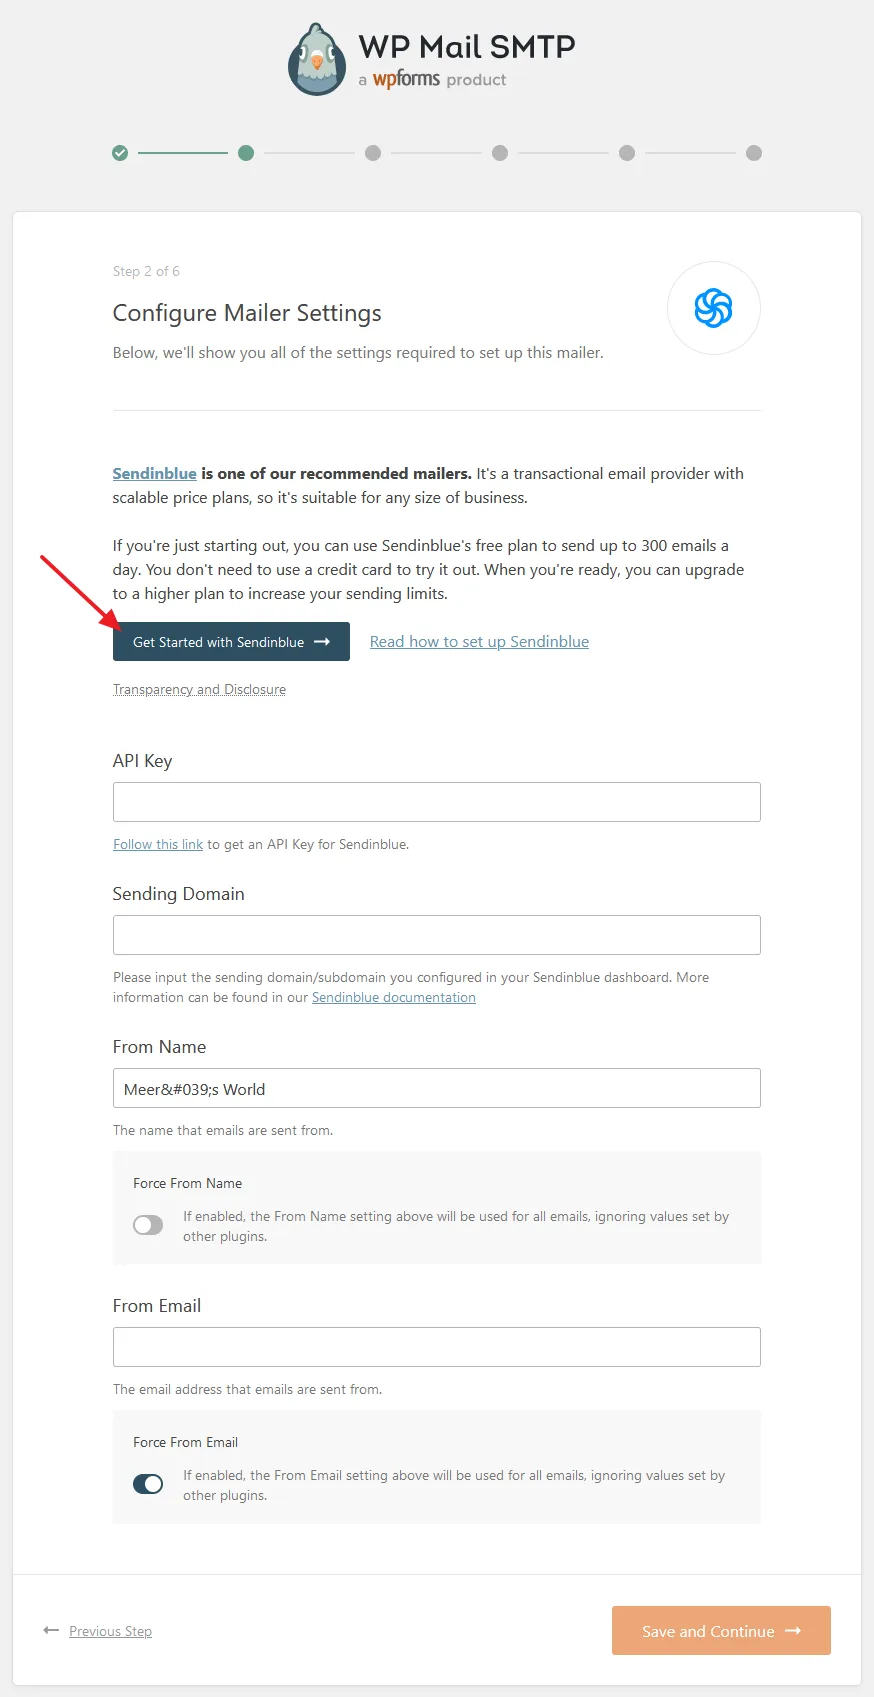
- Click on the Get Started with Sendinblue button. You will be redirected to Brevo website.
Note: Don’t close this page (Configure Mailer Settings) as you have to come back here again.
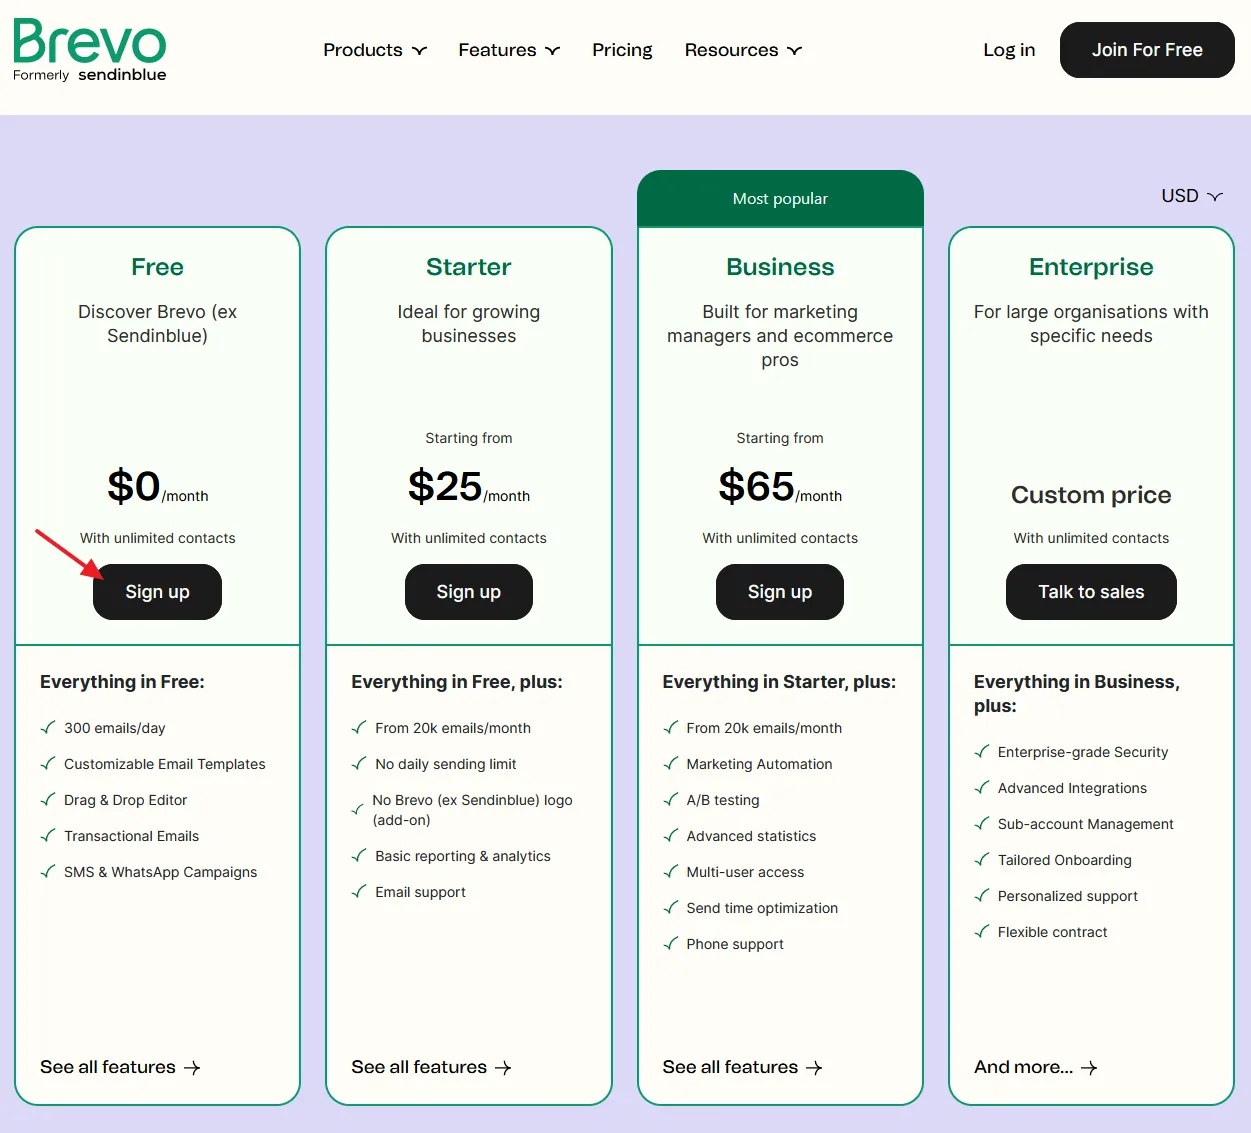
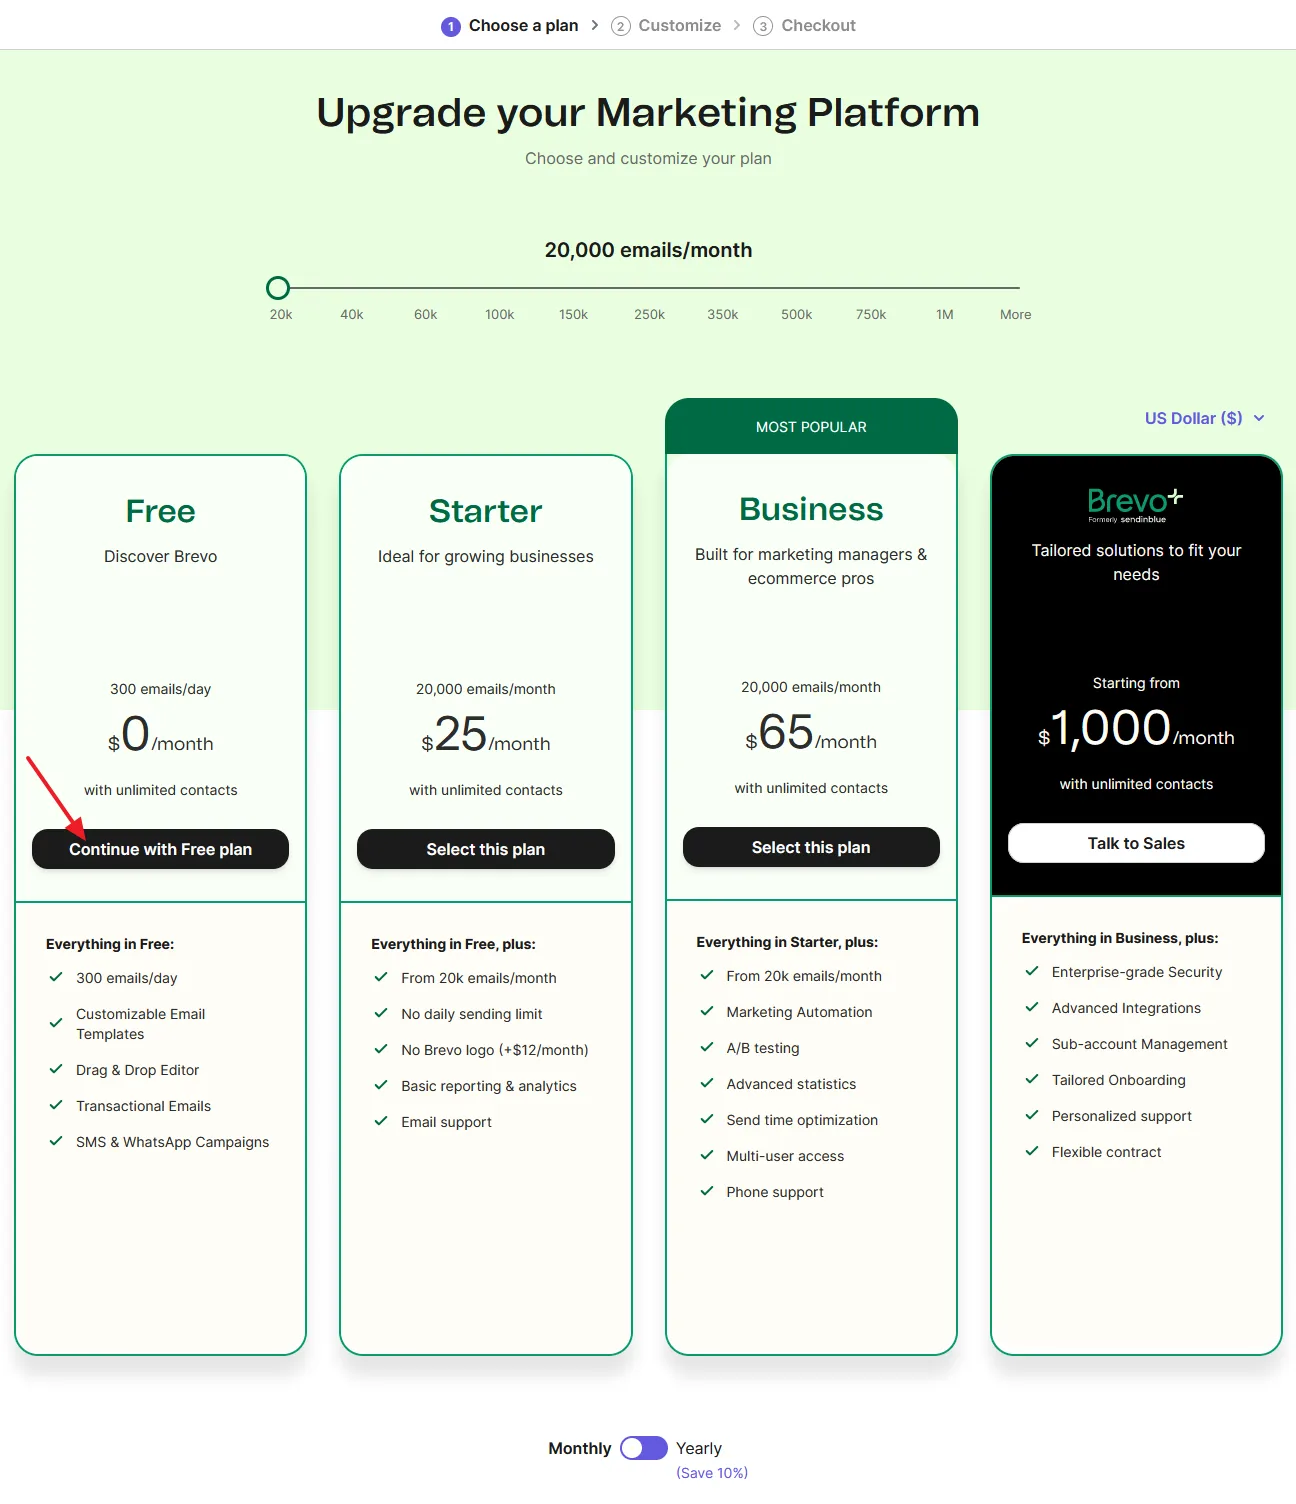
- Brevo (Sendinblue) offers 4 plans (1) Free (2) Starter (3) Business (4) Enterprise. Depending on your requirements choose a plan. Here I am Signing Up for Free Plan.
- Go to Free Plan column and click on the Sign Up button. It offers 300 Emails/day, Customizable Email Templates, Drag & Drop Editor, Transactional Emails, and SMS & WhatsApp Campaigns.
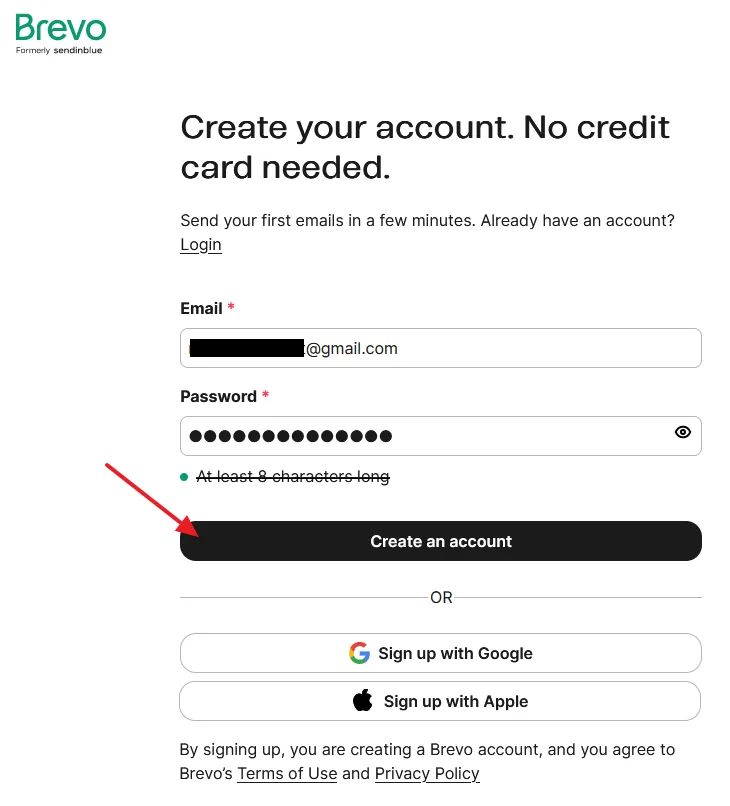
- Create your Brevo account. Enter your Email Address and a secure Password.
- Click on the Create an account button.
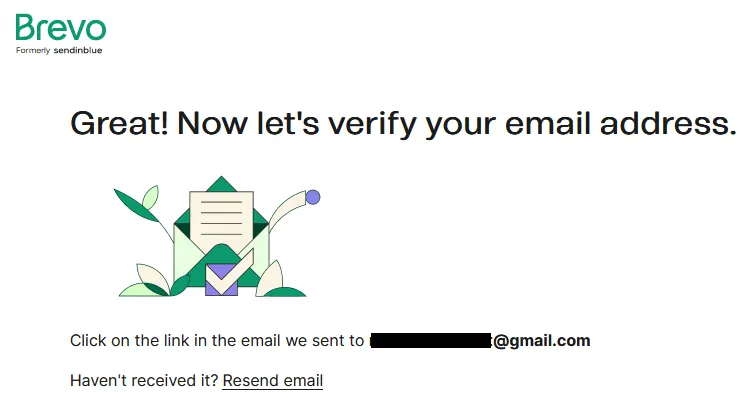
- Brevo will send a link to your given email address to verify it. Open your email account and open the Brevo verification email.
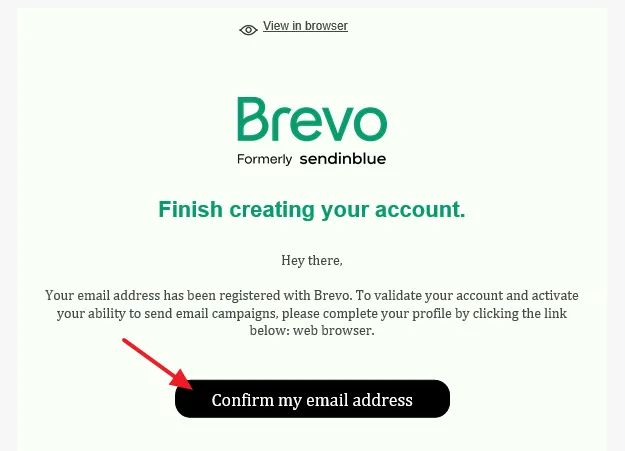
- Open the Brevo Email and click on the Confirm my email address button.
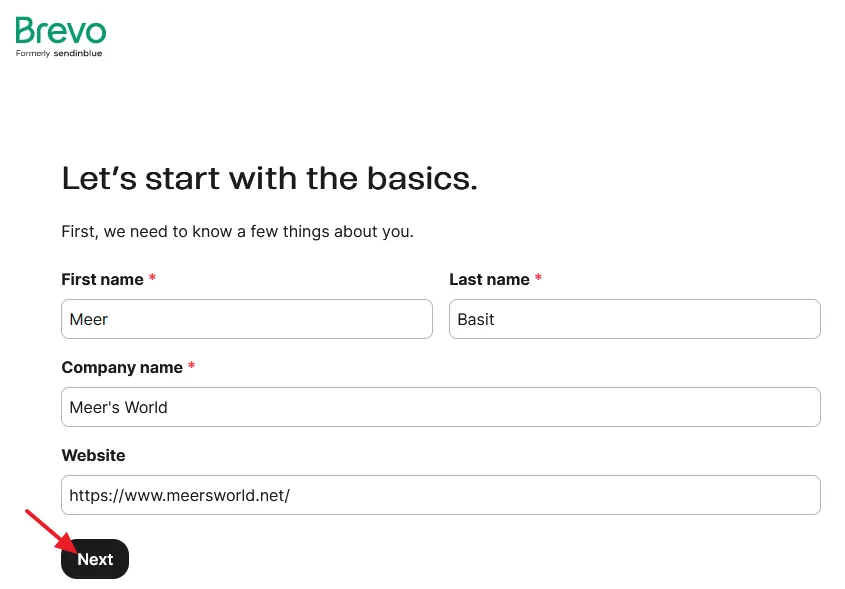
- Enter your First name, Last name, Company name (website), and website URL.
- Click on the Next button.
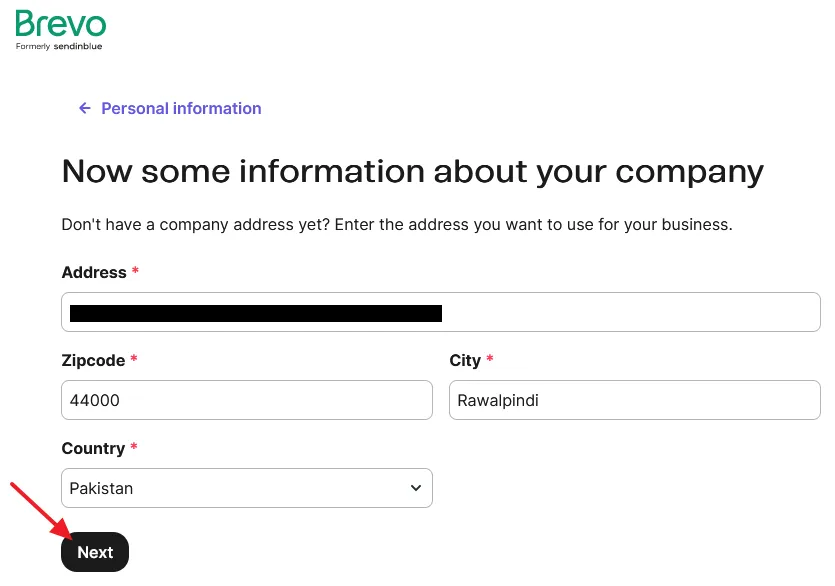
- Enter your Address, Zipcode, City, and select Country.
- Click on the Next button.
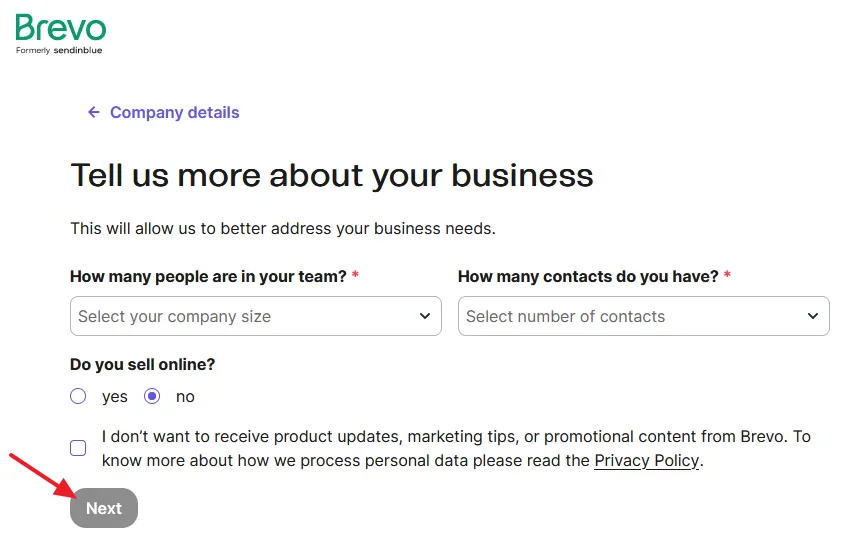
- Provide company/business/website details, like No of people in your team, Contacts do you have, and Do you sell online?.
- Click on the Next button.
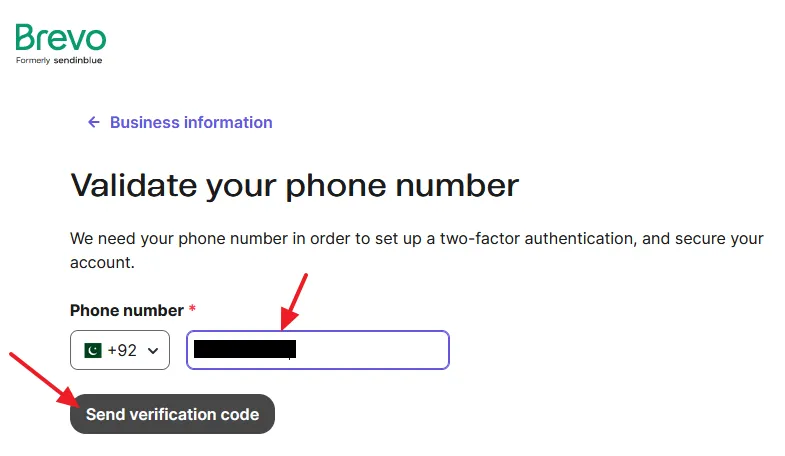
- Validate your Phone Number. Select your Country Code and enter your Phone Number.
- Click on the Send Verification code button.
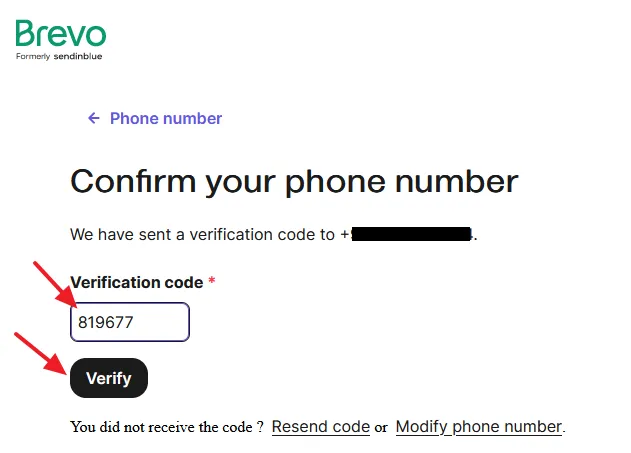
- Confirm your phone number. In the Verification code enter the code that Brevo has sent to you via SMS.
- Click on the Verify button.
- You will be again redirected to Brevo Plans. Go to Free Plan and click on the Continue with Free plan button.
You have successfully created your Brevo (Sendinblue) account. Now you have to (1) Verify & Authentication your domain on Brevo using DNS records (2) Get API Key.
01. Domain Verification & Authentication
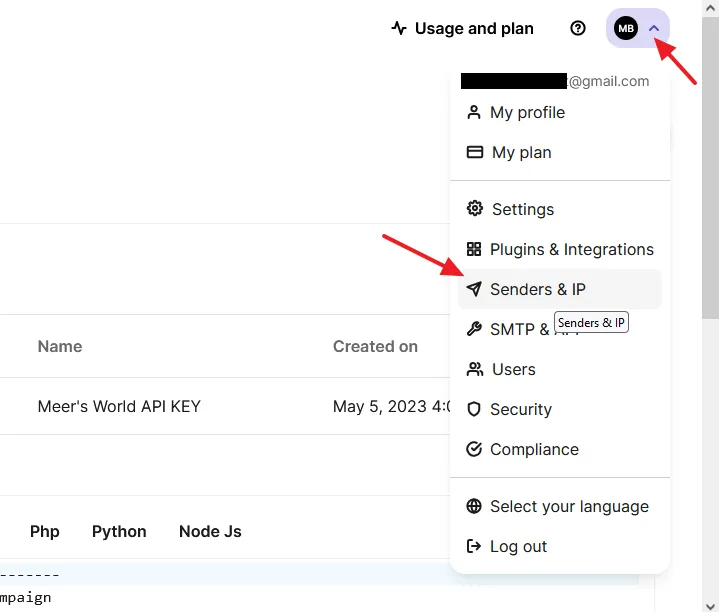
- Go to your Profile Icon and click on the Senders & IP.
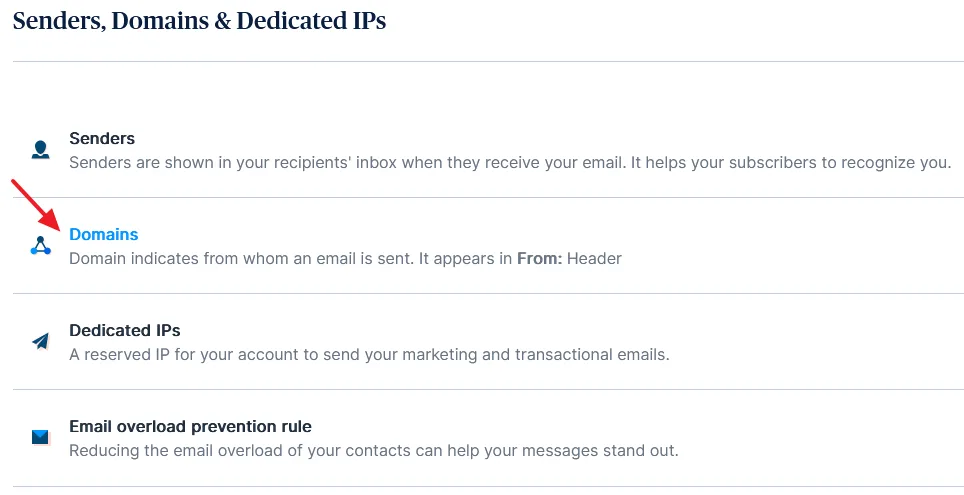
- Click on the Domains.
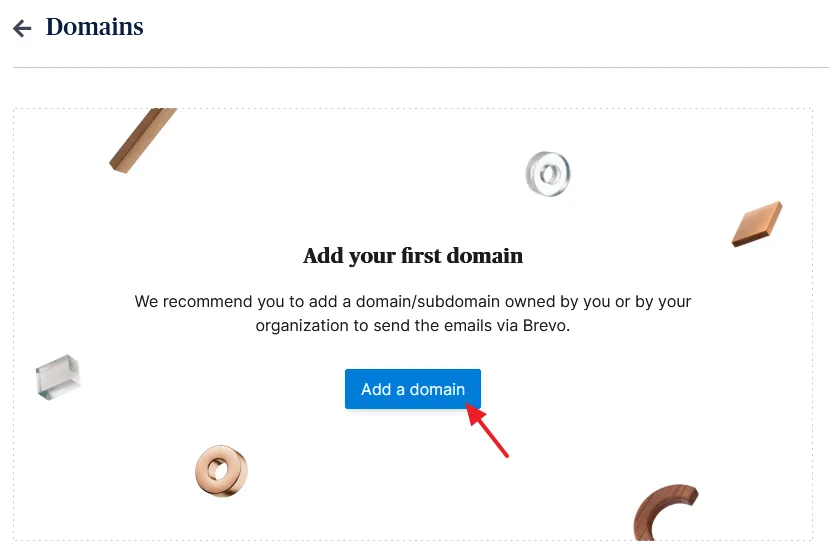
- Click on the Add a Domain button to add your domain.
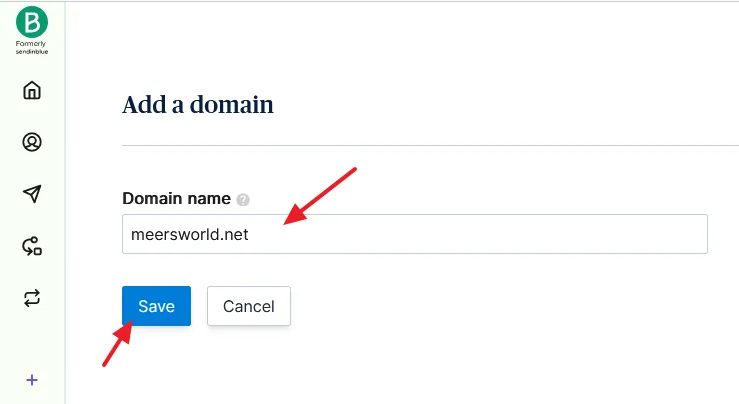
- In the Domain name enter your domain name like this: example.com. Don’t add www and https.
- Click on the Save button.
- Now Verify your domain. Select the DNS records option.
- You have to add these two DNS (TXT) records one-by-one on your domain’s DNS Settings, as I have shown below.
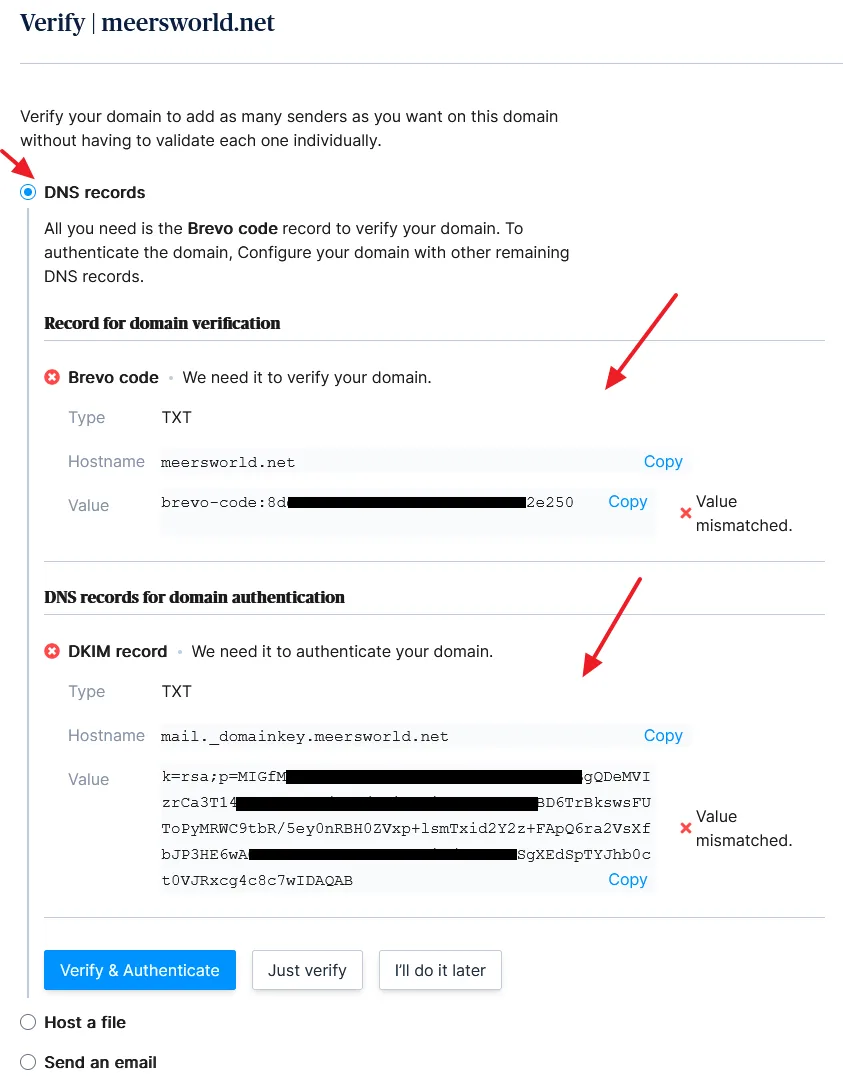
Here I am guiding you on how to add TXT Records for a domain on Namecheap. You can follow this guide to add TXT records for your domain. To learn about how to add a TXT Record for your Domain on cPanel, read this tutorial: How to Add a TXT DNS Record in cPanel.
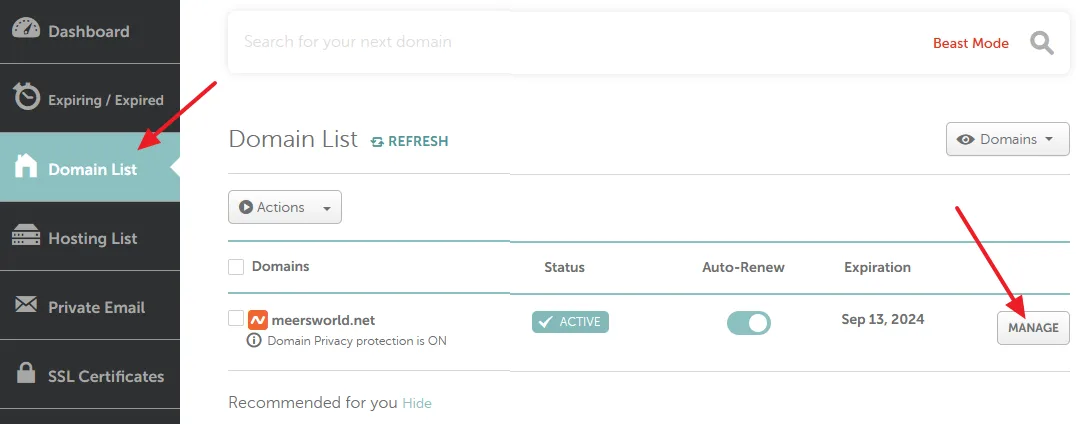
- Login to your Namecheap account.
- Go to Domain List from the sidebar.
- Click on the MANAGE button associated with your domain.
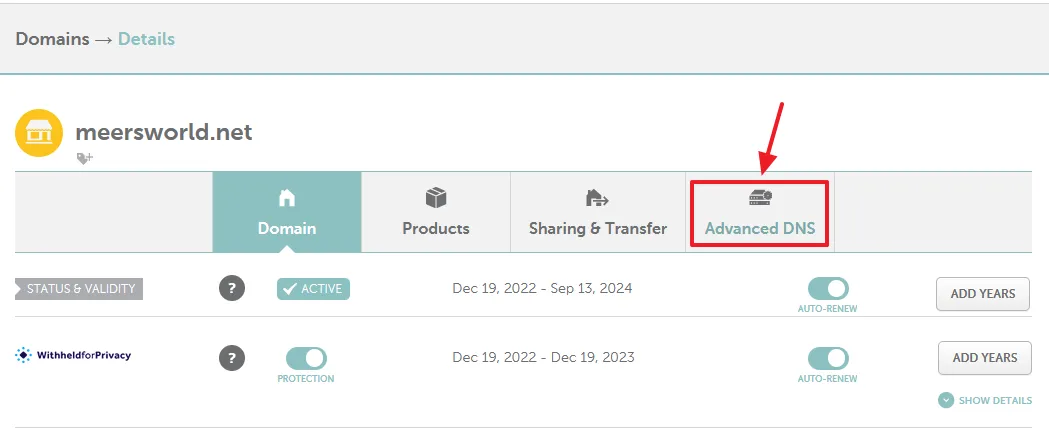
- Go to Advanced DNS tab.
- Click on the ADD NEW RECORD button.
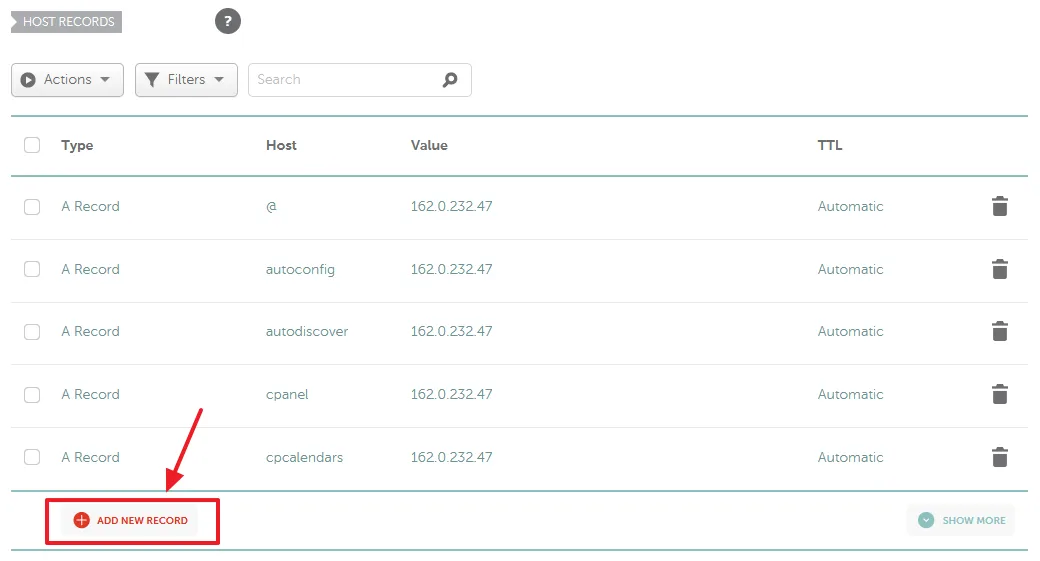
Now add the both TXT Records i.e. Brevo-code and DKIM record one-by-one. First I am adding the Brevo-code.
- In the Record Type select TXT Record.
- In the Host enter @. It is used for the root domain. In my case it is meersworld.net.
- In the Value paste the value (text string/code) of Brevo-code.
- Choose the TTL Automatic.
- Click on the Check mark to save the record.
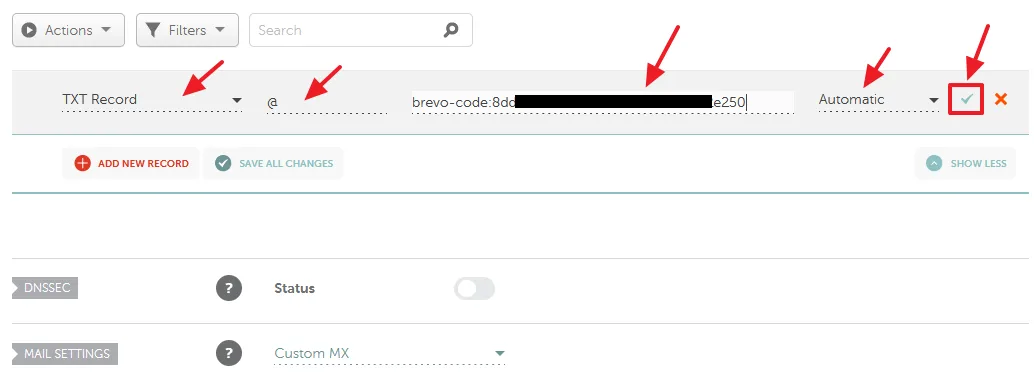
Now I am adding the DKIM Record.
- Click on the ADD NEW RECORD button.
- Select the TXT Record.
- In the Host type enter mail._domainkey. Do not add your domain name. Here you can see that I have excluded meersworld.net.
- In the Value paste the value (text string/code) of DKIM Record.
- Select the TTL Automatic.
- Click on the Check Mark to save the record.
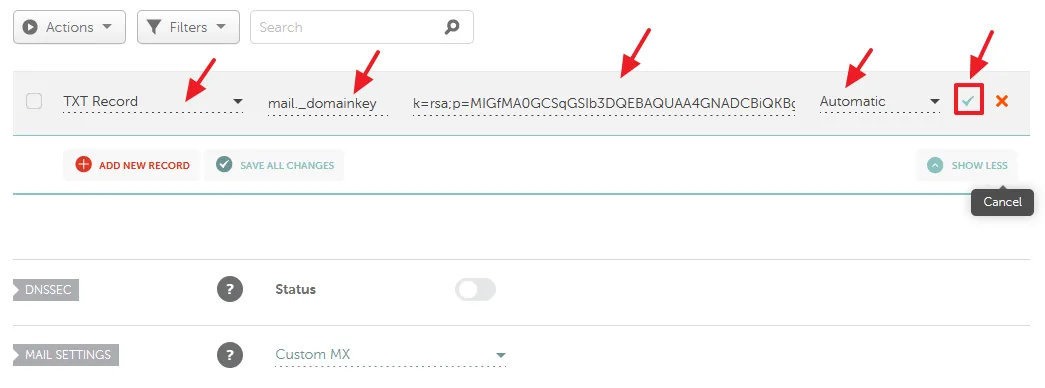
- Go back to Brevo Verify page from where you had copied the DNS TXT Records.
- Click on the Verify & Authenticate button.
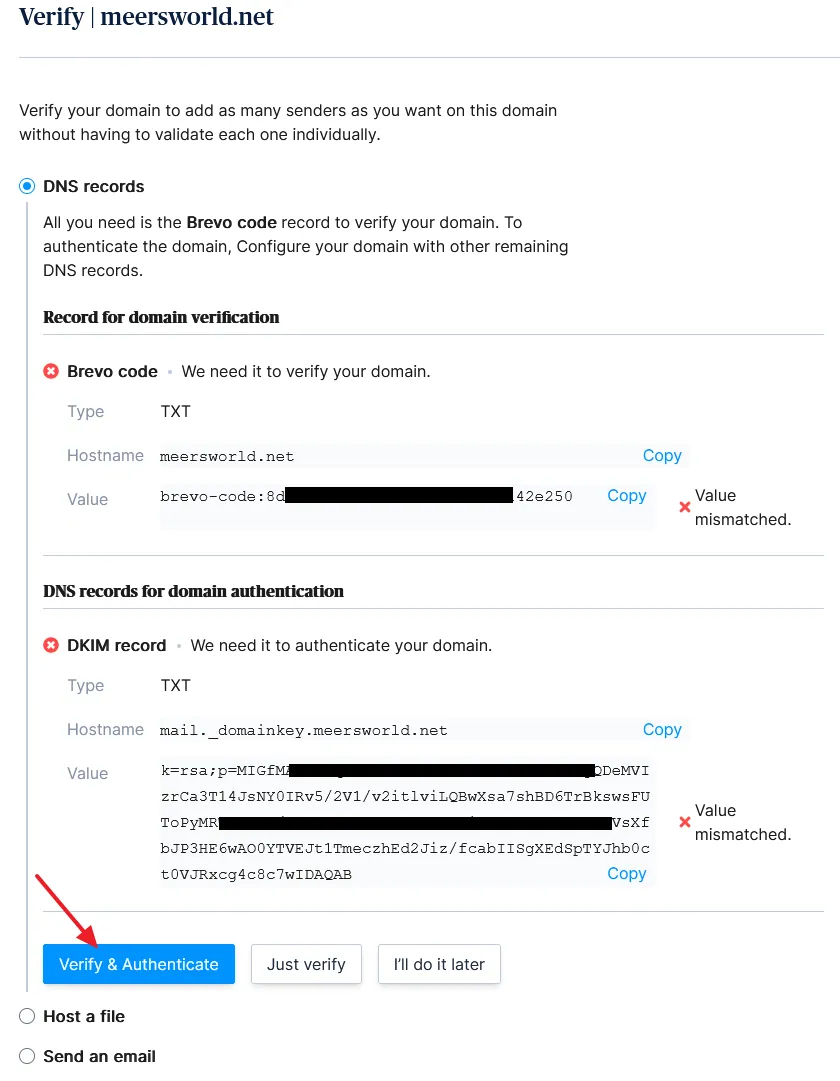
- You can see that the domain meersworld.net is successfully verified and authenticated via DNS TXT Records. The records may require up to 30 minutes to get accepted globally.
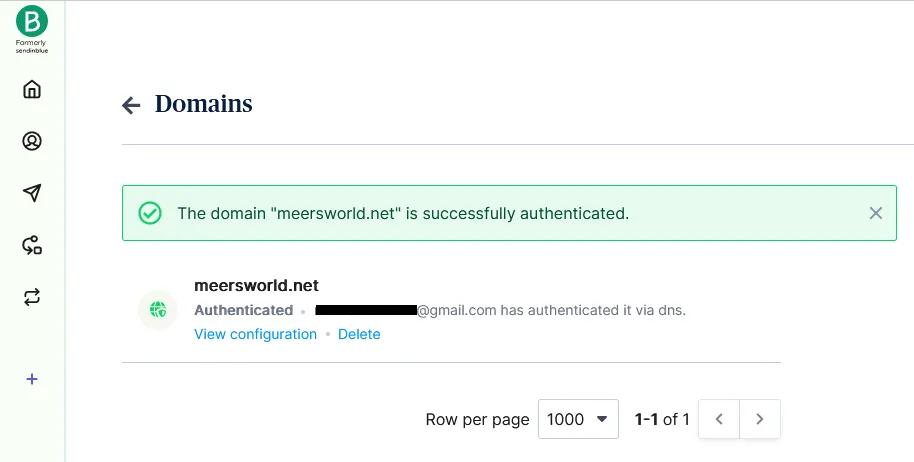
02. Get API Key
The domain is authenticated and verified now you have to get the API key.
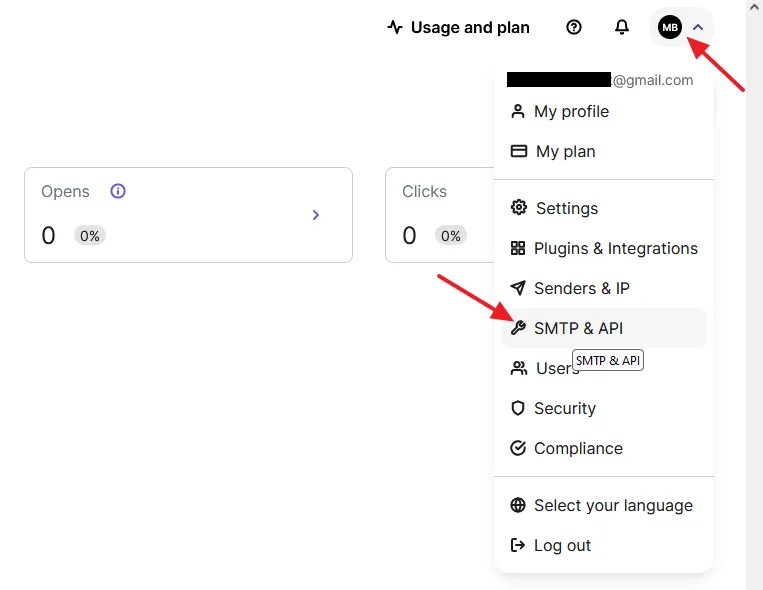
- Click on your Brevo Profile icon.
- Click on the SMTP & API.
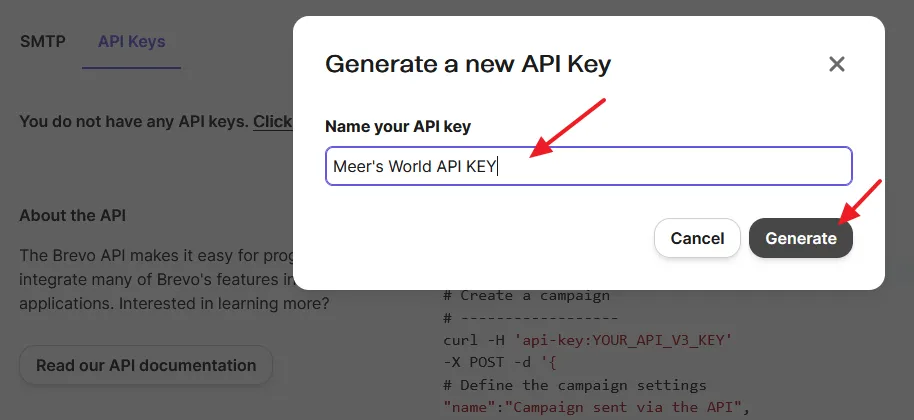
- Enter a name for your API Key.
- Click on the Generate button.
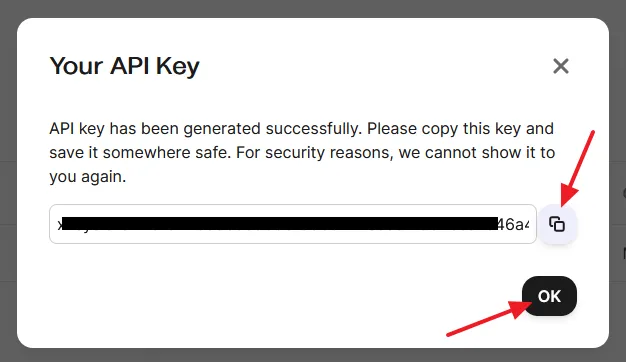
- Copy your API Key and go back to Configure Mailer Setting page.
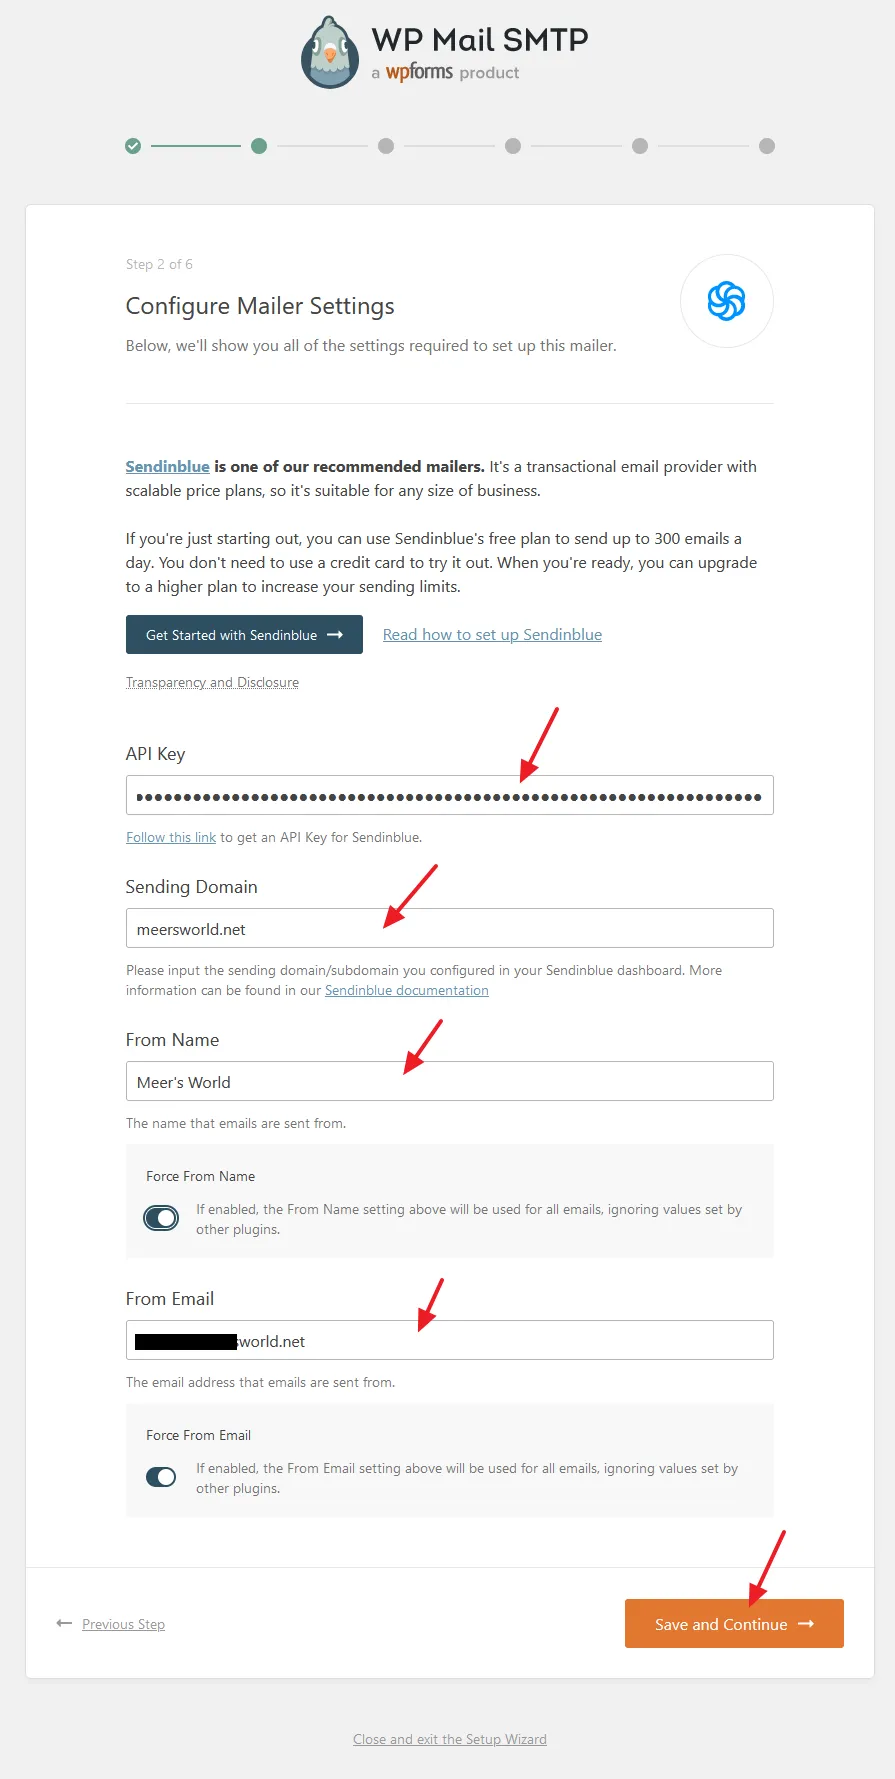
- Paste the copied API Key in the API Key field.
- In the Sending Domain enter your domain name like this, example.com, without adding www and https.
- In the From Name enter your Website name.
- In the From Email enter the email address that emails are sent from.
- Click on the Save and Continue button.
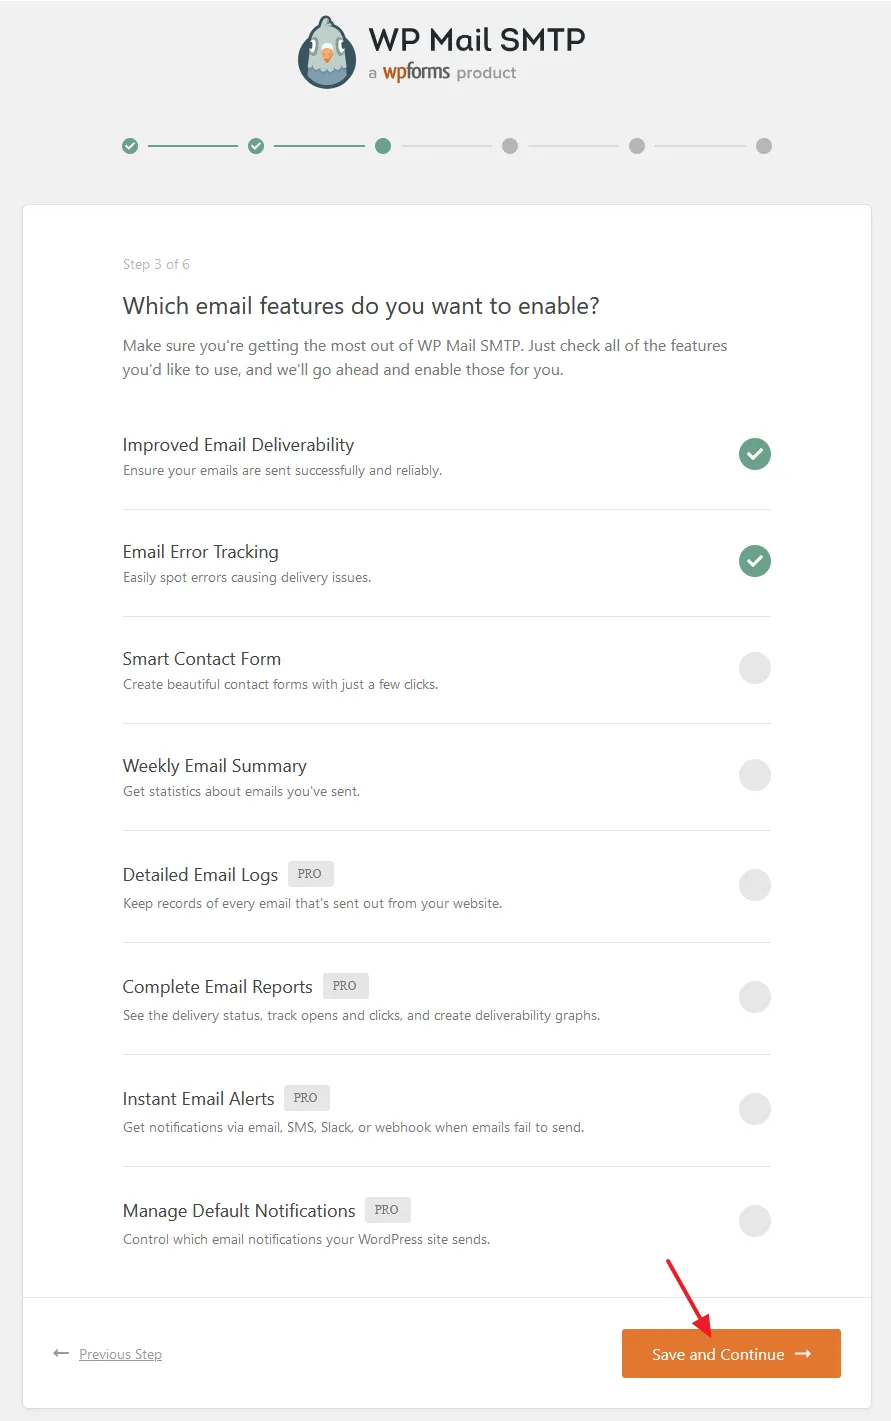
03. Which Email Features Do You Want to Enable?
- Select the email features that you want to enable.
- Click on the Save & Continue button.
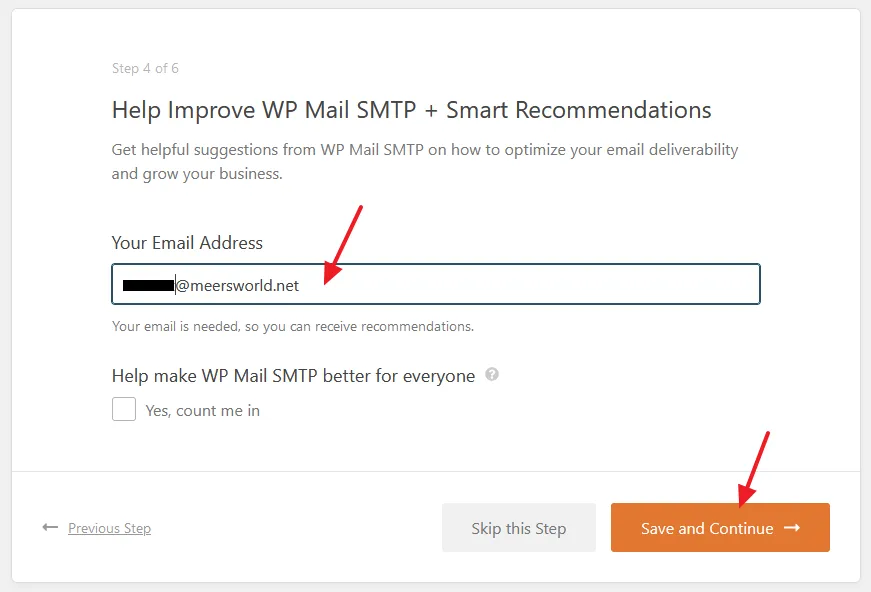
04. Get Helpful Suggestions from WP Mail SMTP
- Enter your Email Address to receive helpful and smart recommendations from WP Mail SMTP.
- Click on the Save and Continue button.
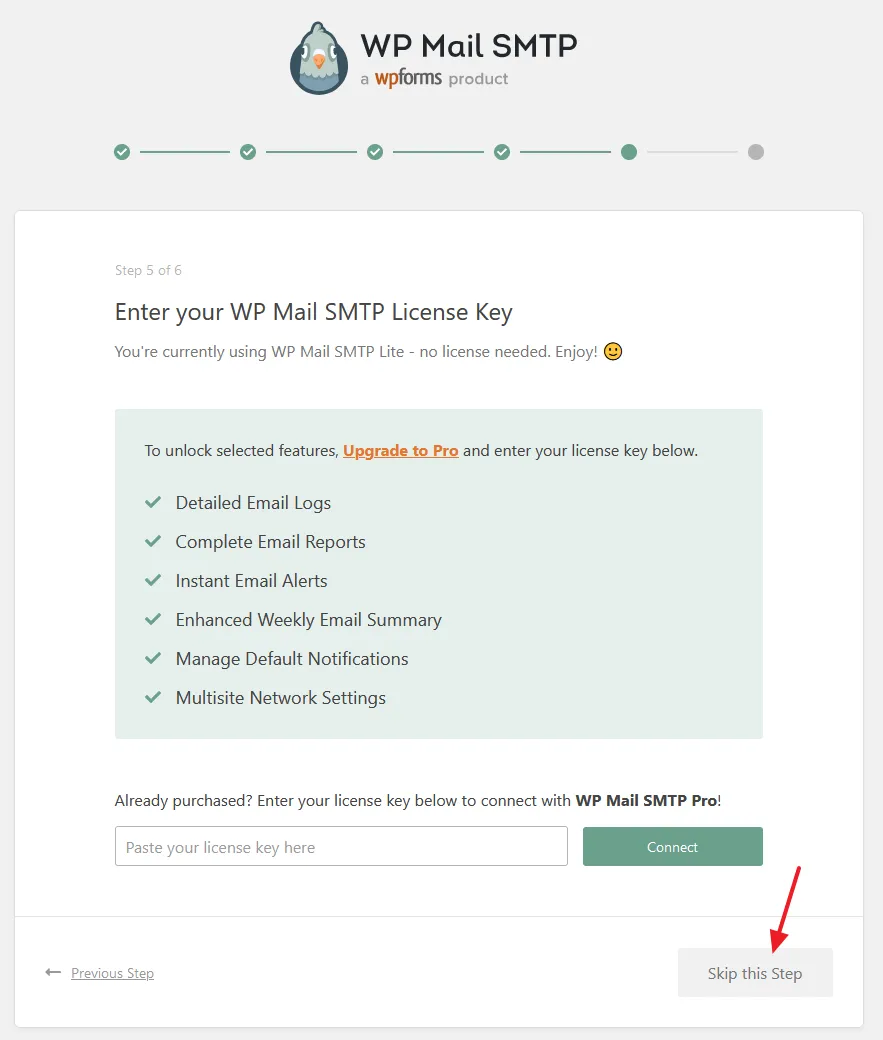
05. Enter your WP MAIL SMTP License Key
- If you have purchased a Paid Plan of Brevo, enter your License Key. If you had Signed Up a Free Plan, click on the Skip this Step button.
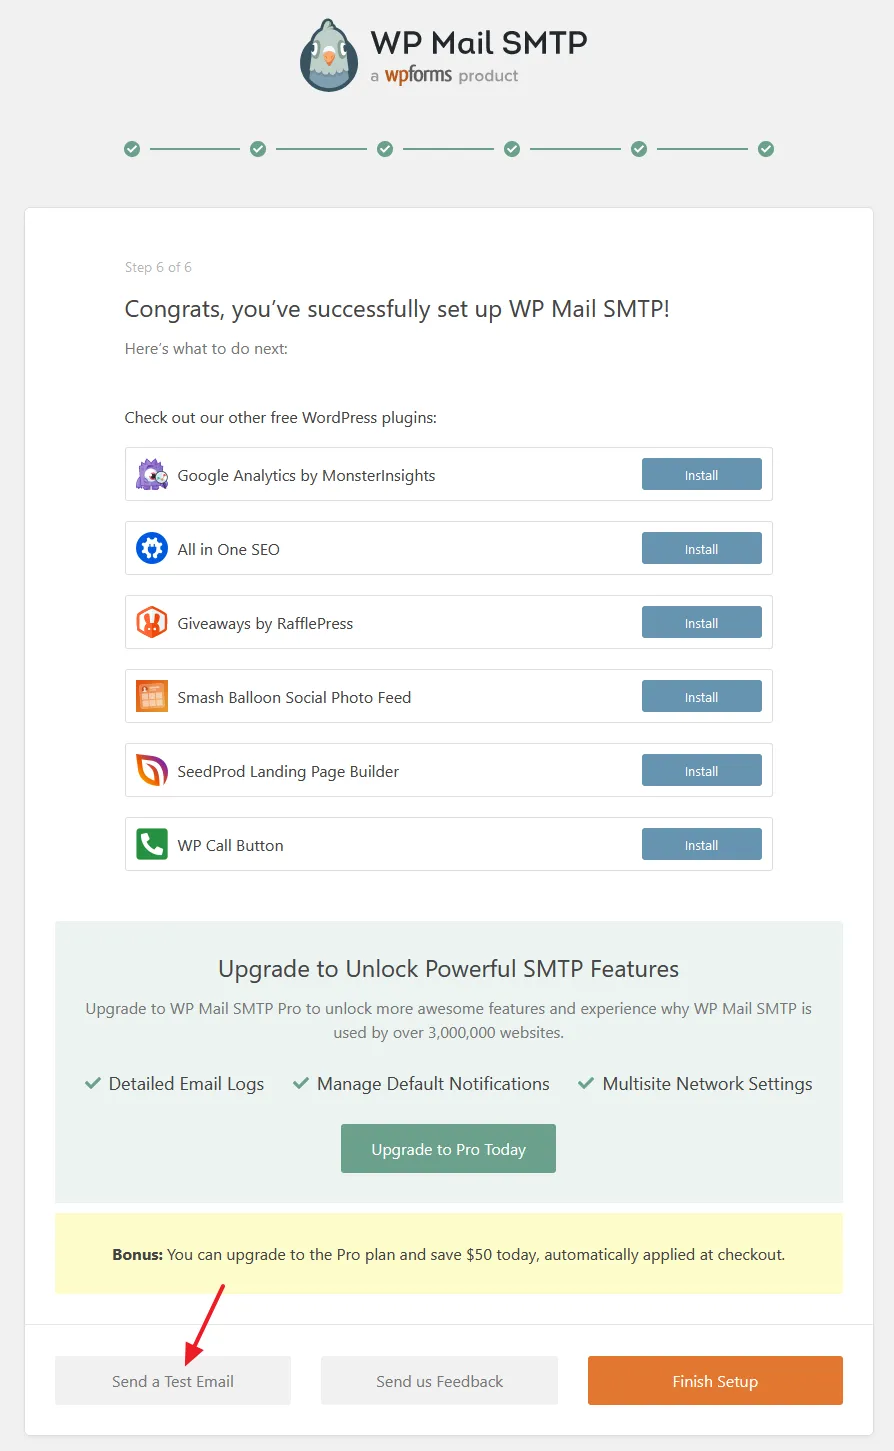
06. Send a Test Email
Congratulations, you have successfully set up WP mail SMTP for Brevo (Sendinblue). Now its time to send a test email.
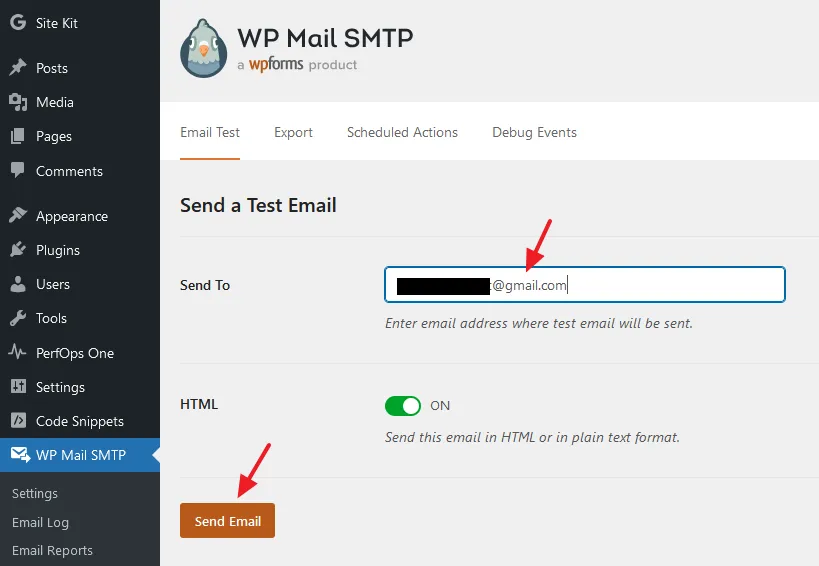
- Scroll-down to bottom of the page and click on the Send a Test Email button.
- In the Send To enter any of your active email address.
- Click on the Send Email button.
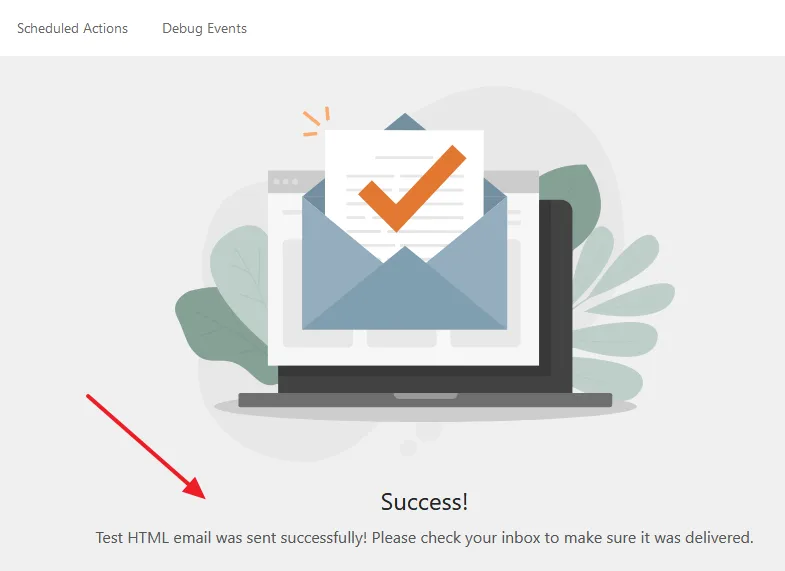
- You can see the message, “TEST HTML email was sent successfully! Please check your inbox to make sure it was delivered.
If you like this post then don’t forget to share with other people. Share your feedback in the comments section below.

Also Read
- How to Add Contact Form on Contact Us Page in WordPress
- How To Integrate reCAPTCHA In Contact Form 7
- How to Claim WordPress Website on Pinterest | 3 Methods
- How to Hide WordPress Admin Toolbar from Top of Website
- How to Enable Persistent Object Cache on WordPress
- How To Show Google Analytics In WordPress | Site Kit By Google



Leave a Reply