Are you getting the error, “Missing a Temporary Folder” while uploading an image or installing a plugin in WordPress? You’re in the right place. I will guide you step-by-step to how to resolve this error and why this error comes.
This error stops you from uploading images or installing WordPress plugins. There could be two possible reasons for this error (1) Your “File Usage” disk quota in cPanel account is exceeded (2) Your “temp” folder in “WP-Content” is mistakenly deleted.
In cPanel the “File Usage” refers to disk inodes, or the number of files uploaded into your account. An inode is a data structure that describes a file or a folder. The number of inodes shows the number of files and folders you have.
If the “File Usage” percentage crosses 100% in your cPanel, your disk quota is exceeded. It means that there were more files created than the actual limit.
Let’s talk about “temp” folder. Before WordPress stores or send a file to the appropriate folder it temporarily stores files in a temporary folder called “temp”. When the “temp” folder is not found it is difficult for WordPress to continue its default process of uploading, as a result it shows this error.
This is how the error looks like when you upload an image from your WordPress Editor.
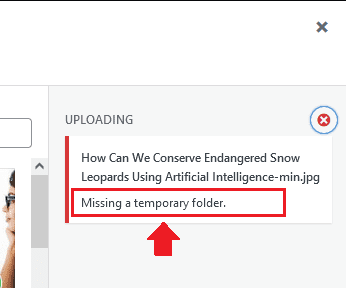
01. File Usage Disk Quota Exceeded
Most of the times the error “Missing A Temporary Folder” comes because of exceeding the “File Usage” disk quota, so always check it first before you go to the Second solution .
Follow the steps to how to check the File Usage in cPanel account and also learn what to do if your disk quota is exceeded.
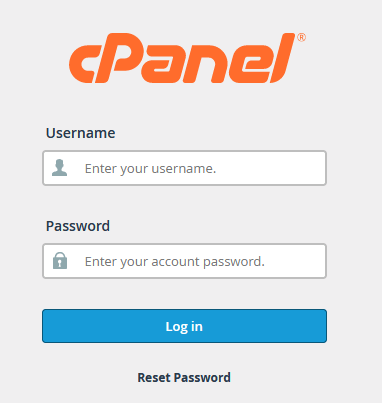
- Login to your cPanel. The Link, Username and Password of your cPanel account are provided to you by your web hosting provider.
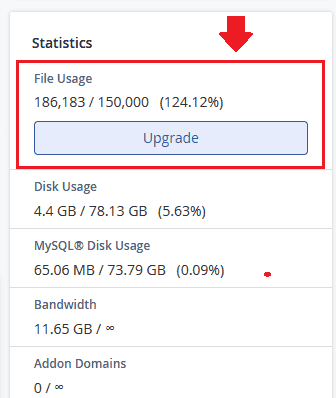
- Once you are logged into your cPanel find the “Statistics” section at right side. Under the “Statistics” you will see the “File Usage” option.
- If you see the File Usage percentage more than 100%, you have exceeded your disk quota. It will also show you the Upgrade option as well.
There are three reasons that “File Usage” crosses its maximum limit (1) Your website is reached the maximum disk quota of file uploading (2) Your Page Cache plugin, most probably it would be W3 Total Cache which consumes your File Usage quota (3) Trash or dummy data has taken the space of your “File Usage” disk quota.
If there is the Second reason, read the step-by-step tutorial below to learn about “File Usage” and clearing the “File Usage” cache on W3 Total Cache Plugin. You can also replace W3 Total Cache with other cache plugins such as LiteSpeed Cache, Breeze, Perfmatters, etc, that do not consume your File Usage disk quota.
If there is the Third Reason i.e. Trash or dummy data has occupied your “File Usage”, ask your web hosting to clean the “cache files” from your cPanel account. You can do it by yourself if you know how to clean cache files. Once the cache files are cleaned your “File Usage” will come to normal percentage.
Let’s say your “File Usage” cache files are cleaned from your cPanel account and “File Usage” percentage is still above 100%! You need to upgrade your hosting package which could offer more “File Usage” disk quota.
RELATED
02. Create “Temp” Folder In WP-Content
If the “Solution 1” solves your problem you don’t need to create a temp folder and follow this solution.
Follow the steps to create temp folder in your cPanel account:
- Login to your cPanel account.
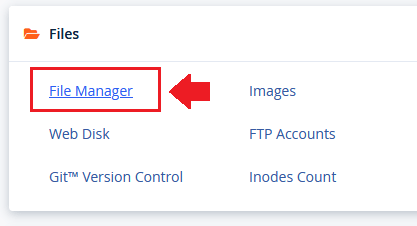
- Click on the “File Manager” located under the “Files” section.
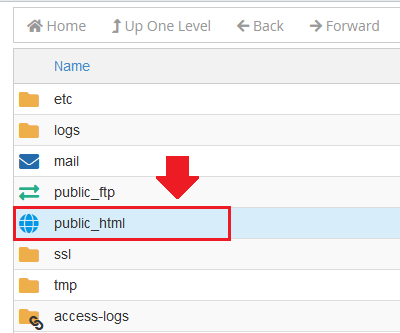
- Click on the public_html.
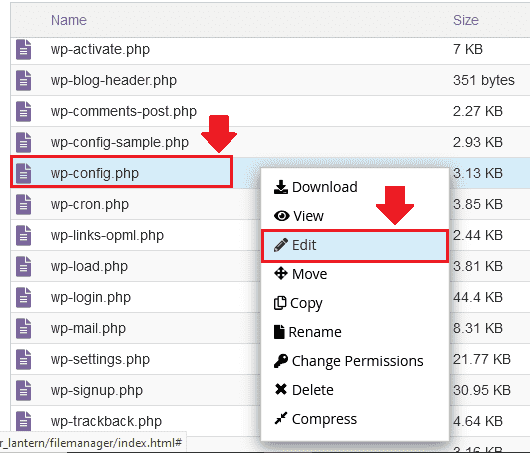
- Click on the “wp-config.php“.
- Click on the “Edit“.
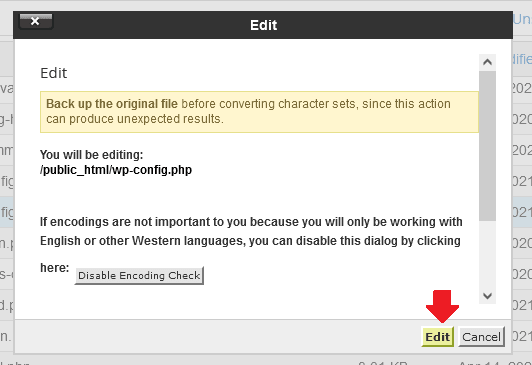
- Click on the “Edit“. Before you edit download a copy of “wp-config.php” to your computer, just as a precautionary measure.
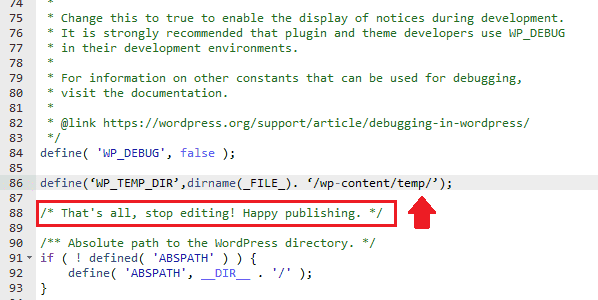
- Find the line that says, “/* That’s all, stop editing! Happy publishing. */”.
- Now Paste this code just above that line, as we have shown in the snapshot.
define(‘WP_TEMP_DIR’,dirname(FILE). ‘/wp-content/temp/’);
- Save the “wp-config.php” file.
- Now go back to the “public_html” directory and open the “wp-content” folder.
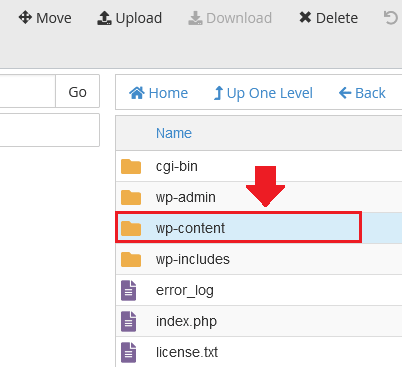
- Click the “+ Folder” to create a new folder.
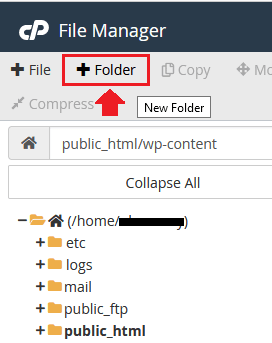
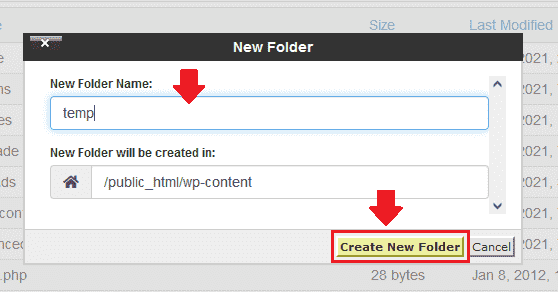
- Enter “temp” in the New Folder Name.
- Click on the “Create New Folder“. It will create a “temp” folder.
- Now go back to your WordPress Editor and check whether files are uploading or not.
I hope that above solutions works for you to remove the error, “Missing A Temporary Folder”. If you like this post then don’t forget to share with other people. Share your feedback in the comments section below.

Also Read



Leave a Reply