Have you created your private email account in cPanel and want to setup it on MS Outlook 2016? You’re in the right place.
In this tutorial, I will guide you step-by-step on how to setup your private email account in MS Outlook 2016 using the POP protocol settings.
POP stands for Post Office Protocol. It is a standard protocol used by e-mail clients such as MS Outlook, Mailbird, Mozilla Thunderbird, etc, to retrieve e-mail from a mail server. POP3 is the most popular, secure and widely used POP version.
An email created by linking it to your domain such as “info@willsmith.com” is called business email or private email. In “info@willsmith.com” the “willsmith.com” is a domain that has been linked to username “info”.
There are many benefits for creating business emails such as security, privacy, ownership, etc. It creates a trust, like you are officially representing a business/company or you are an employee of a company. So that’s why majority of professionals who own a business or part of a business use business email.
If you haven’t created your private email account in cPanel yet, read this tutorial:
How To Setup cPanel/Domain Email on MS Outlook 2016
Follow these steps to setup your cPanel private email in MS Outlook 2016:
- Open MS Office Outlook 2016.
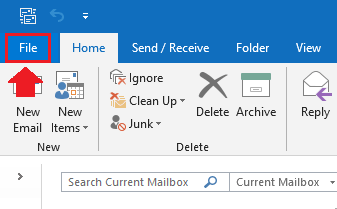
- Click the “File” located at top-left corner.
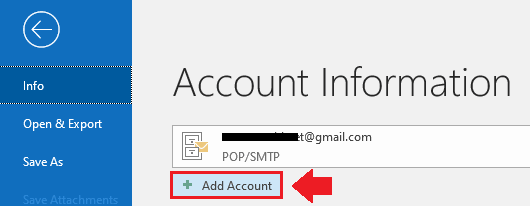
- Click “Info“.
- Click “+ Add Account“.
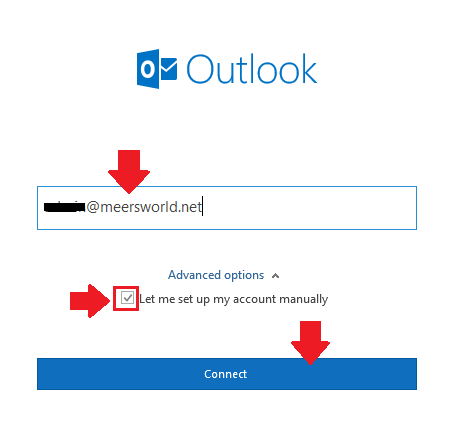
- Enter your full email address that you want to setup on MS Outllook 2016.
- Expand the “Advanced options”.
- Tick the “Let me set up my account manually”.
- Click “Connect“.
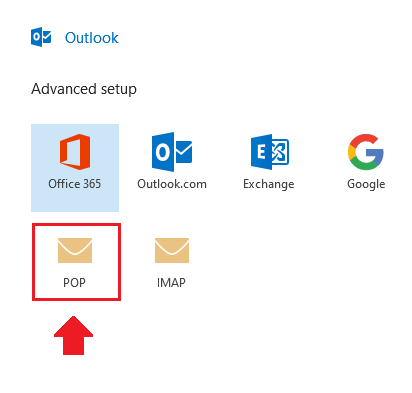
- You have two options here i.e. POP & IMAP. POP is preferred when you access your mail from only one device like from your computer or your smartphone. Generally POP is considered better and more secure than IMAP.
- Click the “POP“.
- When you create an email account in cPanel it provides you with the “Mail Client Manual Settings”. Use those settings here.
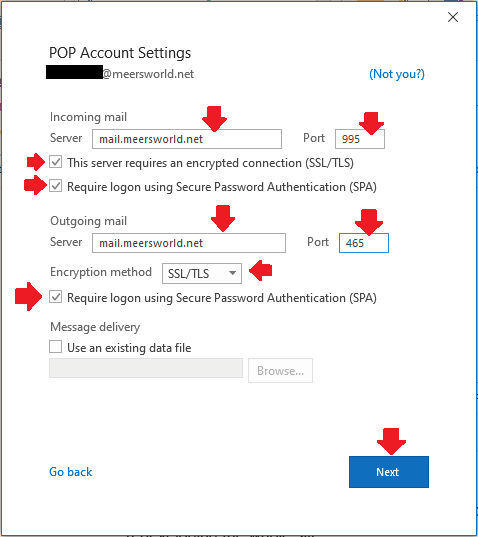
- Enter your “Incomming mail server” and Port. Port for POP is “995”. Your Incomming mail server will be like “mail.YOUR_DOMAIN_NAME”.
- Tick, “This server requires an encrypted connection (SSL/TLS)”.
- Tick, “Require logon using Secure Password Authentication (SPA)”.
- Enter your “Outgoing mail server” and Port. Your Outgoing mail server will be same as Incoming mail server. In “Port” enter “465”. 465 is the port number of SMTP(Simple Mail Transfer Protocol). SMTP is used for sending email over the internet.
- In the “Encryption method” choose the “SSL/TLS” from the dropdown menu.
- Tick, “Require logon using Secure Password Authentication (SPA)”.
- Click “Next”.
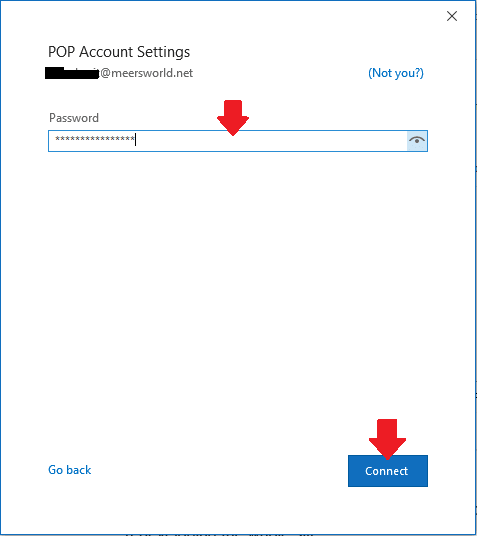
- Enter the “Password” that you created for your email account.
- Click “Connect“.
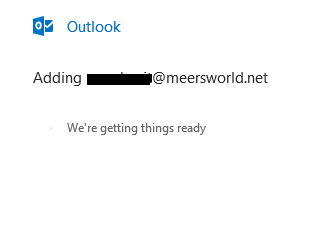
- It will start verifying your email settings to connect it with the mail server.
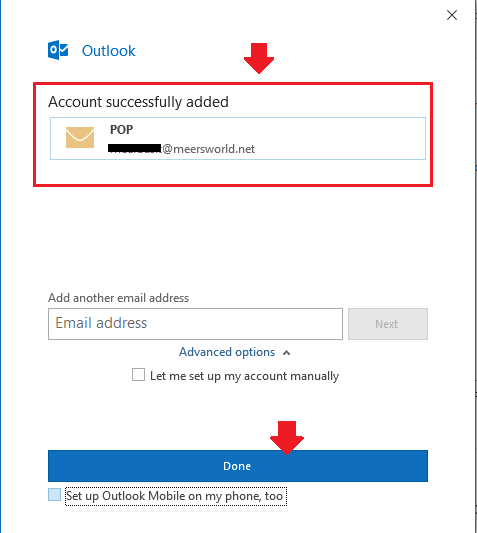
- Once the settings are verified your email account will be successfully added to your MS Outllook 2016. It will show you a message “Account successfully added”.
- Click “Done“.
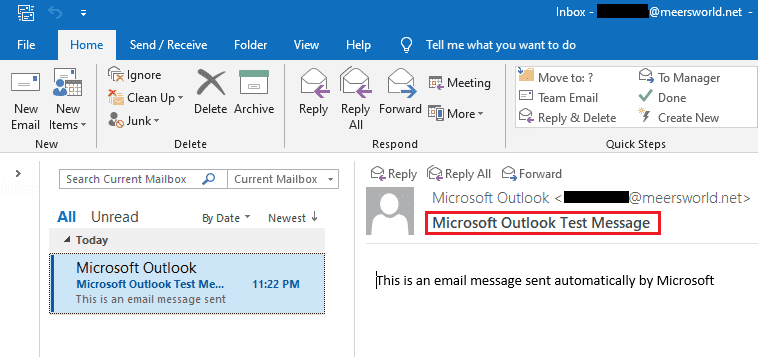
- For the testing purpose Microsoft will send you an email with the title, “Microsoft Outllook Test Message”.
So it was all about setting up your private email account on MS Outlook 2016. If you like this post then don’t forget to share with other people. Share your feedback in the comments section below.

Also Read
- How To Setup/Configure Gmail In Outlook – Step By Step
- How To Setup Hotmail In Outlook 2016 & Outlook 2019 In Windows 10
- Solved: Your E-mail Server Rejected Your Login – Outlook Error
- How To Create & Add Signature In Outlook – Windows 10
- Solved: The Server You’re Connected to is Using a Security Certificate
- How to Use Microsoft Office Free & Its Best Alternatives



Leave a Reply