Have you launched your WordPress website successfully? Congratulations! but you’re not done yet. There are very important plugins which should be installed in your WordPress website for its traffic-growth and optimization.
In this article you will get to know about those 5 essential WordPress plugins that your website needs.
Do you know that apart from basic WordPress settings, most of the things in WordPress are done through plugins! A WordPress plugin is a program containing a group of functions that extend functionality and add new features to your website.
When you go through these plugins you will have a good idea about their importance and role. In addition to their role and importance you will learn plenty of other things related to SEO (Search Engine Optimization) like Google Search Console, Google Analytics, Google AdSense, Indexing, Sitemap, etc.
Following topics will be covered in this article:
- How To Install A WordPress Plugin
- 5 Essential WordPress Plugins
01. How To Install A WordPress Plugin
If you don’t know how to install a WordPress plugin then go through this section.
- Login to your WordPress admin, if you’re not already logged in.
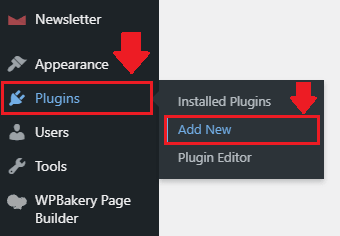
- From your sidebar go to “Plugins” and click on the “Add New“.
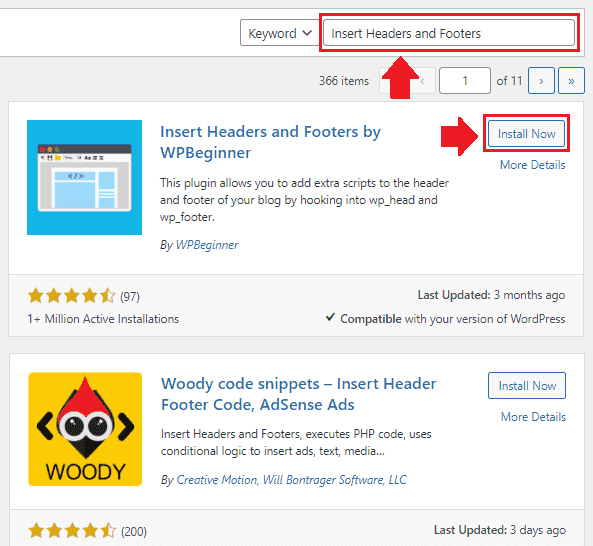
- Enter the plugin name in the Plugin Searchbar, located at your top-right. Here you can see that I have entered “Insert Headers and Footers” and it is appeared in plugin search results below.
- Once you find the desired plugin, click on the “Install Now“.
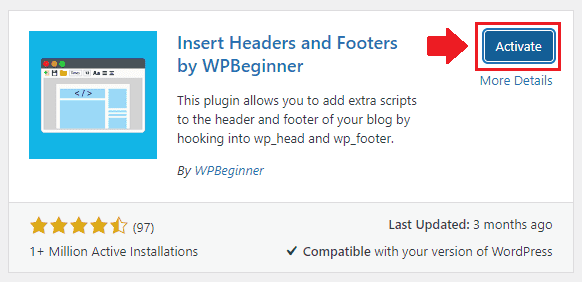
- Once the plugin is installed you will see the “Activate” button instead of Install. Click on the “Activate” to activate your plugin. You can activate the plugin from Plugins’s page as well.
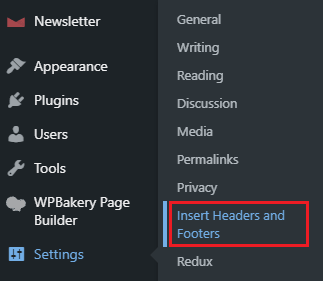
- Once the plugin is activated you can access it from your sidebar. Some plugins appear separately in the sidebar whereas some plugins appear under main menus such as Tools, Settings, Users, Media, etc.
- Here you can see that the plugin that we installed is listed under the Settings menu.
5 Essential WordPress Plugins
Here are my recommended 5 essential WordPress plugins that every new WordPress website/bog needs:
1). Site Kit by Google
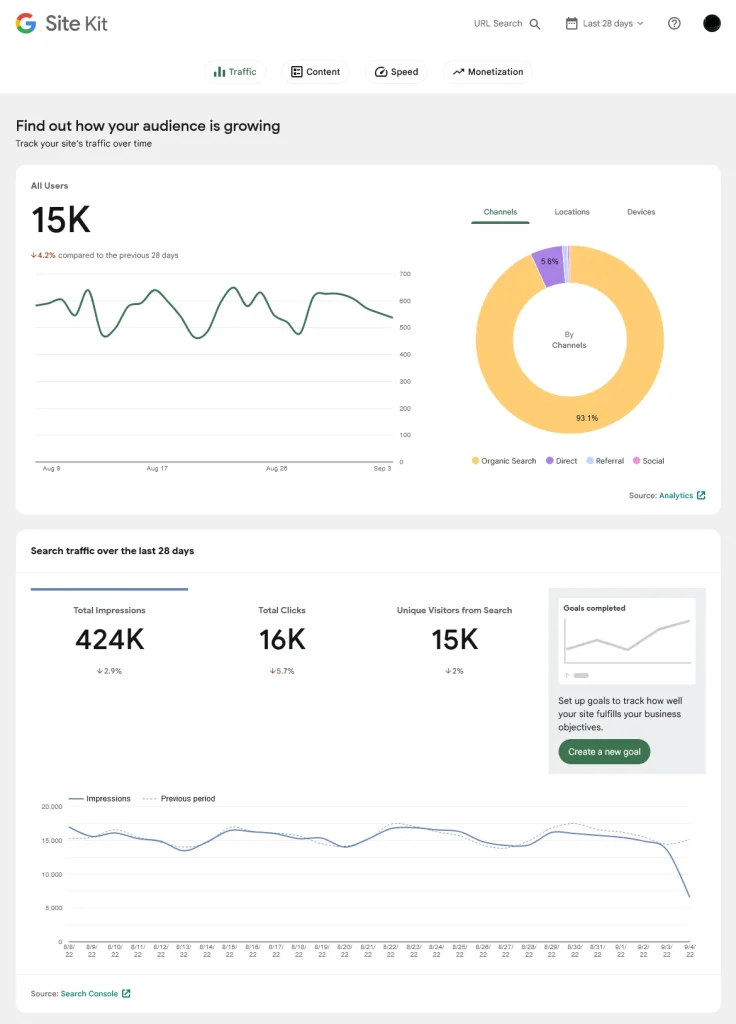
As you know that WordPress does not show you the traffic stats and Google Analytics of your website, so to show your traffic stats and Google Analytics in your WordPress dashboard you need to install a third-party plugin.
Though there are many WordPress plugins for showing traffic stats and analytics alternative to Site Kit by Google, like MonsterInsights, Analytify, Watsonfinds, Pixel Caffeine, etc, but they are not free.
Site Kit by Google is a free WordPress plugin powered by Google, widely used to connect your website to Google Search Console, Google Analytics, Google AdSense and Google PageSpeed Insights.
- Google Search Console is a free SEO tool and a web service by Google, which allows website owners to check indexing status of their pages, tells you about website performance, errors, warnings, URL inspection, coverage, sitemaps, mobile usability and more.
- Google Analytics is a sophisticated tool which provides you detailed information about your website traffic, you can get a deeper understanding of your website visitors, and much more.
- Google AdSense is one of the most popular affiliate networks. If you want to monetize your website with Google AdSense you can connect your website to Google AdSense through Site Kit by Google. It is optional.
- Google PageSpeed Insights tool gets your PageSpeed score and use PageSpeed suggestions to make your website faster.
I have created a separate tutorial that guides you step-by-step on how to connect your Site Kit by Google plugin to Google Services in order to show your website traffic stats and analytics on your WordPress dashboard.
Read This Tutorial: How To View Google Analytics In WordPress Dashboard | Site Kit By Google
2). Yoast SEO
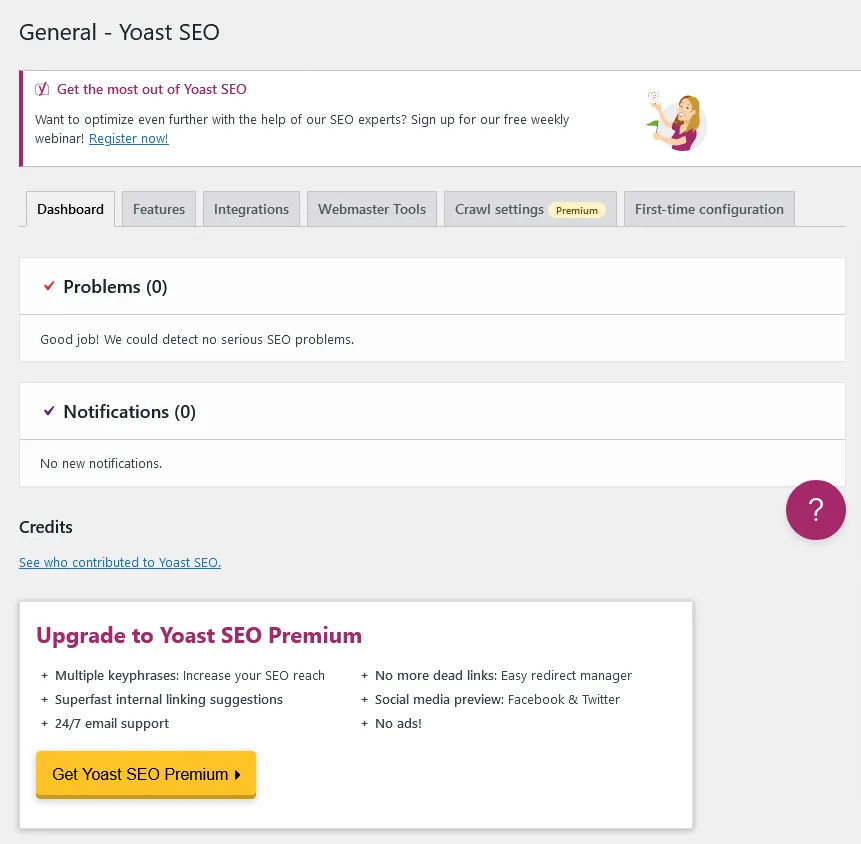
Yoast SEO is one of the leading WordPress SEO plugins used by millions of web publishers. It helps you to optimize your website and make it perform better in search engines i.e Google, Bing, etc.
Its SEO Analysis offers suggestions to improve the SEO of your post content whereas the Readability Analysis offers suggestions to improve the structure and style of your post content.
Once the Yoast is activated in you website you can see the SEO Analysis and Readability Analysis in the bottom section of your Post. You can also edit your post slug, you can add key phrase and meta description of your post, etc.
Apart from SEO Analysis and Readability Analysis there are other settings and tools that you can configure like Search Appearance Settings, Webmaster Tools, General Settings, Social Settings, etc.
Yoast SEO also creates the Sitemap of your website. A sitemap is an XML file that lists the URLs for a website that are available for crawling. The Sitemaps tells the search engines about pages on their site that are available for crawling.
I have created a separate tutorial that guides on:
3). LiteSpeed Cache
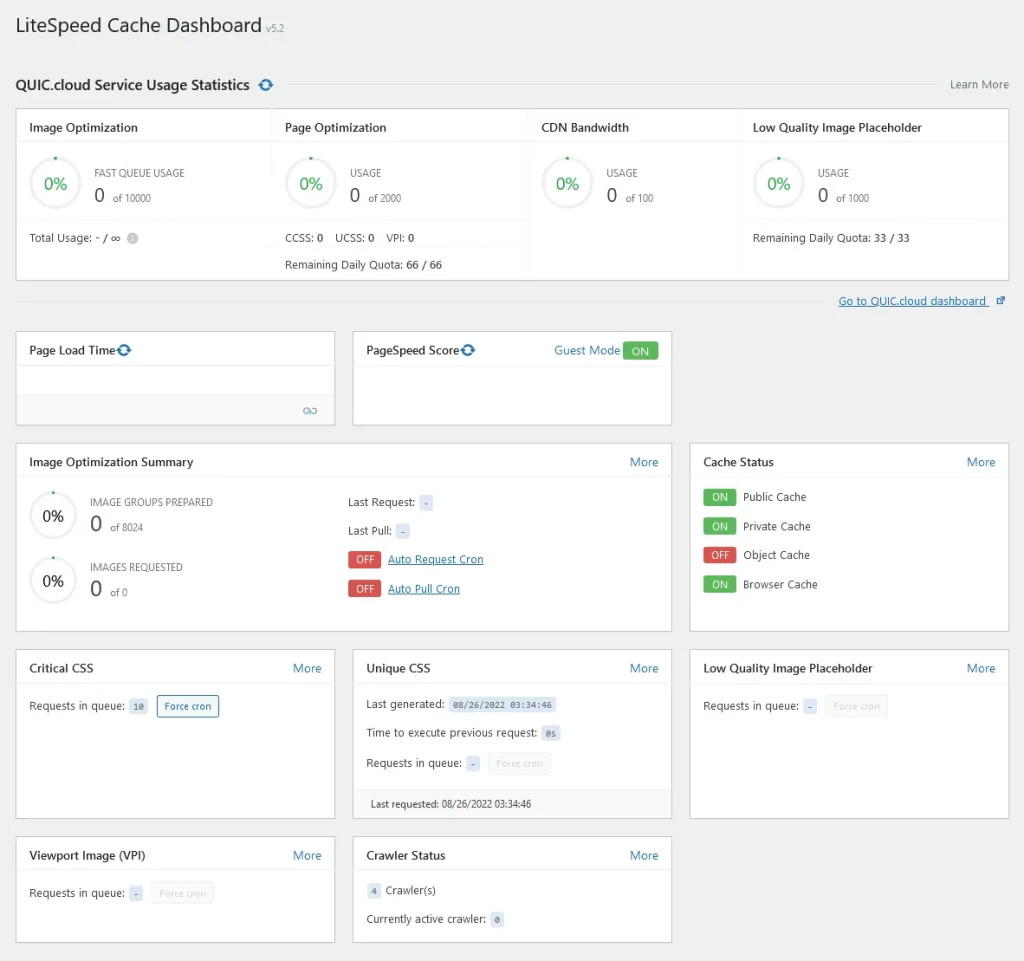
LiteSpeed Cache is one of the fastest and leading free-WordPress performance-optimization plugins. It speeds up your website on both desktop and mobile devices, by reducing page load time, improving web server performance, caching of CSS and JavaScript in memory, etc.
The main purpose of improving the performance of your website is to provide good page experience to visitors and pass the Core Web Vitals metrics, which are now one of the ranking factors in Google. LiteSpeed Cache helps you to pass the Core Web Vitals metrics assessment.
RELATED
To know more about Core Web Vitals metrics, features of LiteSpeed Cache, how to install and set up LiteSpeed cache, and how to pass the Core Web Vitals assessment, read this:
Note: If your WordPress blog/website is NOT monetized with Google AdSense Ads, skip the Section 4 (Delay the Loading of Google AdSense Ads).

4). WP User Avatar
In general, Gravatar is recommended for uploading the avatar(picture) of WordPress authors/admins/users, but to use this service you have to signup on Gravatar and create account there, which is a long process.
Instead of Gravatar you can use a very simple WordPress plugin called WP User Avatar that allows WordPress authors and users to upload their profile pictures quickly.
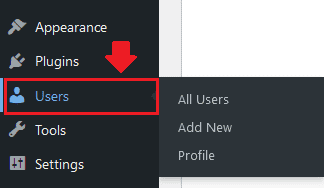
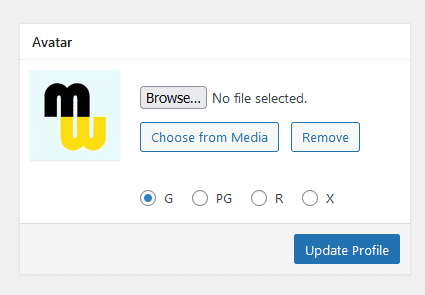
Once the WP User Avatar plugin is installed and activated it is integrated with your “User” settings located on your sidebar.
- Go to “Users” from Sidebar.
- To upload the avatar of main admin, go to Profile.
- To open the list of all your users/authors/admins click “All Users“. On “All Users” edit your desired user and upload the avatar.
- If your avatar is already uploaded in your website’s Media Library you can select “choose from Media”.
- To upload avatar from your computer click on the “Browse” button. On your website(front-end) the avatar appears in Author Bio and Comment Replies.
5). Contact Form 7
A website or blog connects you to a global audience, so there will be people who want to contact you for an inquiry, business offer, or for some other purpose.
Though you can provide your email, social media links, etc, on your website, but the best way is to create a separate contact us page and add a contact form there. People can quickly send emails to you, directly from your website.
WordPress does not come with a builtin contact form, you have to install a third-party plugin for that. Though there are many contact-form WordPress plugins, but the most widely used and popular is Contact Form 7.
I have created a separate tutorial that guides you step-by-step on how to add a Contact Form 7 in a separate page and how to integrate reCAPTCHA in Contact Form 7.
So these were my recommended 5 essential WordPress plugins that a new website needs. If you like this post then don’t forget to share with other people. Share your feedback in the comments section below.
Also Read
- How To Insert Line Break In New WordPress Block Editor
- How to Stop Spam Bot Comments in WordPress
- How Much Monthly Bandwidth Is Required For Website Visitors
- Solved: Favicon Not Showing After Activating LiteSpeed Cache
- Best SEO WordPress Plugins Affiliate Programs
- How to Update WordPress Theme Purchased from Themeforest



Leave a Reply