Have you successfully setup and activated Post+ feature in Tumblr, but don’t how to create/publish Post+ content? Don’t worry! You’re in the right place.
In this tutorial we will guide you step-by-step on how to create/publish Post+ content in Tumblr.
To be eligible for creating Post+ content you must setup and activate the Post+ feature first. If you have not already activated the Post+ feature in Tumblr then go through this tutorial:
|| Looking for cute & aesthetic Tumblr themes? Find Here.
Following topics will be covered in this tutorial.
- Who Can View Post+ Content?
- How To Create Post+ Content In Tumblr.
RELATED
- How To Setup Custom Domain On Tumblr | Beginners
- How To Monetize Tumblr Blog With Google Ads | AdSense
- How To Link Tumblr with Google Analytics | Measurement ID
- Tumblr SEO Settings & On-Page SEO Guide | Increase Traffic
Who Can View Post+ Content?
When you create and publish Post+ content it will be visible to everyone, for both Supporters & Non-Supporters.
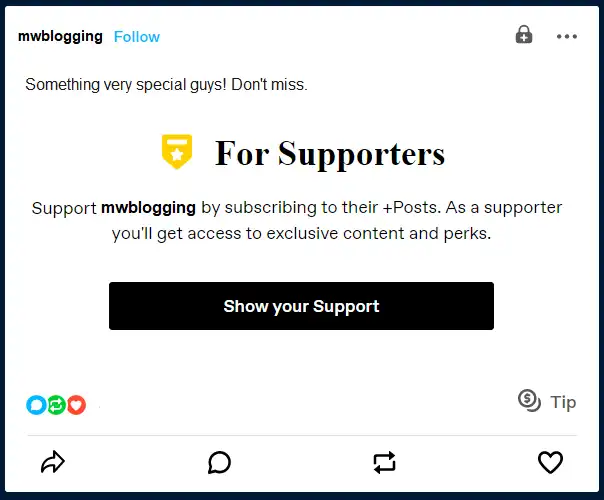
The non-supporters can see only the teaser of Post+ content with Show Support button. Whereas your supporters (paid subscribers) can view full-content of the post.
Non-supporters can access to your Post+ content by buying the subscription. The subscription price, perks and brief intro appears when a non-supporter clicks on Show your Support button.
Read: How To Become a Post+ Supporter On Tumblr
This is how a Post+ content appears for non-supporters on Tumblr.
How To Create Post+ Content In Tumblr
In this section you will learn how to create and publish Post+ content in Tumblr.
- Create a new post from your Tumblr dashboard like Text, Photo, Chat, etc. Remember that in order to create Post+ content you must use the Beta Post Editor.
- As you will create a new post Tumblr will recommend you to use the Beta Post Editor. Click the Try it now button.
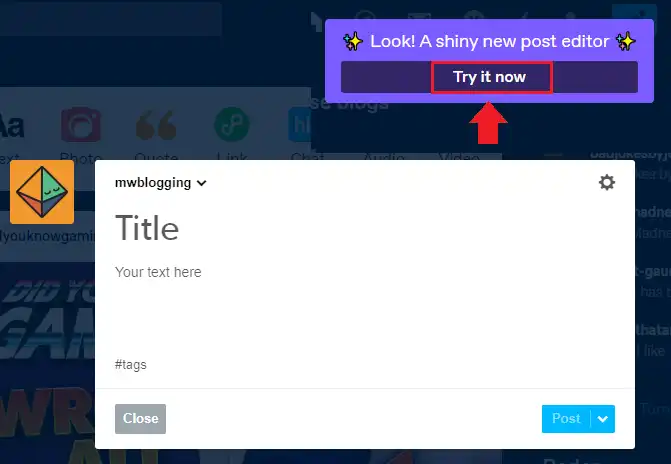
- Again, click the Try it now button.
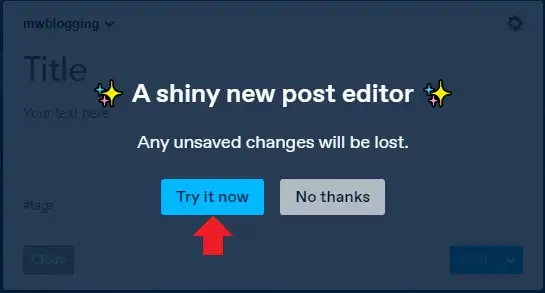
- Now click the Anyone option from the dropdown-list located next to the Settings (Gear) Icon.
- Choose Supporters only.
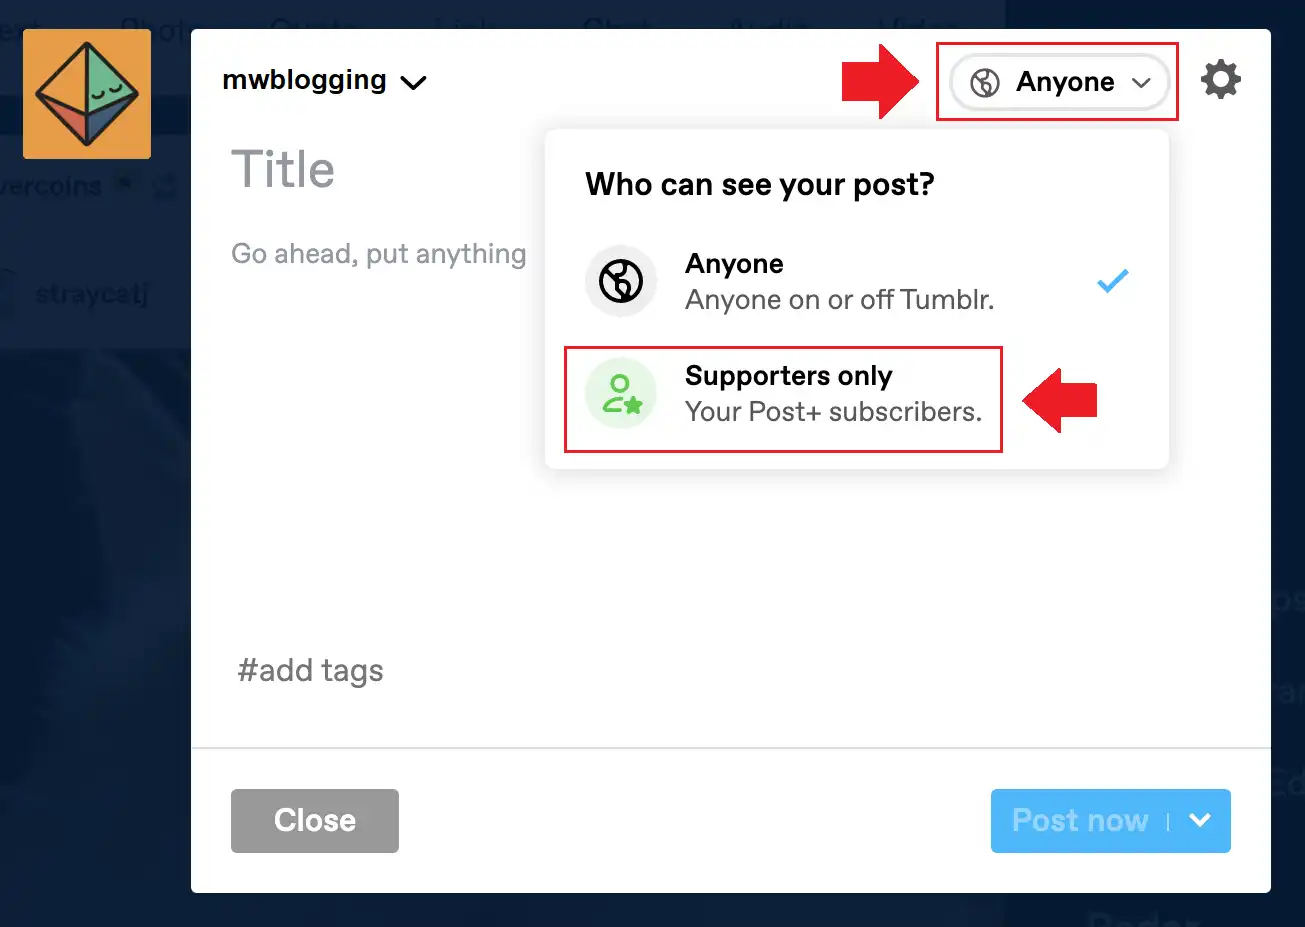
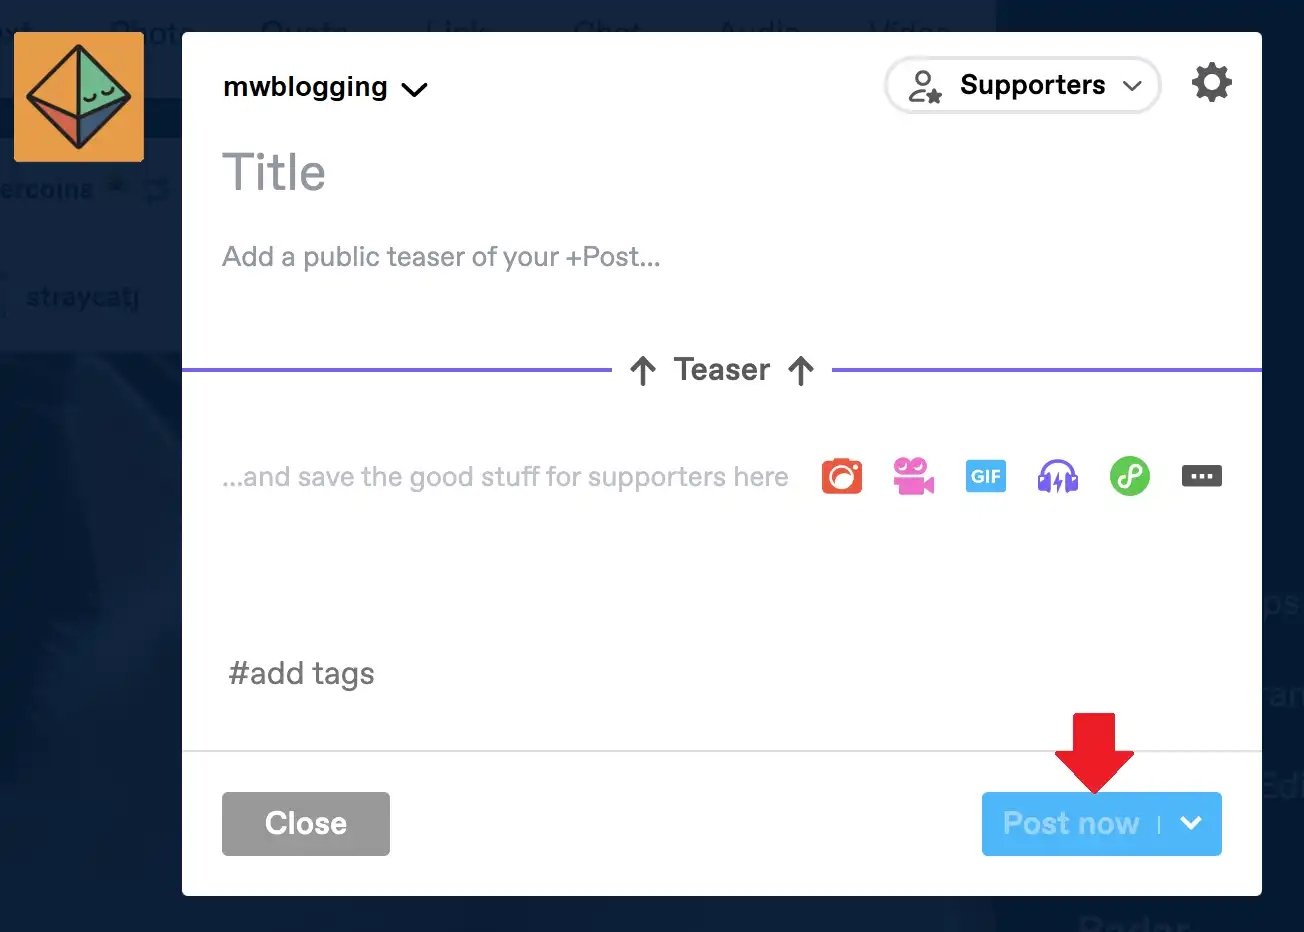
- As you will choose Supporters it will add divider in the post editor. Anything written or added above the divider will be a teaser for non-supporters, as shown in the Section 1 above.
- You can only add maximum of 300 characters and one media item like photo, audio, link, etc, in the teaser section (space).
- Once you write the content of your post click the Post now button to publish it.
That’s it. You have created and published your Post+ content successfully. If you like this post then don’t forget to share with other people. Share your feedback in the comments section.



Leave a Reply