Do you want a detailed and complete introduction to theme CUSTOMIZE settings in Blogger? You’re in the right place.
Theme Customize settings in Blogger allow you to quickly customize your theme without manually editing its HTML & CSS code.
You can customize the theme background, height, color, link color, font size, tabs, page text, widths, etc. You can add your own custom CSS code to apply styling to theme elements and sections. You can also enable/disable Blogger gadgets placed in the Layout such as About Me, Pages, Popular Posts, and many more.
There are three types of Customize Settings in Blogger:
- Background Settings
- Advanced Settings
- Gadgets Settings
RELATED
- How to Set Up Blogger Settings | A to Z
- How to Install Custom Theme in Blogger
- How to Buy a Theme on Themeforest & Download
Blogger Customize Settings
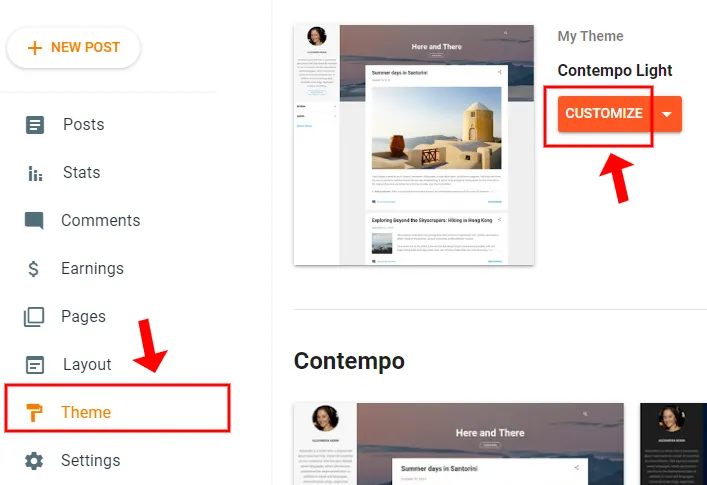
Follow the steps to access the CUSTOMIZE settings in Blogger.
- Go to Theme from your dashboard Sidebar.
- Click the CUSTOMIZE button.
01. Background Customize Settings
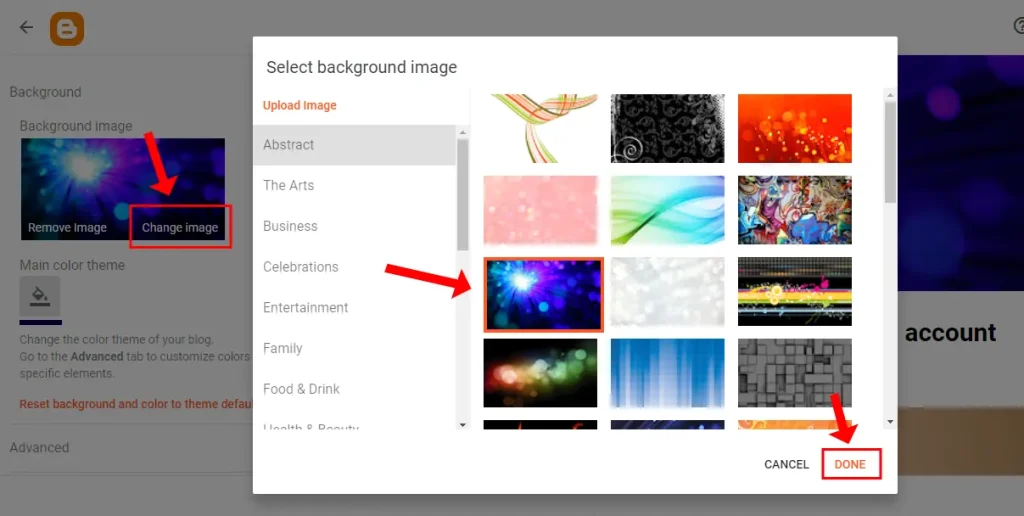
In this section you will learn about Background customize settings in Blogger. The Left Side contains CUSTOMIZE settings whereas the Right Side shows the Demo.
- You have two options for Background image i.e. Remove Image & Change image. The Remove image removes the background image of your theme.
- Click on the Change Image to change the background image of your theme. Blogger offers plenty of premade background images for various niches such as Abstract, Arts, Entertainment, Food & Drink, Family, and more.
- You can also upload a background image from your computer. Click the Upload image link to upload an image from your computer.
- Once you select the image (background) click Done.
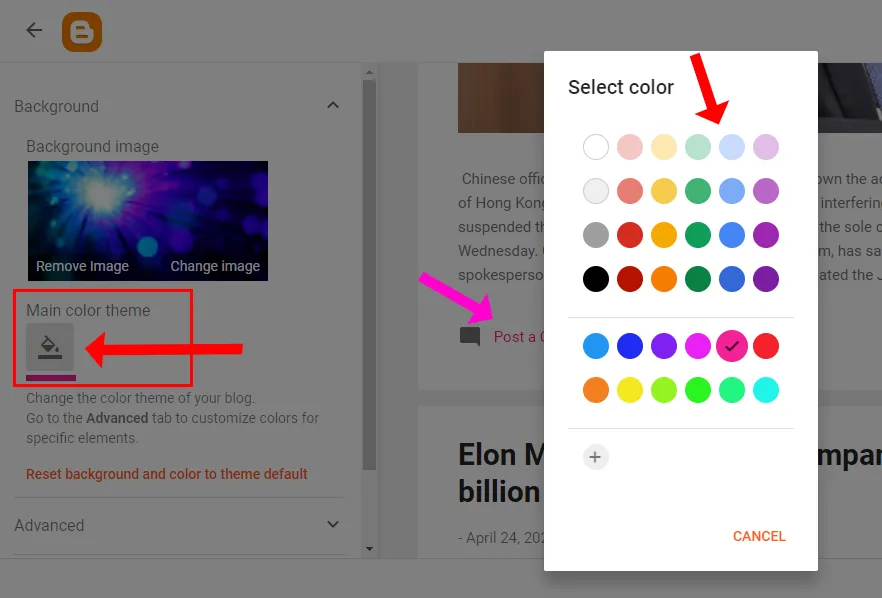
- Click Main color theme icon to choose a color for Links of your theme like Post a Comment link, Read More link, and Date links.
- You can see that we have shown a link color by a Pink Arrow after applying the pink color.
- The “Reset background and color to theme default” option resets the background settings to default.
02. Advanced Customize Settings
The Advanced Customize Settings allow you to customize elements, gadgets, sections, text, background, etc.
There are 16 Advanced Customize settings for Contempo Light Blogger Theme that we will cover one-by-one in the sequence. Do remember that some Blogger themes may have less Advanced Settings.
- Click on the Advanced Tab to expand the settings.
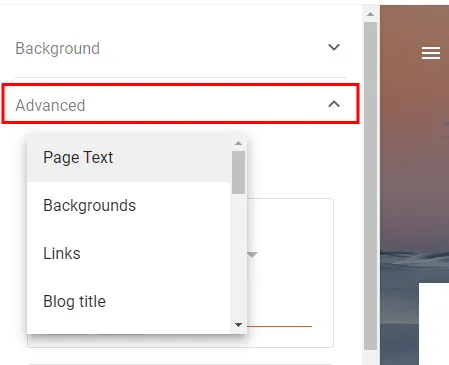
01. Page Text
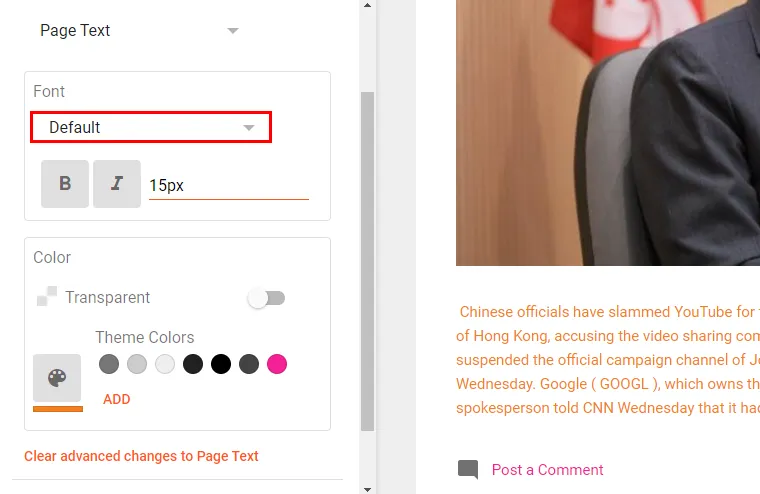
Page Text is the content text of your pages and posts. There are two settings (1) Font Settings (2) Color Settings.
- In Font section you can choose the Font-Family and Font Size for the page text.
- In Color section you can set the color of page text. If you enable Transparent option the color of the text will be same as background, and will not be visible.
- The “Clear advanced changes to Page Text” will reset the Page Text settings to default.
02. Backgrounds
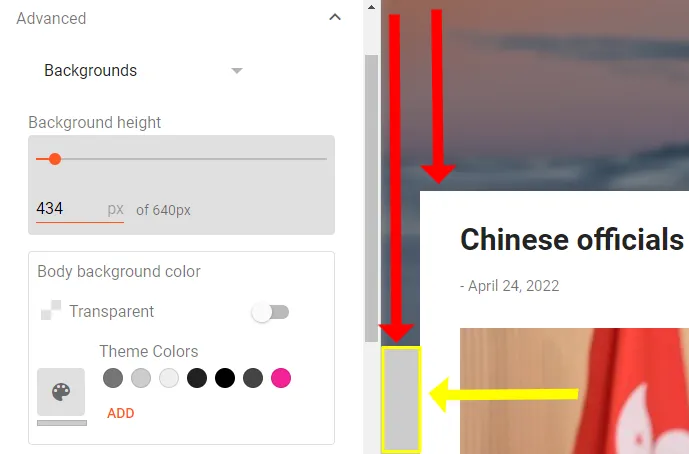
Backgrounds settings allow you to customize (1) Background height (2) Body Background color (3) Post background color (4) Background Blur.
- The Background height allows you to change the height of top background, as shown with red arrows. As you increase the background height the size of the background will be increased downward.
- The Body background color settings allow you to set a background color for your theme’s body, as shown by yellow arrow. The area below the Header is called Body of a theme. If you enable Transparent option the color of the body will be turned white.
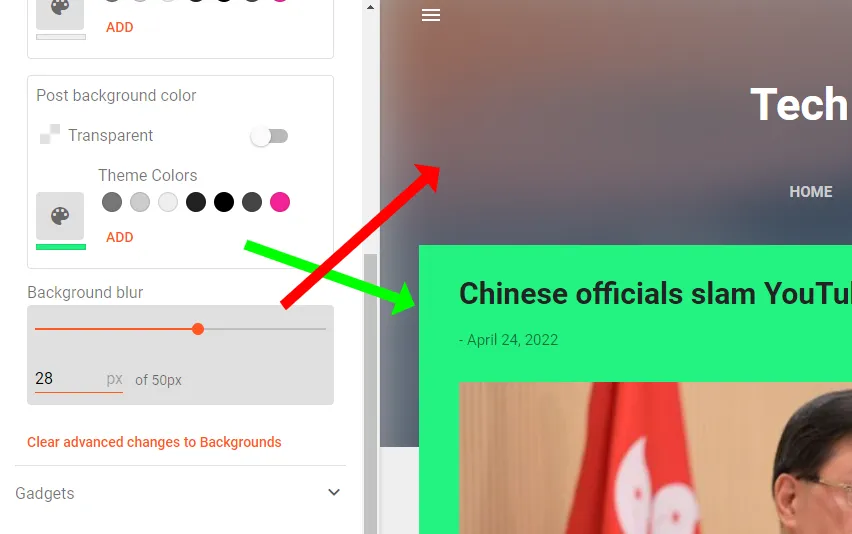
- The Post background color settings allow you to set the background color of posts, as shown by the green arrow. The Transparent option if enabled removes the background color of the post.
- The Background blur option blurs the Header background image as shown by the red arrow. You can set the blur level of your choice.
- The “Clear advanced changes to Backgrounds” will reset the Backgrounds settings to default.
03. Links
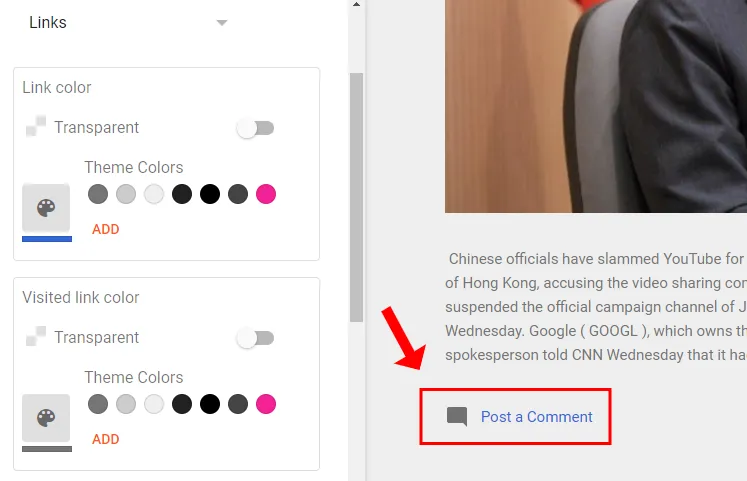
The Links advanced customize settings allow you change the color of (1) Links (2) Visited Links (3) Link hover color.
- The Link color settings allow you to set the color of links within the body (Posts, Pages) of theme. If you enable the Transparent option the links won’t be visible.
- The Visited link color settings allow you to set the color of visited links of posts and pages. If someone opens your website and clicks a link, that will be called a Visited Link. The Visited Link’s color should be different from the Links color, so that a visitor will know; he has visited this link before. If you enable the Transparent option the color of Visited Link will turn black.
- The Link Hover Color settings (Not shown here) allow you to set the color of a link when it is hovered. Hover means, when you move mouse pointer on top of a link. The Hover color should also be different from Links color. If you enable Transparent option the links won’t be visible when you hover over them.
04. Blog Title
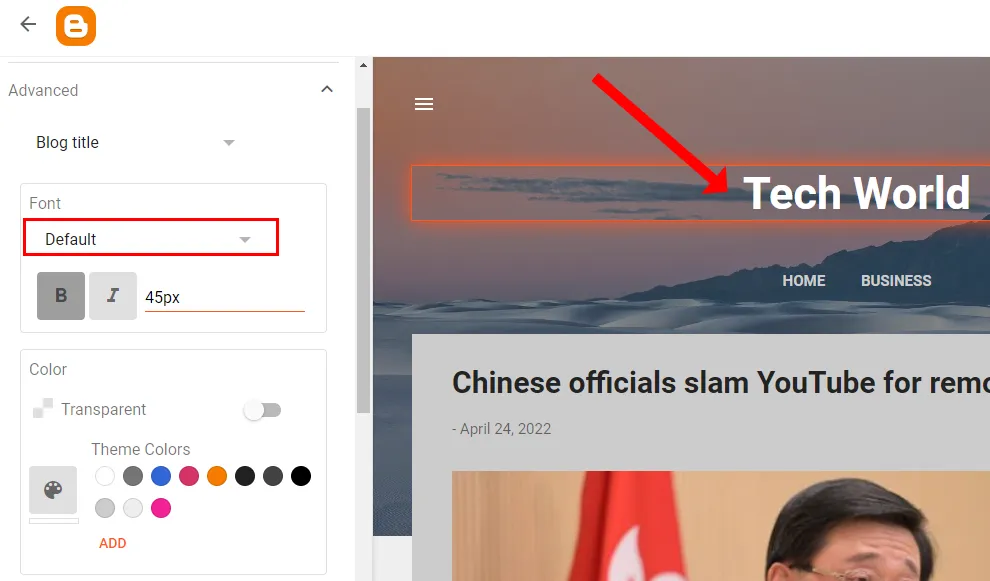
Blog Title is the text logo of your blog located in the Header section. The settings allow you to set (1) Font (2) Color (3) Background icons color.
- In Font section you can set Font-family and Font-size.
- In Color section you can set the color of Blog Title. The Transparent option hides the Blog Title.
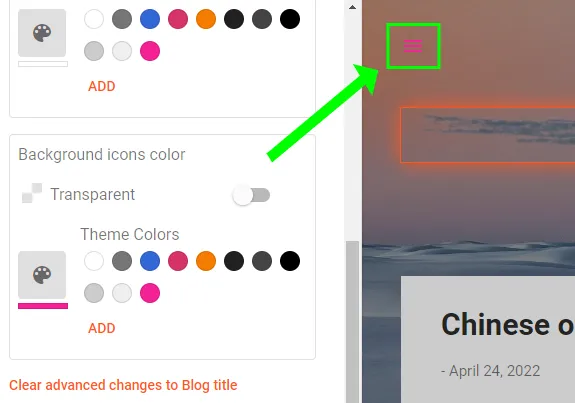
- The Background icons color settings allow you to set the color of icons placed on top of the background image like Hamburger Icon, Search Icon, etc. The Transparent option hides the background icons.
- The “Clear advanced changes to Blog title” resets the Blog Title settings to default.
05. Tabs Text
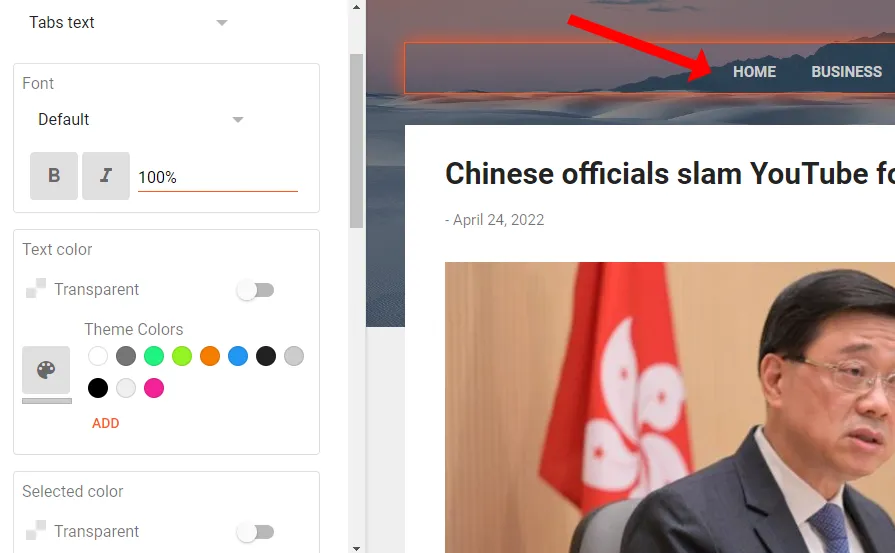
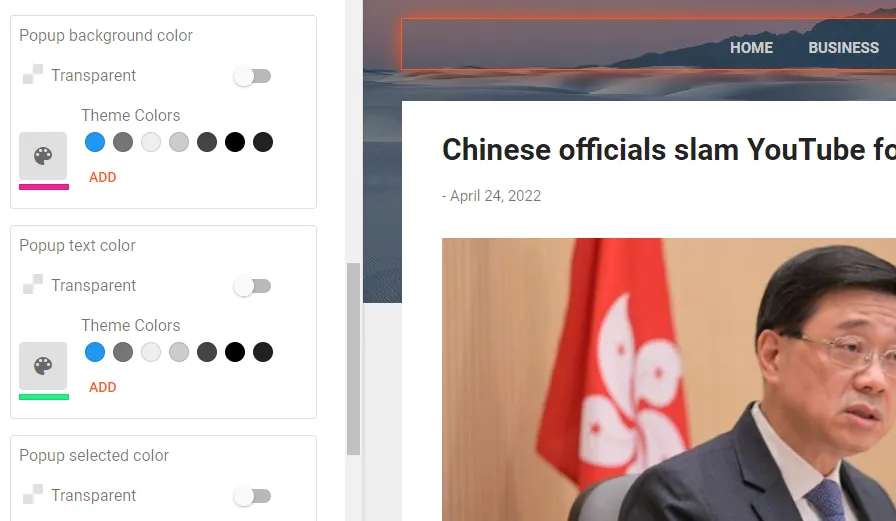
The Tabs Text settings allow you to customize the text of navigation/menu tabs. There are 6 Tabs Text settings (1) Font (2) Text Color (3) Selected Color (4) Popup Background Color (5) Popup Text Color (6) Popup Selected Color.
- In the Font section you can change the Font-family and Font-size of tabs text.
- In the Text color section you can change the color of the tabs text.
- In the Select color you can choose a color for selected (opened) tab.
- The purpose of these three Tabs Text options: Popup background color, Popup text color, and Popup selected are not clear. On builtin Blogger navigation it is not possible to link tabs with popups. We added popup forms and text on other positions of the theme, but these settings are not applicable for them.
06. Posts
The Posts customize settings allow you to set (1) Post title color (2) Post title font (3) Post title stream font (4) Post text font (5) Post text color (6) Post byline color (7) Blockquote font (8) Blockquote color (9) Post icons color.
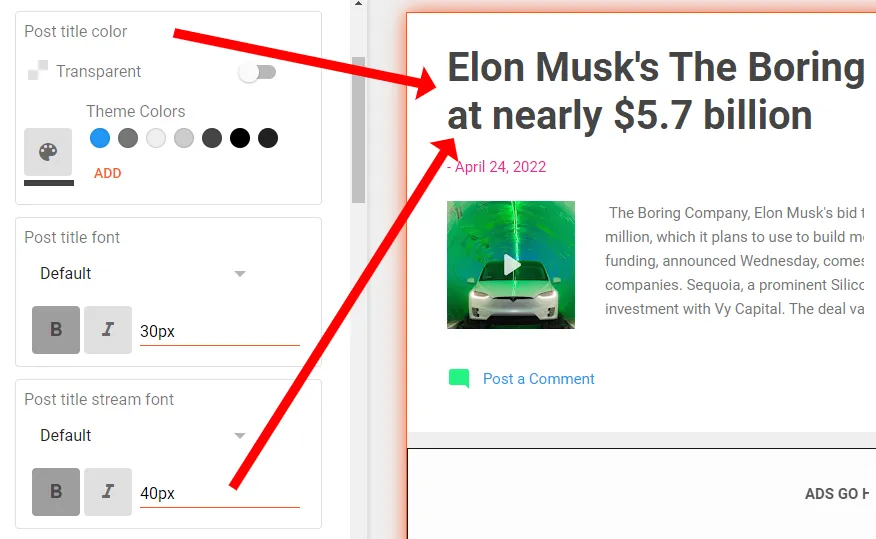
- The Post title color allows you to change the post title color on both Homepage and Itempage.
- The Post title font allows you to change the Font-family and Font-size of Itempage‘s Post Title. The Itempage means the Post Detail Page that shows you the complete content of a post when its link is clicked. After applying settings open any post of your blog and preview the changes.
- The Post title stream font allows you to change the Font-family and Font-Size of Homepage‘s Post Title. Remember that the font-size of Post title font should be less than the Post title stream font.
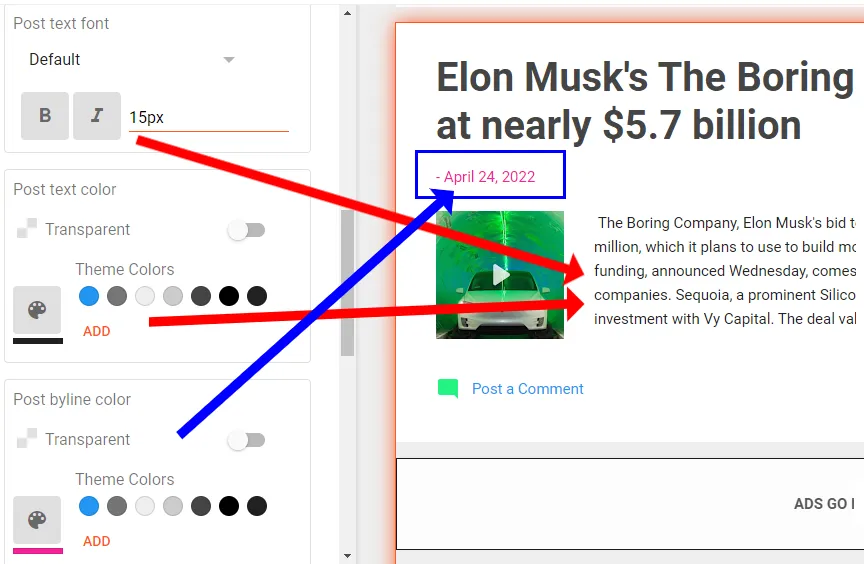
- The Post text font allows you to change the post content font-size.
- The Post text color allows you to change the post content color.
- The Post byline color allows you to change the color of post Publish-Date and Author Name. The byline is located below the post title.
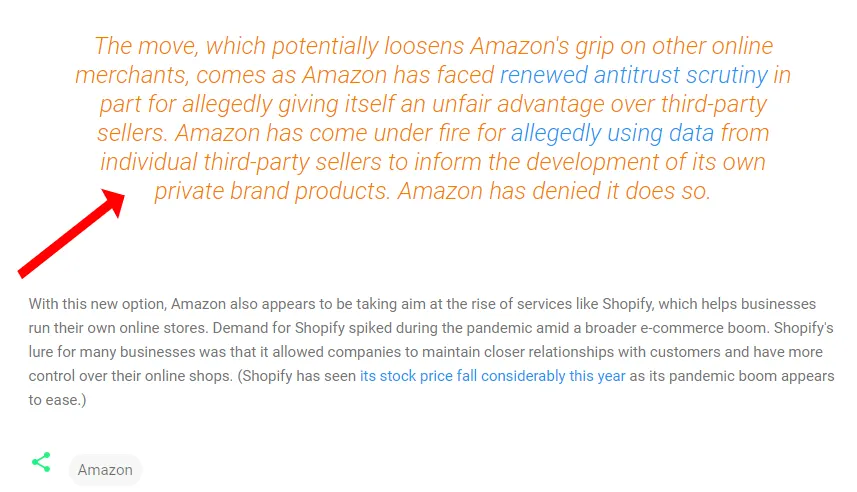
- The Blockquote font allows you to change the Font-family and Font-size of quotations in the posts/articles marked by blockquote-tags (<blockquote></blockquote>), as shown in the next step.
- The Blockquote color allows you to change the color of quotations in the content, as shown in the next step.
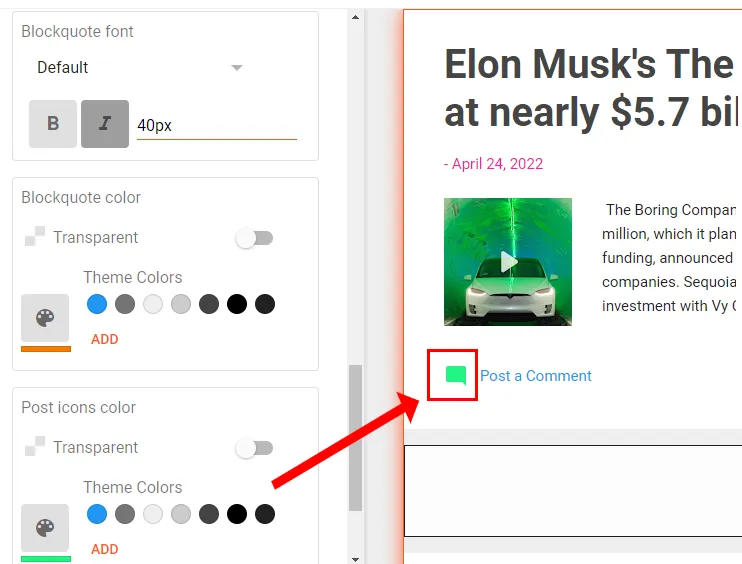
- The Post icons color allows you to change the color of icons which are placed on top of the posts like Comments icon, Share icon, Hamburger icon, etc.
- Here you can see a text in the post marked by blockquote tags. The Blockquote font & color settings have been applied to it.
07. Search
The Search advanced settings allow you to customize the Search Box’s (1) Input color (2) Input font (3) Placeholder text color.
- The Input color settings allow you to change the color of input text that a visitor will type in the Search Box of your blog, as shown in the next step.
- The Input font settings allow you to change the Font-family and Font-size of the input text that a visitor will type in the Search Box.
- The Placeholder text color settings allow you to change the color of preexisting text (Search this blog) of Search Box’s Placeholder. A Placeholder is a place where you type text to search. It is expanded/visible when you click the Search Icon, as shown in the next step.
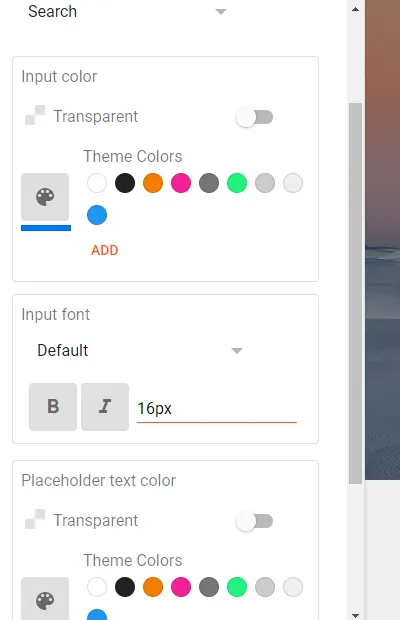
- A blue arrow pointing to a cursor is a place where you will type something to search. As soon as you type the input text the preexisting text (Search this blog) will disappear.
- The texts “Search this blog” and “SEARCH” are Placeholder’s texts.

08. Sharing
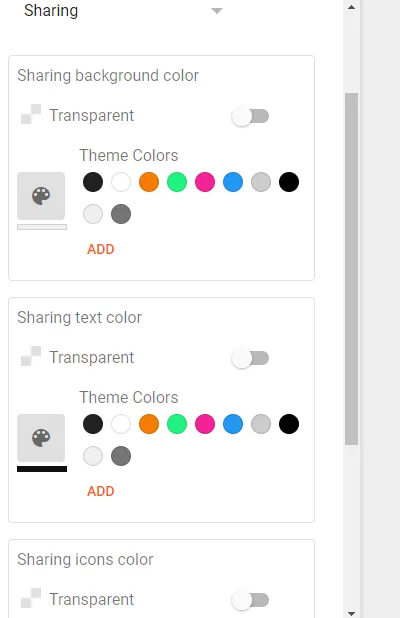
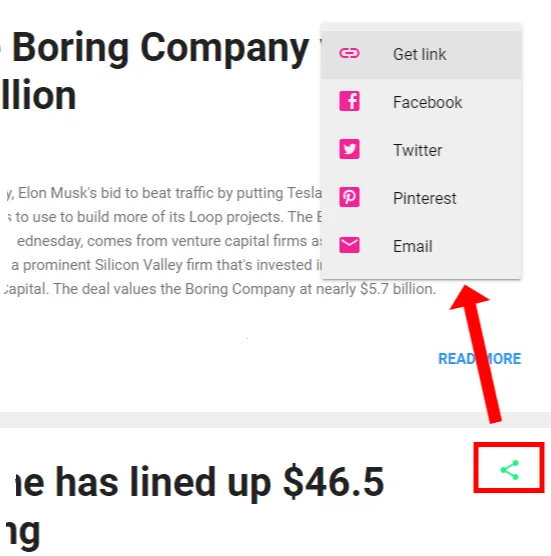
Sharing on Blogger is a popup that contains Social Media sharing icons, Get Link icon and Email icon. It appears when you click the Sharing Icon. The Sharing settings allow you to customize (1) Sharing background color (2) Sharing text color (3) Sharing icon colors.
- In Sharing background color section you can change the color of Popup’s background. If you enable Transparent option the background color will be removed.
- The Sharing text color allows you to change the color of the names of social media platforms and other options inside the Popup, like Facebook, Twitter, Pinterest, Email, etc, as shown in the next step.
- The Sharing icons color allows you to change the color of the social media icons inside the Popup.
- Sharing icon is associated with every post on both Homepage & Itempage. Click a Sharing icon to preview the changes. A popup appears when you click the Sharing icon.
09. Popular Posts
The Popular Posts widget shows the most viewed or clicked posts of your blog in a given time period. If it is already not added in your blog you can add it from the Layout => Add a Gadget.
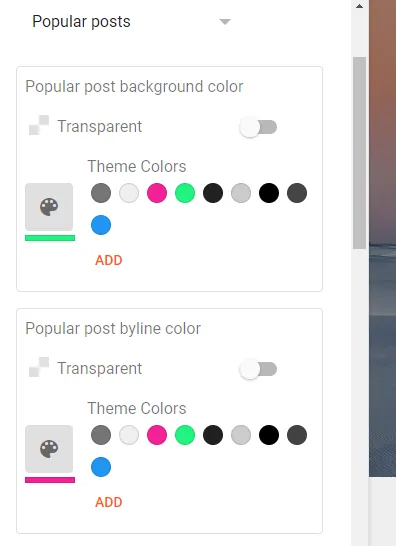
- The Popular posts customize settings include (1) Popular post background color (2) Popular post byline color (3) Popular post title color (4) Popular post text color (5) Popular post link color.
10. Post Navigation
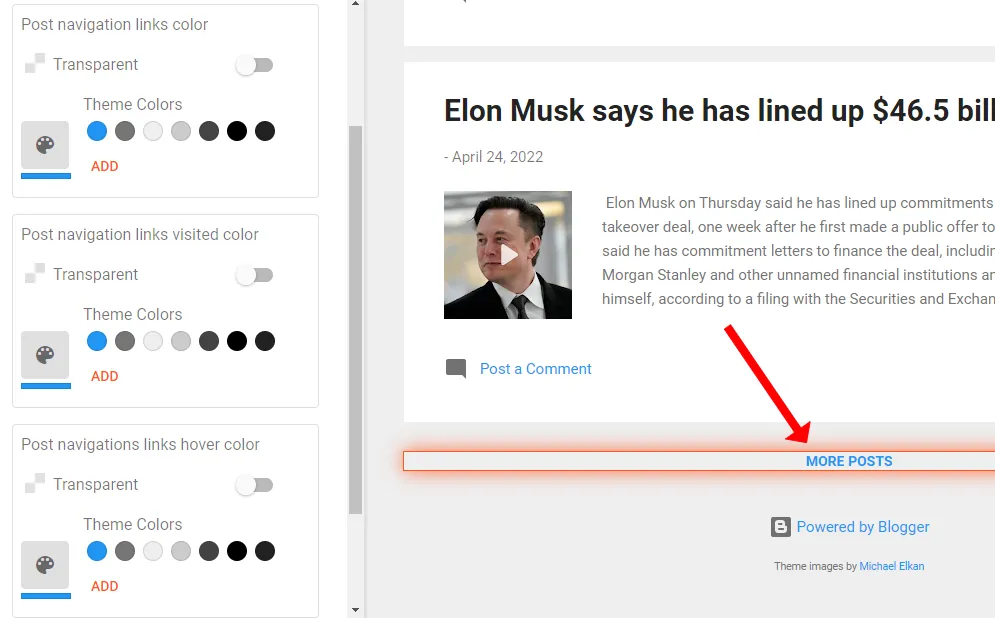
The Post Navigation allows visitors to expand older (more) posts or move from Current post to Next/Previous post.
- The Post Navigation advanced settings allow you to set (1) Post navigation links color (2) Post navigation links visited color (3) Post navigations links hover color.
11. Sidebar
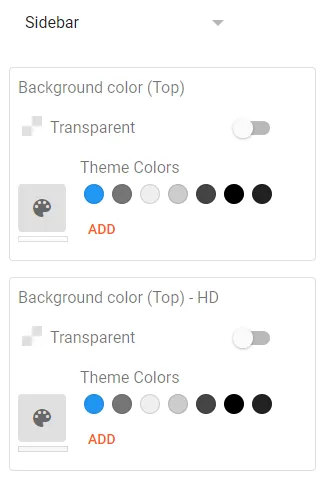
The Sidebar settings allow you to customize (1) Background color (Top) (2) Background color (Top) – HD (3) Background color (Bottom) (4) Separator color (5) Gadget title color (6) Sidebar icons color.
Note: On some Blogger themes sidebar is hidden. It appears only when you click the Hamburger icon.
- The Background color (Top) allows you to change the background color of top section of the sidebar.
- The Background color (Top) -HD is similar to Background color (Top), but it is visible only on HD screens.
- The Background color (Bottom) allows you to change the background color of bottom section of sidebar.
- The Separator color allows you to change the color of sidebar separators. The separators in sidebar are lines that are used to put gadgets in different sections.
- The Gadget title color allows you to change the title color of gadgets in the sidebar.
- The Sidebar icons color allows you to change the color of sidebar gadget icons.
12. Author Profile
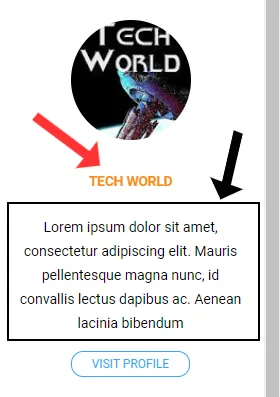
Author Profile is a gadget in Blogger that shows the profile picture, gadget title, author name, and author description.
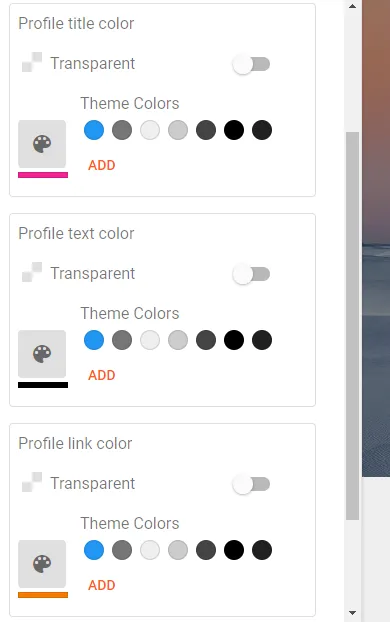
The Author Profile settings allow you to customize (1) Profile title color (2) Profile text color (3) Profile link color, as shown in the next step.
- The Profile title color allows you to change the color of Author Profile gadget name. It could be About Me, About Us, etc.
- The Profile text color allows you to change the color of the author’s bio or profile description.
- The Profile link color allows you to change the color of author’s display name link.
- This is how a typical Author Profile looks on a Blogger blog.
13. Labels
Labels advanced settings allow you to customize (1) Label text color (2) Label background color.
To know more Labels in Blogger, read this: What are Labels in Blogger & Their Purpose.
- The Label text color changes the color of Labels text (name).
- The Label background color changes the background color of Labels, as shown in the next step.
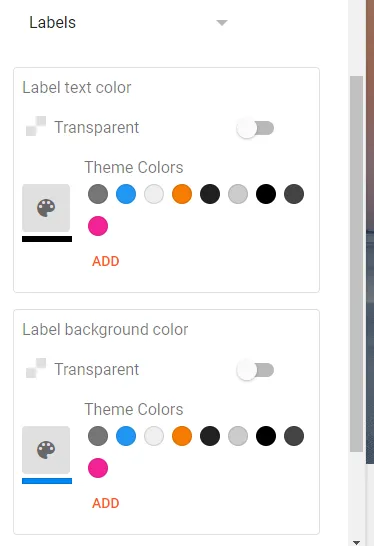
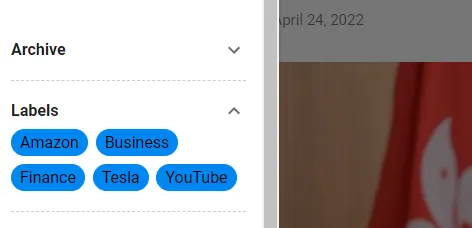
- You can see that the color and background of labels have been changed.
14. Attribution
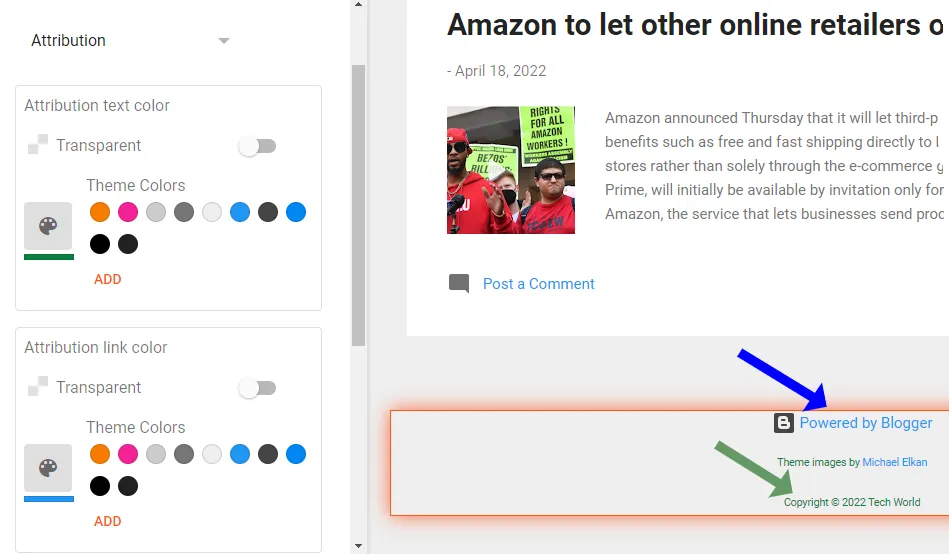
Attribution means to regard a quality, characteristic or product to a person, group, business or entity. In Blogger Attribution section you can add copyright attribution of your blog like Copyright @ 2022 Meer’s World. The “Powered by Blogger” attribution is already present in the builtin Blogger templates. You can manually delete it from HTML code.
- The Attribution text color allows you to change the color of attribution texts.
- The Attribution link color allows you to change the color of attribution links.
- The Attribution link color allows you to change the color of attribution icons.
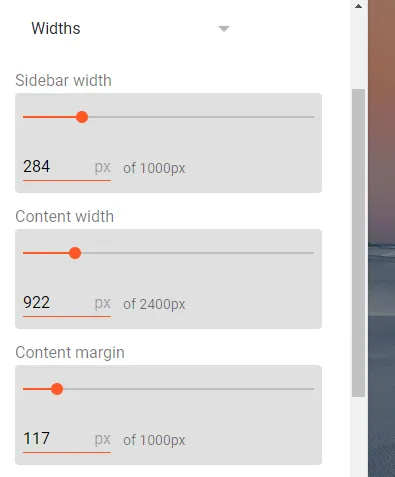
15. Widths
A width is used to set the content area of an element in pixels. The Widths settings in Blogger allow you to customize (1) Sidebar width (2) Content Width (3) Content margin.
- The Sidebar width allows you to change the width of your sidebar.
- The Content width allows you to change the width of your main-content container, means the section where your blog posts are displayed on Homepage and Itempage.
- The Content margin allows you to increase/decrease the space between Sidebar and Main-Content. On Contempo Light Blogger template the Sidebar is hidden on normal desktop screen size. It appears only when you click the Hamburger icon.
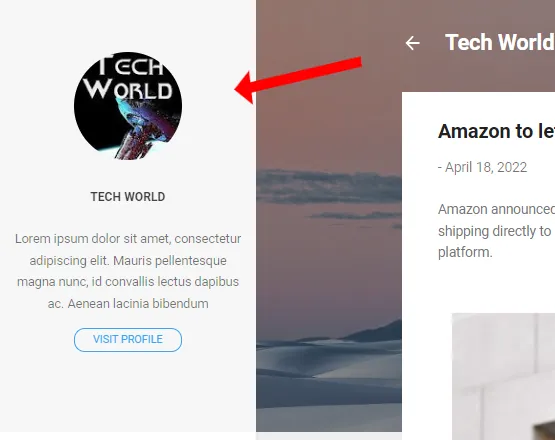
- When you decrease the Content margin to 0px the Sidebar doesn’t hide on desktop screens of any size, whereas if you increase the Content margin the Sidebar may not appear on normal desktop sizes but will appear on large desktop screen sizes, as shown in the next step.
- Here you can see that when we decreased the Content margin the Sidebar is appearing on the page. The Hamburger icon is disappeared.
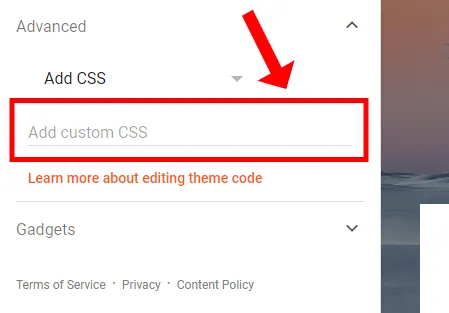
16. Add CSS
CSS stands for Cascading Style Sheet, is a style sheet language that you can use to modify/add style to HTML elements and format the layout of your blog/pages using CSS properties.
The Add CSS in Blogger advanced settings allow you to write your CSS code to apply style on existing elements of you theme using CSS properties. If you don’t have concepts & knowledge about Class, ID, HTML, & CSS, you can’t write your own CSS code. If you’re interested in learning CSS & HTML visit W3Schools.
Here is an example of CSS code. The style is applied to all h1 headings and paragraphs (p) of a theme.
h1 {
  color: blue;
  font-family: verdana;
  font-size: 300%;
}
p {
  color: red;
  font-family: courier;
  font-size: 160%;
}
03. Gadgets Customize Settings
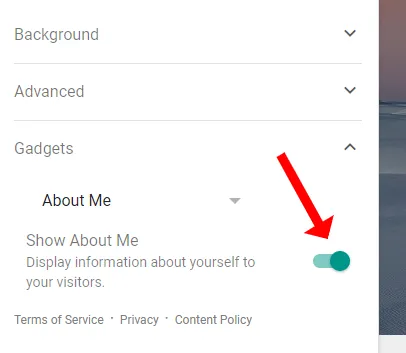
The Gadget customize settings in Blogger allow you to enable/disable gadgets that exist in your Layout, like, About Me, Contact Form, Pages, Labels, Blog Archive, Featured Post, Headers, Blog Search, Report Abuse, Feed, AdSense, Popular Posts, and many more..
- Select the gadget that you want to enable/disable.
- To enable the gadget drag the slider towards your right.
So it was all about Theme CUSTOMIZE settings in Blogger. Blogger is a user-friendly blogging platform. Its powerful admin panel enables you to customize theme settings without visiting/editing the code files. If you like this post then don’t forget to share with other people. Share your feedback in the comments section below.



Leave a Reply