Are you new to Blogger and want to know what are Labels in Blogger and their purpose? You’re in the right place.
Labels in Blogger are what Categories or Tags in WordPress or other blogging platforms. They are used to sort, group, and organize similar posts together. When you add a Label to the post that post is associated with that Label. Entertainment, Sports, Fashion, Politics, News, Blogging, HowTo, Technology, Crypto, Travel, Culture, Business, Education, are some of the examples of Labels.
On Blogger Dashboard you can filter your blog posts by Labels to quickly list them and perform edit, delete, and update operations. Labels also help your blog visitors to quickly find the content of their interest in one place.
Labels also have importance from SEO point-of view because they act as SERP keywords. Like your blog posts, Labels also appear in search-engines (Google, Bing, Yahoo, etc) search results through which people can directly access the content associated with them on your blog. In other words, Labels are one of the sources of bringing organic traffic to your blog.
Following topics will be covered in this post:
- How to Add a Label in Blogger Post
- How to Filter Posts by Labels in Blogger
- How to Delete a Label in Blogger
- How to Show Labels Gadget in Blogger
- How to Add a Label on Menu in Blogger
RELATED
01. How to Add a Label in Blogger Post
In this section you will learn step-by-step on how to add a Label in Blogger post.
There are 2 ways to add a Label in Blogger (1) Add a Label Directly from Dashboard (2) Add Label by Editing a Post.
01. Add a Label Directly from Dashboard
- On your Blogger Dashboard, hover over the post on which you want to add a Label or Labels.
- Click the Labels icon.
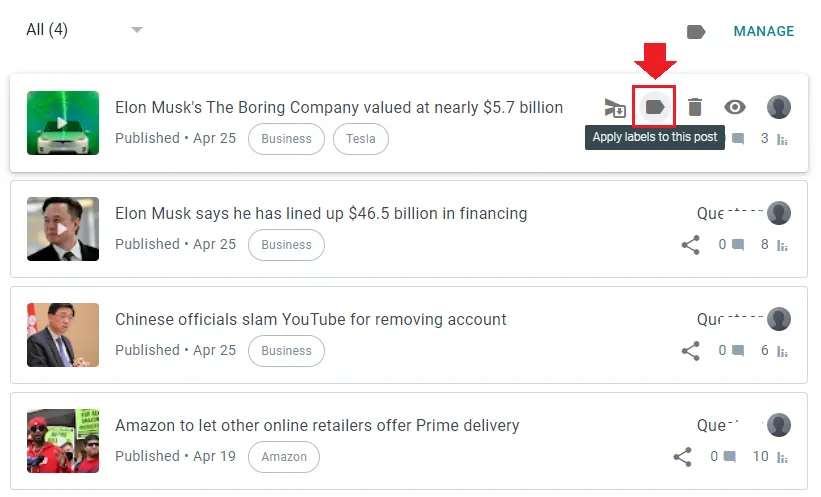
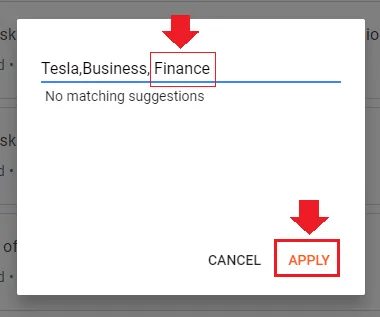
- Enter the Label name. Each Label is separated from the other using the comma (,) symbol. If a Label is already existed it will appear in the suggestions from where you can directly insert.
- Click Apply.
02. Add a Label by Editing a Post
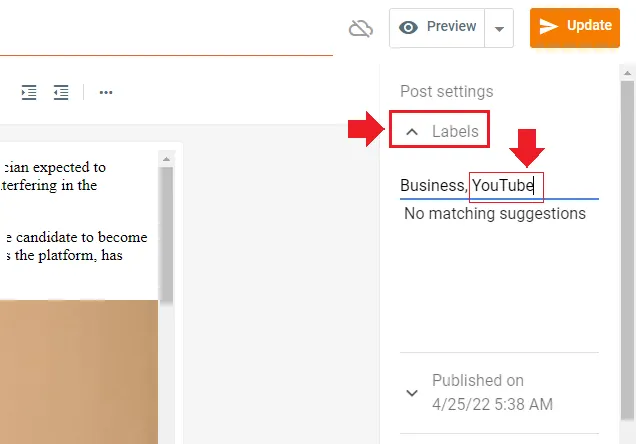
- Open the post in which you want to add a Label or Labels.
- Under the Post settings click the Labels to expand and add your desired Label. Each Label is separated to other by a Comma (,) symbol.
- Click the Update button after adding a Label.
02. How to Filter Posts by Labels
In this section we will guide you on how you can filter posts by a Label or Labels.
Filtering the posts by Labels helps you to quickly find and list posts for various purposes such as deleting a label permanently from posts, copying link of a post, editing a post, deleting a post, or updating a post.
- Click the Filter by label icon on top.
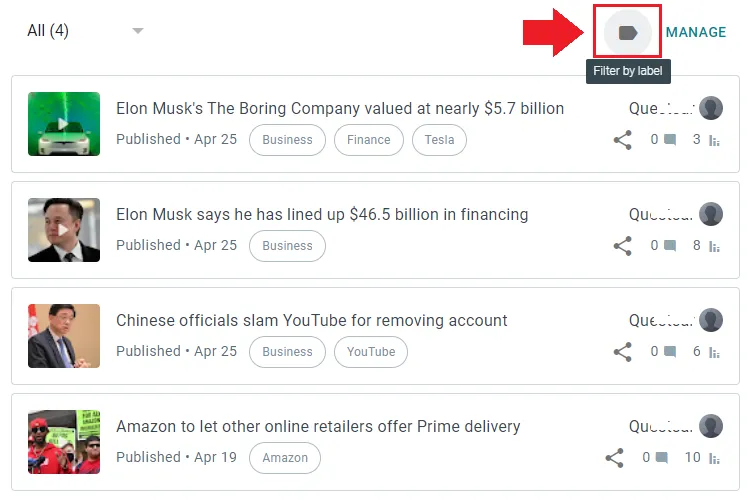
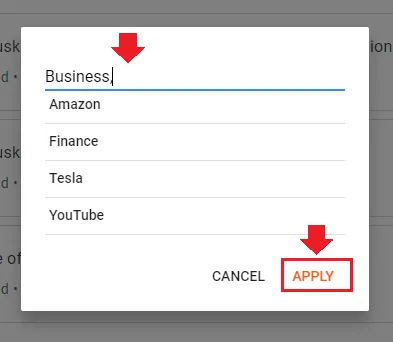
- A pop-up box will appear where you can add Labels.
- All your existing labels will be shown in the the suggestions. When you click a Label it will be added above the blue line. You can filter posts by more than one Label.
- Click Apply.
03. How to Delete a Label in Blogger
In this section you will learn step-by-step on how to permanently delete a Label in Blogger.
If you have added a Label in more than one post then you have to manually delete that Label from all your posts. Only deleting a Label from single post won’t remove it permanently.
There is no option in Blogger to remove a Label from all your posts at once. So, it will take sometime to remove a Label manually from all your posts.
- First of all filter the posts by a Label that you want to delete. It has been shown in the above section.
- Hover over the posts and click Labels icon to remove the Label, as shown in the next step. Do this for all your posts.
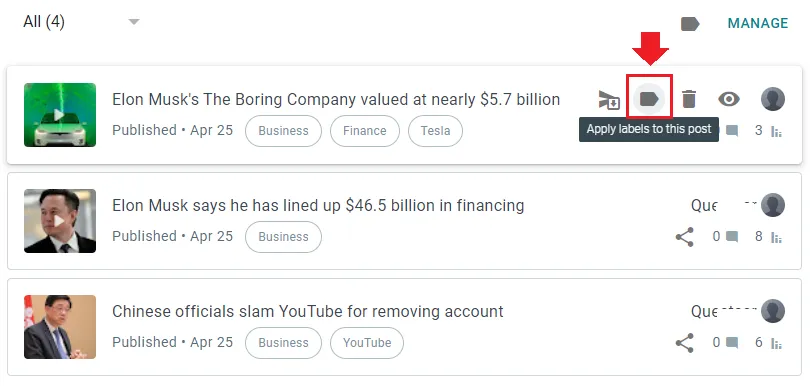
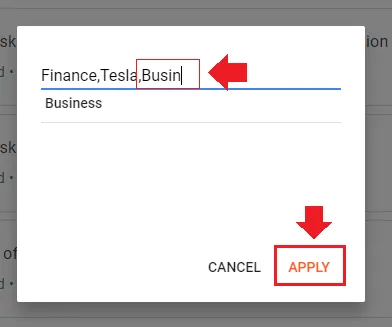
- Here you can see that we are removing a Label “Business”.
- Click Apply when you remove completely.
- You can also remove a Label by editing a post, but it takes lot of time. This method is easy and quick.
04. How to Show Labels Gadget in Blogger
In this section you will learn step-by-step on how to show Labels Gadget on your Blogger blog.
- On your Dashboard, go to Layout.
- Click Add a Gadget link of a section where you want to show.
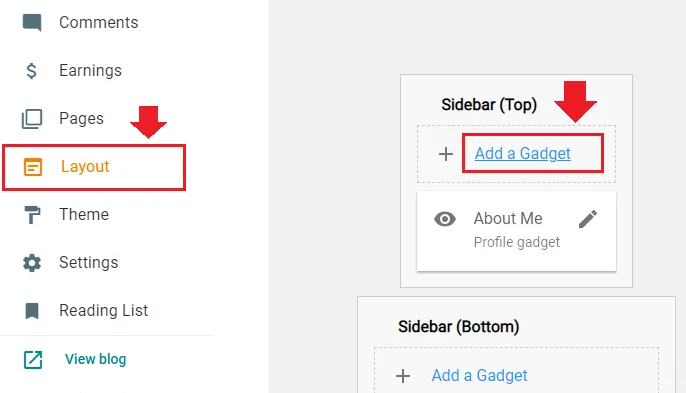
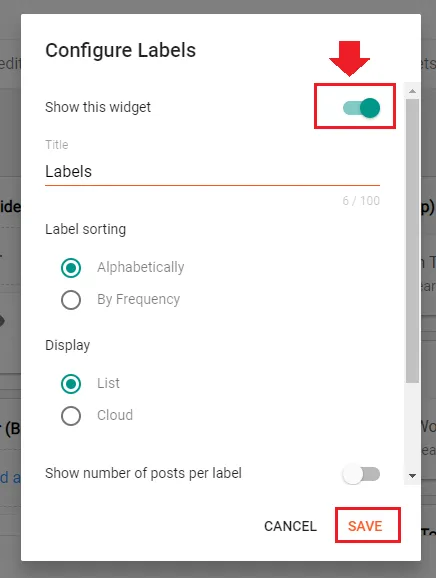
- Enable “Show this widget” by dragging the slider towards right.
- Set the Label Sorting & Display settings.
- The “Show number of posts per label” option displays the total number of posts inside the square brackets, associated with a Label. For example, Entertainment (14), Sports (12).
- At bottom there are two more options (1) All Labels (2) Selected Labels. If you choose All Labels Blogger will show all your Labels. The Selected Labels option allows you to display only the selected Labels to visitors.
- Click Save.
- Here you can see the Labels on Homepage.

05. How to Add a Label on Menu/Navigation
In this section you will learn step-by-step on how to add a Label on your Blogger Menu/Navigation.
The default Menu in Blogger is Pages which is located under the Page List section in the Blogger Layout. When a Label is clicked Blogger shows all the posts associated/linked with that Label.
- On your Blogger Dashboard go to Layout.
- Under the Page List section click the Edit icon (pencil) of Pages gadget.
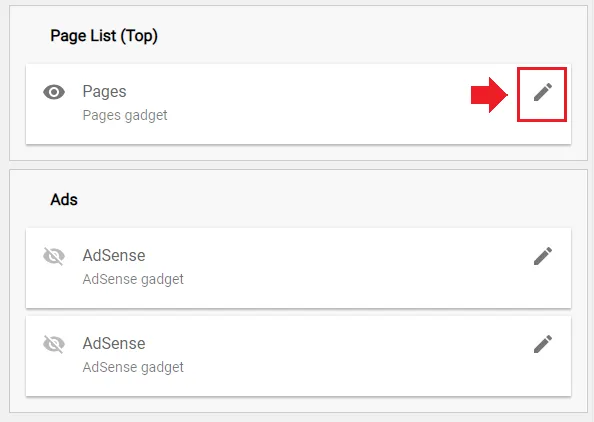
- Enable “Show this widget” if it is disabled.
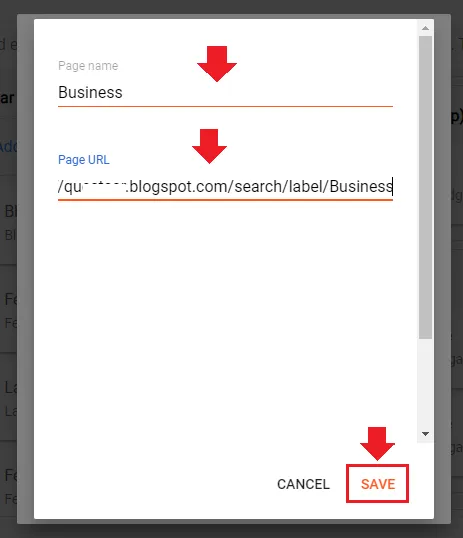
- Click ADD A NEW ITEM.
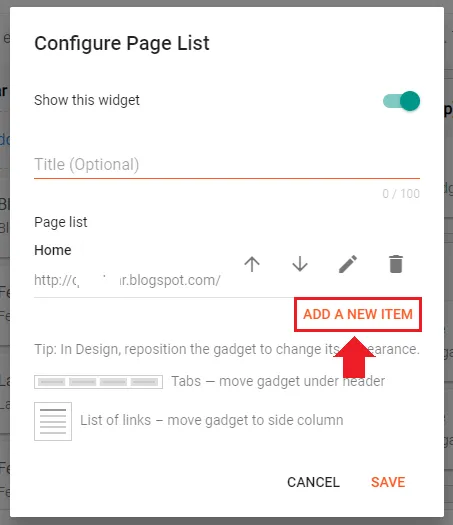
- In the Page name enter your Label name or whatever you think is suitable.
- In the Page URL enter or paste the URL of the Label. The structure of a Label’s URL on Blogger is: Your_domain/search/label/label_name. Replace “Your_domain” with your Blogger domain and “label_name” with the Label.
- For example: “https://example.blogspot.com/search/label/Business“.
- Click Save. You can add more than one Label on your Menu.
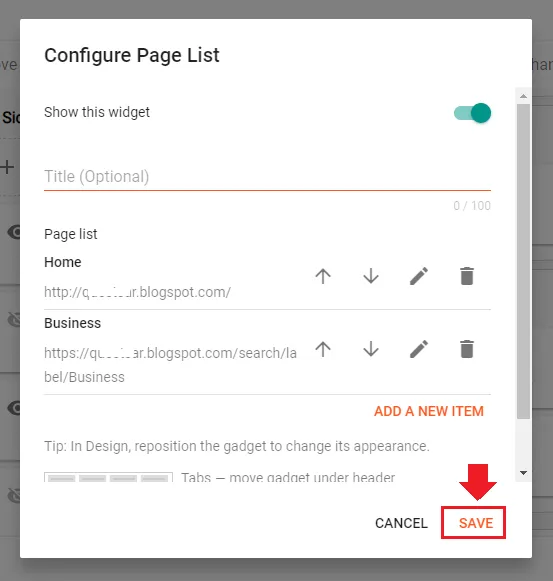
- Here you can see that a new Label is added in the Page List (Menu).
- Click Save.
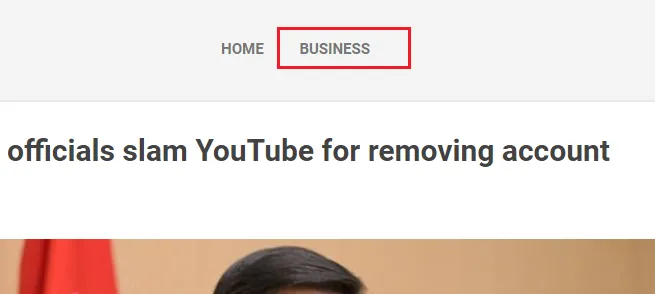
- The Label “Business” is on the Menu next to Home menu item.
You must have a clear idea about Labels in Blogger. Though Label is just a small tag, but has so many uses, particularly it helps you to organize the content of your blog. If you like this post then don’t forget to share with other people. Share your feedback in the comments section below.



Leave a Reply