Are you getting the Internet Security Warning, “The server you’re connected to is using a security certificate that cannot be verified” on Microsoft Outlook? You’re in the right place. In this tutorial, I will guide you step-by-step on how to fix this warning.
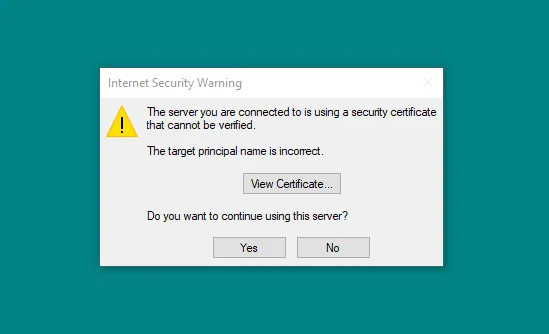
Below is the complete message of the Outlook warning. It pop-ups each time when you open the MS Outlook on your computer. Though you can send/receive emails after you click “Yes” for, “Do you want to continue using this server?“, but getting a warning each time when you open MS Outlook is a bit annoying.
The server you’re connected to is using a security certificate that cannot be verified. The target principal name is incorrect.
RELATED
- How to Migrate your Domain and Hosting to Namecheap
- Solved: Your E-mail Server Rejected Your Login – Outlook Error
- How to Import Emails on MS Outlook From a PST File
- How to Use Microsoft Office Free & Its Best Alternatives
What is the Cause of Warning
The Internet Security Waring on Outlook, “The server you’re connected to is using a security certificate that cannot be verified. The target principal name is incorrect“ occurs because of the Server (Incomming/Outgoing) that you have entered in the POP Account Settings while setting up your email account on Outlook is different from the Server name the certificate has been issued to.
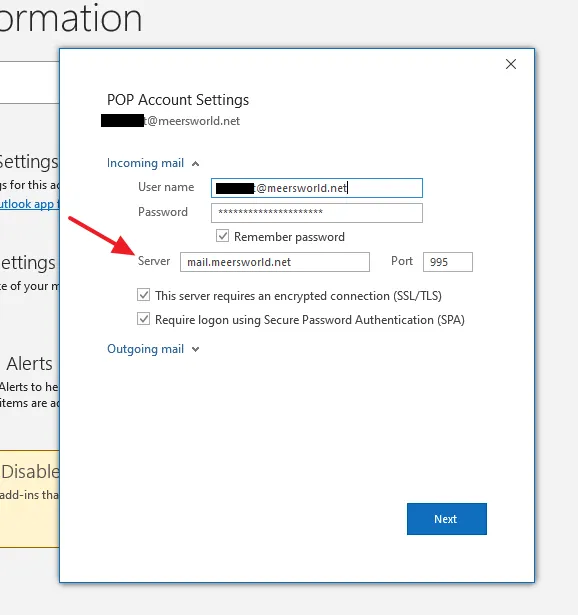
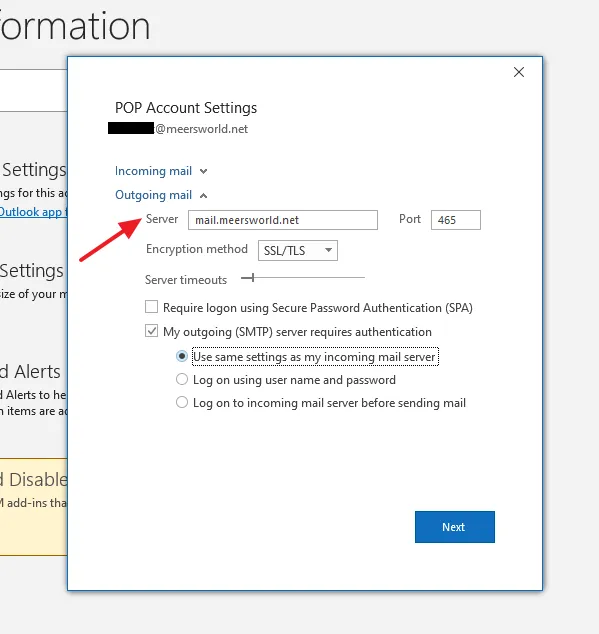
Generally, you enter the Mail Server “mail.example.com” in the Server field on POP Account Settings for Incomming mail and Outgoing mail, as you can see below, there is Mail Server mail.meersworld.net in the Server field.
In order to remove the warning I will enter the Server of my hosting instead of Mail Server mail.meersworld.net for both the Incomming mail and Outgoing mail on the POP Account Settings. In the next section, I have guided on how to find your Server name on cPanel.
How to Find the Server Name on cPanel Account
In this section, I will guide you step-by-step on how to find the Server name of your website on cPanel account.
- Login to your cPanel account.
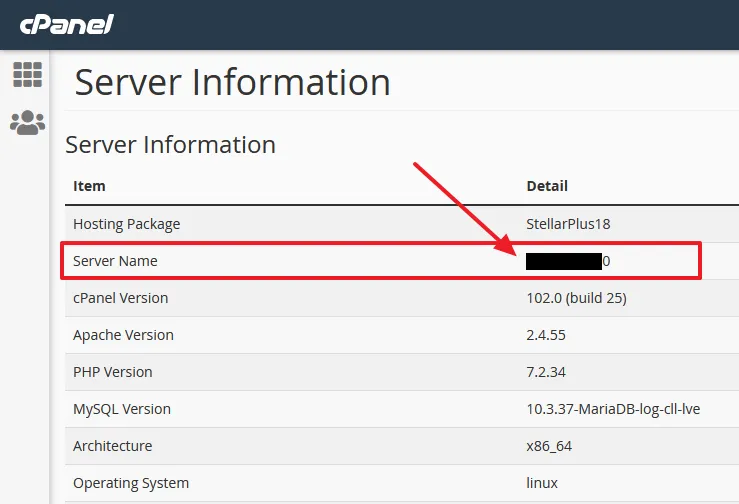
- Go to GENERAL INFORMATION section located at top-right corner.
- Click the Server Information link.
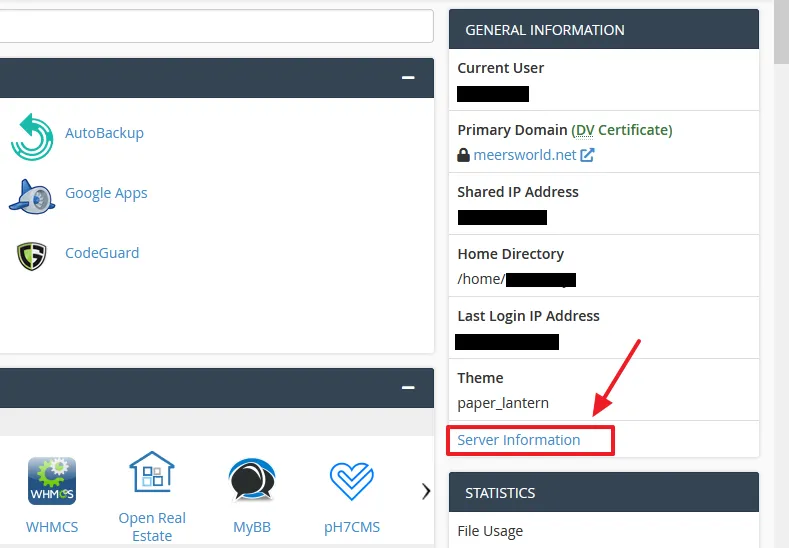
- On the Item column you can see the Server Name.
How to Change the Server on MS Outlook
In this section, I will guide you step-by-step on how to change the Server for an email account on the POP Account Settings, MS Outlook.
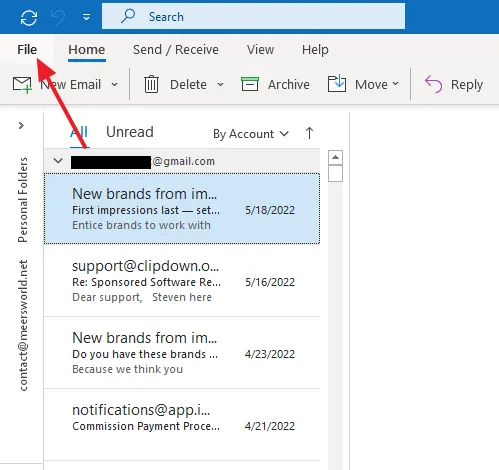
- Open the MS Outlook on your computer.
- Click the File from the menu.
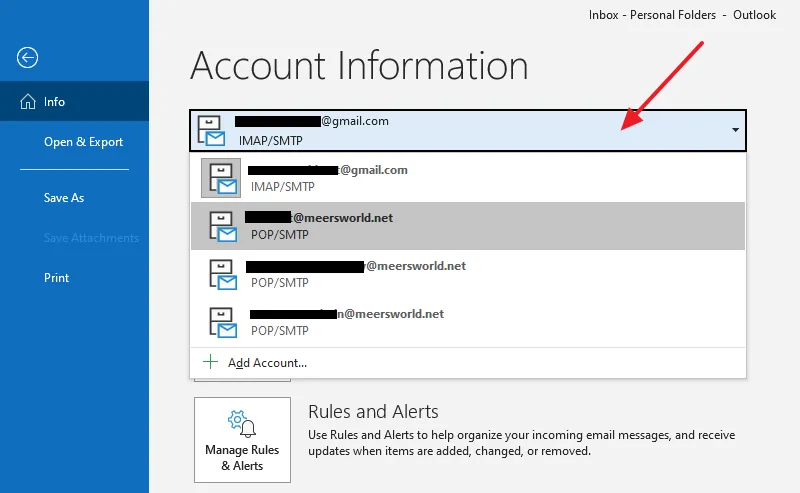
- Select your Email address.
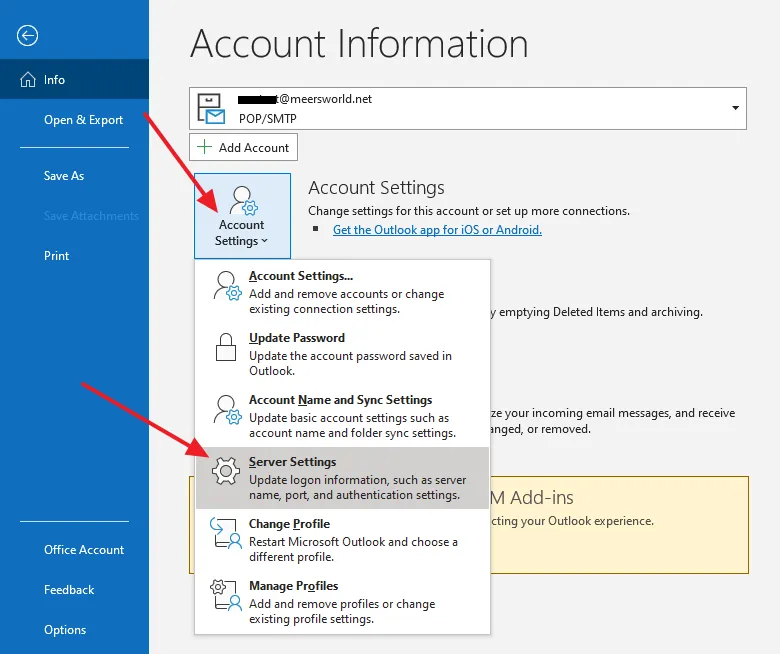
- Click on the Account Settings icon.
- Click the Server Settings.
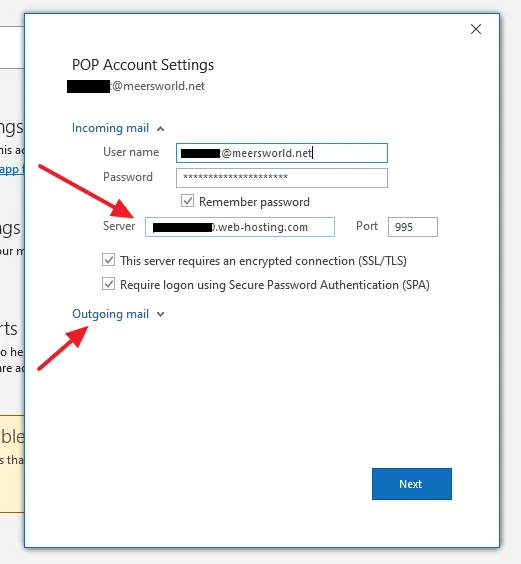
- On the POP Account Settings window, expand the Incomming mail and replace your old Server with the new one. Below you can see that I have replaced mail.meersworld.net with the Server of my hosting i.e. Namecheap. It is similar to server_name.web-hosting.com. If you don’t know about your Server, you can get it from your web-hosting provider.
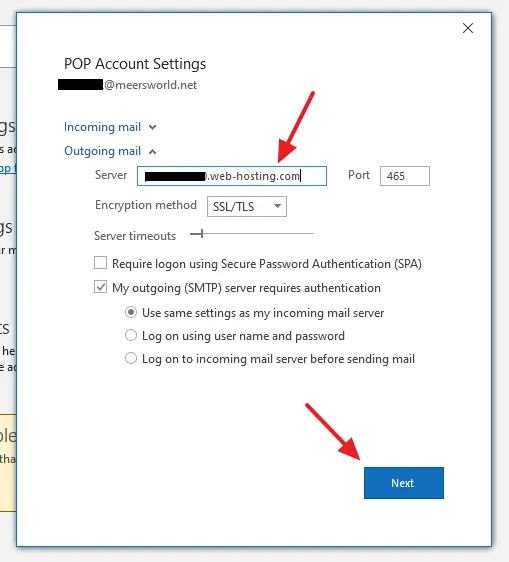
- Expand the Outgoing mail and replace the old Server with the same Server that you have entered in the Incomming mail Server field, as shown in the next step.
- After you change Outgoing mail Server, click the Next button.
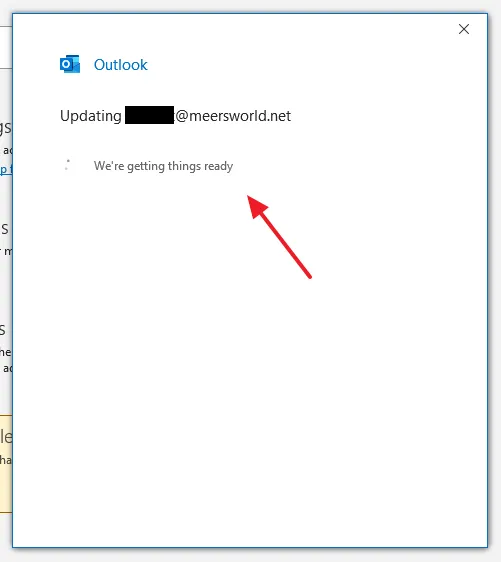
- The Updating process will start. You can see a message, “We’re getting things ready“.
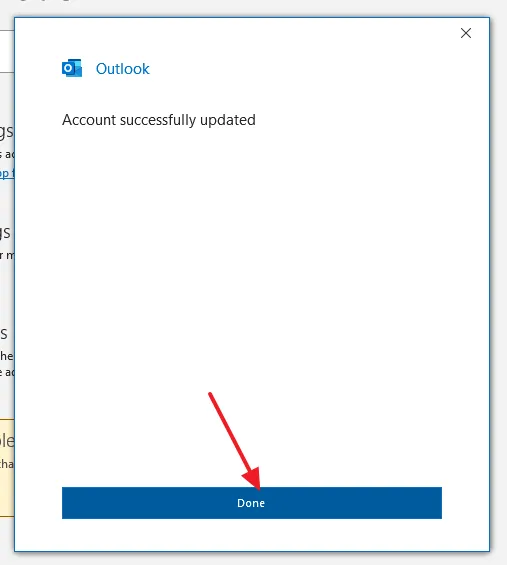
- Once the Server is updated, you will see a message, “Account successfully updated“.
- Click the Done button.
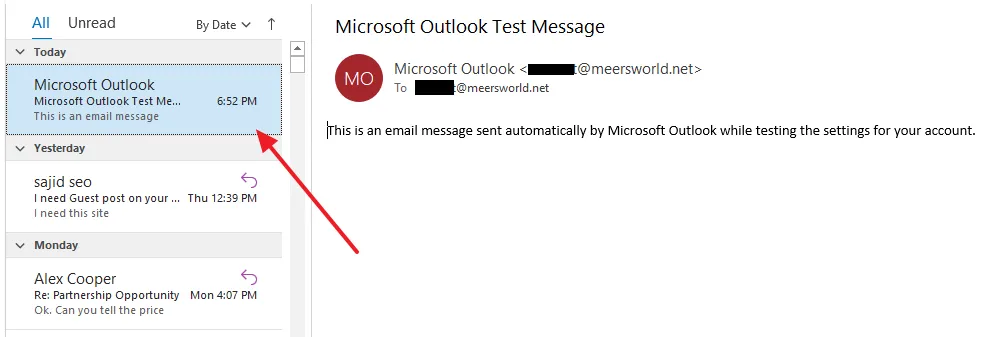
- Microsoft Outlook will send a Test Message to the same email address whose Server is updated. If you receive the message, you have set up the Server successfully. Repeat the same process for all those email accounts for which you’re getting the warning.
- Close your MS Outlook and open it again to check whether you are getting the warning, “The server you’re connected to is using a security certificate that cannot be verified. The target principal name is incorrect.” or not.
If you like this post then don’t forget to share with the other people. Share your feedback in the comments section below.
Also Read



Leave a Reply