Do you want to install ExpressionEngine on XAMPP localhost in Windows? You’re in the right place.
In this tutorial, I will guide you step-by-step on How to download and extract free version of ExpressionEngine on XAMPP htdocs directory, create a database for ExpressionEngine on phpMyAdmin, and install ExpressionEngine on XAMPP server.
ExpressionEngine is an open-source CMS(Content Management System). It offers security, flexibility, add-ons, and plenty of powerful features to manage websites.
Follow this step-by-step tutorial to install XAMPP in Windows:
If you have not set root password on phpMyAdmin, follow this tutorial:
Following topics will be covered in this tutorial:
- How to Download & Extract ExpressionEngine to XAMPP
- How to Create a Database for ExpressionEngine on phpMyAdmin
- How to Install ExpressionEngine on XAMPP in Windows
01. Download & Extract ExpressionEngine to XAMPP
In this section, I will guide you on how to download ExpressionEngine to your computer and then how to extract and copy it to XAMPP htdocs directory.
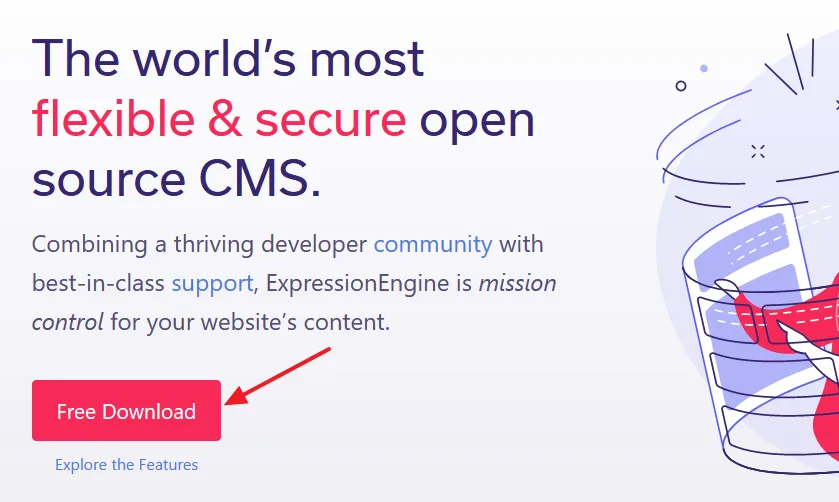
- Open the ExpressionEngine Website.
- Click on the Free Download button to save the ExpressionEngine to your computer in a zip file.
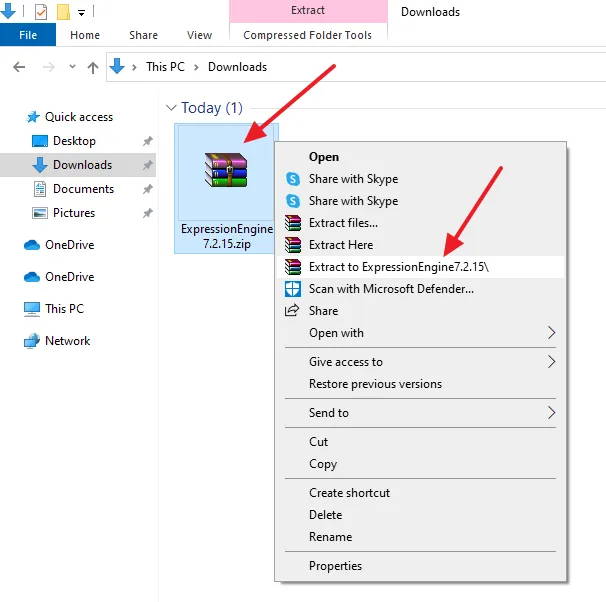
- Right-click on the ExpressionEngine Zip File and click on the Extract to ExpressionEngine. Here the current version of ExpressionEngine is 7.2.15.
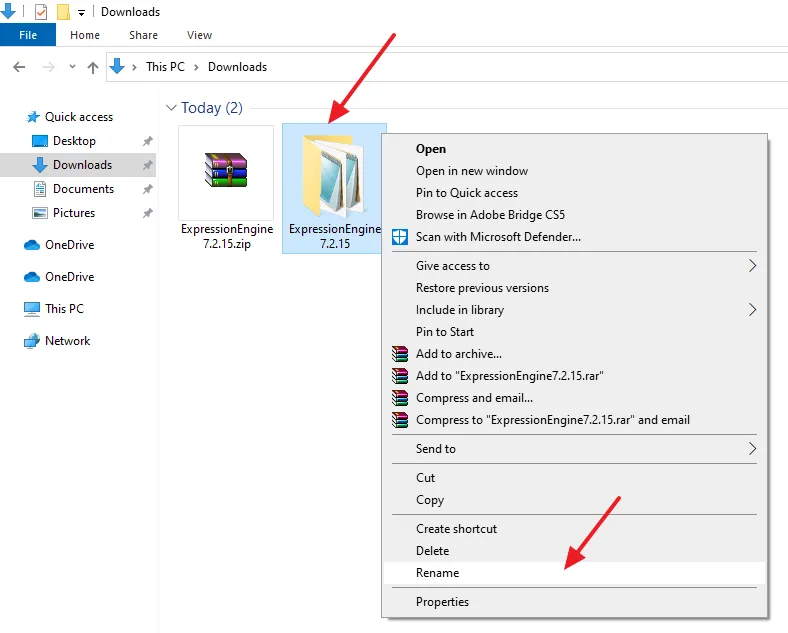
- Right-click on the Extracted folder and click on the Rename.
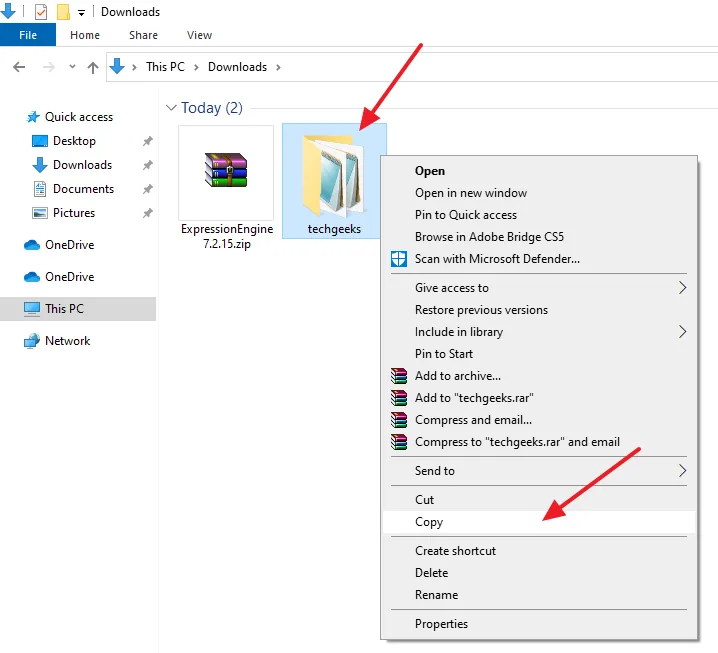
- I have renamed the ExpressionEngine folder to techgeeks. Right-click on the folder and click on the Copy.
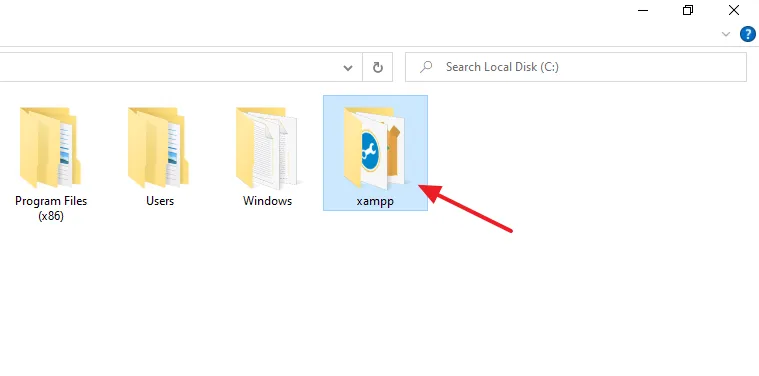
- Now go ahead and open the XAMPP folder.
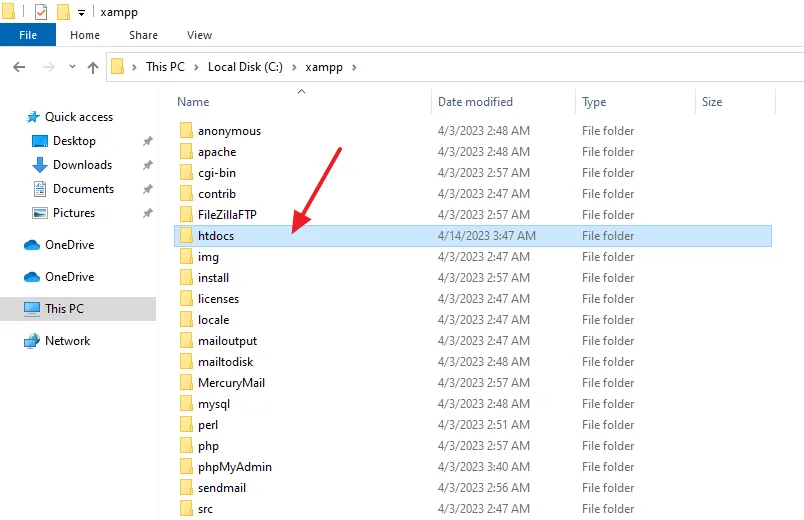
- Open the htdocs directory. The htdocs is the root directory of XAMPP where you place and create sites and applications.
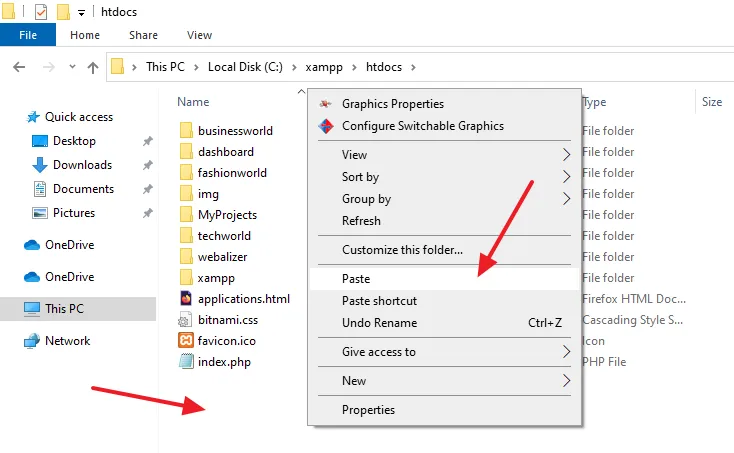
- In the htdocs directory right-click on the white space and click on the Paste to copy ExpressionEngine here.
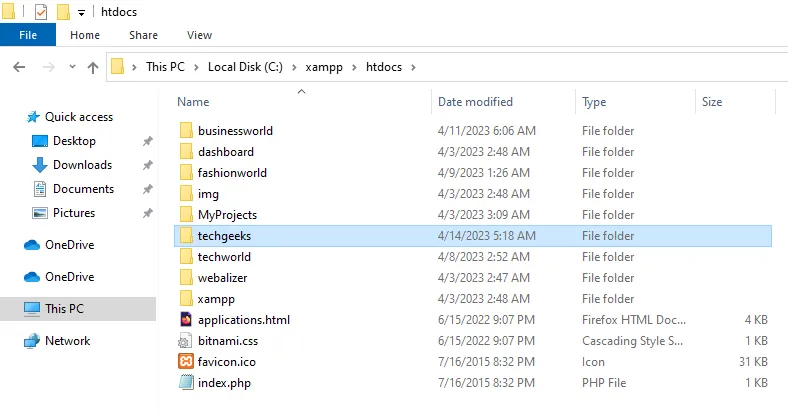
- You can see here that the ExpressionEngine folder techgeeks is copied in the htdocs directory.
02. How to Create a Database for ExpressionEngine on phpMyAdmin
In this section, I will guide you on how to create a database for ExpressionEngine on phpMyAdmin where the data will be stored in the tables.
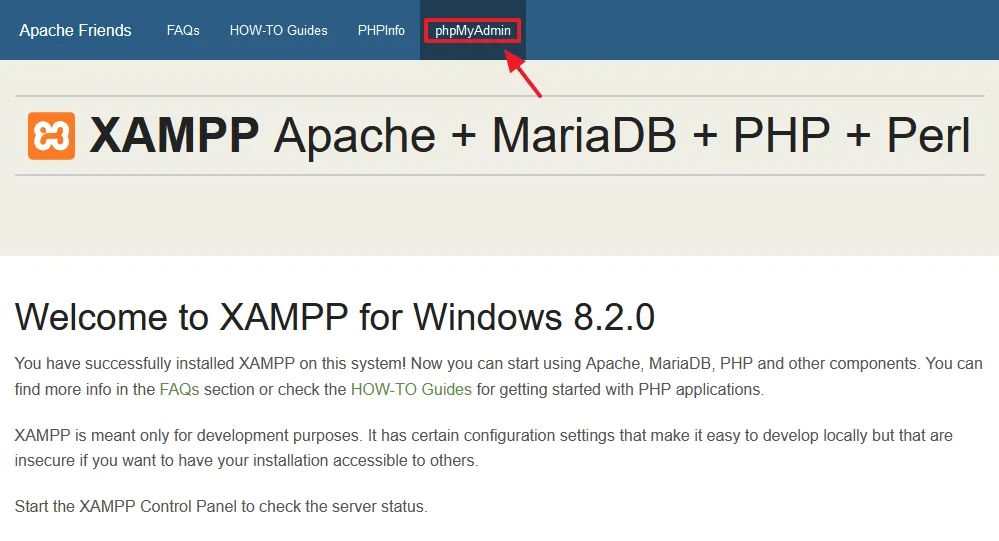
- Open XAMPP localhost (http://localhost) on your browser.
- Click on the phpMyAdmin tab to open the phpMyAdmin. You can directly open phpMyAdmin using this URL: http://localhost/phpmyadmin/.
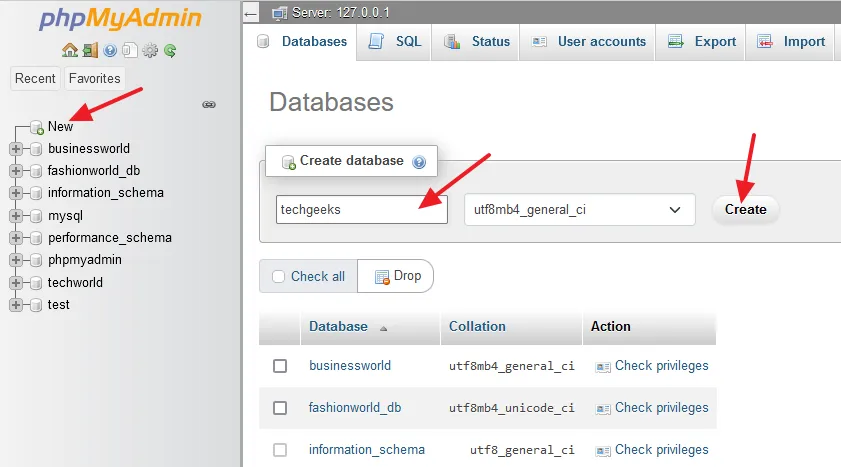
- Click on the New to create a new database on phpMyAdmin.
- On the Create database section enter your database name. I have entered techgeeks.
- Click on the Create button.
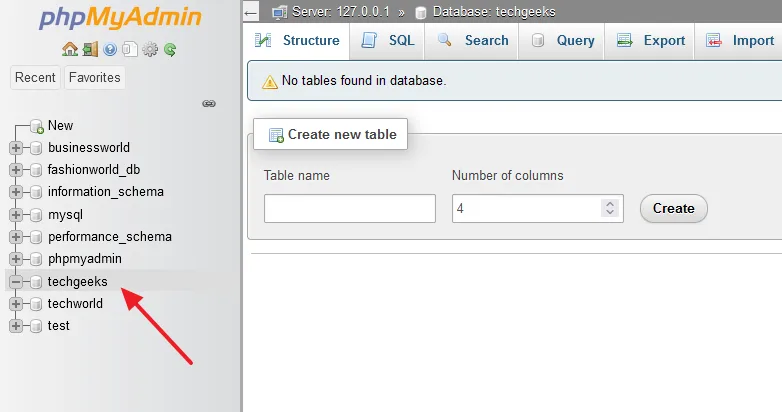
- You can see at the left side that a new database techgeeks for ExpressionEngine site is successfully created. The tables in the database will be created automatically during the ExpressionEngine installation.
03. How to Install ExpressionEngine on XAMPP
In this section, I will guide you on how to install ExpressionEngine on XAMPP server in Windows.
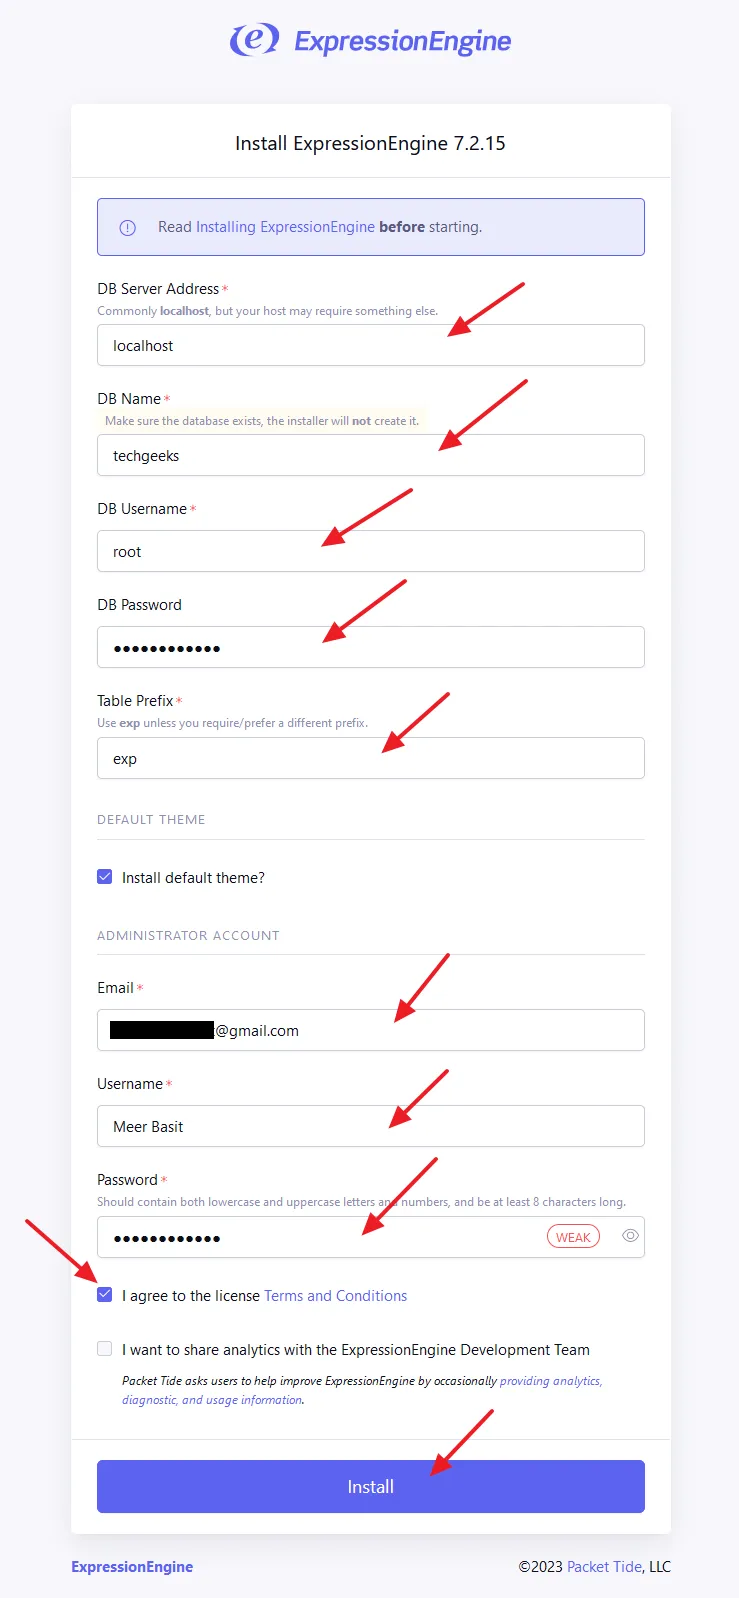
Browse the admin.php file of ExpressionEngine like this: http://localhost/site_name/admin.php, for example, http://localhost/techgeeks/admin.php. The ExpressionEngine installation form will be opened.
- In the DB Server Address, enter localhost.
- In the DB Name, enter the database name that you had created on phpMyAdmin.
- In the DB Username, enter root (if you haven’t changed it to some other name).
- In the DB Password, enter the password of DB Username. The DB Username & DB Password are used to login phpMyAdmin. If you haven’t set password for DB Username, leave the DB Password field empty.
- The Table Prefix is added to the beginning of database table names like exp_content, exp_users, etc. You can change, if you wish.
- Tick on Install default theme.
ADMINISTRATOR ACCOUNT
- Enter your Email Address.
- Enter a Username for your ExpressionEngine admin account.
- Enter a Password for your Username.
Tick on the I agree to the license Terms and Conditions.
Click on the Install button.
After ExpressionEngine is installed on XAMPP, you will be redirected to the admin section of ExpressionEngine. You can access the ExpressionEngine admin section via this URL on localhost like this: http://localhost/techgeeks/admin.php, replace techgeeks with your site folder name.
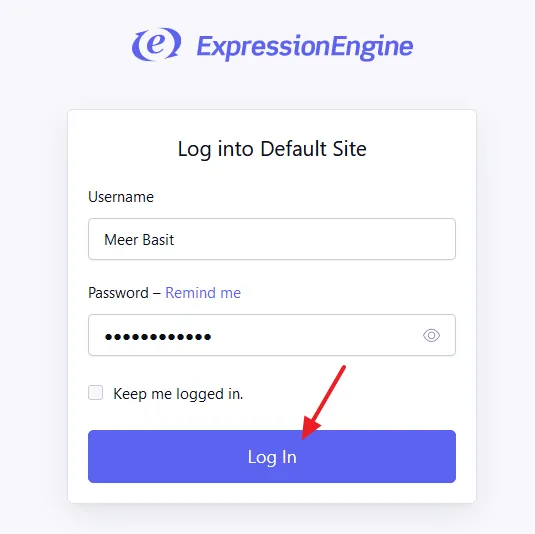
- Enter your Username and Password.
- Click on the Log In button.
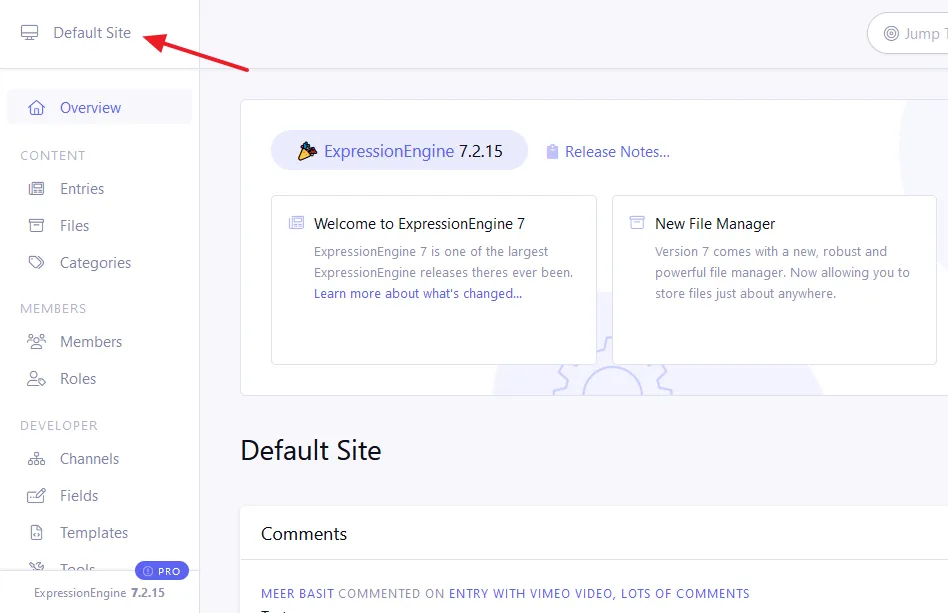
- This is how the Administrator section of ExpressionEngine looks like. Each and everything related to site is set up, configured, added, removed, managed and controlled from admin section.
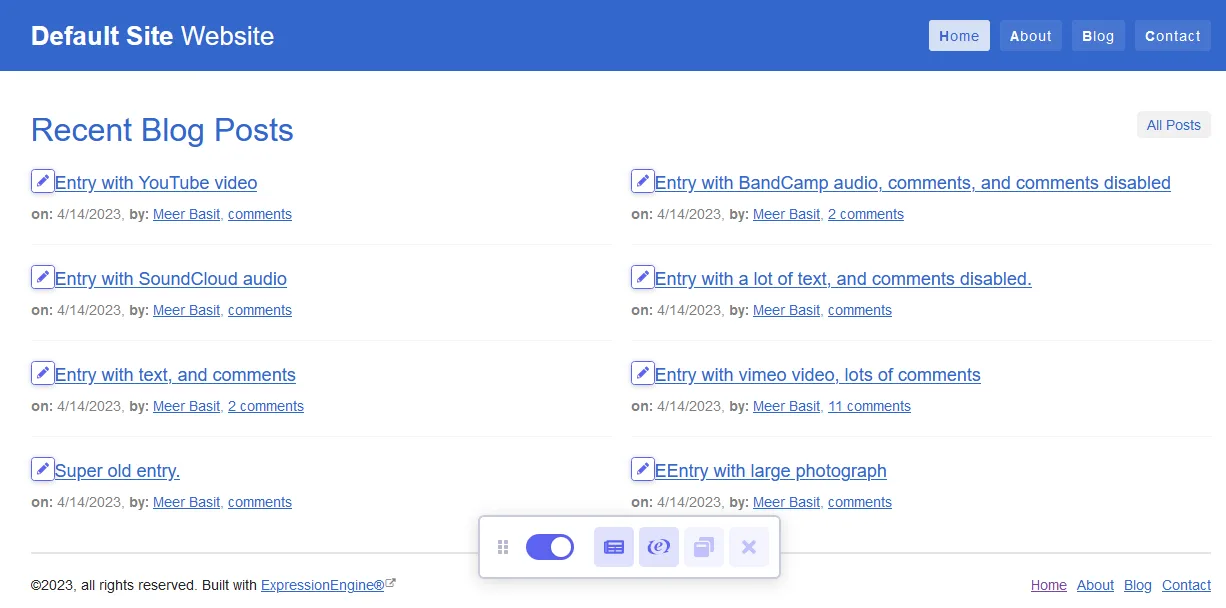
- You can open the front-end of your site from admin section via Default Site link, located at the top-left corner. To directly open the site (front-end) use this URL: http://localhost/techgeeks/. Replace techgeeks with your site folder name.
- This is how your new ExpressionEngine site looks with default theme.
If you like this post then don’t forget to share with other people. Share your feedback in the comments section below.
Also Read
- How to Buy Domain & Hosting Step-by-Step
- How to Install Typo3 CMS on XAMPP in Windows
- How to Install Joomla on XAMPP | Beginner’s Guide
- How to Install WordPress on XAMPP | Beginner’s Guide
- How to Install Drupal on XAMPP in Windows
- How to Install OpenCart on XAMPP in Windows
- How to Install ProcessWire CMS on XAMPP in Windows
- How to Install Dropback CMS on XAMPP in Windows
- How to Install CMS Made Simple on XAMPP in Windows
- How to Install Composr CMS on XAMPP in Windows


Leave a Reply