Do you want to install Concrete CMS on XAMPP (localhost) in Windows? You’re in the right place.
In this tutorial, I will guide you step-by-step on how to download and extract Concrete CMS to XAMPP htdocs directory, How to create a database for Concrete CMS on phpMyAdmin, and How to install and run Concrete CMS on XAMPP.
Concrete CMS is one of the most sophisticated, powerful, fast-performance, feature-rich, easy-to-manage, secure, easy to develop, and unique Content Management Systems for building high-quality sites. Its Admin section is accessed and managed on the front-end. It also provides the builtin caching system to optimize the performance of your site.
If you have not already installed XAMPP in Windows, read this tutorial:
If you have not set root password on phpMyAdmin, read this tutorial:
Following topics will be covered in this post:
- How to Download & Extract Concrete CMS on XAMPP
- How to Create Database for Concrete CMS on XAMPP
- How to Install & Run Concrete CMS on XAMPP in Windows
01. How to Download & Extract Concrete CMS on XAMPP
In this section, I will guide you on how to download and extract Concrete CMS on XAMPP htdocs directory.
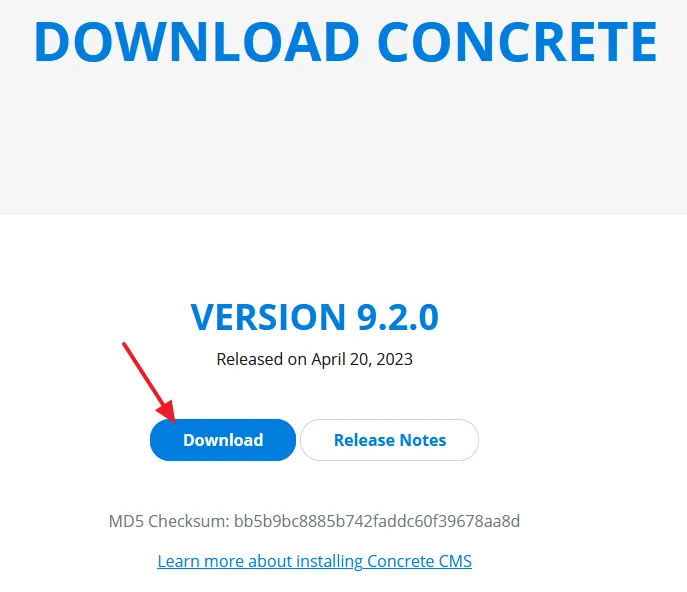
- Go Concrete CMS Download Page.
- Scroll-down to Version section and click on the Download button. It will be downloaded in a zip file. Here the current version of Concrete CMS is VERSION 9.2.0.
Note: You can also install Concrete CMS using the Composer. The installation procedure is given on their site.
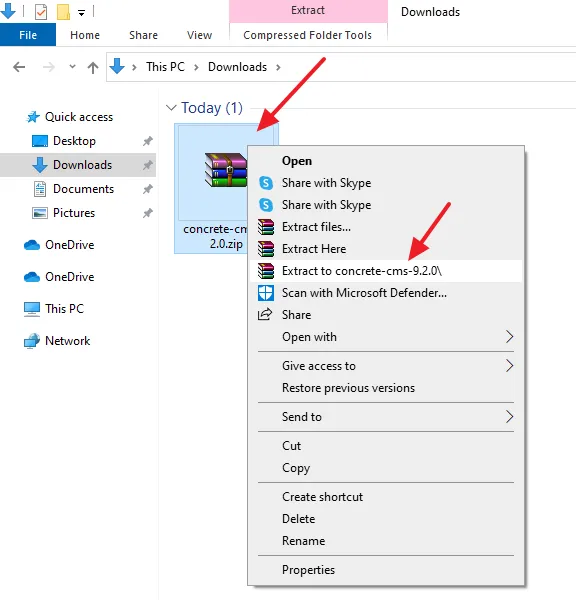
- Go to Downloads and right-click on the zip folder of Concrete CMS.
- Click on the Extract to concrete -cms-version to extract its files and folders.
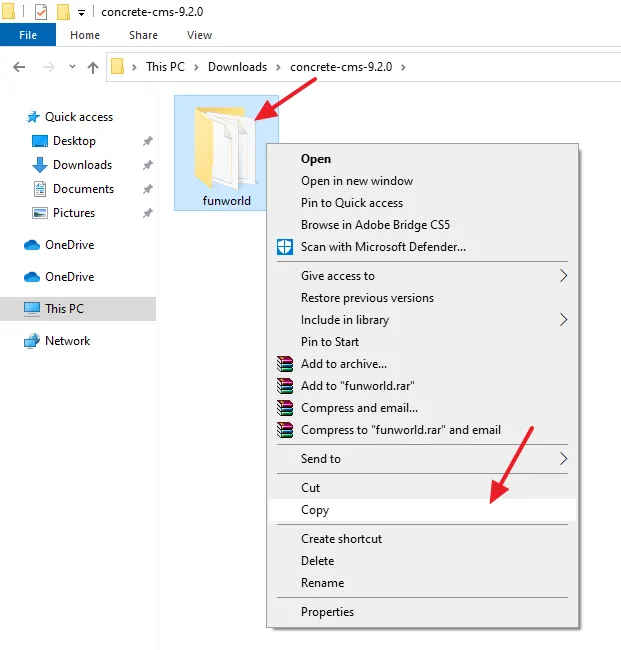
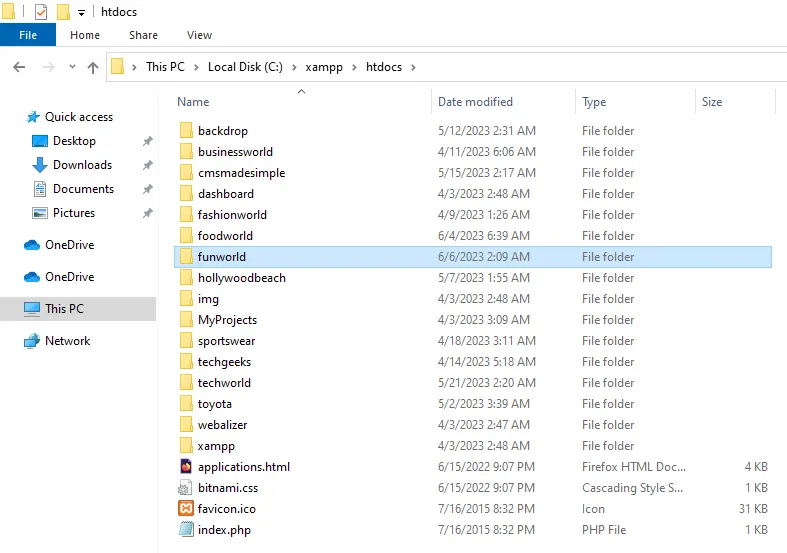
- Open the Extracted Folder. There will be another folder (subfolder) that contains all the files and folders of Concrete CMS. First of all rename that folder with your site/project name, as you can see I have renamed it to funworld.
- Right-Click on that Folder and click on the Copy.
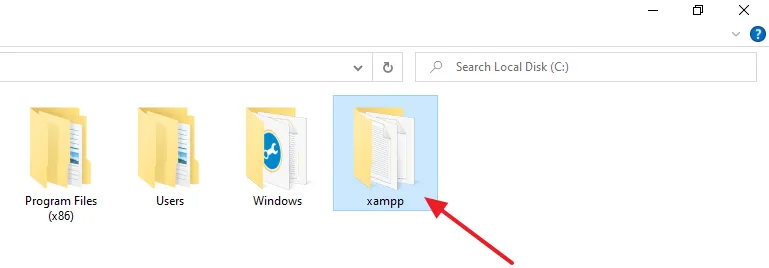
- Open the XAMPP folder.
- Open the htdocs folder.
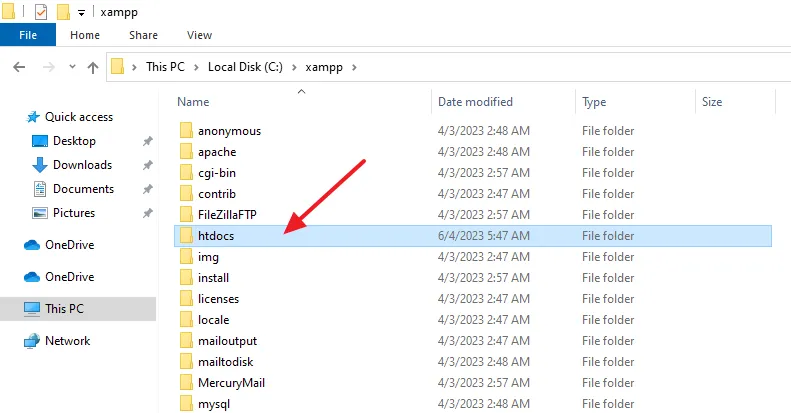
- Paste the copied folder of Concrete CMS in the htdocs directory. It is the root directory of XAMPP where you store the data of sites which are to be executed on XAMPP (localhost).
02. How to Create a Database for Concrete CMS on phpMyAdmin
In this section, I will guide you on how to create a database for Concrete CMS on phpMyAdmin.
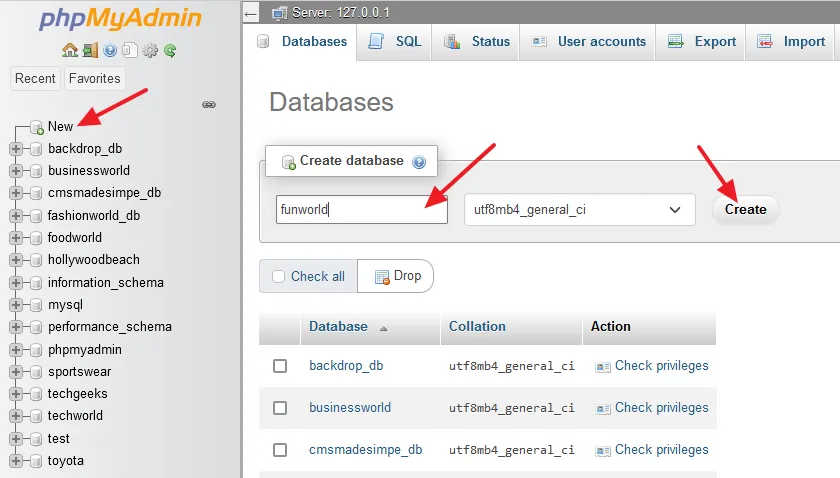
- Open and login to phpMyAdmin. To open phpMyAdmin, browse http://localhost/phpmyadmin/.
- Click on the New to create a new database.
- Under the Create database section enter a database name relevant to your site.
- Click on the Create button.
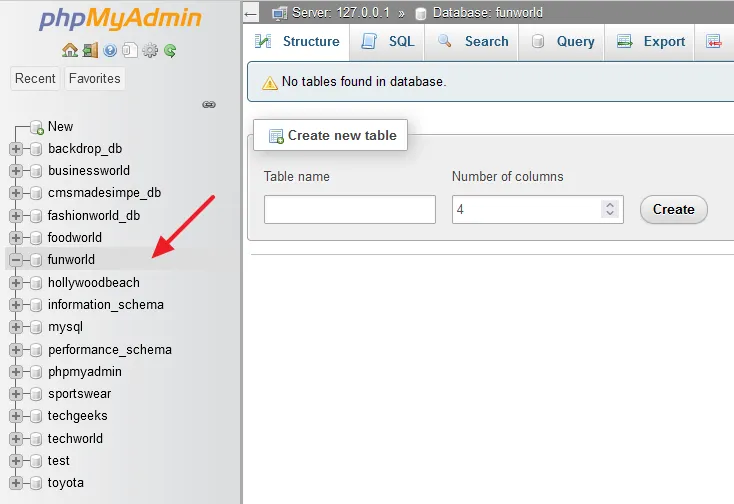
- The database has been created on phpMyAdmin for Concrete CMS. The tables will be created and filled with the data during the installation of Concrete CMS.
03. How to Install Concrete CMS on XAMPP in Windows
In this section, I will guide you on how to install and run Concrete CMS on XAMPP (localhost) in Windows.
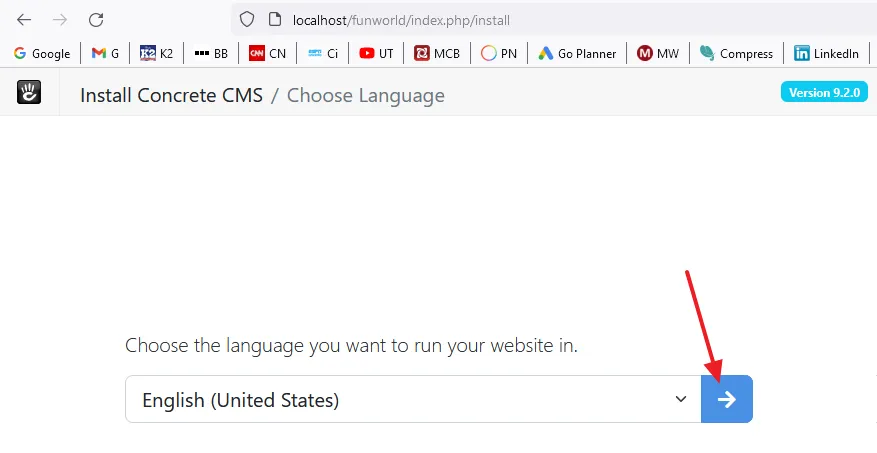
- To begin the installation, browse your Concrete CMS folder that you had copied in the htdocs directory like this: http://localhost/folder_name, for example, http://localhost/funworld/. The Installer will be launched on your browser.
- Choose your Language and click on the Arrow to move forward.
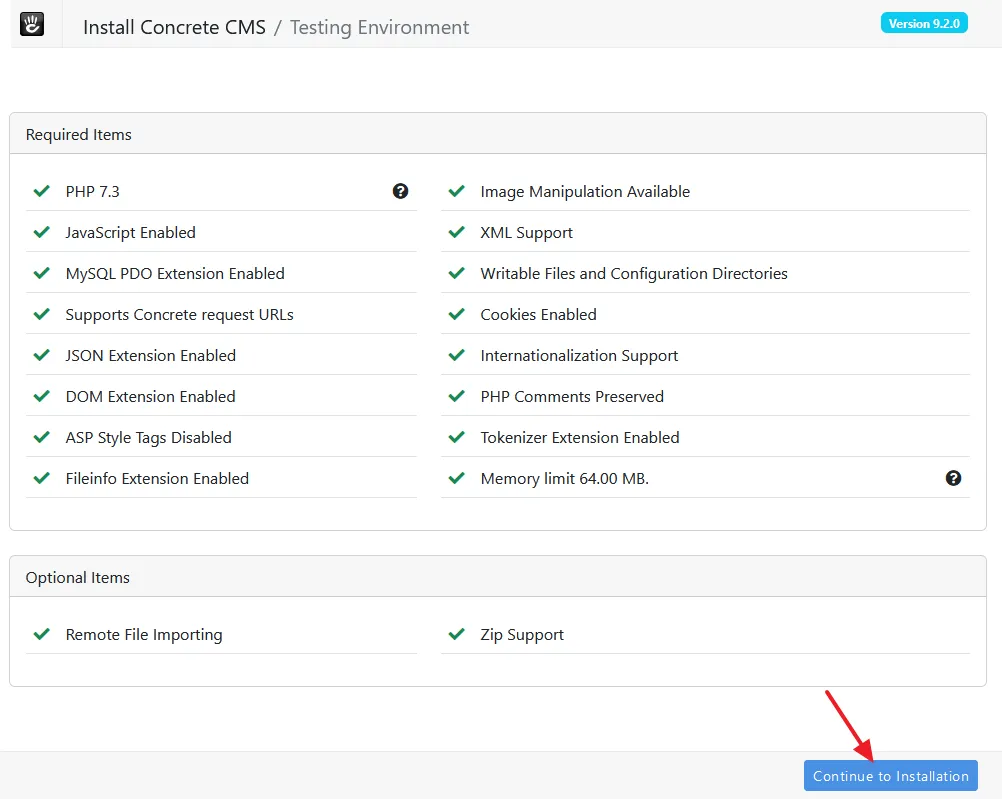
- It will show you the Required Items that should be available or enabled on your XAMPP. If any item is missed or disabled it will show you the Cross icon for it. Below you can see that all the required items are available and enabled on XAMPP. It means that Localhost Environment is ready to install Concrete CMS.
- The extensions are enabled/disabled from php.ini file, which you can open from XAMPP Control Panel => Apache => Config => php.ini.
- Click on the Continue to Installation button.
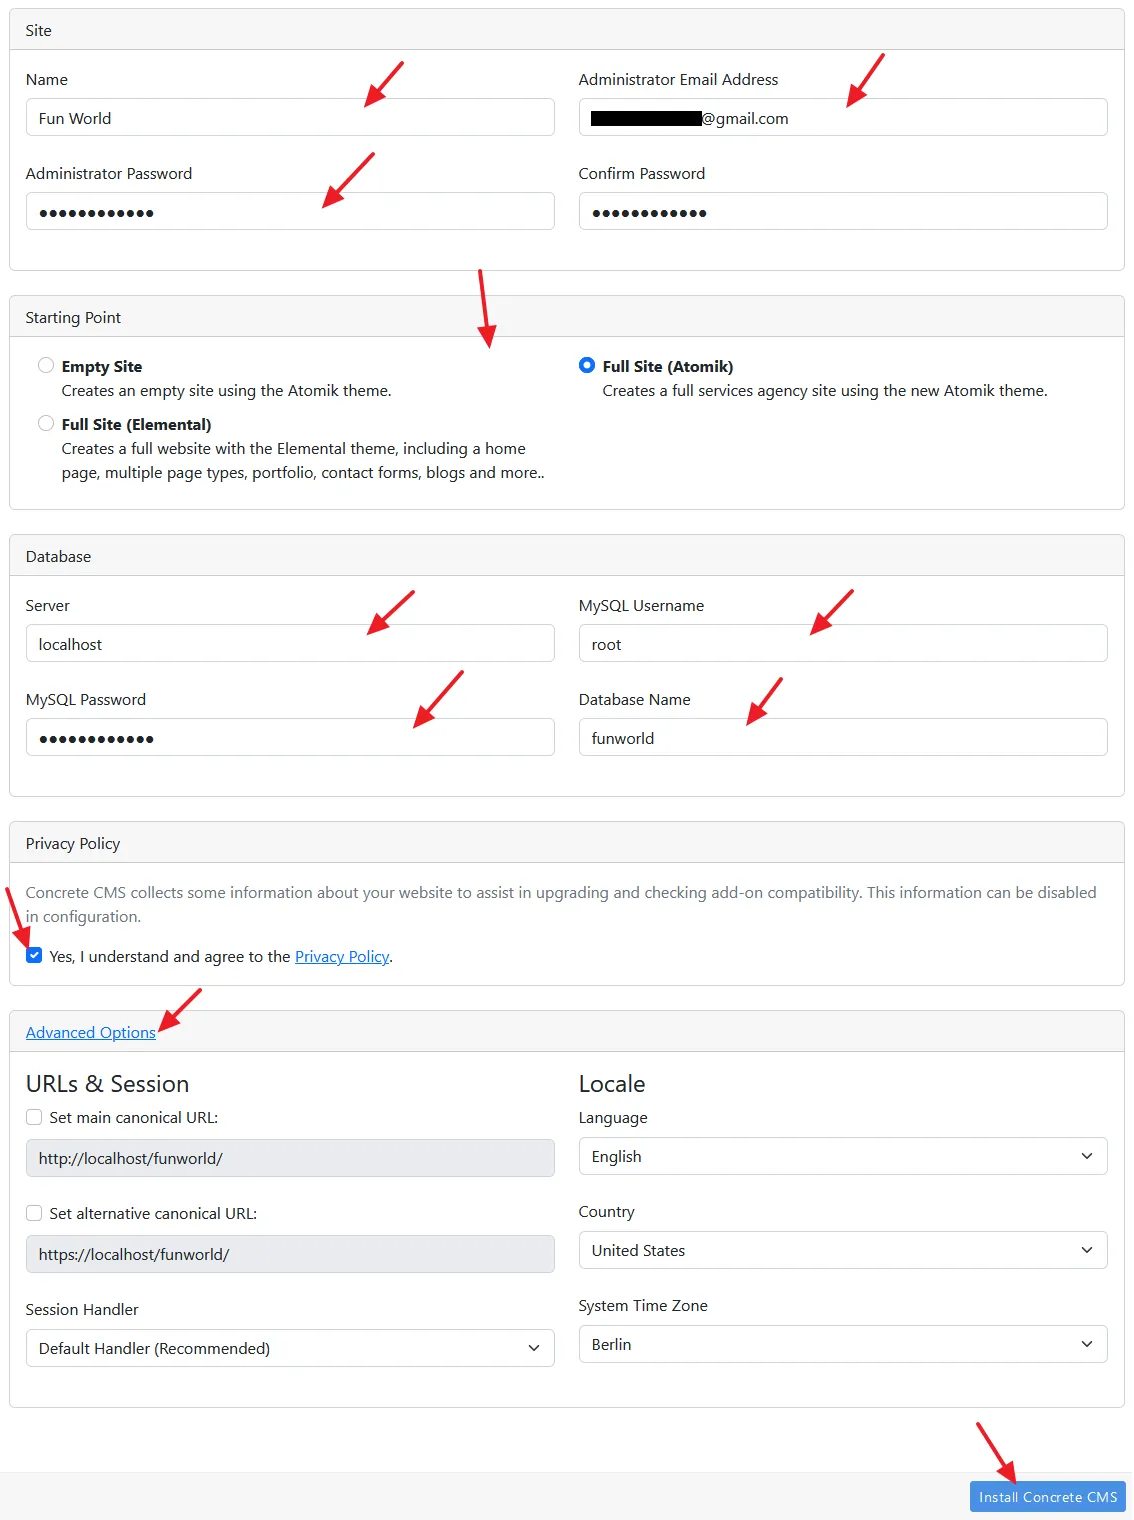
- Enter your Site Name, Administrator Email Address, and Administrator Password.
- On Starting Point, choose an option to decide whether you want an empty installation or an installation with demo content. If you’re a beginner choose one of the Full Site options, that gives you a fully functional site.
- On Database, enter localhost in the Server, enter root in the MySQL Username if you have not changed, enter the Password for Username (root) in the MySQL Password, and enter the name of your database in the Database Name, that you have created on the phpMyAdmin.
- Check the Privacy Policy.
- Click on the Advanced Options link to expand the option. Choose your Language, Country, and Timezone.
- Click on the Install Concrete CMS button.
- It may take few minutes (4 to 5) to complete the installation of Concrete CMS on XAMPP (localhost). So wait till it finishes the installation.
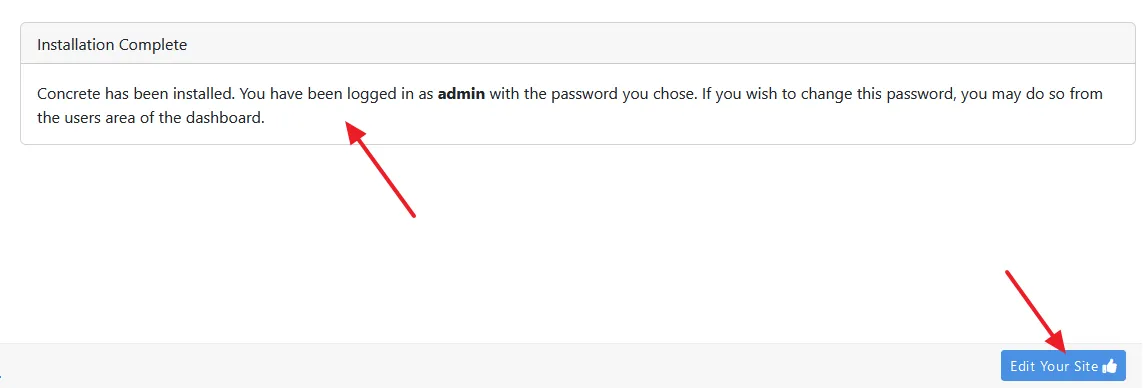
- Once installation is finished, it shows the message, “Installation Complete“.
- Click on the Edit Your Site button.
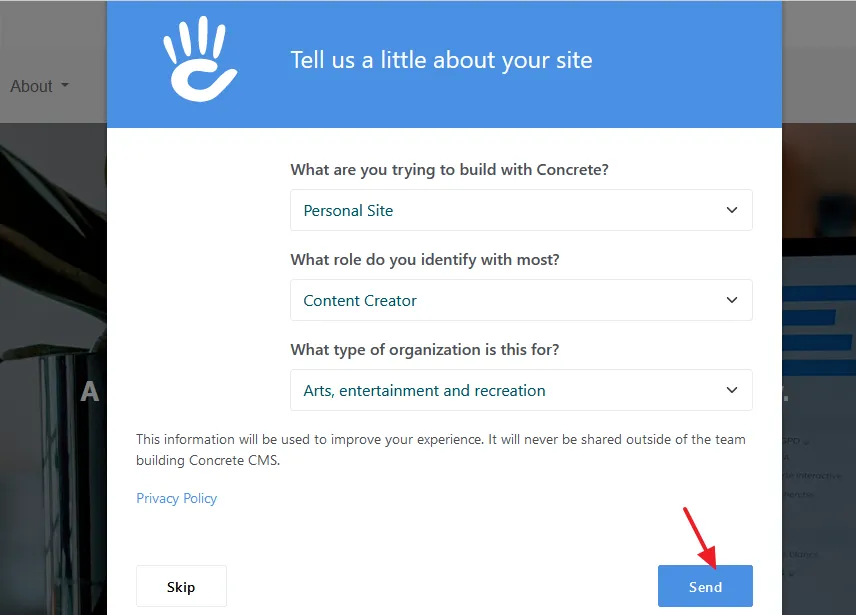
- It may ask you few questions before you’re redirected to your site like What type of site you want to build, What is your role, and for what type of organization (niche) you’re building the site.
- Click on the Send button.
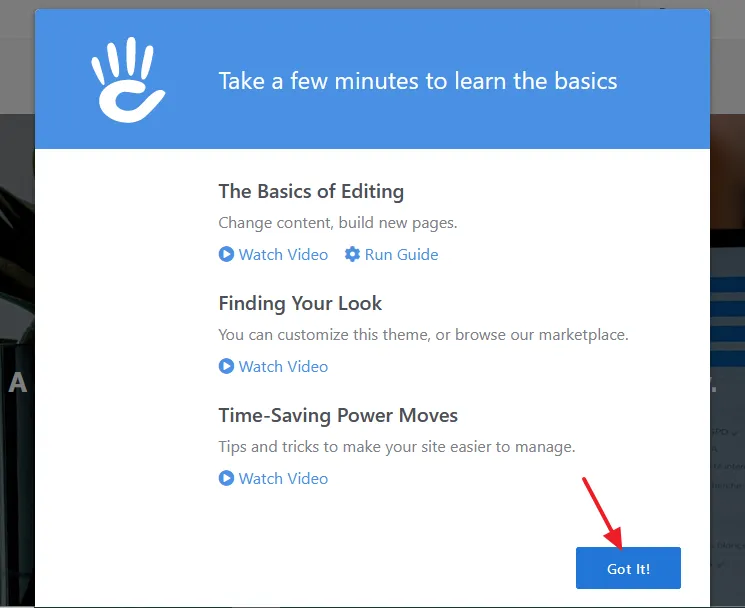
- It will show you the links of useful resources/tutorials related to Concrete CMS.
- Click on the Got it button.
- This is how the homepage of Concrete CMS site looks like with Atomik theme. The URL to open your site is: http://localhost/your_site(folder)_name, for example, http://localhost/funworld/.
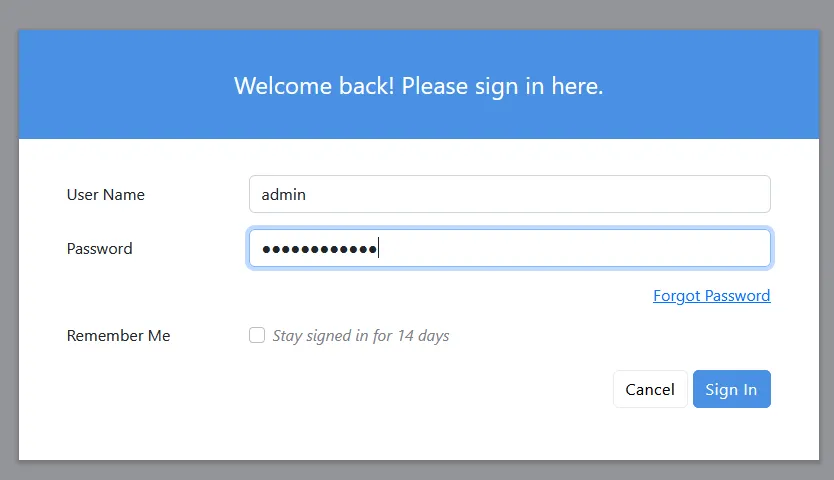
- Scroll-down to bottom of the page to click on the Log In link, so that you can log in and access the admin bar (area) of your site.

- Enter your admin User Name and Password to Sign In.
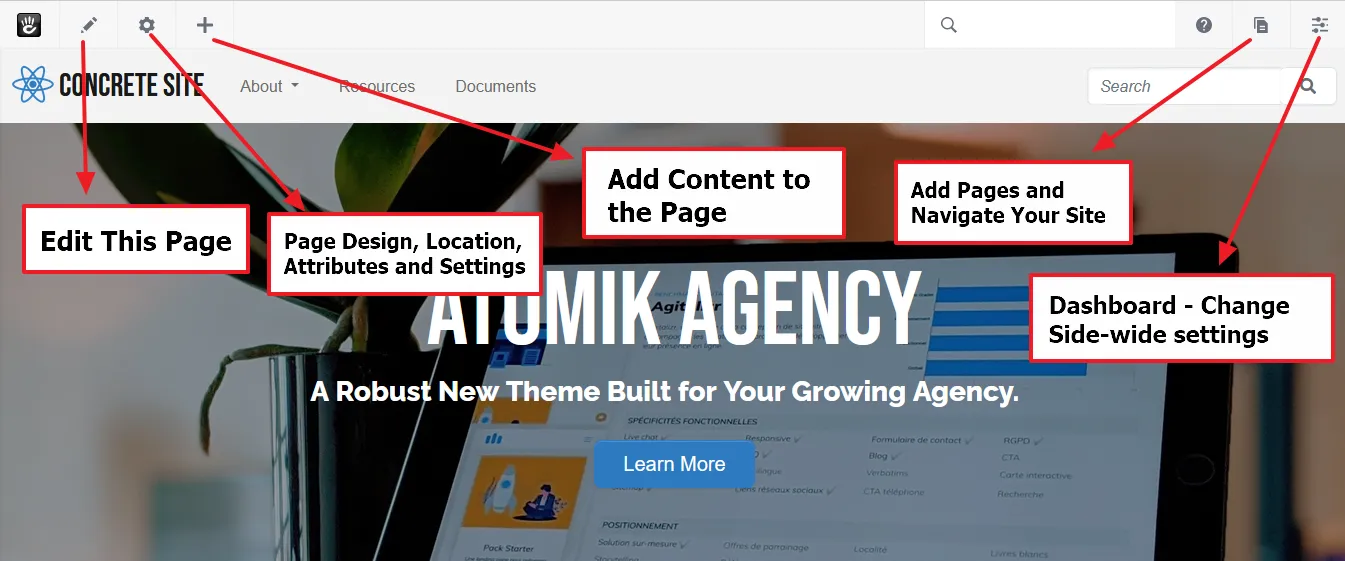
After the Sign In you can see the Admin Bar on top of the page. There are five sections (1) Edit This Page (2) Page Design, Location, Attributes and Settings (3) Add Content to the Page (4) Add Pages and navigate Your Site (5) Dashboard – Change Side-wide settings.
To open a section Click on its Icon. To close a section, again Click on its Icon.
- Edit This Page: To edit the opened (current) page.
- Page Design, Location, Attributes and Settings: It contains Page Settings such as Basic settings, Design (Change Theme, Skin, Page Template), SEO, Location, Attributes, Caching, Permission, Version, Mobile Preview, and Page Delete.
- Add Content to the Page: It provides you list of Blocks that you can add to the page such as Content, HTML, Hero Image, File, Page Title, Navigation, Tags, Page List, Breadcrumbs, Forms, Testimonials, Calendar Events, and many more..
- Add Pages and navigate Your Site: You can add/create New Pages and Blog Posts. It also shows the Sitemap of your site.
- Dashboard – Change Side-wide settings: The Dashboard allows you to change the side wide settings. It contains tons of options and settings that you can explore such as Favorites, Welcome, Sitemap, Files, Members (Users), Boards, Express, Reports, Pages and Themes, Calendars & Events, Conversations, Stacks and Blocks, Extend Concrete, and System and Settings.
- In order to Log Out from your Concrete CMS site click on the Log out link, located at the bottom of your site, on the Footer section.

If you like this post then don’t forget to share with other people. Share your feedback in the comments section below.
Also Read
- How to Install WordPress on XAMPP | Beginner’s Guide
- How to Install ExpressionEngine on XAMPP in Windows
- How to Buy Domain & Hosting Step-by-Step
- How to Install Typo3 CMS on XAMPP in Windows
- How to Install ProcessWire CMS on XAMPP in Windows
- How to Install Dropback CMS on XAMPP in Windows
- How to Install CMS Made Simple on XAMPP in Windows
- How to Install Composr CMS on XAMPP in Windows


Leave a Reply