Do you want to view or check the Bounce Rate of your website/blog on Google Analytics 4 (GA4) reports? Don’t worry! You’re in the right place.
In this tutorial, I will guide you step-by-step on how to add Bounce Rate metric on your Google Analytics 4 reports so that you can view bounce rate information about your website and its pages.
Bounce Rate is a traffic analysis metric that tells you exactly what percentage of visitors leave the website after visiting/entering the first page (landing). It measures how good a website is in keeping the visitors on it.
To know more about Bounce Rate such as Why Low Bounce Rate Is Important? Bounce Rate For Single Page Website, What is Exit Rate, Difference Between Bounce Rate & Exit Rate, Average Bounce Rate by Industry, What Are The Causes Of High Bounce Rate, How To Reduce Bounce Rate of a Website, How To Reduce Bounce Rate of an eCommerce Website, read this post:
- How To Reduce Bounce Rate | Importance, Calculation
- Related: What is Dwell Time in SEO & How It Differs from Bounce Rate?
How to Add & View Bounce Rate on GA4
Remember that Bounce Rate metric can only be added to a Detail Report such as User Acquisition Report, Traffic Acquisition Report, Pages and screens Report, Landing Page Report, etc.
Below I am guiding you on how to add and view Bounce Rate metric on Pages and screen report. You can view the overall bounce rate of your website as well as individual pages for a certain date range.
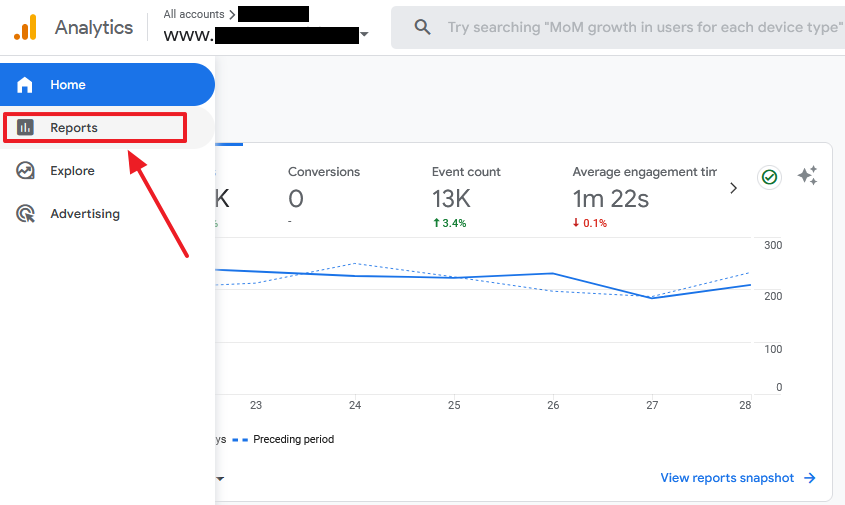
- Go to your Google Analytics 4 account.
- Click on the Reports from the sidebar.
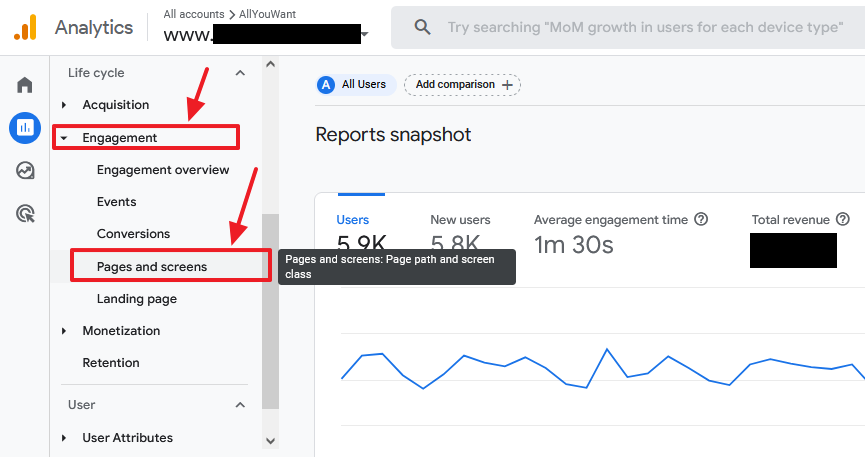
- Click on the Engagement.
- Click on the Page and screens report.
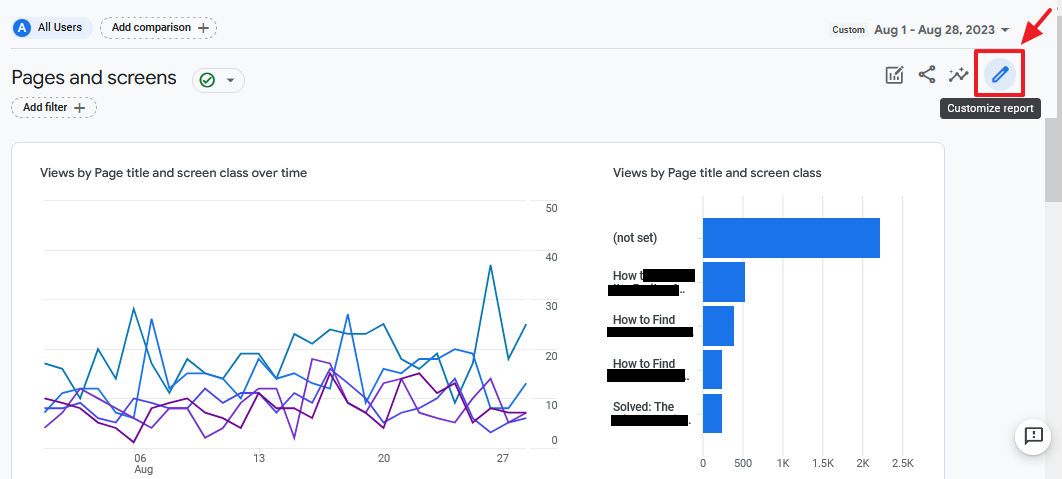
- Click on the Customize report icon, located at top-right corner.
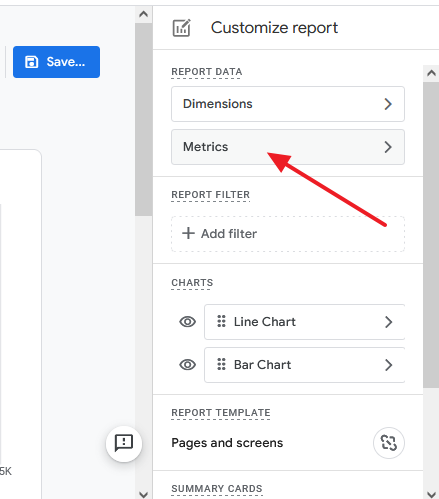
- Click on the Metrics tab.
- Click on the Add metric dropdownlist.
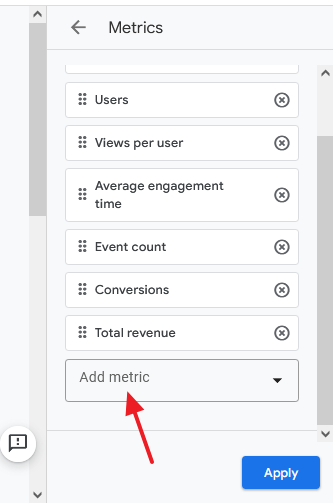
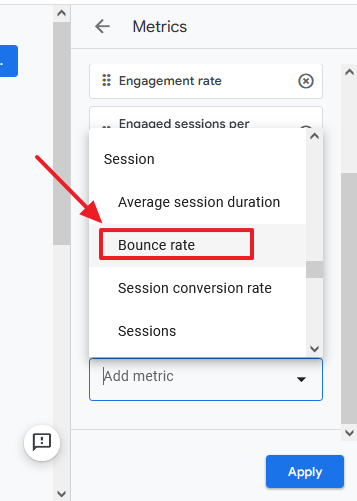
- Type Bounce rate or scroll-down the list to find the Bounce rate metric. It is located under the Session.
- Click on the Bounce rate to add it to the report.
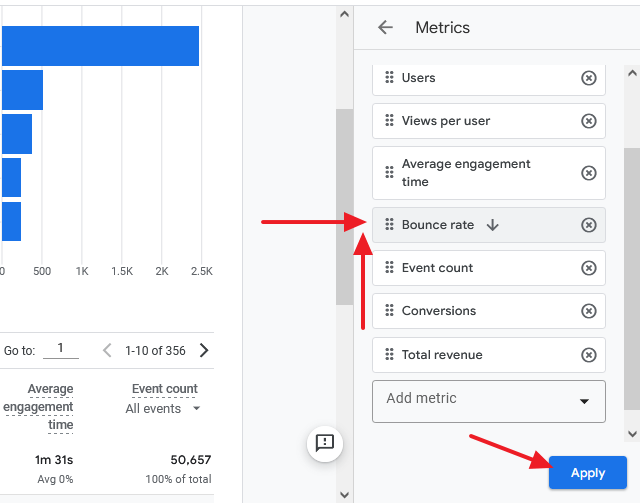
- You can see that the Bounce rate is added to the Metrics list for Pages and screens report. Drag the Bounce rate upward in the list so that it will be visible on the viewport of report. If you leave Bounce rate to the last position you have to drag the slider of the report horizontally to view it.
- Click on the Apply button.
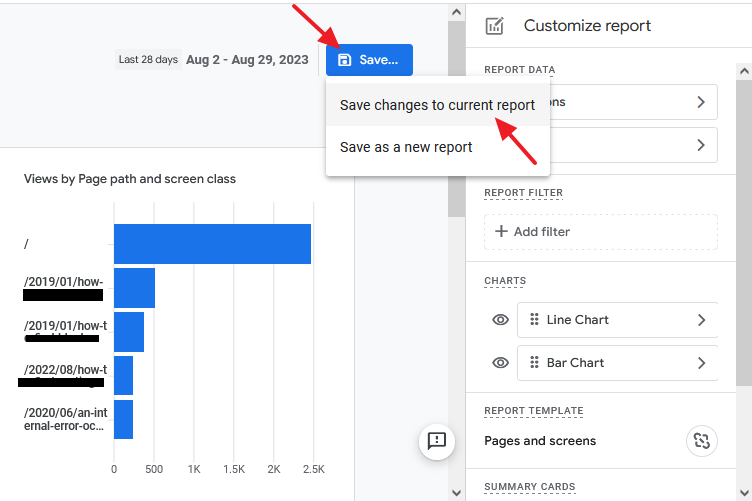
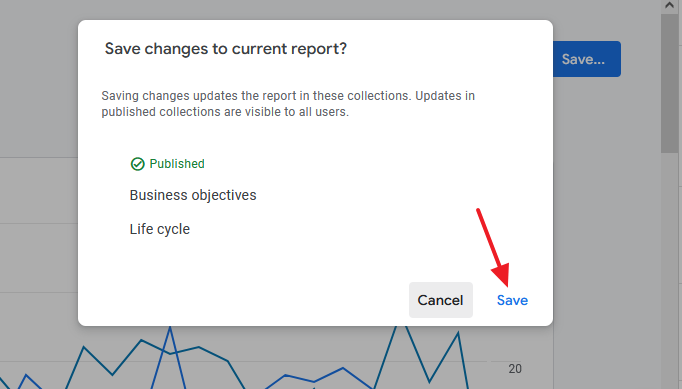
- Click on the Save… button. You have two options (1) Save changes to current report (2) Save as a new report. I have selected the first option.
- It will prompt you for saving changes to current report. Click on the Save button.
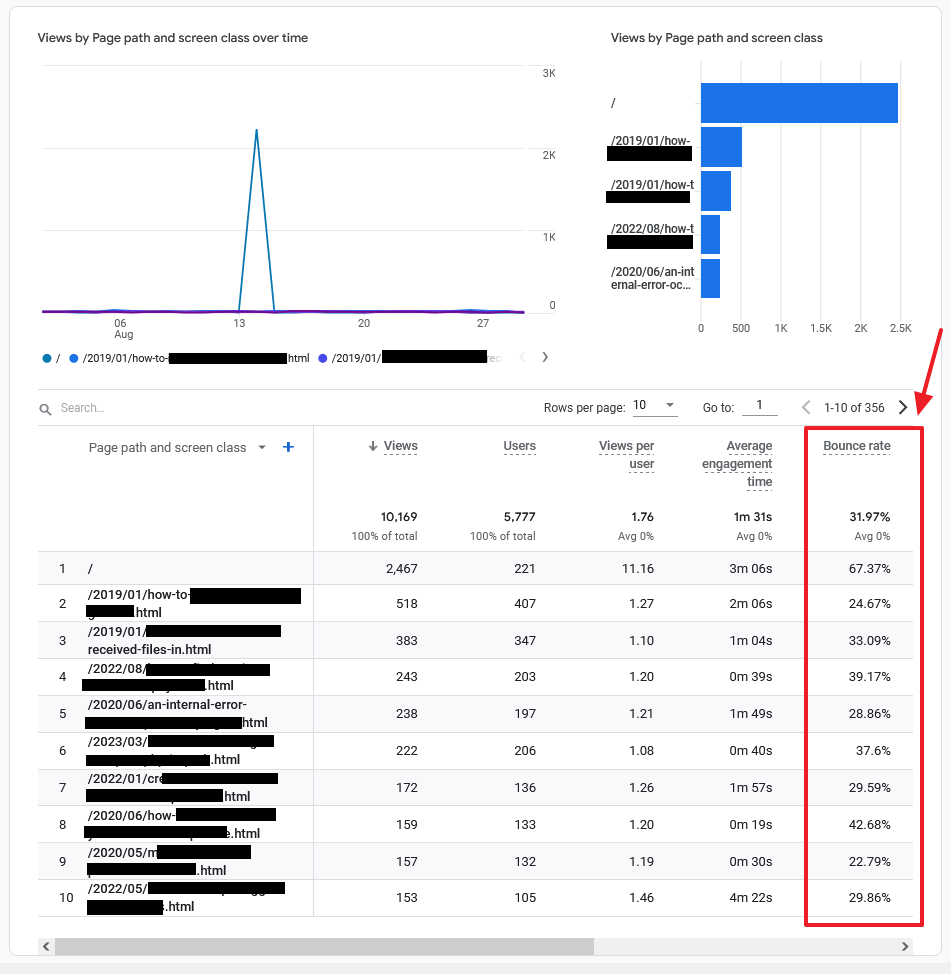
- Scroll-down to view the Bounce rate on report. You can view the total Bounce rate of your website as well as individual pages.
- Identify the pages with high bounce rate. Improve their content and also insert relevant article links so that visitors won’t exit from the first page (landing page) of your site.
If you like this post then don’t forget to share with other people. Share your feedback in the comments section below.

Also Read
- How to Link Google Analytics 4 to AdSense & View Data
- How To Link Google Analytics 4 to Google Search Console
- How To Link Google Ads With Google Analytics 4 (GA4)
- How To Show Google Analytics In WordPress | Site Kit By Google
- How To Link Website To Google Search Console | Sign Up
- Understand On-Page SEO and Off-Page SEO | Grow Your Blog Traffic
- How to Know If Backlinks are Helping or Hurting Your Website?


Leave a Reply